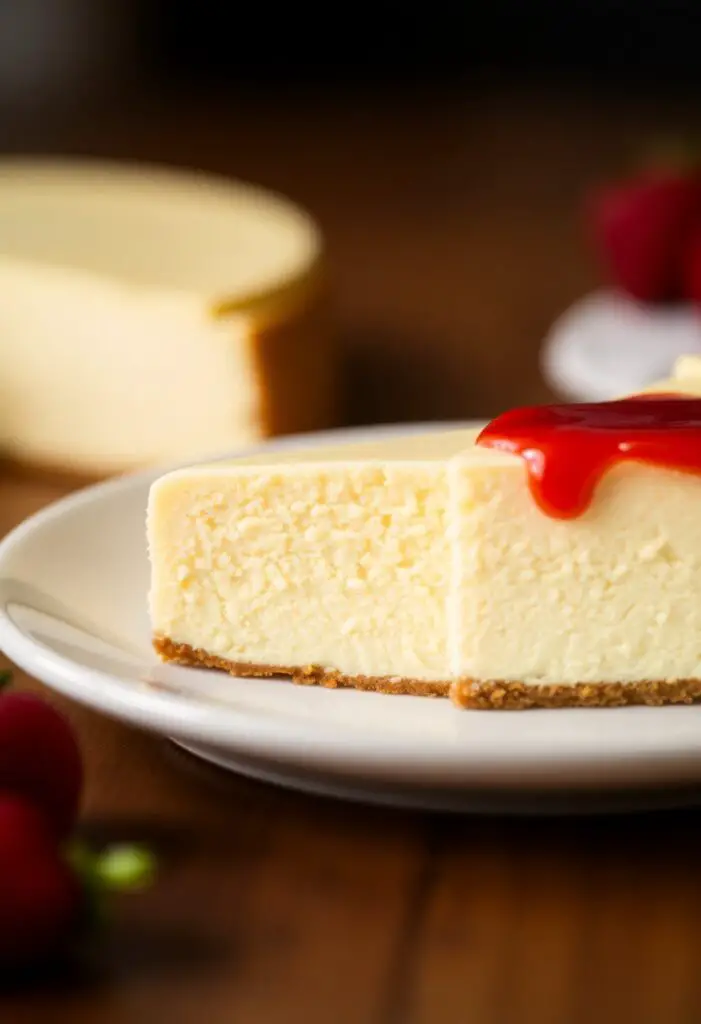
How to Make a Cheesecake (That’s Creamy, Perfect, and Crack-Free!)
Let’s talk about the undisputed monarch of the dessert table, the king of creaminess, the one, the only: Cheesecake. We’ve all seen it, sitting majestically behind the glass at a fancy restaurant in Khulna, its flawless top taunting us. You’ve probably thought about making one, but then the fear sets in. The dreaded crack. The stories of lumpy fillings and leaky pans. It seems like a dessert reserved for professional pastry chefs and people who don’t have anxiety. Well, I’m here to tell you that’s a lie. Today, you are going to learn how to make a cheesecake—a rich, velvety, show-stopping New York-style cheesecake—and you’re going to do it without a single, soul-crushing crack.
Why This Recipe Is Awesome (It’s Your Ticket to a Standing Ovation)
So, why embark on this dairy-fueled adventure? Because this recipe is your foolproof guide to achieving cheesecake nirvana. We’re talking a dense yet silky-smooth, incredibly rich, and tangy filling nestled on a buttery graham cracker crust. It’s the perfect balance of sweet and tangy, and the texture is pure luxury.
This recipe demystifies the process, breaking it down into simple, manageable steps. We will conquer the dreaded water bath (it’s easy, I swear!) and learn the secrets to that flawless, crack-free top. This is the dessert you make when you want to blow everyone away. It’s a make-ahead masterpiece that looks like a million bucks and tastes even better. Get ready to accept your award for “Best Baker Ever.”
Ingredients: Your Creamy Dream Team
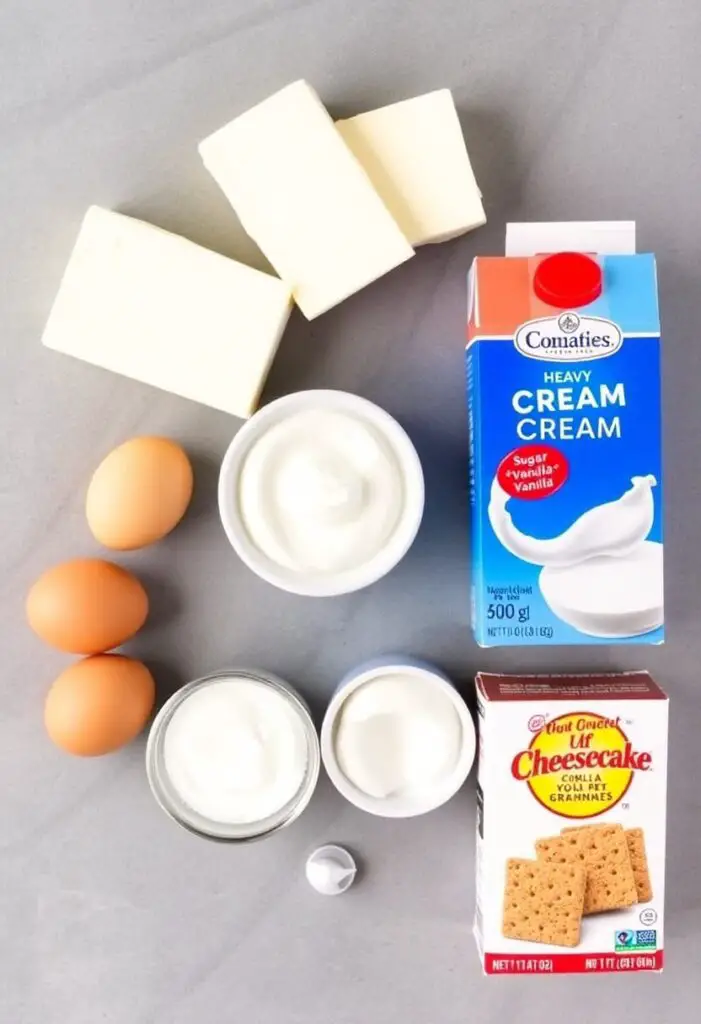
This masterpiece is a two-act play: the crust and the filling. Using room temperature ingredients for the filling is non-negotiable!
For the Buttery Graham Cracker Crust:
- 1 ½ cups graham cracker crumbs (about 10 full sheets)
- ⅓ cup granulated sugar
- 6 tablespoons unsalted butter, melted
For the Creamy Cheesecake Filling:
- Four (8-ounce) packages full-fat block cream cheese, at room temperature
- 1 ⅔ cups granulated sugar
- ¼ cup cornstarch
- 1 tablespoon vanilla extract
- 2 large eggs, at room temperature
- ¾ cup heavy cream, at room temperature
The Golden Rules of Ingredients:
- Full-Fat, Block Cream Cheese: Do not use the stuff in a tub! It has a higher water content and will not give you the right texture. Use the foil-wrapped blocks.
- Room Temperature Everything: Your cream cheese, eggs, and heavy cream must be at room temperature. This is the #1 secret to a smooth, lump-free filling. Set them out on your counter for at least 2-3 hours before you begin.
Tools & Kitchen Gadgets Used: Your Cheesecake Creation Station
A few specific tools are essential for a flawless result.
- 9-inch Springform Pan: This is the special pan with removable sides that makes it possible to serve a beautiful, free-standing cheesecake. It’s a must-have.
- Electric Stand Mixer or a Hand Mixer: You need this for a smooth, lump-free filling.
- Large Roasting Pan: This will hold your springform pan for the water bath.
- Heavy-Duty Aluminum Foil: For waterproofing your springform pan.
- Mixing Bowls
- Rubber Spatula
- Measuring Cups and Spoons
Step-by-Step Instructions: Conquering the Creamy Beast

Deep breaths. We’re going to do this one step at a time. Cracks fear us.
Act 1: The Crust Foundation
- Prep Your Oven and Pan: Preheat your oven to 350°F (175°C).
- Mix and Press: In a medium bowl, stir together the graham cracker crumbs, sugar, and melted butter until it looks like wet sand. Press this mixture firmly and evenly into the bottom and slightly up the sides of your 9-inch springform pan.
- Pre-Bake the Crust: Bake the crust for 10 minutes. This helps it set and stay crisp. Once done, place it on a wire rack to cool while you make the filling.
Act 2: The Silky-Smooth Filling
- Reduce Oven Temp: Lower your oven temperature to 325°F (160°C).
- Beat the Cream Cheese: In your mixer, beat the room temperature cream cheese on medium speed until it’s completely smooth and creamy, with no lumps. This should take about 2-3 minutes. Scrape down the sides of the bowl often.
- Add Sugar and Cornstarch: In a small bowl, whisk together the sugar and cornstarch. With the mixer on low, gradually add the sugar mixture to the cream cheese and mix until just combined.
- Add the Flavor: Stir in the vanilla extract.
- Add the Eggs (Gently!): Add the room temperature eggs, one at a time, mixing on low speed just until each one is incorporated. Do not over-mix after adding the eggs! Over-mixing whips in air, which is a major cause of cracks.
- Finish with Cream: With the mixer still on low, stream in the heavy cream and mix until just combined. The final batter should be smooth, thick, and silky.
Act 3: The Water Bath and the Bake
- Waterproof Your Pan: This is the most important step for a water bath! Tear off two large sheets of heavy-duty aluminum foil. Place them on your counter in a cross shape. Carefully place your springform pan in the center and wrap the foil tightly up the sides of the pan. This creates a waterproof barrier.
- Assemble and Pour: Place your foil-wrapped springform pan into the large roasting pan. Pour the beautiful cheesecake filling over your pre-baked crust and spread it into an even layer.
- Add the Hot Water: Carefully place the roasting pan on the oven rack. Pour hot water into the roasting pan until it comes about halfway up the sides of your springform pan.
- Bake: Bake for 60-75 minutes. The edges should be set, but the center 2-3 inches should still have a slight jiggle to it when you gently nudge the pan. Do not open the oven door for the first hour!
- The Slow Cool-Down (Secret to No Cracks!): When the cheesecake is done, turn off the oven, crack the door open slightly, and let the cheesecake cool down in the oven for 1 full hour. This slow, gentle cooling process is another key to preventing cracks.
- Chill Out: After an hour, remove the cheesecake from the oven and the water bath. Let it cool on the counter until it’s near room temperature, then cover it loosely with plastic wrap and refrigerate for at least 6 hours, but preferably overnight.
Calories & Nutritional Info (Per Decadent Slice)
This is a celebration dessert. Treat it as such. (This is for one slice, assuming 12 slices.)
- Estimated Calories per slice: ~500-600 calories
- Fat: Oh yes, a glorious amount. ~40g
- Carbohydrates: ~35g
- Protein: ~8g
Common Mistakes to Avoid: Don’t Let Your Cheesecake Weep!
Avoid these classic blunders for a flawless cheesecake.
- Using Cold Ingredients: This is the #1 cause of a lumpy cheesecake. Your cream cheese, eggs, and cream must be at room temperature.
- Over-Mixing: Especially after adding the eggs! Over-mixing creates air bubbles, which rise during baking and cause the cheesecake to puff up and then crack as it cools.
- Skipping the Water Bath: The water bath creates a steamy, humid environment that allows the cheesecake to bake gently and evenly, which is the primary defense against cracks.
- Cooling It Too Quickly: A sudden change in temperature will cause the cheesecake to contract and crack. The slow cool-down in the turned-off oven is essential.
Variations & Customizations: Your Cheesecake, Your Masterpiece
The classic is divine, but feel free to get creative.
- Chocolate Swirl Cheesecake: After pouring the filling into the crust, drop spoonfuls of melted and slightly cooled semi-sweet chocolate on top. Use a knife to gently swirl the chocolate into the filling for a beautiful marbled effect.
- Lemon or Lime Cheesecake: Add the zest of 2 lemons or limes and ¼ cup of fresh juice to the filling along with the vanilla. Top with a thin layer of lemon/lime curd after it has chilled.
- Oreo Crust Cheesecake: Swap the graham crackers for about 20-24 Oreo cookies (filling and all), crushed into fine crumbs. No need to add extra sugar to the crust.
FAQ Section: All Your Cheesecake Queries, Answered
You have questions about the king of desserts. I have the answers.
- Q: Seriously, why did my cheesecake crack? A: The most common culprits are: it was over-mixed, it was over-baked, or it cooled down too quickly. Following the “low and slow” mixing, the jiggle test for doneness, and the slow oven cool-down are your best bets.
- Q: Do I absolutely need a water bath? A: If you want a creamy, evenly baked, crack-free cheesecake, then yes. You can bake it without one, but you are much more likely to get cracks and a slightly drier texture.
- Q: How do I stop the water bath from leaking into my pan? A: Use multiple layers of heavy-duty aluminum foil and make sure there are no seams on the bottom. Some people even place their springform pan inside a slightly larger regular cake pan as an extra barrier before putting it in the water.
- Q: What is the “jiggle test” for doneness? A: Gently nudge the side of the pan. The edges of the cheesecake should be firm and set, but the center (about a 2-3 inch circle) should still wobble slightly, like Jell-O. It will set up completely as it chills.
- Q: Can I make cheesecake without a springform pan? A: You can, but it’s tricky to serve. You can make it in a regular 9-inch cake pan if you line it with parchment paper with long overhangs to help you lift it out once it’s chilled.
- Q: How long should I chill my cheesecake? A: A minimum of 6 hours, but overnight is best. This allows the flavors to meld and the texture to become perfectly dense and creamy.
- Q: Can I freeze cheesecake? A: Yes! Cheesecake freezes beautifully. Chill it completely, then you can freeze it whole or in individual slices. Wrap it well in plastic wrap and then foil. It will last for up to 3 months. Thaw in the refrigerator.
Final Thoughts: You Are Now a Cheesecake Deity
You did it. You faced your fears, mastered the water bath, and produced a stunning, creamy, crack-free cheesecake. You are no longer just a baker; you are a dessert deity, a champion of cream cheese. So go forth, slice up your magnificent creation, and accept the chorus of oohs and aahs that you so richly deserve. Welcome to the crack-free club.