The Ultimate Chocolate Chunk Cookies (Because Chips Are for Quitters)
Let’s have a real talk about cookies. For too long, we’ve settled for the polite, uniform, and frankly, boring chocolate chip. It’s time for an intervention. If you’re ready to graduate to a cookie with more personality, more drama, and ridiculously huge pools of melty chocolate, then you need this chocolate chunk cookies recipe in your life. This isn’t just a cookie; it’s a statement. It says, “I value chaotic, delicious, molten chocolate over predictable little morsels.” Prepare to ruin all other cookies for yourself. You’ve been warned.
Why This Recipe Is Awesome (And Will Change Your Life)
What makes these cookies superior to their chipper cousins? One word: texture. When you chop up a good quality chocolate bar, you get a beautiful mess of irregular pieces. You get tiny shards that melt into the dough, infusing it with flavor, and you get massive chunks that stay gooey and decadent long after they’ve cooled. It’s a chocolate experience in every single bite.
These cookies boast the perfect structure: crisp, golden-brown edges that give way to a soft, chewy, buttery center. They are unbelievably easy to whip up, making you look like a baking god with minimal effort. Bring a batch of these to any gathering, and watch as people’s eyes widen. Are you ready for that kind of power?
Ingredients: Your Arsenal for Chocolatey Domination
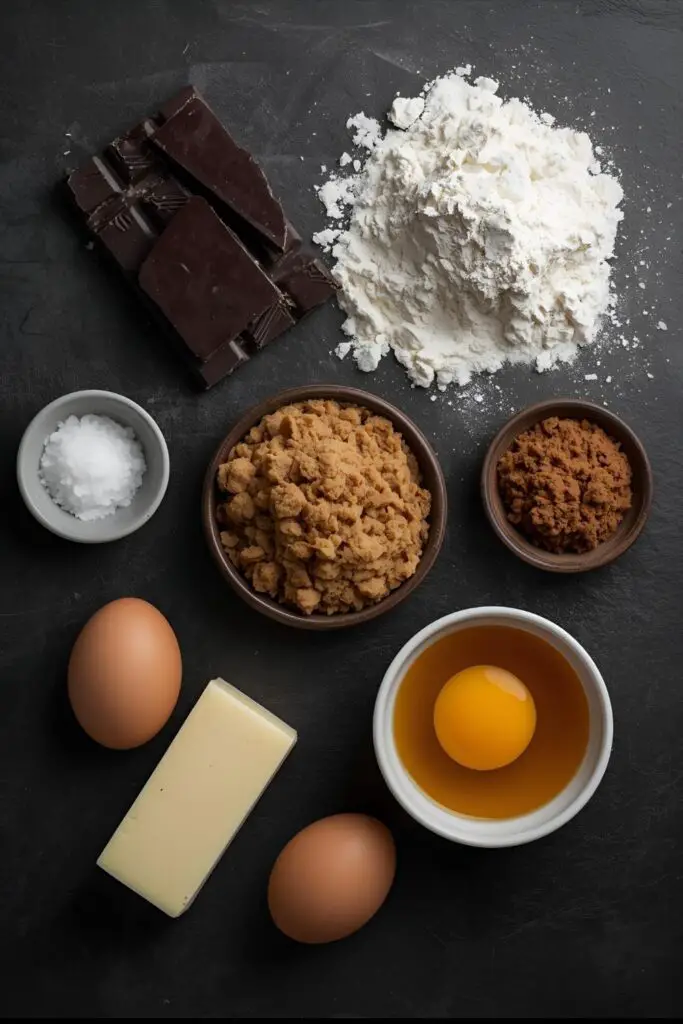
To create these works of art, you need the right stuff. The chocolate is the star here, so don’t you dare use the cheap stuff.
- 1 cup (2 sticks) unsalted butter, softened to room temperature
- ¾ cup packed light brown sugar
- ½ cup granulated sugar
- 2 large eggs, at room temperature (It really does matter, FYI)
- 2 teaspoons pure vanilla extract
- 2 ¼ cups all-purpose flour
- 1 teaspoon baking soda
- 1 teaspoon salt
- 10 ounces (about 2 bars) good-quality semi-sweet or dark chocolate, roughly chopped
- Flaky sea salt, for sprinkling (This is not optional, IMO)
Key Substitutions:
- Chocolate: Feel free to use a mix! Dark, milk, and even white chocolate chunks can coexist beautifully.
- Gluten-Free: Swap the all-purpose flour for a high-quality 1:1 gluten-free baking blend.
- Brown Butter: For a next-level nutty flavor, brown the butter on the stovetop first and let it cool before using. You’re welcome.
Tools & Kitchen Gadgets Used: Your Path to Perfection
You don’t need a professional kitchen, but these tools will make you feel like a pro and ensure cookie success.
- Stand Mixer or a reliable Hand Mixer (Your arms will thank you.)
- Large and Medium Mixing Bowls
- Rubber Spatula (The official tool of the “No Dough Left Behind” club.)
- Whisk
- Measuring Cups and Spoons
- A good Chef’s Knife and Cutting Board (For chopping that glorious chocolate.)
- Baking Sheets (Light-colored, heavy-duty sheets are best.)
- Parchment Paper or Silicone Baking Mats (For easy release and even easier cleanup.)
- Cookie Scoop (For cookies that are cousins, not distant strangers.)
- Wire Cooling Rack
Step-by-Step Instructions: Let’s Get Chopping!
Ready to make the best cookies of your life? Let’s do it.
- Prep and Chop: First, get that oven preheating to 375°F (190°C). Line two baking sheets with parchment paper. Now for the fun part: take your chocolate bars and give them a rough chop. You want a variety of sizes, from slivers to big ol’ chunks.
- Cream Butter & Sugars: In your large bowl, use your mixer to beat the softened butter, brown sugar, and granulated sugar on medium-high speed. Keep going for about 3-4 minutes until it’s light, fluffy, and has paled in color. Don’t rush this step!
- Add Eggs & Vanilla: Crack in your eggs, one at a time, beating well after each one. Scrape down the sides of the bowl, then mix in the vanilla extract.
- Combine the Dry Stuff: In your medium bowl, whisk together the flour, baking soda, and salt. Get it all nicely combined so you don’t end up with a salty surprise in one cookie.
- Bring It All Together: With the mixer on its lowest speed, slowly add the dry ingredients to the wet mixture. Mix only until the flour streaks have just disappeared. I’m serious, do not overmix! Overmixing leads to tough, sad cookies.
- It’s Chocolate Time: Ditch the mixer and grab your spatula. Fold in about three-quarters of your beautiful chopped chocolate chunks. Try not to eat them all.
- Scoop and Stud: Use a cookie scoop (about 2-3 tablespoons) to portion out your dough onto the prepared baking sheets, leaving a couple of inches between them. Now, take those remaining chocolate chunks and press them onto the tops of the dough balls. This is the secret to photogenic, puddly cookies.
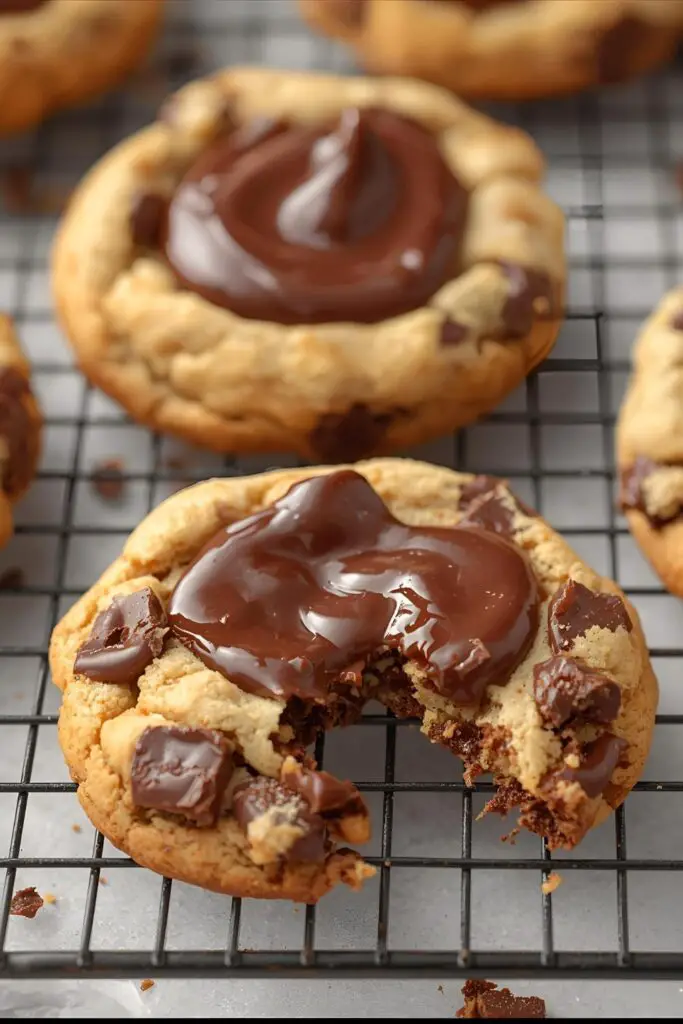
- Bake It Up: Bake for 11-13 minutes. The edges should be set and golden, but the centers should look slightly soft and underdone. This is the key to maximum chewiness.
- The Salty Finish: As soon as the cookies come out of the oven, sprinkle them with a little flaky sea salt. The salt hitting the warm, melty chocolate is pure magic.
- Patience, Grasshopper: Let the cookies cool on the baking sheet for 5-10 minutes to set up before moving them to a wire rack to cool completely. Or, you know, burn your mouth on one immediately. Your call.
Calories & Nutritional Info: The Delicious Details
Let’s be real, you’re not making these for your health. But if you must know, here’s a rough estimate per cookie (assuming the recipe yields about 18-24 cookies).
- Estimated Calories per cookie: ~250-280 calories
- Fat: ~14g
- Carbohydrates: ~30g
- Protein: ~3g
- Sugar: ~20g
Nutritional Notes:
- Contains 100% of your daily recommended dose of happiness.
- The actual numbers vary based on the size of your cookies and the type of chocolate you use. So basically, this is just a guess. 🙂
Common Mistakes to Avoid: Don’t Let This Happen to You!
We all make mistakes. Just try not to make these.
- Using Chocolate Chips: I know, I know. But if you want true chunk cookies, you have to chop a bar. Chips are designed with stabilizers to hold their shape; chopped chocolate is designed to melt into glorious puddles.
- Overbaking: I will say it until I’m blue in the face: pull your cookies from the oven when they still look a little gooey in the middle. They finish baking on the hot pan. An overbaked cookie is a tragedy.
- Ignoring the Salt: The flaky sea salt at the end isn’t just for looks. It balances the sweetness of the cookie and makes the chocolate flavor pop. Don’t skip it!
- Using Cold Ingredients: Room temperature butter and eggs are essential. They emulsify better, creating a more uniform dough and a better final texture.
Variations & Customizations: Go On, Get Wild
This recipe is a perfect canvas for your culinary creativity.
- The Nutty Professor: Add ¾ cup of toasted, chopped walnuts or pecans to the dough for a classic, crunchy combination.
- Coffee Addict’s Dream: Add 2 teaspoons of instant espresso powder to the dry ingredients. It won’t make the cookies taste like coffee; it will just make the chocolate taste more intensely chocolatey.
- The Everything Cookie: Feeling chaotic? Throw in ½ cup of toffee bits and ½ cup of rolled oats. It’s a flavor and texture explosion.
FAQ Section: Your Chunk-Related Questions, Answered
You’ve got questions about chunks. I’ve got answers.
- Q: What’s the real difference between chocolate chunk and chocolate chip cookies? A: It’s all about the chocolate! Chocolate chips are uniform and contain less cocoa butter, so they hold their shape. Chocolate chunks, from a chopped bar, have more cocoa butter and melt into irregular pools, creating a better texture and flavor distribution.
- Q: What is the best chocolate to use for chunk cookies? A: A good quality baking bar with 60-70% cacao is perfect. Brands like Ghirardelli, Lindt, or Scharffen Berger are great choices. Don’t use candy bars, as they have extra ingredients that can affect the melt.
- Q: Should I chill the dough for these cookies? A: For this recipe, it’s not strictly necessary if you’re in a hurry. However, chilling the dough for at least an hour (or up to 48 hours) will result in thicker cookies with a deeper, more complex flavor.
- Q: How do you get those big puddles of chocolate on top? A: The secret is to reserve some of your biggest chocolate chunks and press them gently into the tops of the dough balls right before they go into the oven.
- Q: Why are my cookies cakey instead of chewy? A: Cakey cookies are often the result of too much flour or overmixing the dough after the flour has been added. Measure your flour correctly (spoon and level, don’t scoop!) and mix sparingly.
- Q: Can I just use chocolate chips if I’m lazy? A: Sigh. Yes, you can. They will still be delicious cookies. But they won’t be the life-changing, puddly chocolate chunk cookies we’ve been talking about. You’ve been demoted back to the junior leagues.
- Q: How should I store these cookies to keep them fresh? A: Store them in an airtight container at room temperature for up to 5 days. Adding a slice of sandwich bread to the container can help keep them soft and chewy.
Final Thoughts: Welcome to the Chunk Side
Congratulations, you’ve done it. You’ve unlocked the secret to superior cookie-dom. Once you’ve experienced the joy of a true chocolate chunk cookie, there’s no going back to a life of boring, uniform chips. So go forth and bake. Share them with people you like (or don’t, and keep them all for yourself). You’ve earned it.