Ditch the Delivery: How to Make a Pizza at Home That’s Actually Good
Let’s be real. Ordering pizza is easy. Too easy, maybe? But have you ever found yourself staring at a lukewarm box, slightly soggy crust, and toppings that seem to have migrated to one sad corner? Yeah, me too. It’s a culinary letdown of epic proportions. But what if I told you that learning how to make a pizza at home isn’t some mystical art reserved for Italian grandmothers? Nope. With a few simple tricks, you can create a pizza that puts your local joint to shame. Seriously.
Ready to unleash your inner pizzaiolo and craft a masterpiece that’s hot, cheesy, and exactly to your liking? Of course, you are. Learning how to make a pizza at home is easier than you think, and the satisfaction of pulling that perfect pie from your own oven? Unbeatable. Get ready to say “ciao” to mediocre takeout forever.
Why Homemade Pizza Is Your New Obsession
So, why should you ditch the delivery apps and get your hands doughy? Let me tell you.
First, control is king. You get to choose exactly what goes on your pizza. No more mystery meats or skimpy cheese portions. Want extra pepperoni? Go wild! Obsessed with Kalamata olives? Pile ’em high! It’s your pizza, your rules.
Second, the flavor is next-level. Freshly made dough, quality sauce, and your favorite toppings, baked to bubbly perfection in your own oven? It’s a taste sensation that takeout just can’t replicate. Plus, that amazing smell wafting through your kitchen? Priceless.
And let’s not forget the fun factor. Making pizza at home can be a blast, whether you’re doing it solo or getting the whole family involved. It’s a hands-on culinary adventure that ends in deliciousness. What’s not to love?
The Delicious Ingredient Lineup


To make pizza magic happen, you’ll need a few key players. Don’t worry, most are easy to find.
For the Dough (Makes about 2 medium pizzas):
- 1 1/2 cups Warm Water (about 105-115°F): Not too hot, not too cold – think lukewarm bathwater for yeast.
- 1 teaspoon Sugar: To give the yeast a little snack to get them going.
- 2 1/4 teaspoons (1 packet) Active Dry Yeast: The magic ingredient that makes it all rise.
- 3 1/2 – 4 cups All-Purpose Flour, plus more for dusting: The backbone of our pizza.
- 1 teaspoon Salt: For flavor!
- 2 tablespoons Olive Oil, plus more for drizzling: Adds richness and helps the dough.
For the Sauce:
- 1 (15 ounce) can Crushed Tomatoes: Good quality crushed tomatoes make a world of difference.
- 1 teaspoon Dried Oregano: Classic pizza flavor.
- 1/2 teaspoon Dried Basil: Another essential herb.
- 1/4 teaspoon Garlic Powder: Or a clove of fresh garlic, minced, if you’re feeling fancy.
- Pinch of Salt and Black Pepper: To taste.
For the Toppings:
- Shredded Mozzarella Cheese: The quintessential pizza cheese. Fresh mozzarella is even better if you can find it!
- Your Favorite Toppings! Pepperoni, mushrooms, onions, peppers, olives, cooked chicken – the possibilities are endless. Don’t be afraid to get creative!
Your Pizza-Making Toolkit
You don’t need a professional pizza oven, just a few essential kitchen items.
- Large Mixing Bowl: For bringing the dough together.
- Measuring Cups and Spoons: Precision is your friend in baking.
- Clean Work Surface (like a countertop or cutting board): For kneading and shaping the dough.
- Rolling Pin: For rolling out your pizza base.
- Pizza Pan, Baking Sheet, or Pizza Stone: A pizza stone or steel will give you the crispiest crust.
- Oven Mitts: Because hot things are hot.
- Pizza Cutter or Large Knife: For slicing your masterpiece.
Let’s Get Cooking: Step-by-Step to Pizza Perfection
Ready to become a pizza-making wizard? Let’s do this!
Step 1: Activate the Yeast
In your large mixing bowl, combine the warm water and sugar. Sprinkle the yeast over the top and let it sit for 5-10 minutes, until it looks foamy. This means your yeast is alive and ready to work its magic. If it doesn’t foam, your yeast might be old, and you’ll need to start over. Trust me on this.
Step 2: Make the Dough
Add 2 cups of the flour and the salt to the yeast mixture. Stir with a wooden spoon or spatula until a shaggy dough forms. Add the olive oil and continue to stir.
Step 3: Knead It Good
Turn the dough out onto a lightly floured surface. Knead for 8-10 minutes, adding more flour a little at a time as needed, until the dough is smooth and elastic. It should bounce back slightly when you poke it. Don’t over-knead, but make sure it’s well-developed.
Step 4: Let It Rise

Lightly oil a clean bowl. Place the dough in the bowl, turning to coat. Cover the bowl with plastic wrap or a clean kitchen towel and let it rise in a warm place for 1-1.5 hours, or until it has doubled in size. This is where the magic really happens.
Step 5: Make the Sauce
While the dough is rising, make your pizza sauce. In a small saucepan, combine the crushed tomatoes, oregano, basil, garlic powder, salt, and pepper. Bring to a simmer over medium heat and cook for about 15 minutes, stirring occasionally, until slightly thickened. Set aside to cool slightly.
Step 6: Preheat Your Oven (Get It Hot!)
About 30 minutes before you’re ready to bake, preheat your oven to 450°F (232°C). If you’re using a pizza stone or steel, place it in the oven while it preheats. This helps create a super crispy crust.
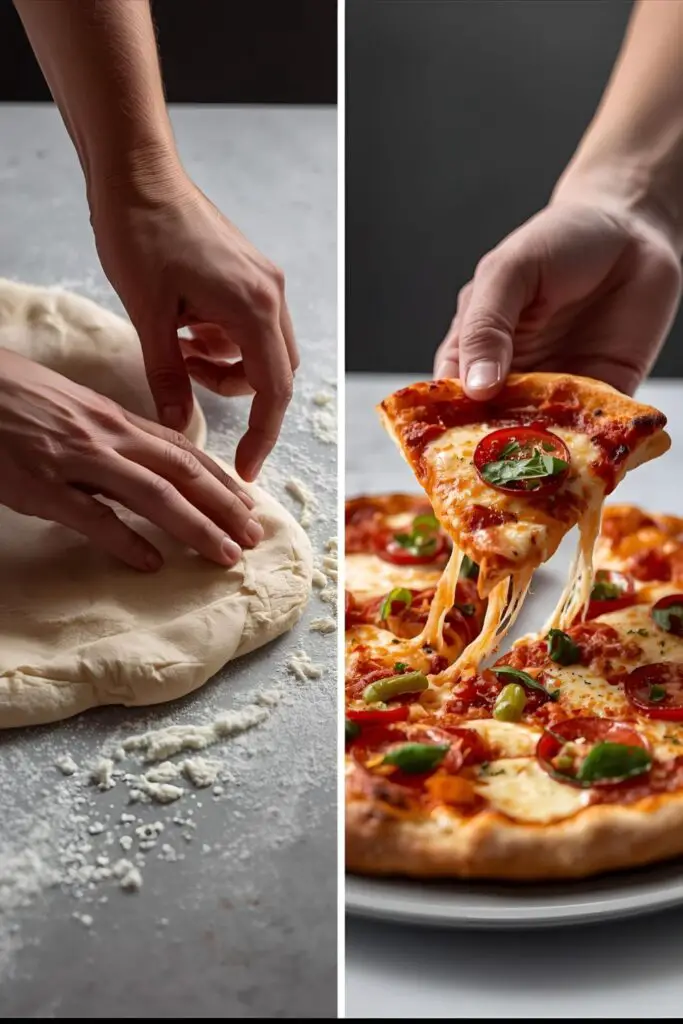
Step 7: Shape the Dough
Punch down the risen dough to release the air. Divide it in half. On a lightly floured surface, shape one half of the dough into a ball. You can either roll it out with a rolling pin into a 12-inch circle, or for a more rustic look (and a bit of arm workout), you can gently stretch and shape it with your hands. Leave a slightly thicker edge for the crust.
Step 8: Sauce and Cheese
Carefully transfer the shaped dough to your pizza pan or onto a floured pizza peel (if using a pizza stone). Spread a thin layer of your prepared pizza sauce evenly over the dough, leaving about a 1-inch border for the crust. Sprinkle generously with shredded mozzarella cheese.
Step 9: Add Your Favorite Toppings
Now for the fun part! Arrange your favorite toppings over the cheese. Don’t overload it, though; too many toppings can make the crust soggy. Less is often more.
Step 10: Bake to Perfection
Carefully transfer the pizza to your preheated oven (or onto the pizza stone/steel). Bake for 12-15 minutes, or until the crust is golden brown and the cheese is melted, bubbly, and slightly browned in spots.
Step 11: Slice and Enjoy!
Remove the pizza from the oven with oven mitts. Let it cool for a minute or two before slicing and serving. Drizzle with a little extra olive oil if you’re feeling fancy. Repeat with the remaining dough and toppings.
Calories & Nutritional Info
Estimating calories for a homemade pizza is tricky since it depends entirely on your toppings and portion size. However, for a roughly 1/4 slice of a basic cheese pizza on homemade crust:
- Calories: Approximately 300-400 kcal
- Fat: Around 15-20g
- Carbohydrates: Roughly 30-40g
- Protein: About 10-15g
- Note: Loading up on veggies will increase the nutritional value and fiber content!
Common Mistakes to Avoid (Pizza Fails)
- Water That’s Too Hot or Too Cold: If your water is too hot, it will kill the yeast. Too cold, and the yeast won’t activate. Aim for that lukewarm temperature.
- Not Kneading Enough: Under-kneaded dough will be tough and won’t rise properly. Give it the full 8-10 minutes of kneading love.
- Skimping on Preheat Time: A hot oven is crucial for a crispy crust. Give your oven (and pizza stone/steel) plenty of time to get up to temperature.
- Overloading the Toppings: More isn’t always better. Too many toppings can weigh down the crust and make it soggy in the middle. Be strategic with your additions.
- Poking Holes in Your Dough (Unless You’re Making Flatbread): Resist the urge to poke holes all over your pizza base. You want it to rise and create that lovely airy crust.
Variations & Customizations
Pizza is your blank canvas! Get creative.
- Spicy Pepperoni Pizza with Hot Honey: Add a generous layer of pepperoni and a drizzle of hot honey after baking for a sweet and spicy kick.
- Mediterranean Veggie Pizza: Top with roasted red peppers, Kalamata olives, feta cheese, spinach, and a drizzle of olive oil.
- BBQ Chicken Pizza: Use BBQ sauce instead of tomato sauce, top with cooked chicken, red onion, cilantro, and a blend of cheddar and mozzarella cheese.
Frequently Asked Questions (Your Pizza Ponderings)
1. What’s the secret to a crispy pizza crust at home? A hot oven (450°F or higher!), a pizza stone or steel that’s been preheating with the oven, and not overloading the toppings are key.
2. Can I make pizza dough ahead of time? Absolutely! After the first rise, punch down the dough, shape it into a ball, and wrap it tightly in plastic wrap. Store in the refrigerator for up to 3 days. Let it come to room temperature for about 30 minutes before rolling out.
3. Why is my pizza dough so sticky? You might have added too much water or not enough flour. Try adding a little more flour when kneading until the dough is smooth and slightly tacky but not overly sticky.
4. How do I prevent my pizza toppings from sliding off? Don’t overload the pizza with too many toppings. Also, make sure you have a good layer of cheese underneath to act as a “glue.”
5. Can I cook pizza on a regular baking sheet? Yes, you can! It won’t be quite as crispy as on a stone or steel, but it will still be delicious. Lightly oil the baking sheet before placing the dough on it.
6. How long should I preheat my pizza stone? At least 30 minutes at your oven’s highest temperature (or at least 450°F). This ensures the stone is hot enough to cook the crust evenly and quickly.
7. Can I use bread flour instead of all-purpose flour for pizza dough? Yes, bread flour has a higher protein content, which can result in a chewier crust. If you have it on hand, feel free to use it!
Final Thoughts
There you have it! You’re now officially armed with the knowledge to create a pizza masterpiece in your very own kitchen. Say goodbye to pizza disappointment and hello to a world of customizable, delicious possibilities.
Go forth, get creative with your toppings, and enjoy the amazing smell of homemade pizza wafting through your home. Your taste buds (and your wallet) will thank you. You might even find yourself becoming that friend who always makes the “amazing homemade pizza.” Just don’t get too smug about it. Maybe. Enjoy!