Why These Kool-Aid Gummies Are Basically Magic
Still on the fence about making your own neon-colored, intensely flavored candies? Let me lay down the undeniable awesomeness of these Kool-Aid gummy bears.
Firstly, the flavor is off the charts. We’re not talking subtle hints of fruit here. We’re talking a full-on flavor explosion that will transport you straight back to those summer afternoons with sticky fingers and a bright red smile. Remember Sharkleberry Fin? You can make a gummy of that.
Secondly, they are surprisingly easy to make. Seriously. If you can boil water and stir, you’re practically a gummy bear pro. The ingredient list is short, and the steps are simple. It’s a fantastic project to do with kids (or just for your own inner kid).
Finally, they are endlessly customizable. Want different colors? Different flavors? Different shapes? The power is in your hands, my friend. You’re the gummy bear overlord now. Rule your sugary kingdom wisely.
The Gummy Gang (Ingredients)
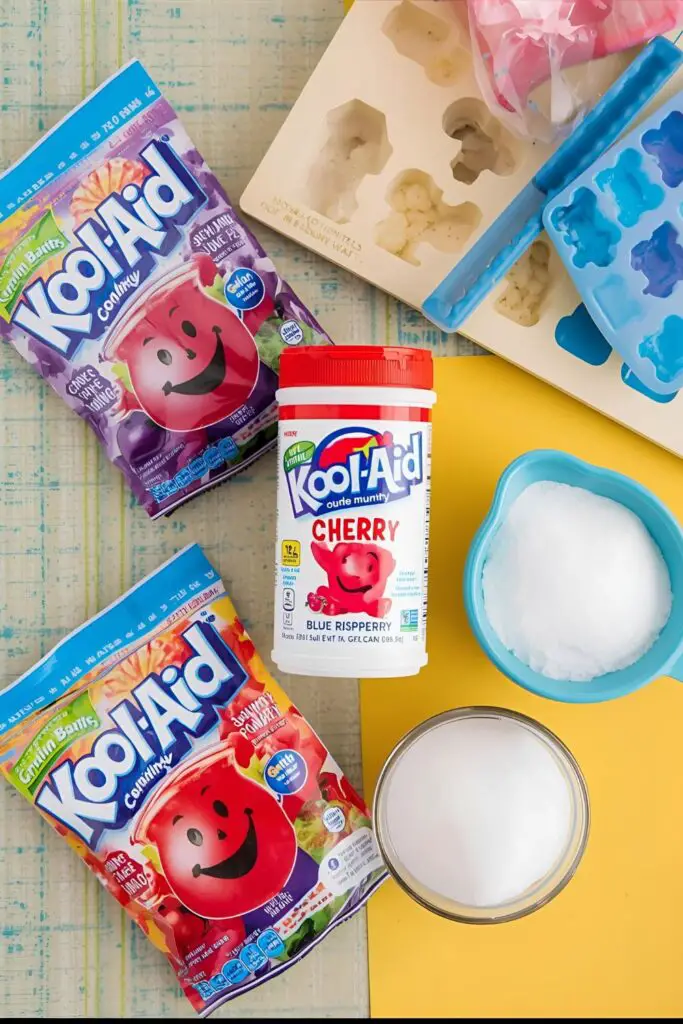
You won’t need a trip to a specialty store for this. Just a few basics will do the trick.
- Unflavored Gelatin: About 6 tablespoons. This is what gives our gummies that signature bouncy texture. Don’t try to substitute with flavored gelatin – it won’t work the same.
- Kool-Aid Powder: 2 packets of your favorite flavor(s). Go wild! Grape? Cherry? Blue Raspberry that stains your tongue for days? The choice is yours.
- Water: 1 cup, divided (½ cup cold, ½ cup boiling).
- Sugar: ½ cup (adjust to your preference, but remember Kool-Aid is already pretty sweet).

Pro Tip for Khulna folks: You can find unflavored gelatin easily in most supermarkets here. Kool-Aid might be in the imported goods section, or you can find similar powdered drink mixes if needed.
Your Gummy Bear Workshop (Tools & Kitchen Gadgets)
Time to assemble your gummy-making arsenal.
- Small Saucepan: For heating up our magical mixture.
- Whisk: To ensure everything dissolves smoothly.
- Small Bowl: For blooming the gelatin.
- Measuring Cups and Spoons: Precision is key in the gummy game.
- Gummy Bear Molds: Silicone molds are your best friend here. They make releasing the gummies super easy. You can find these online.
- Dropper or Syringe: For carefully filling the molds. A clean medicine dropper works great.
- Baking Sheet: To place the filled molds on for easy transport to the fridge.
Step-by-Step to Kool-Aid Gummy Goodness
Ready to get your gummy on? Let’s do this!
Step 1: Bloom the Gelatin
In the small bowl, pour the ½ cup of cold water over the unflavored gelatin powder. Stir it gently and let it sit for about 5-10 minutes. This process, called blooming, allows the gelatin to absorb the water and get all thick and jiggly – which is exactly what we want.
Step 2: Create the Flavor Base
In the small saucepan, bring the remaining ½ cup of water to a boil. Once it’s boiling, remove it from the heat and stir in the Kool-Aid powder and sugar until they are completely dissolved. Keep stirring until you don’t see any more granules. This is where that iconic color and flavor come from!
Step 3: Combine the Magic
Now, pour the bloomed gelatin into the hot Kool-Aid mixture. Stir everything together thoroughly and constantly until the gelatin is completely dissolved and the mixture is smooth and clear. This usually takes a couple of minutes. Make sure there are no lumps of gelatin lurking at the bottom!
Step 4: Mold It!

Carefully pour the hot liquid into your gummy bear molds using the dropper or syringe. Work quickly before the mixture starts to set. If you don’t have gummy bear molds, you can pour the mixture into a lightly greased shallow dish and then cut it into squares or other shapes once it’s set (though let’s be honest, gummy bears are way more fun).
Step 5: Chill Out (Literally)
Once all the molds are filled, carefully transfer the baking sheet with the molds to the refrigerator. Let the gummies chill for at least 2-3 hours, or preferably overnight, until they are firm and set. Patience is a virtue, especially when it comes to gummy bears.
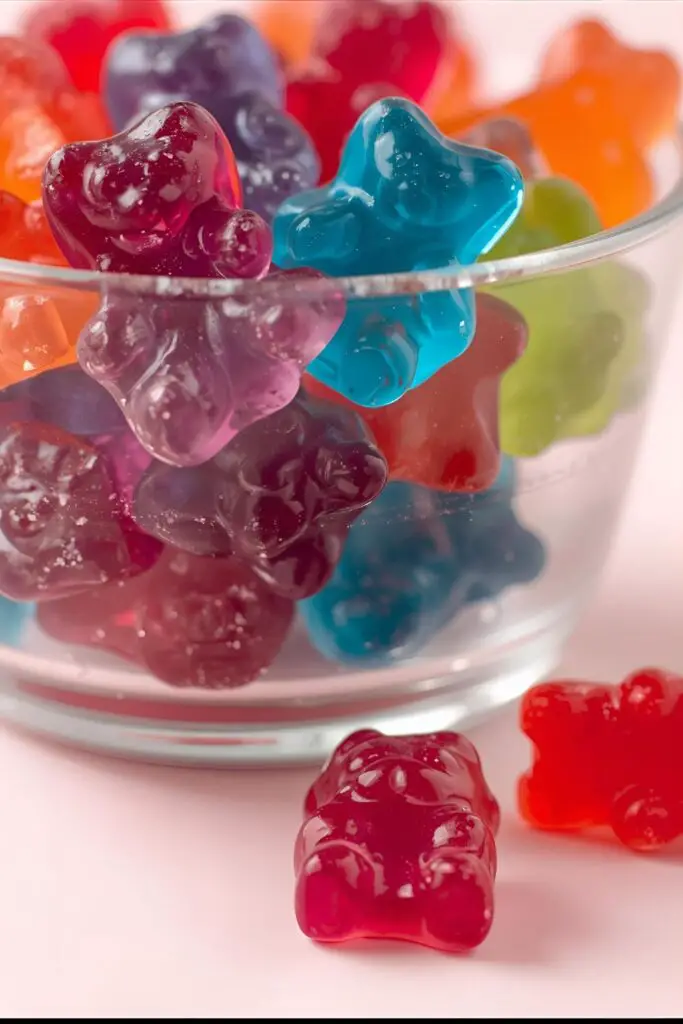
Step 6: Unmold and Enjoy!
Once the gummies are firm, gently pop them out of the silicone molds. If you used a dish, carefully cut the set gelatin into your desired shapes. Now, behold! You have homemade Kool-Aid gummy bears! Store them in an airtight container in the refrigerator.
Calories & Nutritional Info (Spoiler Alert: They’re Candy)
Let’s not pretend these are a health food, okay? They’re a fun treat, and should be enjoyed as such.
- Serving Size: About 10-15 gummy bears (depending on mold size)
- Estimated Calories: Around 80-100 calories per serving. Mostly from sugar.
- Key Nutrients: Zero. Nada. Zilch. Unless you count the pure, unadulterated joy they bring.
- Nutritional Note: These are candy. Enjoy in moderation. Your teeth will thank you.
Common Mistakes to Avoid (Don’t End Up with Gummy Soup)
Making gummies isn’t rocket science, but a few pitfalls can lead to less-than-perfect results.
- Not Blooming the Gelatin Properly: If you skip this step, your gelatin won’t dissolve correctly, and you’ll end up with grainy or lumpy gummies. Bloom that gelatin!
- Not Dissolving Everything Completely: Make sure the sugar and gelatin are fully dissolved in the hot liquid. Any undissolved granules will result in a weird texture. Stir, stir, stir!
- Letting the Mixture Cool Too Much Before Molding: If the mixture starts to set before you pour it into the molds, it will be difficult to work with. Work quickly!
- Not Chilling Long Enough: Impatience is the enemy of a good gummy bear. If you try to unmold them too soon, they’ll be soft and sticky. Give them enough time to chill!
- Using Too Much Water: Stick to the recipe’s measurements. Too much water will result in soft, wimpy gummies.
Variations & Customizations (Get Creative with Your Gummies)
Want to take your gummy game to the next level? Here are a few fun twists.
1. Sour Power!

Once the gummies are unmolded, toss them in a mixture of granulated sugar and citric acid for that classic sour gummy kick. Start with a small amount of citric acid and add more to taste.
2. Layered Gummies
Make different flavored Kool-Aid mixtures and pour them into the molds in layers, allowing each layer to partially set in the fridge before adding the next. This creates fun, colorful, multi-flavored gummies.
3. Grown-Up Gummies (Optional Adult Twist)
For a strictly adults-only treat, try substituting a portion of the water with a clear spirit like vodka. Be mindful that the alcohol content won’t cook out completely, so consume responsibly and keep them away from kids. Start with a small amount (maybe 1-2 tablespoons) and adjust to your preference.
FAQ: Your Burning Gummy Bear Questions Answered
Let’s tackle some of those sticky situations.
1. Can I use sugar-free Kool-Aid? Yes, you can! The texture of the gummies should still be similar. Keep in mind the flavor might be slightly different due to the artificial sweeteners.
2. Can I use a different type of gelatin? It’s best to stick with unflavored gelatin powder for this recipe to get the right texture. Flavored gelatins already have sugar and flavoring added, which will alter the outcome.
3. How long do homemade Kool-Aid gummy bears last? Stored in an airtight container in the refrigerator, they should last for about a week or two. They might lose some of their initial squishiness over time.
4. My gummies are too soft. What did I do wrong? You likely didn’t use enough gelatin or didn’t chill them for long enough. Make sure you use the correct amount of gelatin and give them ample time to set in the fridge.
5. My gummies are too hard and rubbery. What happened? You might have boiled the gelatin mixture for too long, which can break down the gelatin. Heat it gently just until everything is dissolved.
6. Can I reuse the gummy bear molds? Absolutely! Silicone gummy bear molds are reusable and easy to clean. Just wash them with soap and water after each use.
7. Can I make these without sugar? You can try reducing or omitting the added sugar, but the texture might be slightly different. The Kool-Aid itself already contains sweeteners.
Final Thoughts
Congratulations, you’ve officially unlocked the secret to homemade Kool-Aid gummy bears! You are now equipped to spread joy (and maybe a little bit of sticky residue) wherever you go. So go forth, experiment with flavors, and embrace the glorious world of DIY candy. And the next time you’re at the store staring at those boring, regular gummy bears, you can just smirk to yourself, knowing you have the power to create something far more… Kool.