Drowning in Dry Chicken? Rescue It with This Silky Homemade Chicken Gravy Recipe
Okay, let’s have a real talk moment. You’ve roasted a beautiful chicken. It looks glorious. You’re feeling like a culinary rockstar. Then you slice into it… and it’s a tad… parched. Don’t panic! Before you reach for that questionable jar of gravy (you know the one), let me introduce you to the superhero of any poultry-centric meal: homemade chicken gravy recipe. It’s easier than you think, tastes a million times better, and will save your bird from a dry, flavorless fate.
Forget that gloopy, salty stuff from the store. We’re talking about rich, savory gravy that’s perfectly seasoned and has that “mmm, this is good” factor. Ready to elevate your chicken (and mashed potatoes, and stuffing…) to a whole new level? Let’s get saucy!
Why This Chicken Gravy Will Be Your New Best Friend
Seriously, why settle for mediocre when you can have magnificent? This homemade chicken gravy recipe is a game-changer for several reasons.
First, it’s packed with real flavor. We’re talking about pan drippings (the good stuff!), flavorful broth, and simple seasonings that come together to create a gravy that’s anything but bland.
Second, it’s surprisingly quick and easy. Especially if you’ve just roasted a chicken and already have those delicious drippings. We’re talking minutes to velvety smooth perfection.
And finally, it’s completely customizable. Want it thicker? Thinner? More herby? You’re the boss! Adjust the ingredients to your liking and create the gravy of your dreams.
The Gravy Dream Team (Ingredients)
You don’t need a long list of fancy ingredients for this liquid gold. Just a few key players.
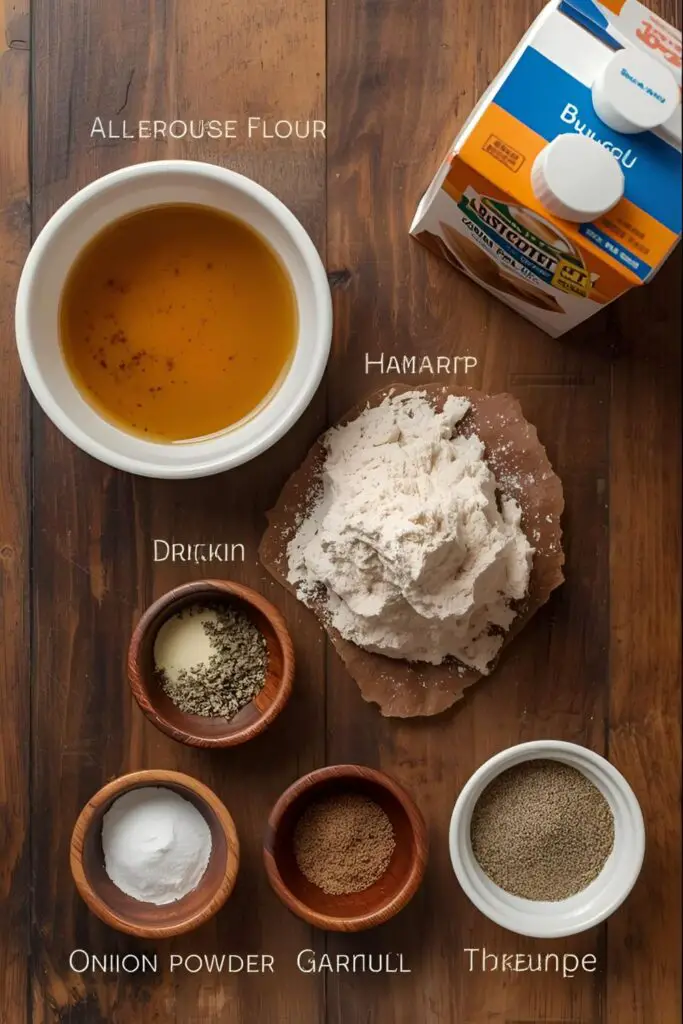
- Chicken Drippings: ¼ cup (from your roasted chicken). This is where the magic starts! If you don’t have enough, you can supplement with melted butter.
- All-Purpose Flour: ¼ cup. This is our thickening agent.
- Chicken Broth: 2 cups, low sodium. You can also use homemade chicken stock if you’re feeling fancy.
- Milk (Optional): ¼ cup. Adds extra creaminess. You can skip this for a more traditional gravy.
- Onion Powder: ½ teaspoon. Adds a subtle savory depth.
- Garlic Powder: ¼ teaspoon. Because garlic makes everything better.
- Dried Thyme: ½ teaspoon. A classic herb that pairs perfectly with chicken.
- Salt and Black Pepper: To taste. Seasoning is crucial!
- Fresh Parsley (Optional): 1 tablespoon, chopped. For a fresh, vibrant garnish at the end.
Your Gravy-Making Arsenal
You won’t need a ton of fancy equipment for this. Just a few basics will do the trick.
- Skillet or Saucepan: Where the gravy will come together. Make sure it’s large enough to hold all the liquid.
- Whisk: Essential for creating a smooth gravy without lumps. Trust me on this one.
- Measuring Cups and Spoons: For accurate ingredient measurements.
- Spoon or Spatula: For stirring and scraping up any flavorful bits from the bottom of the pan.
- Small Bowl (Optional): For mixing the slurry if needed (we’ll get to that).
Let’s Get Gravy-licious: Step-by-Step Instructions
Alright, are you ready to transform those humble ingredients into a glorious gravy? Let’s do it!
Step 1: Deglaze the Pan (Flavor Town, Population: You)
If you’ve just roasted a chicken, skim off any excess fat from the pan drippings, leaving about ¼ cup in the roasting pan or transfer the drippings to your skillet or saucepan. Place the pan over medium heat. Use a spoon or spatula to scrape up any of those delicious browned bits stuck to the bottom of the pan. That’s pure flavor, my friend!
Step 2: Make the Roux (The Thickening Powerhouse)
Reduce the heat to medium-low. Sprinkle the all-purpose flour evenly over the drippings in the pan. Use your whisk to stir constantly for 1-2 minutes. This mixture is called a roux, and cooking it slightly removes that raw flour taste and helps with thickening. It should look like a thick paste.
Step 3: Whisk in the Liquid (Smooth Operator)
Slowly whisk in the chicken broth, a little at a time, making sure to incorporate it fully into the roux before adding more. Keep whisking constantly to prevent any lumps from forming. This is where your whisk becomes your best friend.
Step 4: Simmer and Season (Flavor Building Time)
Bring the gravy to a gentle simmer over medium heat, stirring occasionally. Let it simmer for about 5-7 minutes, or until it has thickened to your desired consistency. Remember, it will thicken a bit more as it cools.
Stir in the onion powder, garlic powder, and dried thyme. If you’re using milk, stir it in now for extra creaminess. Season the gravy generously with salt and black pepper to taste. Don’t be shy! Taste and adjust as needed.
Step 5: Finishing Touches (Optional but Awesome)
If you’re using fresh parsley, stir it in at the very end for a pop of fresh flavor and color.
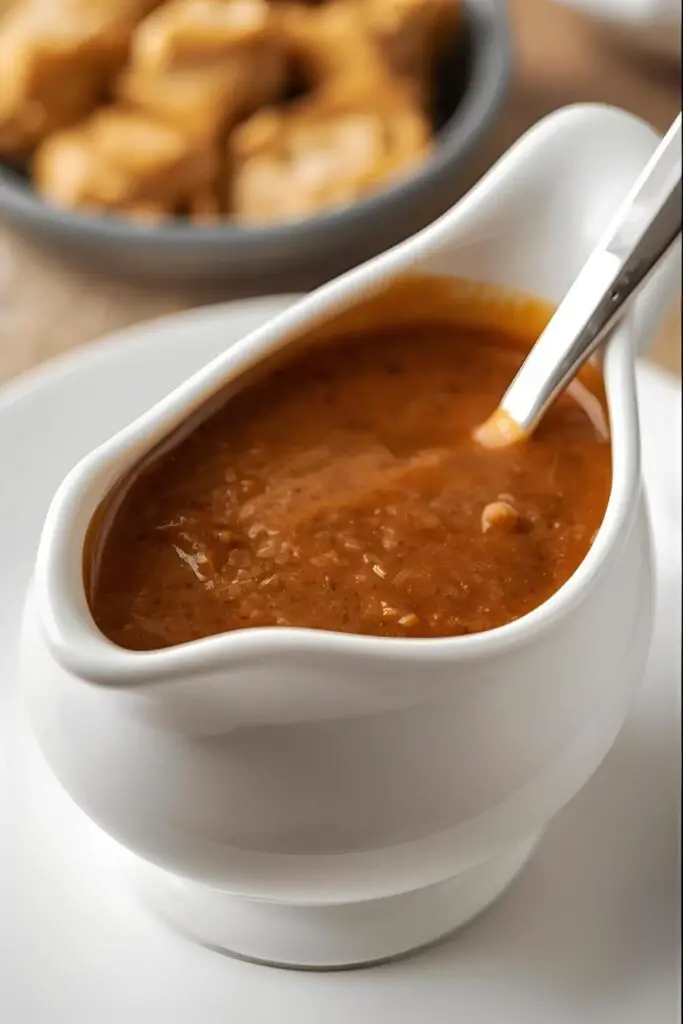
Serve your glorious homemade chicken gravy immediately over your roasted chicken, mashed potatoes, stuffing, or whatever else your heart desires!
Calories & Nutritional Info (The Gravy Lowdown)
Let’s be real, gravy isn’t exactly a health food. But a little bit can add a whole lot of flavor to your meal.
- Serving Size: About ¼ cup
- Estimated Calories: 50-75
- Fat: Varies depending on the amount of drippings used.
- Carbohydrates: Mostly from the flour.
- Sodium: Can vary depending on the broth and seasoning.
Common Mistakes to Avoid (Don’t Be a Gravy Gremlin)
- Lumpy Gravy Catastrophe: The biggest gravy fear! This usually happens when the flour isn’t properly incorporated into the fat or when the liquid is added too quickly. Whisk like your life depends on it!
- Thin and Weepy Gravy: You didn’t use enough flour or didn’t simmer it long enough. Give it some time to thicken.
- Thick and Gloopy Gravy: You used too much flour or simmered it for too long. You can try whisking in a little more broth to thin it out.
- Bland and Boring Gravy: You didn’t season it properly! Don’t be afraid to add salt, pepper, and other herbs and spices to enhance the flavor.
- Raw Flour Taste: You didn’t cook the roux long enough. Give it a minute or two to cook before adding the liquid.
Variations & Customizations (Gravy Your Way!)

Want to put your own spin on this classic? Here are a few ideas:
1. Herbaceous Gravy
Add other fresh or dried herbs like rosemary, sage, or marjoram to the gravy for a more complex flavor profile.
2. Mushroom Gravy
Sauté some sliced mushrooms in the pan after deglazing before making the roux for a delicious mushroom-infused gravy.
3. Keto-Friendly Gravy
Skip the flour roux and use a thickening agent like xanthan gum or arrowroot powder mixed with a little cold broth to create a slurry. Add it to the simmering broth and drippings gradually until thickened.
FAQ: Your Gravy Grievances, Gone!
Got some burning gravy questions? Let’s get them answered.
1. Can I make chicken gravy without pan drippings? Yes! You can melt ¼ cup of butter in a skillet and proceed with the recipe, using chicken broth as the base. It won’t have the exact same depth of flavor, but it will still be delicious. You can also sauté some chopped onion and celery in the butter first for extra flavor.
2. How can I make a smoother gravy? Constant whisking is key! If you still end up with a few lumps, you can strain the gravy through a fine-mesh sieve for a super smooth result.
3. Can I make gravy ahead of time? Yes, you can make gravy a day or two in advance. Store it in an airtight container in the refrigerator. Reheat it gently on the stovetop, whisking in a little extra broth or water if it has become too thick.
4. My gravy is too salty! Help! If your gravy is too salty, you can try adding a small amount of milk or cream to help neutralize the saltiness. You can also add a peeled potato chunk while it simmers; the potato will absorb some of the salt (remove it before serving).
5. What if I don’t have chicken broth? Can I use water? While you can use water in a pinch, chicken broth adds a significant amount of flavor. If you don’t have broth, try using vegetable broth or even the water you used to boil vegetables for a bit more flavor.
6. Can I add wine to my chicken gravy? Absolutely! After deglazing the pan, you can add a splash of dry white wine (like Pinot Grigio or Sauvignon Blanc) and let it reduce for a minute before proceeding with the roux. It adds a lovely layer of complexity.
7. Why did my gravy turn gray? This can sometimes happen if you use too much black pepper or if there’s a reaction with certain minerals in your water or cookware (though this is less common). Stick to a reasonable amount of pepper and use a non-reactive pan.
Final Thoughts
There you have it! You’re now armed with the knowledge to create a truly magnificent homemade chicken gravy that will rescue even the driest of birds. So go forth, embrace the roux, and never again suffer the indignity of flavorless, store-bought sludge. Your taste buds (and your dinner guests) will thank you. Now go forth and get your gravy on!