You’re Making Green Frosting? Let’s Make It a Jewel, Not a Swamp.
Let’s talk about a very specific kind of baking tragedy. You have a vision: a cake or cupcake frosted in a deep, luxurious, jewel-toned green. You grab your standard green food coloring, add a few drops to your beautiful white buttercream, and end up with… sad, pale, minty green. So you add more, and suddenly you’ve bypassed “elegant” and landed squarely in “swamp monster” territory. Sound familiar? Today, we are ending this cycle of disappointment. You are here to learn how to make emerald green frosting, and I’m here to give you the secret color-mixing formula that will change your decorating game forever.
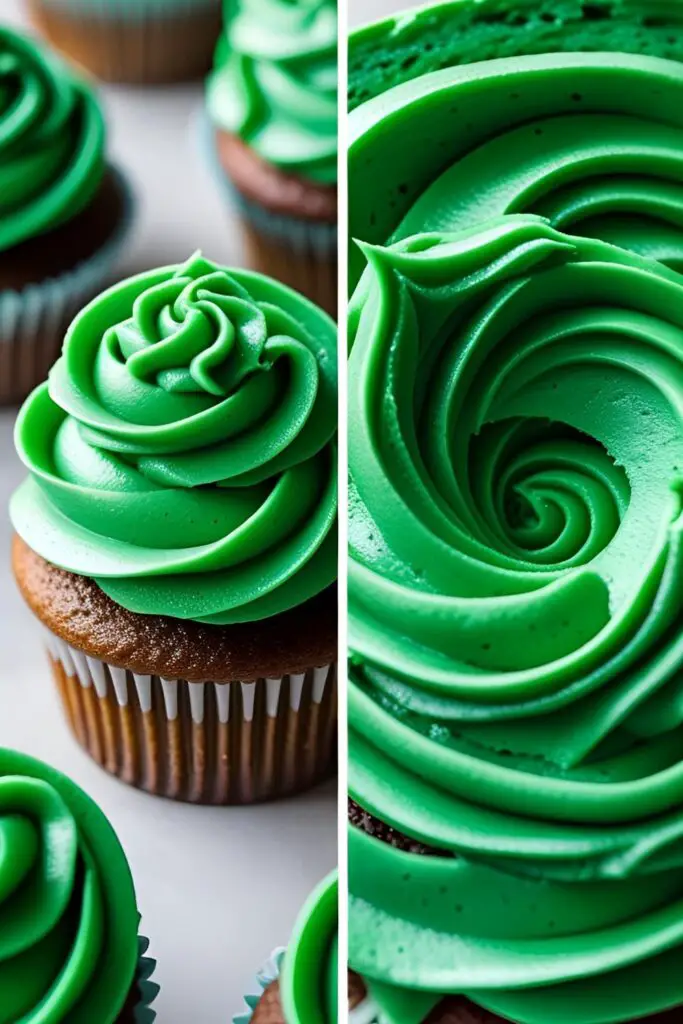
Forget those lackluster greens of your past. We are creating a frosting so rich, so vibrant, and so stunningly beautiful that it practically belongs in a queen’s crown. This isn’t just a color; it’s a statement. It’s the perfect shade for elegant birthday cakes, festive holiday treats, or any dessert that deserves to look like a million bucks.
Why This Emerald Green Frosting is a Precious Gem
So, why go to the trouble of playing color scientist with your buttercream? Why not just settle for “green-ish”? Because you, my friend, are better than that.
First and foremost, it’s absolutely gorgeous. This isn’t your average St. Patrick’s Day green. Emerald green is sophisticated, it’s deep, and it has an incredible “wow” factor. It makes a simple cupcake look like a gourmet creation from a high-end bakery.
Second, it’s a ridiculously easy technique with professional results. The secret isn’t some complicated pastry chef trick; it’s simply knowing which colors to combine. I’m going to show you the simple formula that turns basic “leaf green” into a stunning, deep jewel tone. You’ll feel like a master artist.
Finally, it’s incredibly versatile. This stunning color is perfect for so many themes! Think Christmas wreath cupcakes, a Slytherin-themed birthday cake, Mardi Gras treats, or elegant floral designs on a wedding cake. Once you master this color, you’ll find excuses to use it.
Your Color Palette: Ingredients

To create a masterpiece, you need the right paints. In this case, our paints are delicious. We’ll start with a classic, stable American buttercream that takes color like a dream.
For the Perfect White Buttercream Canvas:
- 1 cup (2 sticks) unsalted butter, softened.
- 4 cups powdered sugar, sifted. (Don’t skip the sifting, unless you enjoy lumpy frosting).
- 2-4 tablespoons milk or heavy cream.
- 1 teaspoon clear vanilla extract. (Using clear vanilla is a pro-tip to keep your base frosting as white as possible!)
- A pinch of salt.
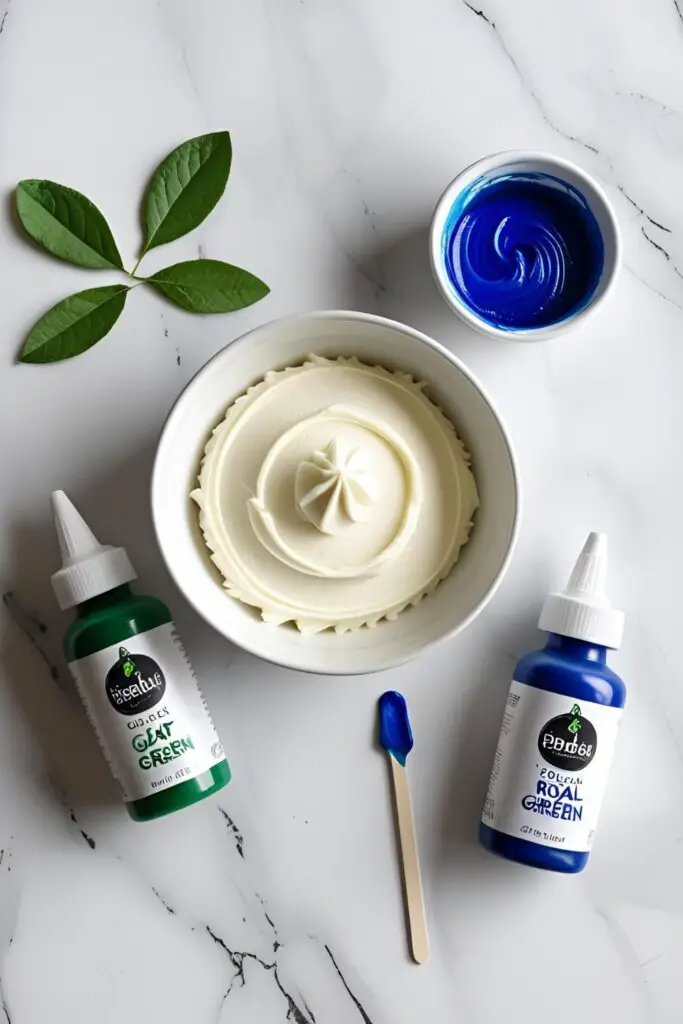
For the Emerald Green Magic (The Secret Formula):
- Leaf Green gel food coloring. This is your base.
- Royal Blue or Sky Blue gel food coloring. This is the key ingredient that adds depth and richness.
- A tiny speck of Black gel food coloring (optional, but recommended for a super deep, non-cartoony emerald).
- IMPORTANT: You must use gel food coloring. Liquid food coloring will water down your frosting and will never achieve the vibrant color we’re after.
Your Artist’s Studio: Tools & Gadgets
You don’t need a fancy art degree, but these tools will help you mix your perfect color without making a huge mess.
- Electric Mixer (stand or handheld): Essential for whipping up a light and fluffy buttercream.
- Mixing Bowl: A large one for your frosting masterpiece.
- Sifter or a fine-mesh sieve: For that lump-free powdered sugar.
- Silicone Spatula: For scraping the bowl and getting every last bit of sugary goodness.
- Measuring Cups and Spoons.
- Toothpicks or small spoons: For adding the gel food coloring. Never squeeze the gel directly from the bottle into your frosting!
Creating Your Masterpiece: Step-by-Step Instructions
Alright, let’s turn that plain buttercream into a precious gem.
Step 1: Create Your White Canvas (The Buttercream Base) In a large bowl, use your electric mixer to beat the softened butter on medium speed for about 2-3 minutes until it’s light and creamy. Scrape down the sides of the bowl. With the mixer on low, gradually add the sifted powdered sugar, one cup at a time, until it’s all incorporated.

Step 2: Get it Fluffy Add the clear vanilla extract and 2 tablespoons of milk or cream. Beat on medium-high speed for another 3-5 minutes. The frosting should become very light, white, and fluffy. If it’s too stiff, add another tablespoon or two of milk until you reach a smooth, pipeable consistency.
Step 3: Lay the Green Foundation Now for the color. Using a clean toothpick, add a good amount of Leaf Green gel coloring to your white buttercream. Don’t be too shy here; we’re aiming for a vibrant base. Mix on low speed until the color is fully combined. You should now have a nice, bright, grassy green. It’s pretty, but it’s not emerald.
Step 4: The Secret Ingredient Here’s the magic trick. Using a new clean toothpick, add a tiny, tiny drop of Royal Blue or Sky Blue gel coloring. I’m talking about a speck of color. You can always add more, but you can’t take it away! Mix on low speed until the blue is completely incorporated. You will see the color instantly transform from a bright, flat green into a deeper, richer, more complex teal-green.
Step 5: Add Depth (Optional Pro-Move) If you want an even deeper, more luxurious emerald, take another clean toothpick and add the tiniest possible speck of Black gel coloring. This will deepen the shade and take away any “neon” or “cartoony” vibe, resulting in a true, rich jewel tone. Mix it in completely.
Step 6: Let It Rest! (The Most Important Step) Cover your bowl of frosting with plastic wrap and let it sit at room temperature for at least 30-60 minutes. The colors in gel food coloring will deepen and develop over time. The color you see right after mixing is not its final form. Be patient! Your frosting will become even more stunningly emerald as it rests.
Nutritional Information (It’s Frosting, Folks)
Let’s not delude ourselves. We just made a big bowl of butter and sugar.
- Calories: ~150 per 2-tablespoon serving.
- Sugar: A fabulous amount.
- Fat: A buttery, delicious amount.
- Jewel-Toned Opulence: Off the charts.
- Note: This is for decorating treats. Enjoy the beauty and the sweetness!
Avoiding Color Calamities: Common Mistakes

Don’t let your jewel-toned dreams become a muddy mess. Avoid these common frosting faux pas.
- Using Liquid Food Coloring: I will say this again because it’s that important. Liquid coloring is too weak and will make your buttercream watery and sad. You will get a pale, pathetic pastel, not a deep emerald. Stick to high-quality gel coloring.
- Going Overboard with the Blue: The blue is what creates the emerald tone, but too much will turn your frosting into a teal or even a straight-up blue mess. Start with a tiny speck on a toothpick. You can always add more.
- Being Impatient: If you judge the color right after mixing, you’ll likely add way too much coloring trying to get it darker. Let the frosting rest and allow the color to develop. This is the number one secret to achieving deep, dark colors.
- Starting with Yellow Frosting: If your butter is very yellow or you use a traditional yellow vanilla extract, your buttercream base will be ivory, not white. Adding green and blue to a yellow base can sometimes result in a murky, olive-toned green. Use clear vanilla extract and beat your butter well to get it as light as possible.
Customizing Your Gems: Variations
Once you’ve mastered the color, you can play with the flavor.
- Mint Emerald Frosting: Add ½ teaspoon of peppermint extract to the buttercream for a delicious and classic minty flavor that pairs beautifully with the green color. Perfect for holiday treats!
- Vegan Emerald City: Make your buttercream using a high-quality vegan butter substitute and a plant-based milk (like unsweetened almond or soy milk). The color mixing technique remains exactly the same.
- Emerald Cream Cheese Frosting: This color works beautifully with cream cheese frosting too! Just be aware that cream cheese frosting is naturally a bit softer and more off-white, so your final color might be slightly less vibrant but equally delicious.
Your Color Theory Questions, Answered (FAQ)
1. What specific food coloring brands work best? I have great success with professional-quality gel brands like Americolor (Leaf Green and Royal Blue are a perfect combo), Wilton Color Right system, or Chefmaster. They are highly concentrated.
2. What colors make emerald green frosting?The formula is a vibrant green base, a small amount of blue to add depth and shift the tone from yellow-green to blue-green, and an optional tiny speck of black to deepen the shade.
3. Will this deep green frosting stain my teeth and mouth? Yes, it most likely will, temporarily. Like any deeply colored food (think blue slushies or black licorice), it can leave a bit of color behind. It’s harmless and usually fades quickly, but it’s something to be aware of! FYI.
4. How do I get the color to be even and not streaky? After adding your color, make sure to mix the frosting on a low speed for a full minute or two. Scrape down the sides and bottom of the bowl a few times to ensure there are no hidden pockets of white frosting.
5. Why does my colored frosting sometimes taste bitter? This often happens when you have to use a massive amount of a lower-quality food coloring to achieve a dark color. The benefit of using a highly-concentrated gel is that you need very little, which prevents any bitter aftertaste.
6. Can I make this emerald green frosting ahead of time? Absolutely! In fact, it’s a great idea. You can make it up to a week in advance and store it in an airtight container in the refrigerator. The color will continue to deepen as it sits. Just let it come to room temperature and give it a quick whip before using.
7. Will this frosting hold its shape for piping? Yes, this American buttercream recipe is a “crusting” buttercream, which means it’s very stable and perfect for piping decorations like borders, rosettes, and stars.
Final Thoughts
You did it. You are now a master of color theory, a wizard of the whisk, a true artist. You’ve unlocked the secret to creating a frosting that is not just green, but a deep, luxurious, stop-and-stare emerald. No more swampy frosting for you!
So go forth and adorn your baked goods with this gorgeous gem of a frosting. Watch as your friends and family marvel at the beautiful color. And when they ask which fancy bakery you got it from, just smile and say, “Oh, this? It was just a little color-mixing magic.” You’ve earned it. 🙂