How to Make Golf Ball Cake Pops: Fore! Flavor Fun!
Ever looked at a golf ball and thought, “Man, I wish I could eat that?” No? Okay, maybe that’s just me after a particularly frustrating round on the green. But even if edible sporting equipment isn’t your usual craving, trust me on this: how to make golf ball cake pops is a hole-in-one idea for parties, golf outings, or just when you’re feeling a little… whimsical. Get ready to tee off on a delicious adventure!
Why This Recipe Is Par for the Course (Get It?)
So, why should you spend your precious time turning cake into tiny edible spheres? Firstly, they’re adorable and impressive. Imagine showing up with a batch of these at your next golf-themed event. Instant MVP status, guaranteed. They’re way more exciting than a regular cake, right?
Secondly, they’re surprisingly easy to make. We’re talking about crumbling cake, mixing it with frosting (the lazy baker’s secret weapon!), and dipping. It’s like Play-Doh for grown-ups, but you get to eat the results. Plus, they’re a perfectly portioned treat. No more guilt-tripping over that giant slice of cake. You get a bite-sized ball of happiness. What’s not to love?
Ingredients: Your Edible Golf Gear
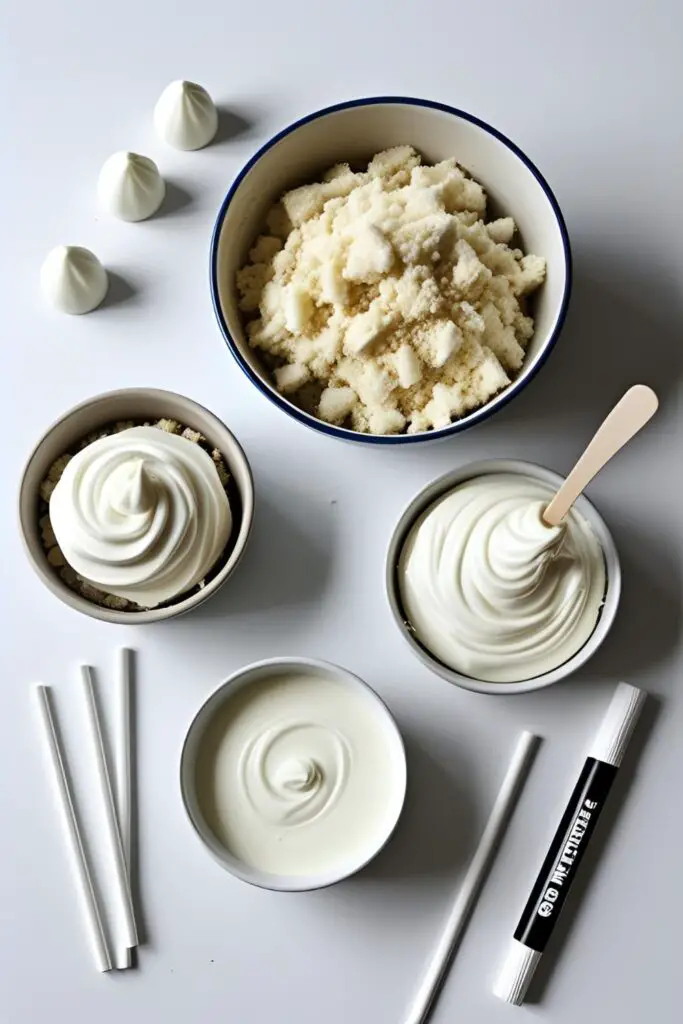
You don’t need a fancy country club membership for these ingredients. Just a quick trip to the grocery store.
- 1 box (15.25 oz) cake mix (any flavor you like! Vanilla and chocolate are classic)
- Ingredients called for on the cake mix box (usually eggs, oil, and water)
- 1 container (16 oz) frosting (vanilla or cream cheese works best for color)
- Bright white candy melts (about 12-16 oz)
- Black edible food marker (the kind with a fine tip)
- Optional: Green candy melts or green sprinkles (for a “grass” effect on your display)
- Optional: Cake pop sticks
Key Substitutions:
- Cake Mix: Feel free to use leftover cake instead of a mix! About 6 cups of crumbled cake will do the trick.
- Frosting: You can use homemade frosting if you’re feeling ambitious. Just make sure it’s a smooth consistency.
- Candy Melts: White chocolate can be used instead of candy melts, but you might need to add a little shortening or paramount crystals to get a smooth dipping consistency.
Tools & Kitchen Gadgets Used: Your Cake Pop Caddy

You won’t need a full set of clubs for this, just a few kitchen essentials.
- Oven
- Mixing bowls
- Electric mixer (handheld or stand mixer)
- Baking pan (as called for on the cake mix)
- Wire rack
- Large bowl (for melting candy melts)
- Small bowl (optional, for holding candy melts for detail work)
- Cake pop sticks (if you’re making pops on sticks)
- Wax paper or parchment paper
Step-by-Step Instructions: Let’s Get Rolling!
Ready to score some serious dessert points? Let’s get started.
- Bake Your Base: Bake the cake according to the instructions on the box (or your trusty recipe). Let the cake cool completely on a wire rack. This is crucial! Warm cake will just turn into a sticky mess when you try to crumble it. Patience, young grasshopper.
- Crumble Time: Once the cake is completely cool, crumble it into a large bowl. You want it to be finely broken down with no large chunks. This is your stress relief for the day. Go to town!
- Frosting Fusion: Add the entire container of frosting to the crumbled cake. Use your hands or a spatula to mix it together thoroughly until you have a moist, moldable dough. It should stick together easily when squeezed.
- Shape the “Balls”: Roll the cake mixture into small, smooth balls about 1.5 inches in diameter – roughly the size of a golf ball. Place the rolled balls on a wax paper or parchment-lined baking sheet.
- Chill Out: Place the baking sheet of cake balls in the refrigerator for at least 30 minutes. This firming-up step is essential for easy dipping. Trust me on this.
- Melt the Magic: While the cake balls are chilling, melt your bright white candy melts according to the package directions. You can usually do this in the microwave in short intervals, stirring in between, or over a double boiler. Make sure it’s smooth and lump-free.
- Dip and Dry (If Using Sticks): If you’re using cake pop sticks, dip about an inch of the stick into the melted candy and then insert it halfway into a chilled cake ball. This helps the stick stay put. Let them sit for a minute to set slightly. Then, dip each cake ball completely into the melted white candy, tapping off any excess. You can insert the stick into a piece of Styrofoam or lean them against a glass to dry.
- Dip and Dry (No Sticks): If you’re not using sticks, simply dip each chilled cake ball into the melted white candy using a fork. Gently tap off any excess and place them back on the wax paper or parchment-lined baking sheet to dry completely.
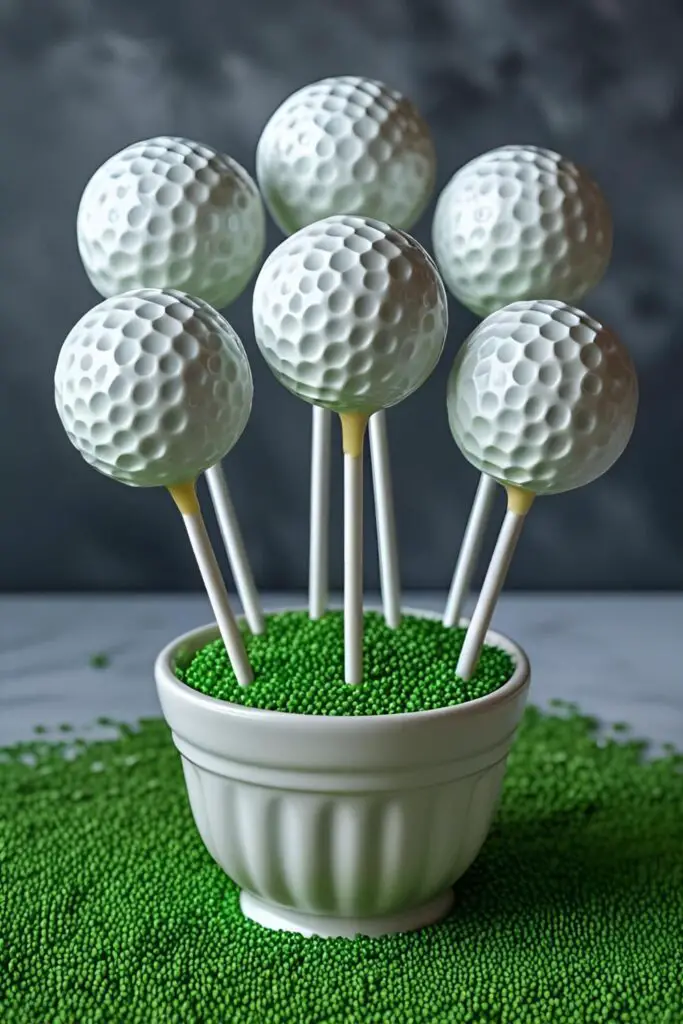
- Detail Time: Once the white candy coating is completely hardened, use your black edible food marker to draw the dimples of a golf ball onto each cake pop. Don’t worry about being perfectly precise; a little variation makes them look more realistic (or at least that’s what we’ll tell ourselves).
- Optional “Grass” Display: If you’re feeling extra fancy, you can melt some green candy melts and drizzle it lightly over the bottoms of the cake pops, or dip the bottoms in green sprinkles before the white candy fully sets.
Calories & Nutritional Info (Fore! Get Ready for Some Sugar!)
Let’s not kid ourselves, these are dessert. Delicious, adorable dessert.
- Serving Size: 1 cake pop
- Estimated Calories: Around 150-200 per pop (depending on cake flavor, frosting, and amount of candy coating)
- Fat: Approximately 8-12g
- Carbohydrates: Roughly 18-25g
- Sugar: A fair amount. It’s candy-coated cake, after all.
Nutritional Note: Enjoy these in moderation, or, you know, go wild. It’s your life.
Common Mistakes to Avoid: Don’t Bogey Your Cake Pops
- Dipping Warm Cake Balls: This is a recipe for disaster. Warm cake will crumble and fall off the stick (if you’re using them) or just generally be a hot mess. Make sure your cake balls are thoroughly chilled.
- Melting Candy Melts Incorrectly: Follow the package directions carefully. Overheating can cause the candy melts to seize up and become unusable. Melt in short intervals and stir frequently.
- Too Much Frosting: Resist the urge to add the entire container of frosting at once. Add it gradually until you reach a moldable consistency. Too much frosting will make the cake pops too soft and difficult to shape.
- Not Tapping Off Excess Candy: Nobody wants a giant puddle of candy at the bottom of their cake pop. Gently tap off the excess after dipping for a smooth coating.
Variations & Customizations: Tee Up Some Fun!
Get creative with your edible golf balls!
- Different “Course” Flavors: Experiment with different cake flavors (red velvet, lemon, marble) and corresponding frosting for a variety of tastes.
- “Hole-in-One” Filling: Before rolling the cake balls, press a small chocolate chip or a tiny bit of caramel into the center for a surprise filling.
- Other “Sports Ball” Pops: Once you master the round shape, you can adapt this technique for other sports! Use different colored candy melts and edible markers to make baseballs, soccer balls, or even basketballs.
FAQ Section: Your Cake Pop Questions, Answered
- Can I make these the day before? Absolutely! Once the candy coating is hardened, you can store the cake pops in an airtight container at room temperature for a few days.
- Do I have to use candy melts? White chocolate can be used, but it’s a bit more temperamental. Candy melts are specifically designed for dipping and tend to harden smoothly without needing tempering (usually).
- My candy melts are too thick. What do I do? You can add a teaspoon of vegetable shortening or paramount crystals (available at most craft stores) to the melted candy and stir until smooth. This will thin it out.
- Why are my cake pops cracking? This can happen if the cake balls were too cold when dipped into very warm candy melts, causing a rapid temperature change. Let the cake balls sit at room temperature for about 10-15 minutes before dipping.
- How do I get a smooth candy coating? Ensure your candy melts are fully melted and smooth. Dip the cake pop quickly and tap off any excess gently. Avoid swirling the pop too much in the melted candy.
- Can I freeze cake pops? While you can freeze them, the texture of the cake and candy coating might change slightly upon thawing. It’s generally best to make them 1-2 days in advance.
- What if I don’t have cake pop sticks? As mentioned, you can definitely make these without sticks! Just dip the chilled cake balls and let them harden on wax paper. They’ll be more like little edible truffles.
Final Thoughts
Well, there you have it! You’re now officially equipped to create the most delicious (and arguably the most edible) golf balls the world has ever seen. So go ahead, impress your golf buddies, delight your party guests, or just treat yourself to a fun and tasty snack. Just try not to take a swing at them before you eat them. Trust me, it won’t end well.