The Only Cake Icing Recipe You’ll Ever Need (Seriously, Throw Out the Can)
Have you ever baked a beautiful, glorious cake, only to slather it in that weird, vaguely chemical-tasting stuff from a plastic tub? You know the one. It sits on the shelf, mocking your baking efforts with its unnatural sheen. Well, my friend, today we declare war on sad, store-bought frosting. I’m going to show you how to make cake icing so good, so ridiculously simple, you’ll wonder why you ever settled for less. Get ready to transform your cakes from “meh” to “OMG, where did you get this?!”
Why This Recipe is Awesome (And Will Make You a Baking Hero)
Let’s be honest, the icing is often the best part of the cake. So why are we outsourcing it to a factory? This homemade buttercream icing is a game-changer. First, the flavor is out of this world—rich, creamy, and perfectly sweet, not gritty or artificial. Second, it takes, like, 10 minutes to whip up. You probably spend more time deciding what to watch on Netflix.
Plus, you have total control. Want it sweeter? Less sweet? Vanilla-ier? You’re the boss! And when your guests take a bite and their eyes widen with pure delight, you can just casually say, “Oh, this old thing? Just whipped it up from scratch.” The bragging rights alone are worth it. TBH, it’s the ultimate baking power move.
Ingredients
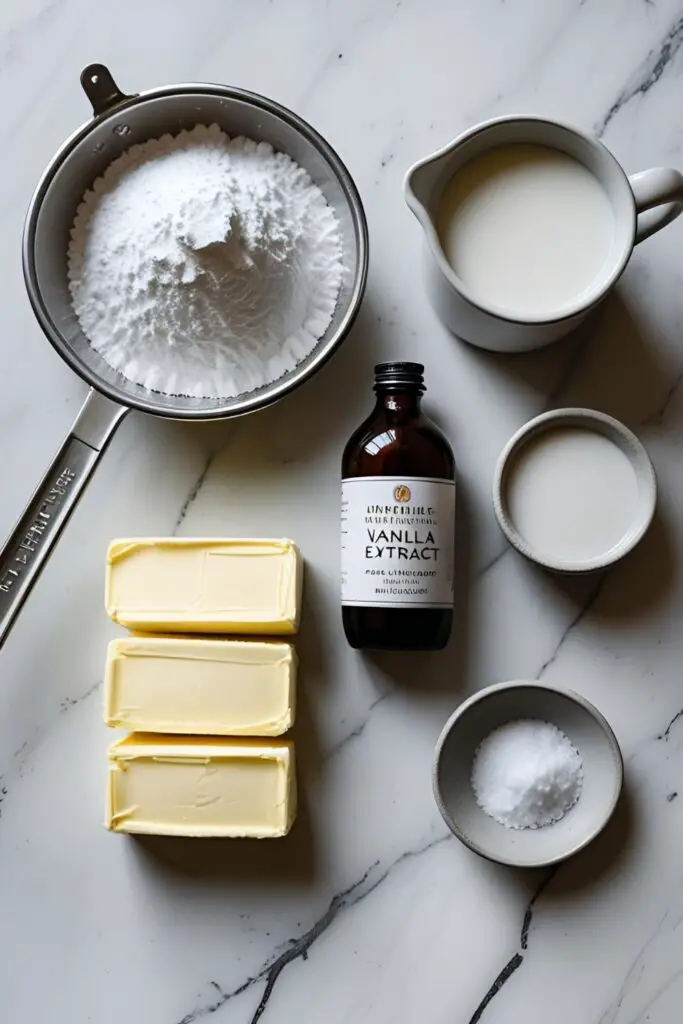
This isn’t rocket science, people. You only need a few pantry staples to achieve icing perfection.
- 1 cup (2 sticks or 227g) unsalted butter, softened. And I mean softened, not melted into a sad puddle. Leave it on the counter for an hour or so.
- 3-4 cups powdered sugar, sifted. Don’t skip the sifting unless you enjoy lumpy icing. You do you, but I’m judging.
- 1 ½ teaspoons pure vanilla extract. Please, for the love of all that is delicious, use the real stuff. Imitation vanilla is a crime against dessert.
- 2-3 tablespoons milk or heavy cream. This is for consistency. Start with a little; you can always add more.
- Pinch of fine sea salt. This is the secret weapon! It cuts the sweetness and makes the flavors pop.
Tools & Kitchen Gadgets Used
To become an icing wizard, you’ll need a few trusty sidekicks. Here’s your arsenal:
- Electric Mixer (Stand Mixer or Hand Mixer): This is non-negotiable unless you want a serious arm workout and potentially mediocre icing. A stand mixer with a paddle attachment is the GOAT, but a hand mixer works great too.
- Large Mixing Bowl: You need room for the powdered sugar explosion. Trust me on this.
- Measuring Cups and Spoons: Precision is your friend.
- Sifter or Fine-Mesh Sieve: To banish lumpy sugar forever.
- Rubber Spatula: For scraping down the bowl and making sure every last bit of buttery goodness gets incorporated.
- Offset Spatula (Optional): If you want to frost your cake like a pro, this is a game-changer.
Step-by-Step Instructions
Ready to make some magic? Let’s do this. It’s so easy, you’ll feel like you’re cheating.
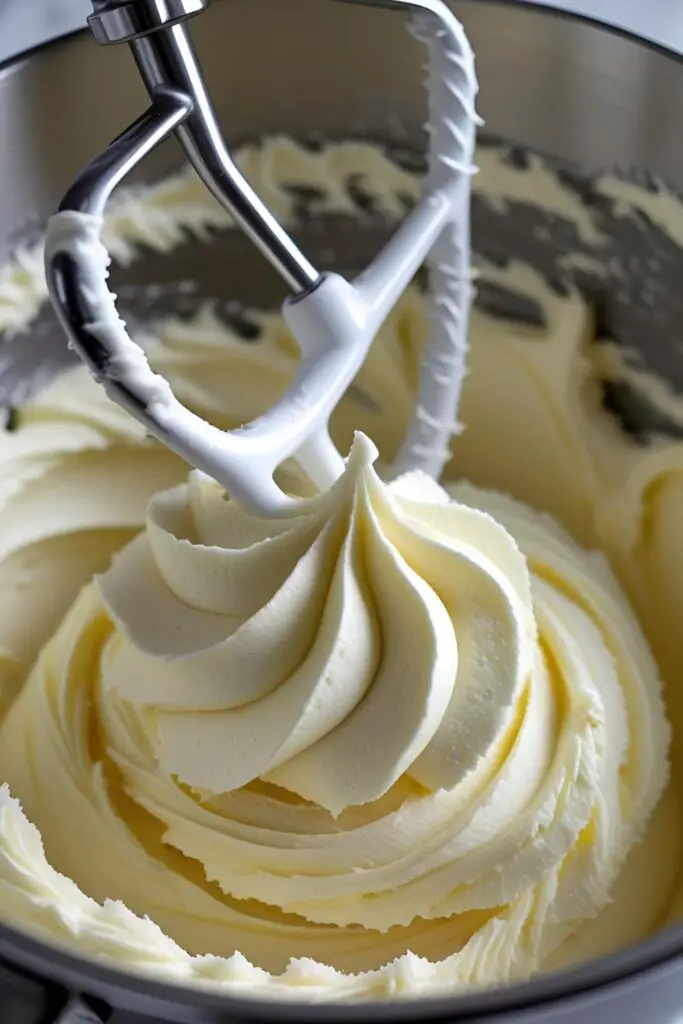
- Cream the Butter: In your large mixing bowl, take your softened butter and beat it with the electric mixer on medium speed for about 2-3 minutes. You want it to be super creamy, smooth, and pale in color. Don’t rush this part; it’s the foundation of your fluffy empire.
- Begin the Sugar Onslaught: Turn the mixer down to low. Very low. Gradually add about half of your sifted powdered sugar. Mix until it’s just combined. If you go too fast here, you and your entire kitchen will be wearing a fine white dust. It’s a look, but maybe not the one you’re going for.
- Add the Flavor: Pour in your vanilla extract and the pinch of salt. Give it a quick mix to incorporate. Your kitchen should be smelling pretty amazing right about now.
- Finish the Sugar: With the mixer still on low, add the remaining powdered sugar and mix until it’s incorporated. Scrape down the sides and bottom of the bowl with your rubber spatula to make sure there are no rogue butter pockets.
- Get the Consistency Right: Now, check your texture. Is it too stiff? Add 1 tablespoon of milk or heavy cream. Mix it in. Still too stiff? Add another. Keep adding liquid, one tablespoon at a time, until you reach a smooth, spreadable consistency.
- Whip It! Whip It Good!: Once you have the right consistency, turn the mixer up to medium-high and beat the icing for another 3-5 minutes. This is the final, crucial step that makes it incredibly light, fluffy, and airy. Don’t skip it!
- Admire Your Work: You did it! You’ve created a bowl of pure, unadulterated joy. Now go frost something! Or, you know, just eat it with a spoon. No judgment here.
Calories & Nutritional Info (The Part We Pretend to Read)

This is an estimate per serving of about 2 tablespoons. Let’s not dwell on it, okay?
- Calories: Approximately 130-150
- Fat: ~8g
- Carbohydrates: ~15g
- Sugar: ~15g (Yep, it’s mostly sugar. Shocking, I know.)
- Protein: 0g
- Sodium: ~20mg
Basically, it’s a delicious concoction of butter and sugar. Enjoy it, savor it, and maybe go for a walk later. Or don’t. Life is about balance. 😉
Common Mistakes to Avoid (Or, How Not to Ruin Everything)
We’ve all had baking fails. Let’s prevent an icing catastrophe with these simple tips.
- Using Cold or Melted Butter: Your butter must be softened to room temperature. Cold butter won’t cream properly, and you’ll get lumps. Melted butter will give you a soupy, greasy mess that will never fluff up.
- Dumping All the Liquid in at Once: I know it’s tempting, but add your milk or cream one tablespoon at a time. It’s so much easier to thin out icing than it is to thicken it. A little liquid goes a long way.
- Forgetting to Sift: Do you see a theme here? Sift your powdered sugar! It takes an extra 30 seconds and guarantees a silky-smooth icing. Lumps are the enemy of happiness.
- Icing a Warm Cake: This is the cardinal sin of cake decorating. If you put this beautiful buttercream on a warm cake, it will melt into a sugary, heartbreaking puddle. Let your cake cool completely. Period.
Variations & Customizations (Let Your Freak Flag Fly)
This basic vanilla buttercream is your playground. Let’s get creative!
- Dreamy Chocolate Icing: Sift in ½ cup of unsweetened cocoa powder along with the powdered sugar. You might need an extra tablespoon of milk to get the right consistency. It’s rich, decadent, and a certified crowd-pleaser.
- Tangy Cream Cheese Frosting: The perfect partner for red velvet or carrot cake. Replace half the butter with an 8-ounce block of full-fat cream cheese, softened. Beat the butter and cream cheese together until smooth before adding the sugar.
- Zesty Citrus Icing: Add 1-2 tablespoons of fresh lemon, lime, or orange zest when you add the vanilla. It adds a bright, fresh flavor that’s amazing on a simple white or yellow cake.
- Color Your World: Add a few drops of gel food coloring at the very end of mixing to create any color you can imagine. Perfect for that Cookie Monster cake you’ve been dreaming of.
FAQ Section (Answering Your Deepest Icing Desires)
Here are the answers to the questions I know are bouncing around in your head.
Q: Can I make cake icing without an electric mixer? A: You can, but you’ll need some serious elbow grease! Use a whisk and a lot of energy. Your icing won’t be quite as light and fluffy as with a mixer, but it will still be delicious. Think of it as your workout for the day.

Q: My icing is too thin! How can I thicken it? A: Easy fix! Just add more sifted powdered sugar, about ¼ cup at a time, until it reaches the thickness you want. If it gets too sweet, a tiny extra pinch of salt can help balance it out.
Q: What’s the difference between icing and frosting? A: TBH, people use the terms interchangeably these days. Technically, icing is often thinner and glossier (like a glaze), while frosting is thick, fluffy, and used for spreading, like this buttercream recipe. But if you call this icing, no one’s going to arrest you.
Q: Can I use granulated sugar instead of powdered sugar? A: Please don’t. Granulated sugar won’t dissolve properly, and your icing will have a horrible, gritty texture. Powdered sugar (or confectioners’ sugar) is essential for a smooth finish.
Q: How long does homemade cake icing last? A: You can store it in an airtight container in the refrigerator for up to a week, or in the freezer for up to 3 months. Just let it come back to room temperature and give it a quick re-whip with your mixer before using it to restore its fluffy texture.
Q: Why is my buttercream grainy? A: This usually happens for one of two reasons: you used granulated sugar (a big no-no) or your butter was too cold and didn’t incorporate the powdered sugar smoothly. Make sure your butter is properly softened!
Q: How do you make icing shiny? A: For a buttercream like this, it will have a matte finish. For a shiny glaze-type icing, you’d typically use a recipe with corn syrup or an egg white base (like royal icing). But a little light corn syrup (about a teaspoon) can add a bit of sheen to this recipe if you desire.
Final Thoughts (Go On, You Master Baker, You)

And there you have it. You are now a certified cake icing expert. See how easy that was? You’re just a few simple ingredients and 10 minutes away from dessert glory. So go ahead, bake that cake, whip up this icing, and prepare to accept a flood of compliments. You’ve officially left the sad plastic tub club for good. Welcome to the delicious side.