Ditch the Tub! Learn How to Make Homemade Whipped Cream Like a Boss
Ever reached for that sad can of aerosol “whipped topping” only to feel a profound sense of culinary disappointment? Yeah, me too. But fear not, my friend! Today, we’re diving headfirst into the ridiculously easy world of how to make homemade whipped cream. Trust me, once you taste the real deal, that canned stuff will look about as appealing as day-old gas station sushi. Ready to ditch the artificial and embrace fluffy, dreamy deliciousness? Let’s get whisking!
Why This Recipe Is Awesome (Spoiler: It’s the Best)
Okay, let’s be real. Store-bought whipped cream is fine. It exists. But awesome? Nah. Homemade whipped cream, on the other hand? It’s a game-changer. The flavor is pure, creamy bliss. It’s so easy to make, you’ll wonder why you haven’t been doing this your whole life. Plus, imagine the impressed looks on your friends’ faces when you casually mention it’s homemade. Boom. Instant foodie cred. And did I mention you control the sweetness? No more cloying, sugary clouds! You’re welcome.
Ingredients
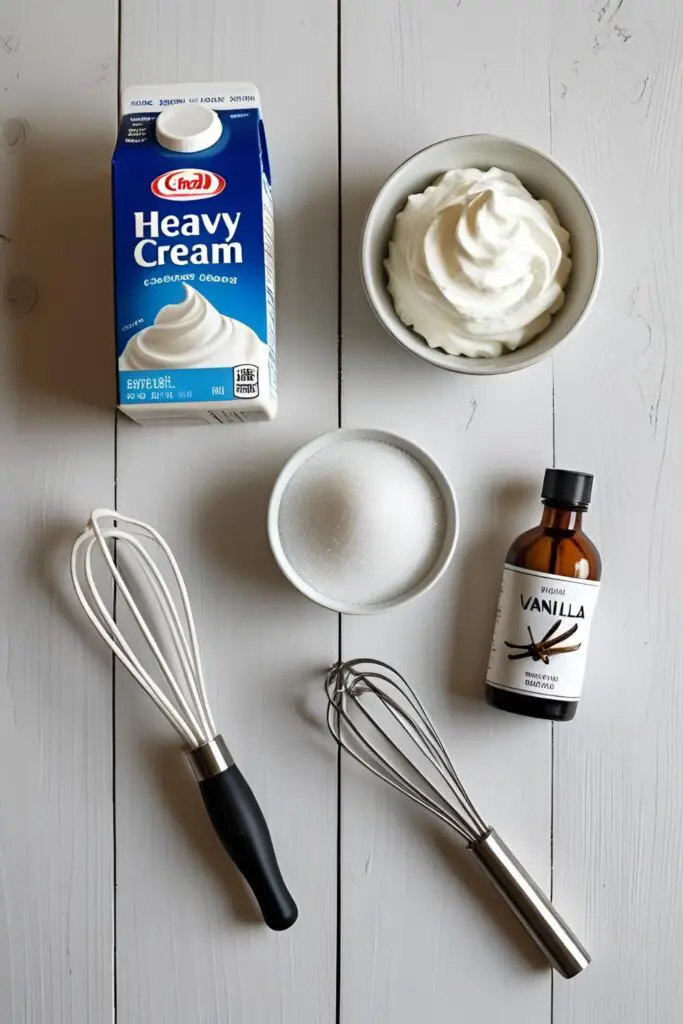
Gather ’round, ingredient enthusiasts! You’ll need just a few simple things:
- 1 cup (240ml) heavy cream (cold!). This is non-negotiable. Don’t even think about using milk or half-and-half. It won’t work. Trust me.
- 1-2 tablespoons granulated sugar or powdered sugar. Adjust to your sweet tooth. Powdered sugar has cornstarch, which can help stabilize the whipped cream a bit, FYI.
- ½ teaspoon pure vanilla extract. Optional, but highly recommended for that classic flavor. Don’t skimp on the good stuff!
Tools & Kitchen Gadgets Used
Alright, let’s talk gadgets! Here’s what you’ll need to whip up this masterpiece:
- Large mixing bowl (preferably chilled). A cold bowl helps the cream whip faster. Pro tip: pop it in the freezer for 10-15 minutes beforehand.
- Electric mixer (handheld or stand mixer). This is your best friend here. You can whisk by hand, but your arm might stage a revolt.
- Whisk attachment (if using a stand mixer).
- Measuring cups and spoons. For precise ingredient action.
- Rubber spatula (optional, but handy for scraping the bowl).
Step-by-Step Instructions
Alright, let’s get down to the nitty-gritty. Here’s how to make this magic happen:
- Chill Out: Grab your chilled mixing bowl. Seriously, don’t skip this. Cold is key. It’s like the whipped cream’s happy place.
- Cream Time: Pour the cold heavy cream into the chilled bowl. Are we excited yet? We should be!
- Sweeten the Deal (Optional): If you’re using sugar, add the granulated sugar or powdered sugar now. Don’t go overboard unless you’re aiming for a sugar coma.
- Vanilla Vibes (Also Optional): Stir in the vanilla extract if you’re feeling fancy (you should be!).
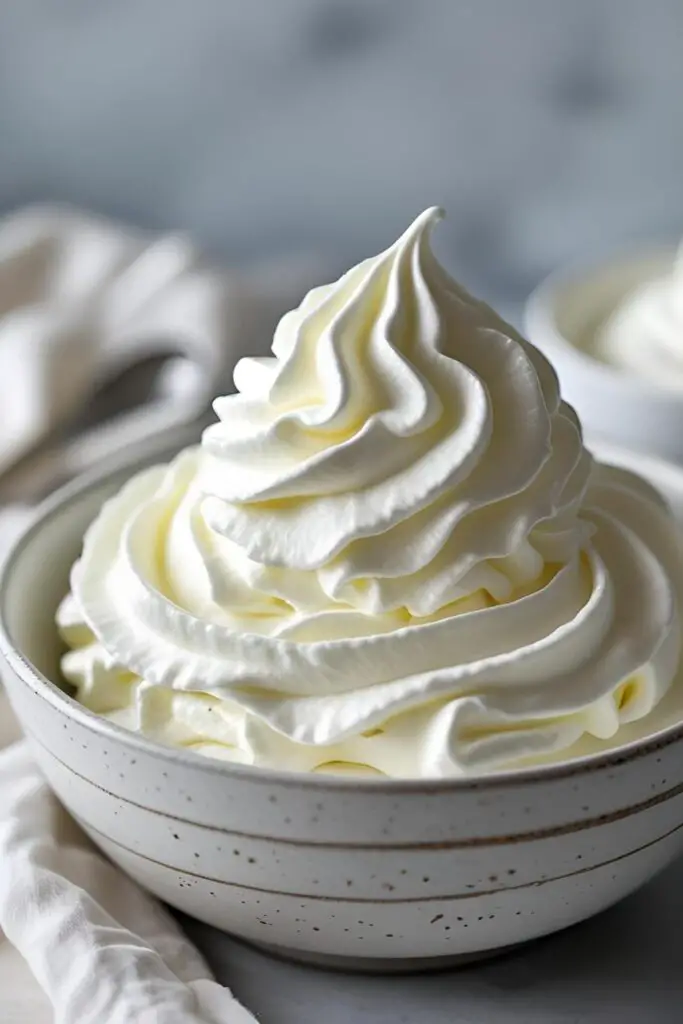
- Whip It Good: Now comes the fun part! Using your electric mixer (start on low speed to avoid a creamy explosion), begin whipping the cream. Gradually increase the speed to medium-high.
- Watch the Magic Happen: Keep whipping! At first, it’ll look like, well, liquid cream. Then, it’ll start to thicken and form soft peaks when you lift the beaters. These peaks will gently fold over.
- Stiff Peaks Alert!: Continue whipping until stiff peaks form. This means when you lift the beaters, the peaks will stand up straight and hold their shape. Be careful not to overwhip, or you’ll end up with butter. (Still delicious, but not our goal today!)
- Stop Right There!: Once you have stiff peaks, stop the mixer. Congratulations, you’ve just made homemade whipped cream!
- Enjoy the Fluff: Use a rubber spatula to gently transfer your beautiful creation to a serving dish or dollop it onto your favorite desserts. Prepare for pure joy.
Calories & Nutritional Info (Estimated per serving – about ¼ cup)
- Calories: ~100-120 (depending on sugar added)
- Fat: ~10-12g
- Saturated Fat: ~6-7g
- Cholesterol: ~30-35mg
- Sodium: ~5-10mg
- Carbohydrates: ~1-3g (mostly from sugar)
- Protein: <1g

Keep in mind these are estimates and will vary based on the amount of sugar you use and your serving size. It’s a treat, not a health food, folks. But oh-so-worth it.
Common Mistakes to Avoid (Don’t Be That Person!)
We’ve all been there. Here are a few common whipped cream fails and how to steer clear:
- Using warm cream: Seriously, did you even read the ingredients? COLD CREAM ONLY! Warm cream won’t whip properly. It’ll just be sad and soupy.
- Overwhipping: This is the whipped cream equivalent of a bad breakup. One minute you’re in fluffy heaven, the next you’ve got butter. Keep a close eye on it in the final stages. If it starts to look grainy, you’ve gone too far.
- Not using enough fat: Remember, it’s heavy cream, not milk! The high fat content is what allows it to whip. Don’t try to be healthy here. Just embrace the deliciousness.
- Adding too much sugar too early: While you can add sugar at the beginning, adding it too early can sometimes inhibit the whipping process. Wait until the cream starts to thicken slightly.
- Using a dirty bowl or whisk: Any trace of grease or residue can prevent the cream from whipping properly. Make sure your equipment is squeaky clean.
Variations & Customizations (Get Creative!)
Homemade whipped cream is your blank canvas! Here are a few fun ways to jazz it up:
- Keto-Friendly Whipped Cream: Use a sugar substitute like erythritol or stevia instead of regular sugar. Just be aware that some sugar substitutes may affect the texture slightly.
- Boozy Whipped Cream: Add a tablespoon of your favorite liqueur (like vanilla vodka, rum, or Irish cream) along with the vanilla extract. Perfect for adult desserts!
- Chocolate Whipped Cream: Whisk in a tablespoon or two of unsweetened cocoa powder along with the sugar. For extra richness, melt a bit of dark chocolate and let it cool slightly before adding it in.
- Spiced Whipped Cream: Add a pinch of cinnamon, nutmeg, or cardamom for a warm and cozy twist. Great for topping apple pie or pumpkin desserts.
- Citrus Zest Whipped Cream: Add the finely grated zest of a lemon, lime, or orange for a bright and refreshing flavor.
FAQ Section (Because You Know You Have Questions)
Alright, let’s tackle some of those burning whipped cream queries:
Q: Can I make whipped cream ahead of time? A: You sure can! Homemade whipped cream will hold in the refrigerator for about 2-3 days. Just store it in an airtight container. It might lose a little volume over time, but a gentle whisk before serving should revive it.
Q: Why isn’t my whipped cream getting thick? A: The most likely culprit is that your cream isn’t cold enough. Make sure you’re using cold heavy cream and a chilled bowl. Also, ensure your equipment is clean and free of grease.

Q: Can I use a blender to make whipped cream? A: While technically possible, it’s not ideal. Blenders can overwhip the cream very quickly and unevenly, leading to a grainy texture or even butter. Stick to an electric mixer or a good old-fashioned whisk (if you’re feeling ambitious).
Q: Help! I overwhipped my cream. Can I save it? A: Sometimes! If it’s just slightly overwhipped and looks a little grainy, you can try gently folding in a tablespoon or two of fresh, cold heavy cream. This might loosen it up a bit. However, if it’s turned into full-blown butter, well, you’ve made butter! Not a total loss, right?
Q: Can I freeze homemade whipped cream? A: Freezing whipped cream isn’t really recommended as it can change the texture and make it watery upon thawing. It’s best enjoyed fresh.
Q: What’s the difference between heavy cream and whipping cream? A: In most places, heavy cream and whipping cream are very similar and have a high enough fat content (usually 30% or more) to whip well. Sometimes, heavy cream might have a slightly higher fat percentage. Just make sure the label says “heavy cream” or “whipping cream” and has a fat content of at least 30%.
Q: Can I make vegan whipped cream? A: Absolutely! While this recipe focuses on dairy-based whipped cream, you can achieve a similar fluffy texture using chilled full-fat coconut milk (scoop out the solid part) or store-bought vegan whipping creams.
Final Thoughts (Go Forth and Whip!)
So there you have it! You’re now officially equipped with the knowledge and (hopefully) the enthusiasm to conquer the world of homemade whipped cream. Seriously, it’s so easy, it’s almost criminal not to make it. Ditch that sad can, embrace the fluff, and prepare for a whole new level of dessert enjoyment. Now go forth, my friend, and whip like the wind! And hey, if you make a particularly epic batch, feel free to brag in the comments below. We’re all friends here. 🙂