One Smart Cookie Cake: Your Guide to a Totally Awesome Sesame Street Cake Recipe
Okay, picture this: the look on someone’s face when you present them with a cake that screams pure, unadulterated joy. Like, Elmo-level enthusiasm. That’s the power of a sesame street cake. Forget those snooty, overly complicated desserts. We’re diving headfirst into a world of colorful fun that tastes just as good as it looks. Ready to bring a little sunshine to your kitchen? Let’s go!
Why This Sesame Street Cake Will Make You the Hero of Snack Time
Seriously, why settle for a boring cake when you can have a sesame street cake? Think about it. It’s a guaranteed smile-inducer, whether you’re making it for a kid’s birthday or just because you feel like embracing your inner child (no shame!).
Plus, you get to unleash your creativity with all those iconic characters. Who doesn’t love Elmo’s fuzzy red face or the googly eyes of Cookie Monster? And the best part? You don’t need to be a professional artist to pull this off. We’ll keep it simple and fun, because who needs cake-related stress? Not you, my friend. Not you.
Ingredients (The Colorful Crew)
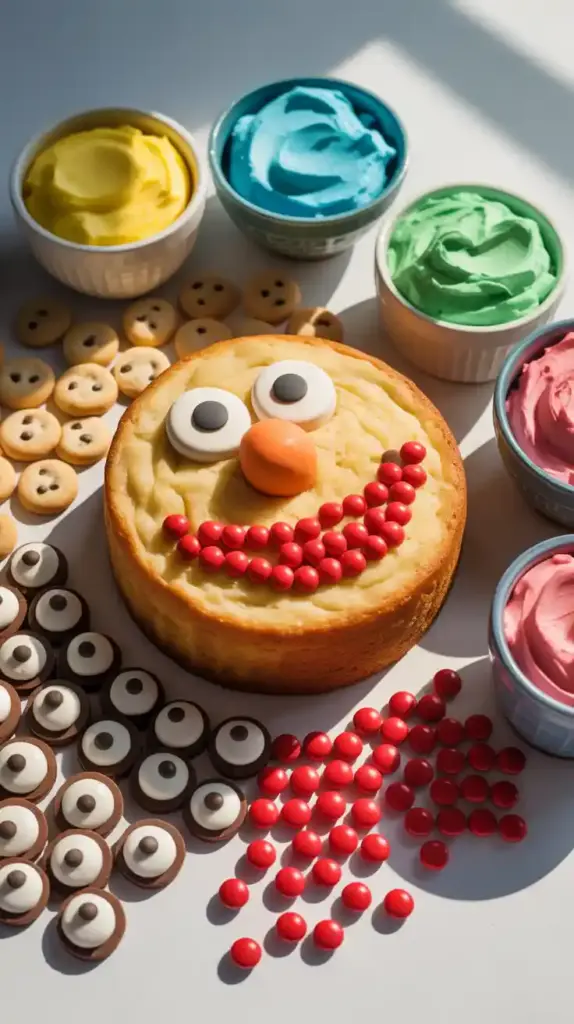
Gather your supplies, my fellow baker! We’re about to get this party started. Feel free to adjust colors and candies based on your favorite residents of Sesame Street.
For the Cake:
- Your favorite cake recipe or a boxed cake mix (Hey, no judgment here! Vanilla or chocolate works great)
- Ingredients according to your chosen cake recipe/mix
For the Frosting & Decorations:
- Vanilla buttercream frosting (You can buy pre-made or find a simple recipe online)
- Food coloring gels: Red, blue, green, yellow, orange, pink, etc. (Gel is more vibrant than liquid)
- Candy eyes (Because googly eyes make everything better)
- Assorted candies: Oreos, M&Ms, Skittles, gummy worms, sprinkles, etc. (Think about colors that match your characters!)
- Black decorating icing (For outlines and details)
- Optional: Fondant in various colors for more detailed character features
Key Substitutions:
- Cake: Use a gluten-free cake mix if needed. Flavor-wise, anything goes, but classic vanilla or chocolate provides a good base.
- Frosting: Dairy-free buttercream alternatives are available if you have dietary restrictions.
- Food Coloring: While gels give the best vibrancy, liquid food coloring will work in a pinch – you might just need to use more.
Tools & Kitchen Gadgets Used:
Time to raid your kitchen drawers!
- Two 8-inch or 9-inch Round Cake Pans: For classic layers. Square pans work too!
- Mixing Bowls (various sizes): For cake batter and frosting.
- Electric Mixer (handheld or stand mixer): For smooth batter and fluffy frosting.
- Rubber Spatula: For scraping bowls and folding.
- Measuring Cups and Spoons: Accuracy is your friend in baking.
- Serrated Knife or Cake Leveler: For achieving flat cake layers (optional, but recommended).
- Piping Bags and Tips (various sizes, round and star): For decorating. You can also use zip-top bags with a corner snipped off in a pinch.
- Offset Spatula or Butter Knife: For spreading frosting.
- Small Bowls: For dividing and coloring frosting.
- Toothpicks: For placing candy eyes and small decorations.
- Cooling Rack: For letting your cakes cool properly.
Step-by-Step Instructions (Let’s Get This Show on the Road!)

Alright, let’s get baking and decorating this sesame street cake! Don’t worry if you’re not Picasso; we’re aiming for fun, not fine art.
Baking the Foundation (The Cake):
- Pre-Heat Party: Preheat your oven according to your cake recipe or box mix instructions. Grease and flour your cake pans. Don’t skip this, unless you enjoy the thrill of cake sticking to the pan (said no one ever).
- Mix Master: Prepare your cake batter according to the recipe. Try not to eat too much raw batter, no matter how tempting. We need that cake, remember?
- Divide and Conquer (If Making Layers): Pour the batter evenly into your prepared cake pans.
- Bake Time Fun: Bake for the recommended time, or until a toothpick inserted into the center comes out clean. If it’s gooey, give it a few more minutes. Nobody likes an underbaked cake.
- Cool It Down: Let the cakes cool in the pans for about 10-15 minutes before inverting them onto a wire rack to cool completely. This is crucial. Frosting warm cake is a recipe for disaster (literally).
Frosting and Decorating: The Sesame Street Transformation:
- Frosting Fiesta: If you’re making your own buttercream, whip it up until it’s light and fluffy. If you’re using store-bought, give it a good stir to make it smooth.
- Color Chaos (in a Good Way!): Divide your frosting into several small bowls. Add a few drops of food coloring gel to each bowl and mix well until you achieve your desired vibrant colors. Remember, you can always add more color, but you can’t take it away!
- Base Coat: Frost your cooled cake layers with a base coat of your chosen color. A simple layer of white or light blue works well as a background. Use your offset spatula or a butter knife for this. Don’t aim for perfection; it’s going to be covered in fun stuff anyway.
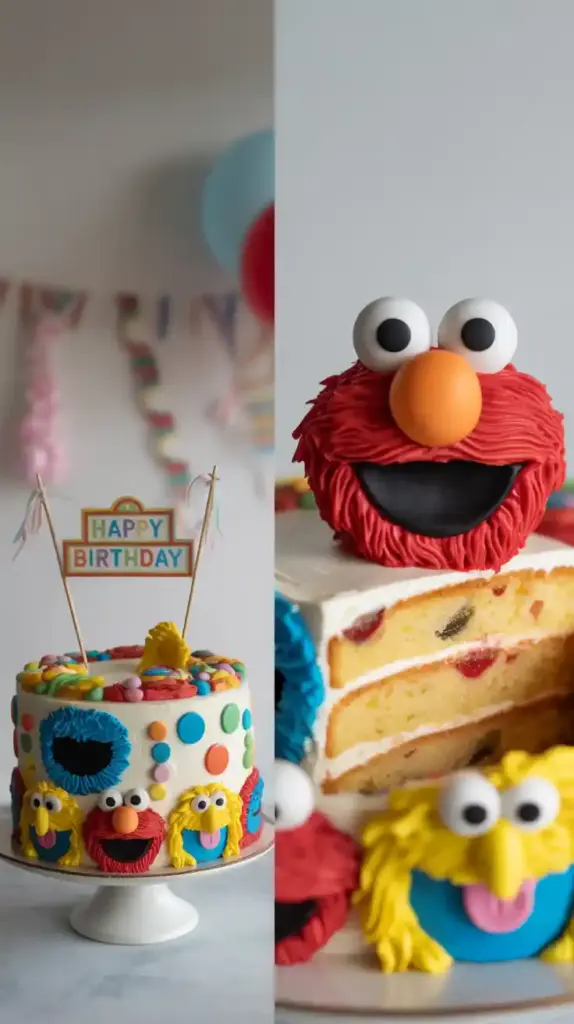
- Character Creation (The Fun Part!): Now comes the artistic license! Here are a few ideas:
- Elmo: Use red frosting to cover a portion of the cake. Pipe on two white circles for eyes and add candy eyes. Use black icing for a simple mouth. You can even use a small orange candy for his nose.
- Cookie Monster: Cover an area with blue frosting. Stick on two large candy eyes. Use black icing to create a wide, open mouth, and then strategically place mini chocolate chip cookies or Oreo pieces inside and around his mouth. Nom nom nom!
- Oscar the Grouch: Use green frosting for his face peeking out of a brown or gray “trash can” made of frosting or even an upside-down ice cream cone. Add candy eyes and a grumpy-looking mouth with black icing. Don’t forget his unibrow!
- Big Bird: Cover an area in yellow frosting. Use larger candy eyes. You can create his long beak with yellow fondant or even a yellow candy corn.
- Abby Cadabby: Use pink or purple frosting. Add candy eyes and pipe on some whimsical details with other colored frostings. Don’t forget her magic wand (you can use a pretzel stick!).
- Candy Land: Use your assorted candies to add more details, borders, or just general fun to the cake. M&Ms and Skittles make great colorful accents. Gummy worms could be Slimey the Worm!
- Outline Ace: Use your black decorating icing to outline character features, add smiles, or write a birthday message.
- Chill Out (Again): Once you’re happy with your masterpiece, pop the cake in the fridge for at least 30 minutes to allow the frosting to set. This will make it easier to slice and serve.
Calories & Nutritional Info (The Price of Happiness)
Alright, let’s talk numbers. A sesame street cake, while bringing immense joy, isn’t exactly a health food. But hey, it’s cake! Here’s a rough estimate per slice (depending on the size and how much frosting/candy you go wild with):
- Estimated Calories per Serving (1 slice): 350-500 (This can vary wildly!)
- Fat: Contains a fair amount of fat, especially from the frosting and any chocolate candies.
- Saturated Fat: Yep, that’s in there too, mostly from butter and chocolate.
- Carbohydrates: Sugar and flour are the main sources.
- Sugar: It’s a decorated cake. Prepare for a sugar rush (and happy faces!).
Nutritional notes? This cake is primarily for fun and celebration. Enjoy it in moderation and maybe balance it out with some carrot sticks later. Just a thought. 😉
Common Mistakes to Avoid (Don’t Be a Grouch!)
Even though this cake is all about fun, there are a few pitfalls to watch out for:
- Frosting Warm Cake: We’ve said it before, but it’s worth repeating. Always let your cake cool completely before frosting. Otherwise, you’ll end up with melty, sad frosting.
- Using Too Much Liquid Food Coloring: This can make your frosting too thin and change the consistency. Gel food coloring is your best bet for vibrant colors without adding excess liquid.
- Overmixing Frosting After Adding Color: Once your frosting is colored, mix it gently until just combined. Overmixing can incorporate too much air and make it harder to work with.
- Not Letting the Frosting Set: Impatience is a baker’s enemy. Chill your decorated cake for a bit before slicing and serving. This helps the frosting firm up and keeps your decorations in place.
- Trying to Be Too Perfect: This is a Sesame Street cake! It’s supposed to be fun and a little whimsical. Don’t stress too much about perfectly smooth frosting or flawlessly piped lines. Embrace the imperfections!
Variations & Customizations (Let Your Inner Kid Shine!)
Want to jazz up your sesame street cake even more? Here are a few ideas to get those creative gears turning:
- Character Cupcakes: Instead of a full cake, bake cupcakes and decorate each one as a different Sesame Street character. This is great for parties and portion control (sort of!).
- Pull-Apart Cake: Arrange frosted cupcakes in the shape of a large Sesame Street character (like Elmo’s face) and decorate them individually. This makes serving super easy.
- Sesame Street Smash Cake: For a little one’s first birthday, make a small, simply decorated cake just for them to smash (and enjoy!). Keep it relatively low in sugar, if you’re concerned.
FAQ Section (Your Sesame Street Cake Queries Answered)
Got some questions about bringing your Sesame Street cake dreams to life? Let’s see…

1. Can I make this cake a day in advance? Absolutely! Bake and frost the cake, then store it in an airtight container in the refrigerator overnight. Decorate it the day of your event for the freshest look.
2. What’s the easiest way to color frosting? Gel food coloring is generally the easiest to work with and provides the most vibrant colors. Add a few drops at a time and mix thoroughly until you reach your desired shade.
3. How do I make sure my frosting is smooth? Beat your buttercream for a few minutes until it’s light and fluffy. If you still have lumps, try pressing it through a fine-mesh sieve (though this can be a bit messy).
4. Can I use fondant for all the decorations? Yes, you can definitely use fondant for more detailed character features if you’re comfortable working with it. It allows for cleaner lines and more intricate shapes.
5. What if I don’t have piping bags and tips? No worries! You can use zip-top bags. Just fill the bag with frosting, squeeze out any excess air, and snip off a small corner of the bag to create a makeshift piping bag. The size of the snipped corner will determine the thickness of your frosting lines.
6. How do I transport a decorated cake? The best way is in a sturdy cake carrier. If you don’t have one, use the original cake pan (if it has a lid) or a cardboard box that fits the cake snugly. Place non-slip material (like a damp paper towel or a silicone mat) on the bottom of the carrier to prevent sliding.

7. Where can I find candy eyes? You can usually find candy eyes in the baking aisle of most grocery stores or at craft stores that sell cake decorating supplies. They’re a game-changer for character cakes!
Final Thoughts (Have Your Cake and Eat It Too!)
So there you have it! Your very own guide to creating a sesame street cake that’s guaranteed to bring smiles (and maybe a little bit of sticky fingers). Don’t be afraid to get creative and have fun with it. After all, that’s what Sesame Street is all about, right? Now go forth, bake, decorate, and let your inner child run wild. And hey, if your cake ends up looking a little wonky, just tell everyone it’s abstract Sesame Street art. Problem solved! 😉