Holy Caramel Goodness: Your Foolproof Guide to the Best Caramel Cake Recipe
Ever had a slice of cake that just makes you close your eyes and sigh contentedly? Yeah, that’s the magic of a good caramel cake recipe. Forget those dry, bland excuses for cake you’ve encountered. We’re talking about a moist, tender crumb slathered in a luscious, homemade caramel frosting that’s basically edible gold. Trust me, this recipe is about to become your new best friend.
Why This Caramel Cake Will Make You Famous (Among Your Friends)
So, why should you bother whipping up this particular caramel cake recipe? Let me count the ways. First off, the flavor is insane. That rich, buttery caramel permeates every single bite, from the cake itself to that dreamy frosting. Are you drooling yet? You should be.
Secondly, while it might sound a little fancy, this recipe is surprisingly approachable. We break it down into easy-to-follow steps, so even if your baking experience peaks at making boxed brownies (no judgment!), you can totally nail this. And let’s be honest, a homemade caramel cake? That’s instant “wow” factor. Prepare for the compliments, my friend. You’ve earned them.
Ingredients (The Nitty-Gritty)
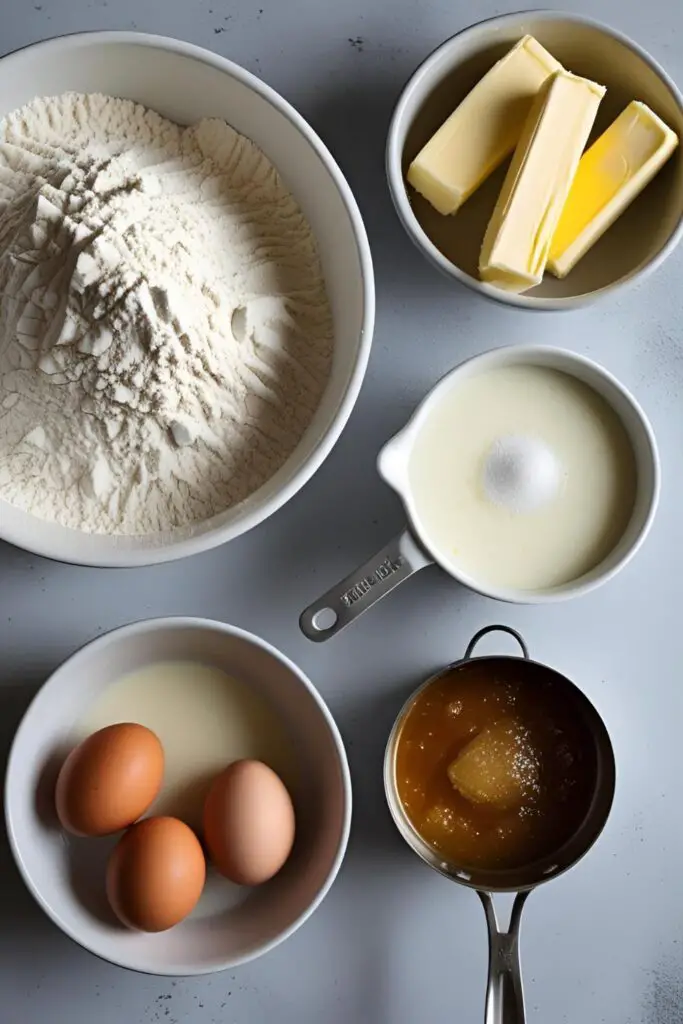
Here’s what you’ll need to create this caramel masterpiece. Don’t skimp on the butter; it’s crucial for that authentic caramel flavor.
For the Cake:
- 2 ¼ cups all-purpose flour
- 1 ½ teaspoons baking powder
- ¼ teaspoon baking soda
- ½ teaspoon salt
- ¾ cup (1 ½ sticks) unsalted butter, softened
- 1 ¾ cups granulated sugar
- 3 large eggs
- 1 teaspoon vanilla extract
- 1 cup buttermilk (If you don’t have it, see substitution below!)
For the Caramel Frosting:
- 1 ½ cups granulated sugar
- ¾ cup (1 ½ sticks) unsalted butter
- ½ cup evaporated milk
- ¼ teaspoon salt
- 1 teaspoon vanilla extract
- About 3 cups powdered sugar (You might need a little more or less to get the right consistency)
Key Substitutions:
- Buttermilk: If you’re in a pinch, you can make a quick substitute by adding 1 tablespoon of lemon juice or white vinegar to a liquid measuring cup, then filling it with milk to the 1-cup line. Let it sit for 5 minutes – voila!
- Evaporated Milk: In a real emergency, you could use heavy cream, but evaporated milk gives the frosting that classic caramel tang.
Tools & Kitchen Gadgets Used:
You’ll need a few essentials to bring this cake to life.
- Two 9-inch Round Cake Pans: Because we’re making a beautiful layered cake!
- Mixing Bowls (various sizes): For all the mixing magic.
- Electric Mixer (handheld or stand mixer): Trust me, this will make your life much easier.
- Rubber Spatula: For scraping down bowls and folding ingredients.
- Measuring Cups and Spoons: Precision is key in baking, my friend.
- Saucepan (medium-sized): For making that glorious caramel frosting.
- Whisk: For stirring the frosting to smooth perfection.
- Offset Spatula or Knife: For spreading the frosting evenly.
- Cooling Rack: Essential for preventing soggy bottoms (on your cakes, that is).
Step-by-Step Instructions (Let’s Get Baking!)

Alright, buckle up, buttercup! We’re about to create some serious caramel goodness.
Baking the Caramel-Kissed Cake:
- Prep is Key: Preheat your oven to 350°F (175°C). Grease and flour your two 9-inch round cake pans. You can also line the bottoms with parchment paper for extra insurance against sticking.
- Dry Squad Assemble: In a medium bowl, whisk together the flour, baking powder, baking soda, and salt. Set this aside for now.
- Cream Dream: In a large mixing bowl, cream together the softened butter and granulated sugar until light and fluffy. This usually takes a good 2-3 minutes. Don’t rush this step; it’s important for a tender cake.
- Egg-cellent Addition: Beat in the eggs one at a time, making sure each one is fully incorporated before adding the next. Then, stir in the vanilla extract.
- Alternating Act: Gradually add the dry ingredients to the wet ingredients, alternating with the buttermilk, beginning and ending with the dry ingredients. Mix on low speed until just combined. Be careful not to overmix; overmixing leads to a tough cake, and nobody wants that.
- Divide and Conquer: Divide the batter evenly between your prepared cake pans.
- Bake It Up: Bake for 25-30 minutes, or until a wooden skewer inserted into the center comes out clean. Ovens vary, so keep an eye on them!
- Cool Down Period: Let the cakes cool in the pans for about 10 minutes before inverting them onto a wire rack to cool completely. Make sure they are completely cool before you even think about frosting them. Warm cake + frosting = sad, melty mess.
Whipping Up the Liquid Gold (Caramel Frosting):
- Sugar Rush: In a medium saucepan over medium heat, melt the granulated sugar, stirring constantly with a whisk until it is completely dissolved and turns a deep amber color. This requires patience, folks. Don’t walk away, and don’t let it burn! Burnt sugar = bitter frosting = sadness.
- Butter Bath: Once the sugar is caramelized, carefully whisk in the butter. It will bubble up – don’t panic, that’s normal. Keep stirring until the butter is fully melted and smooth.
- Milk Magic: Gradually whisk in the evaporated milk and salt. The caramel might seize up a bit, but keep stirring over low heat, and it will smooth out again.
- Vanilla Kiss: Remove the saucepan from the heat and stir in the vanilla extract.
- Powder Power: Let the caramel mixture cool slightly for about 10-15 minutes. Then, gradually whisk in the powdered sugar until you reach a smooth, spreadable consistency. You might not need all of it, or you might need a little more. Trust your gut (and your whisk).
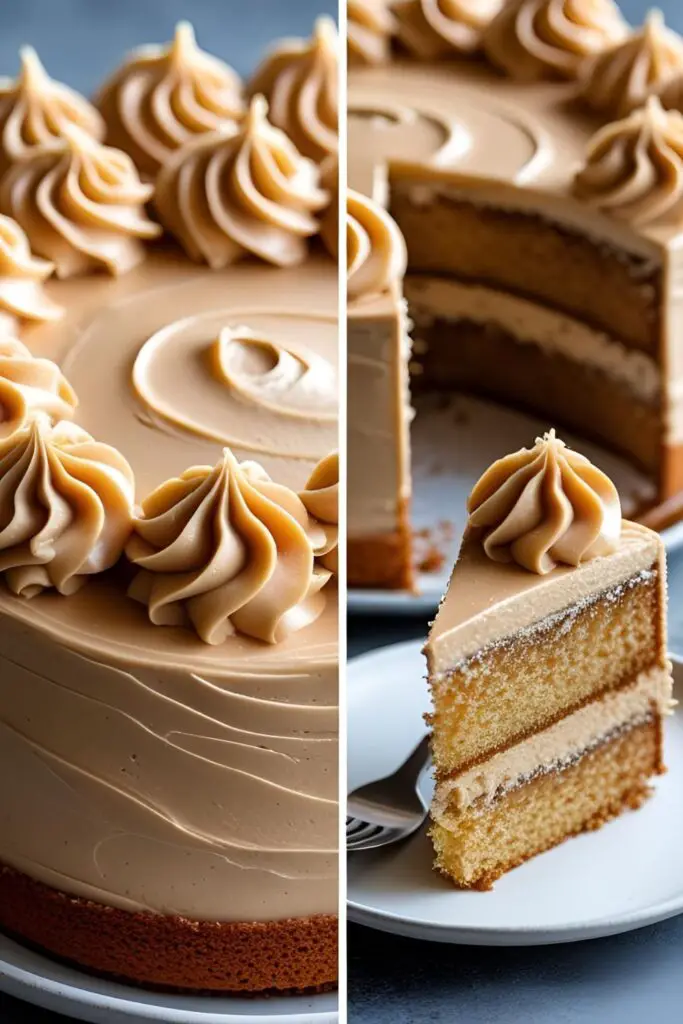
- Frosting Frenzy: Once the cakes are completely cool, place one layer on a serving plate and spread with a generous amount of caramel frosting. Top with the second layer and frost the top and sides of the cake. Get creative with your swirls!
Calories & Nutritional Info (The Unpleasant Truth)
Okay, let’s rip off the band-aid. This caramel cake recipe is a treat, and like most delicious treats, it’s not exactly a health food. But hey, life’s too short for boring cake, right? (Disclaimer: These are rough estimates and will vary based on serving size and specific ingredients used.)
- Estimated Calories per Serving (1 slice, assuming 10-12 slices): 450-600
- Fat: Likely a significant amount, thanks to all that butter.
- Saturated Fat: Yep, that’s in there too.
- Carbohydrates: Sugar and flour are carbs, who knew? 😉
- Sugar: It’s a caramel cake. Enough said.
Nutritional notes? Enjoy in moderation. It’s a celebration food, not a daily requirement (though it might feel like one!).
Common Mistakes to Avoid (Don’t Say I Didn’t Warn You)
Making caramel can be a little temperamental. Here are some common slip-ups to watch out for:
- Burning the Caramel: Keep a close eye on that sugar when you’re caramelizing it. Once it starts to turn amber, it goes from perfect to burnt very quickly. Burnt sugar is bitter and will ruin your frosting. Low and slow is your motto here.
- Adding Cold Liquids to Hot Caramel Too Quickly: This can cause the caramel to seize up dramatically. Add the butter and evaporated milk gradually and be prepared to stir vigorously.
- Not Letting the Cake Cool Completely Before Frosting: I know you’re excited to slather on that caramel goodness, but trust me on this one. Warm cake will melt your frosting into a sugary puddle. Patience, my friend, patience.
- Overmixing the Cake Batter: We talked about this earlier, but it’s worth repeating. Overmixing develops the gluten in the flour, resulting in a tough cake. Mix until just combined.
- Making the Frosting Too Thin or Too Thick: The consistency of your frosting is key. If it’s too thin, it will slide right off the cake. If it’s too thick, it will be difficult to spread. Add powdered sugar gradually until you reach a smooth, spreadable consistency.
Variations & Customizations (Get Your Freak On)
Want to put your own spin on this classic caramel cake recipe? Here are a few fun ideas:
- Salted Caramel Dream: Add a teaspoon of sea salt to your caramel frosting for that trendy and delicious salted caramel flavor. You can even sprinkle some flaky sea salt on top of the finished cake.
- Nutty Caramel Delight: Stir in about a cup of chopped pecans or walnuts into your frosting for added texture and flavor. You can also toast the nuts for an even richer taste.
- Caramel Apple Cake: Add diced apples (tossed in a little cinnamon and flour) to your cake batter for a fall-inspired twist. A drizzle of extra caramel sauce on top would be chef’s kiss.
FAQ Section (Your Caramel Conundrums Solved)
Got some burning caramel cake questions? Let’s tackle them!

1. Can I make the caramel frosting ahead of time? You can! Store it in an airtight container in the refrigerator for up to a week. When you’re ready to use it, let it come to room temperature and then rewhip it until smooth. You might need to add a tiny bit of milk if it’s too thick.
2. Why did my caramel seize up when I added the butter/milk? This is a common reaction due to the temperature difference. Just keep stirring over low heat, and it should smooth out again. Don’t panic!
3. Can I use store-bought caramel sauce instead of making frosting? While you could, it won’t have the same rich flavor and spreadable consistency as homemade caramel frosting. Trust me, the homemade version is worth the extra effort.
4. How do I get my cake layers to be perfectly flat? Leveling your cake layers with a serrated knife is a good trick. Once the cakes are completely cool, trim off any domed tops. This will also make them easier to stack.
5. What’s the best way to store caramel cake? Store leftover caramel cake in an airtight container at room temperature for up to 3 days or in the refrigerator for up to a week.
6. My frosting is too runny. What can I do? Gradually whisk in more powdered sugar until you reach the desired consistency. Be careful not to add too much at once, or it could become too stiff.

7. Can I double this recipe for a larger cake? Yes, you can! Just make sure you have appropriately sized cake pans and adjust the baking time accordingly (it might need a little longer).
Final Thoughts (Go Forth and Bake Like a Caramel Boss!)
Well, there you have it – your ultimate guide to conquering the caramel cake recipe. It might seem a little intimidating at first, but with a little patience and attention to detail, you’ll be rewarded with a truly spectacular cake. So, are you ready to impress your friends and family (and yourself!) with this slice of caramel heaven? I think you are. Now go preheat that oven and let the caramel magic begin! And hey, don’t forget to share your delicious creations – and maybe a slice or two with me (virtually, of course!). 😉