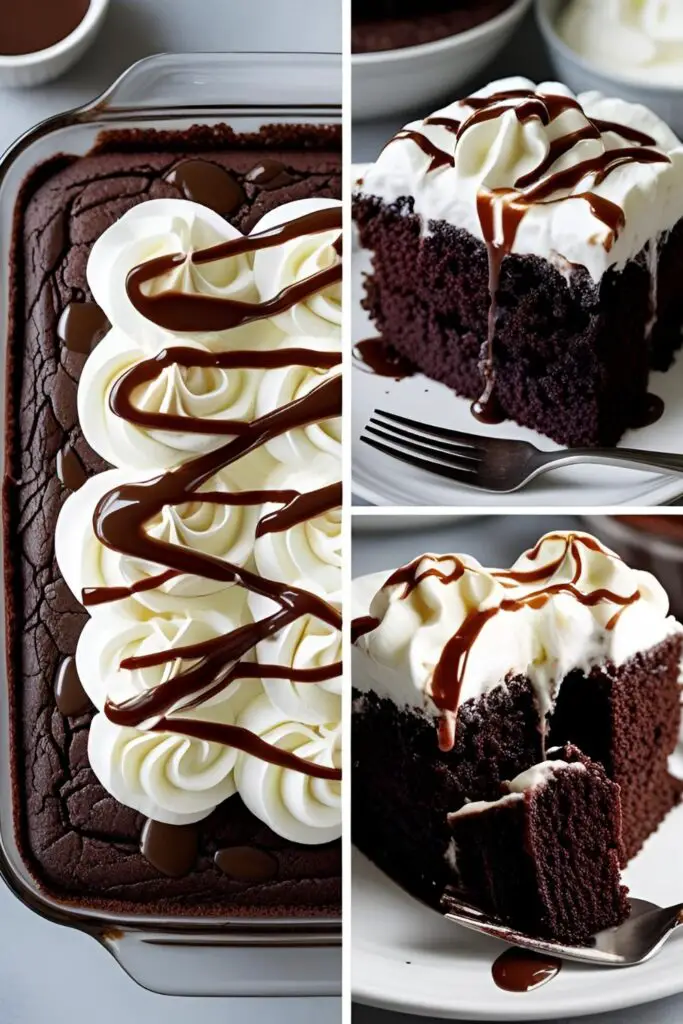
Dive Headfirst into Deliciousness: The Easiest Chocolate Poke Cake Recipe EVER
Okay, let’s be real. Sometimes you just need chocolate. Like, really need it. And you need it fast. Forget fancy layers and complicated frosting techniques. Today, we’re talking about the chocolate poke cake, the champion of lazy bakers and serious chocolate fiends. Heard of it? Prepare to have your dessert game forever changed. This isn’t just a cake; it’s a chocolate-soaked hug in every single bite.
Why This Chocolate Poke Cake Will Rock Your World
So, why should you ditch that elaborate seven-layer situation for this humble poke cake? Well, for starters, it’s ridiculously easy. I’m talking “dump everything in a bowl and stir” levels of easy. You can even use a boxed cake mix if you’re feeling extra rebellious (and short on time). Don’t judge; we’ve all been there.
But ease isn’t the only perk. This cake is unbelievably moist. Like, weep-with-joy moist. All those little holes you poke? They’re not just for fun; they’re tiny reservoirs of chocolatey goodness soaking into every nook and cranny. Plus, it’s the ultimate crowd-pleaser. Who can resist a super fudgy cake swimming in even more chocolate? Exactly.
Ingredients: The Chocolate Dream Team

Here’s what you’ll need to whip up this chocolatey masterpiece. Don’t worry, it’s not a mile-long list.
- 1 box (15.25 ounces) chocolate cake mix (or your favorite chocolate cake recipe ingredients)
- Ingredients called for on the cake mix box (usually eggs, oil, and water) OR your homemade cake ingredients
- 1 can (14 ounces) sweetened condensed milk (this is the magic ingredient for ultimate moisture!)
- ½ cup hot fudge sauce (go for the good stuff, you deserve it!)
- 1 ½ cups heavy whipping cream
- 3 tablespoons powdered sugar
- ½ teaspoon vanilla extract
- Chocolate shavings or sprinkles, for garnish (because presentation matters, even when you’re being lazy)
Key Substitutions:
- Cake Mix: Feel free to use your go-to chocolate cake recipe from scratch if you’re feeling ambitious. A devil’s food or dark chocolate cake works particularly well.
- Sweetened Condensed Milk: While it provides the best texture, in a pinch, you could try a very thick chocolate syrup, but the moisture level might differ.
- Hot Fudge Sauce: Any thick chocolate sauce you love will work.
- Heavy Cream: For a lighter option, you could use whipped topping, but the texture won’t be quite as rich and stable. For a dairy-free version, try a full-fat coconut cream that has been chilled and whipped.
Tools & Kitchen Gadgets Used:
Here’s the lowdown on what you’ll need. Time to make that Amazon wish list a reality.
- 9×13 inch Baking Pan: The standard size for poke cakes.
- Mixing Bowls: One or two, depending on whether you’re using a mix or baking from scratch.
- Electric Mixer (Handheld or Stand Mixer): Optional if you’re using a boxed mix and feeling strong, but recommended for smoother batter.
- Wooden Spoon or the Back of a Wooden Spoon: For making those essential pokes!
- Measuring Cups and Spoons: Gotta keep those ratios right, even when it feels like a free-for-all.
- Whisk or Electric Mixer with Whisk Attachment: For whipping the cream.
- Spatula: For spreading frosting and scraping bowls clean (don’t waste that chocolate!).
Step-by-Step Instructions (Prepare for Chocolate Overload!)

Alright, let’s get this chocolate party started. It’s easier than convincing your cat to take a bath, promise.
- Bake the Cake: Prepare and bake the chocolate cake according to the package directions (or your recipe). Once baked, let it cool slightly in the pan for about 5-10 minutes. Don’t let it cool completely; we want it a little warm for the poking action.
- Poke It Good: Now for the fun part! Use the end of a wooden spoon or something similar to poke holes all over the warm cake. Make sure the holes are about 1 inch apart. Don’t be shy; really give it a good poke! These holes are where the magic happens.
- Drench It in Chocolate: Slowly pour the sweetened condensed milk evenly over the warm, poked cake, making sure it seeps down into all those glorious holes. Next, drizzle the hot fudge sauce over the top, letting it ooze into the holes as well. It’s okay if it looks a little messy; that’s the point!
- Chill Out: Cover the cake and refrigerate it for at least 1-2 hours. This allows the chocolatey goodness to fully soak in and the cake to cool completely. Patience, young grasshopper, patience.
- Whip It, Whip It Good: While the cake is chilling, prepare the whipped cream. In a cold bowl, using an electric mixer (or a very enthusiastic whisk), beat the heavy whipping cream until soft peaks form. Add the powdered sugar and vanilla extract and continue beating until stiff peaks form. Be careful not to overwhip, unless you want butter (which, while delicious, isn’t our goal here).
- Frost and Garnish: Once the cake is thoroughly chilled, spread the whipped cream evenly over the top. Finally, garnish with chocolate shavings or sprinkles. Feel free to get creative here!
- Serve and Devour: Slice and serve this chocolatey dream boat. Prepare for happy sighs and requests for seconds (and maybe thirds).
Calories & Nutritional Info (The Price We Pay for Deliciousness)
Alright, let’s peek behind the chocolate curtain for a moment. Keep in mind these are estimates and will vary based on your specific ingredients and serving sizes (and how big of a slice you sneak).
- Estimated Calories per serving (1/12 of the cake): 350-450
- Fat: 15-25g
- Carbohydrates: 45-60g
- Sugar: 30-40g (it’s a dessert, what did you expect? 😉)
- Protein: 5-7g
Consider it a treat-yourself moment. You earned it!
Common Mistakes to Avoid (Don’t Be That Baker!)
Let’s sidestep some potential chocolate catastrophes, shall we?
- Poking Too Soon or Too Late: Make sure the cake is still warm when you poke it. If it’s completely cooled, the liquids won’t soak in as well. But don’t poke it while it’s still scorching hot, or you might end up with a crumbly mess.
- Not Poking Enough Holes: Be generous with those pokes! The more holes, the more chocolatey goodness seeps in. Think of it as giving the cake a delicious spa treatment.
- Using Cold Condensed Milk or Fudge Sauce: While not a deal-breaker, slightly warming the condensed milk and fudge sauce can help them absorb into the cake more easily.
- Overwhipping the Cream: We want fluffy whipped cream, not butter. Keep a close eye on it as you’re beating. Once stiff peaks form, stop!
- Impatience: Resist the urge to slice into the cake before it’s fully chilled. This allows the flavors to meld and the cake to firm up, making it much easier (and less messy) to serve.
Variations & Customizations (Spice Up Your Chocolate Life!)
Feeling adventurous? Here are a few ways to put your own spin on this classic.
- Mexican Chocolate Poke Cake: Add a pinch of cinnamon and a tiny pinch of cayenne pepper to your cake batter for a hint of spice. Drizzle with sweetened condensed milk and then a chocolate sauce infused with more cinnamon and cayenne. Top with whipped cream and a sprinkle of cinnamon. ¡Delicioso!
- Peanut Butter Chocolate Poke Cake: Use a chocolate cake mix (or recipe). After poking, drizzle with sweetened condensed milk and then a generous amount of melted peanut butter. Top with whipped cream and crushed peanut butter cups. Peanut butter lovers, you’re welcome.
- Cookies and Cream Poke Cake: Use a chocolate cake. After poking, drizzle with sweetened condensed milk. Then, mix crushed Oreo cookies into your hot fudge sauce before drizzling it over the cake. Top with whipped cream and more crushed Oreos. It’s like a giant Oreo in cake form!
FAQ Section (Your Burning Chocolate Questions Answered)
Got more questions swirling in your head? Let’s tackle them.

1. Can I use a different flavor of cake mix? Absolutely! A yellow cake or even a red velvet cake would be delicious with chocolate soakings. Get creative!
2. Can I make this cake ahead of time? Yes! In fact, it’s often better the next day after the flavors have had even more time to meld. Just store it covered in the refrigerator.
3. Do I have to use sweetened condensed milk? While it provides the best moisture and a unique sweetness, you could experiment with other thick liquids, but the result might not be quite the same. Evaporated milk is thinner and won’t work as well on its own.
4. Can I freeze chocolate poke cake? While you can freeze it, the texture of the whipped cream might change slightly upon thawing. It’s best enjoyed fresh or within a few days. If freezing, do so before adding the whipped cream and add it fresh after thawing.
5. What’s the best way to poke the holes? The back of a wooden spoon works perfectly because it creates nice, round holes. You can also use a chopstick or even a clean straw for smaller holes.
6. Can I use a different kind of frosting? While whipped cream is traditional and light, you could definitely use a chocolate buttercream frosting if you prefer something richer and more stable at room temperature.

7. Why is my poke cake soggy? If your cake is overly soggy, you might have used too much liquid or poked the holes while the cake was still too hot, causing it to break down. Stick to the recipe amounts and let the cake cool slightly before poking.
Final Thoughts (Go Forth and Poke!)
There you have it – the ridiculously easy and utterly delicious chocolate poke cake recipe. It’s proof that you don’t need to be a master baker to create something truly decadent and satisfying. So, grab your wooden spoon, embrace the poke, and prepare for a chocolate experience that will make you wonder why you ever bothered with anything more complicated. Now, go forth and make some chocolatey magic! And if anyone asks for the recipe, just tell them your secret ingredient is pure, unadulterated chocolate love. 😉