How to Crumb Coat a Cake: The Secret to Frosting That Doesn’t Look a Mess
Have you ever baked a beautiful, delicious cake, only to have your decorating dreams crushed by an onslaught of crumbs? You go to apply that lovely, smooth frosting, and suddenly it’s a fuzzy, speckle-filled disaster. It’s infuriating. It’s the moment you question all your life choices. Well, my friend, I’m here to tell you there’s a secret handshake among bakers, a magical step that banishes those pesky crumbs forever. Today, you’re going to learn how to crumb coat a cake, and your decorating game will be changed for good.
This isn’t a recipe for a cake itself, but rather a recipe for success. It’s the single most important technique that separates amateur-hour cakes from those smooth, professional-looking masterpieces you see on TV. Prepare to level up.
Why This Technique is Your New Best Friend
So, why add an extra step? Isn’t frosting a cake already enough of a production? Trust me, this isn’t extra work; it’s smart work.
First and foremost, it traps the crumbs. A crumb coat is a thin, sacrificial layer of frosting that acts like a delicious, edible prison for all the loose cake bits. It locks them down so they can’t invade your beautiful final coat of frosting. No more speckles, no more fuzzy patches.
Second, it creates the perfect canvas. This thin layer fills in any little gaps, smooths over bumps, and helps you create a more level and stable structure. It’s like applying a primer before you paint a wall. It ensures your final coat goes on flawlessly, making those beautiful swirls and smooth sides a million times easier to achieve.
Finally, it will make you feel like a total pro. There is an immense satisfaction that comes from applying that final, pristine layer of frosting onto a perfectly crumb-coated cake. It’s a moment of pure, unadulterated baking glory. You’ll feel so powerful. 😉
What You’ll Need for This Magical Process

This isn’t about ingredients for a cake, but the essential components for the technique itself. The list is short and sweet.
- A Completely Cooled Cake: I cannot stress this enough. Your cake layers must be 100% cooled, preferably even chilled. A warm cake is a fragile, crumbly nightmare that will collapse into a puddle of sadness when you try to frost it.
- Frosting: Any kind of frosting you love will work – American buttercream, Swiss meringue, cream cheese frosting, ganache, you name it. You’ll need enough for a thin layer now, and a thicker layer later.
- Pro Tip: For the crumb coat, you can thin your frosting slightly with a splash of milk or cream. This makes it even easier to spread without tearing the delicate cake.
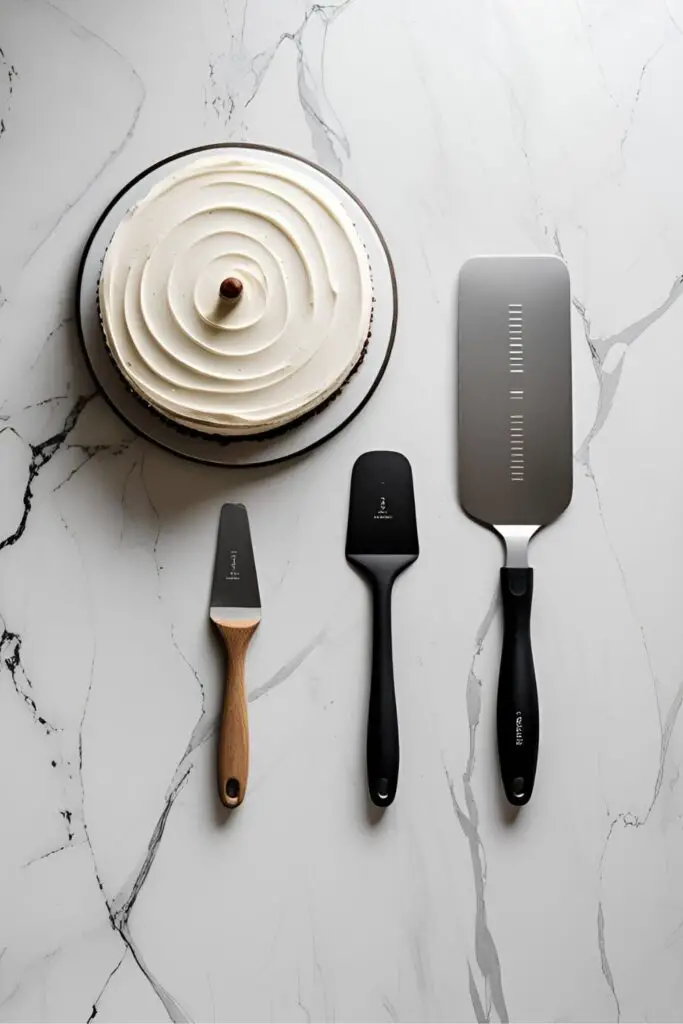
The Decorator’s Arsenal: Tools & Gadgets
You can do this with just a butter knife and a plate, but if you want to make your life infinitely easier (and get better results), these are the tools of the trade.
- Cake Turntable (or a Lazy Susan): This is the MVP of cake decorating. Being able to spin the cake as you frost is an absolute game-changer for getting smooth, even sides.
- Offset Spatula: This is the co-MVP. Its angled design lets you smooth frosting without getting your knuckles in it. A long, thin one is your best friend.
- Bench Scraper: The secret weapon for achieving those flawlessly smooth, sharp sides. It’s an inexpensive tool that delivers professional results.
- Cake Board or Serving Platter: You need a solid, flat base to build your masterpiece upon.
- Serrated Bread Knife: Essential for leveling your cake layers if they baked with a dome. A flat cake is a happy cake.
Step-by-Step Instructions: The Path to a Crumb-Free Life
Ready to transform your cake decorating process? Let’s walk through it. It’s easier than you think.
Step 1: Level Your Layers (If Necessary) Look at your cooled cake layers. Do they have a dome on top like a little hill? If so, we need to perform some minor surgery. Using a long, serrated knife, carefully slice off the dome to create a flat, level surface. (Bonus: you now have cake scraps to snack on. You’re welcome.)
Step 2: Secure Your Base Place a small dollop of frosting in the center of your cake board or platter. This acts as a “glue” to hold your first cake layer in place and prevent it from sliding around while you work.
Step 3: Stack It Up Place your first (leveled) cake layer onto the board, pressing it gently into the frosting. If you’re making a multi-layer cake, add a generous layer of frosting or filling on top, spreading it evenly. Place your next cake layer on top, making sure it’s aligned. Repeat for all your layers.

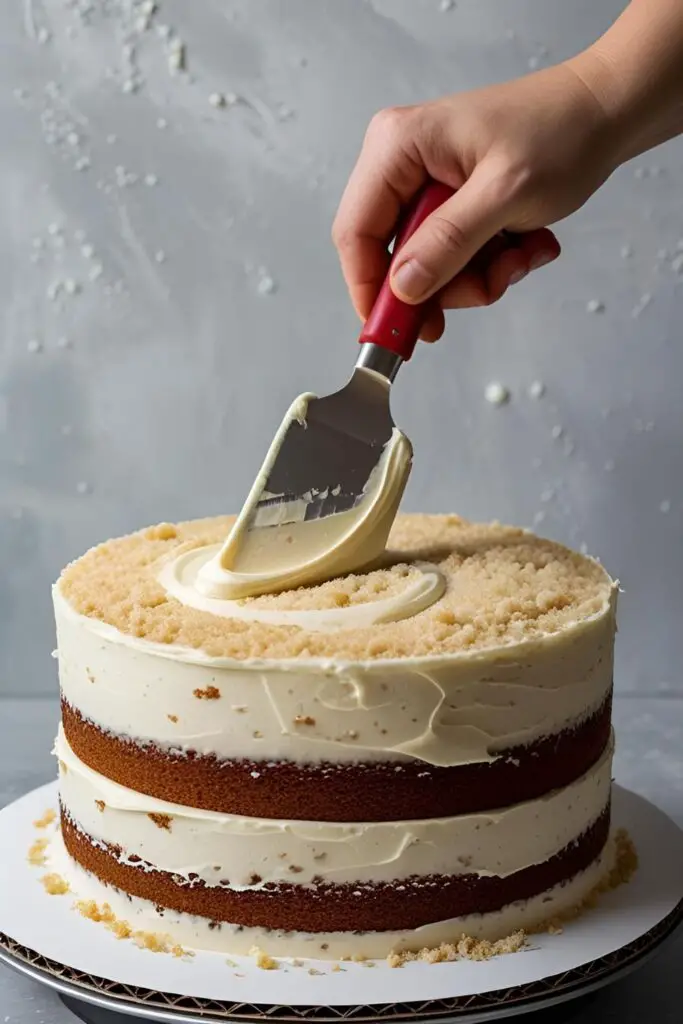
Step 4: The Crumb Coat Commences! Plop a generous scoop of your (slightly thinned) frosting onto the top of the cake. Using your offset spatula, gently spread it over the top, pushing it slightly over the edges.
Step 5: Work Your Way Down Now, use your spatula to work that excess frosting from the top down the sides of the cake. The goal here is a thin, even layer. You will see crumbs mixing into the frosting. DO NOT PANIC. This is exactly what is supposed to happen. The crumbs are being trapped. Embrace the mess; it’s part of the process.
Step 6: The “Ugly Duckling” Stage Once the cake is thinly covered, take your bench scraper. Hold it straight up and down against the side of the cake and use your turntable to spin the cake, smoothing the frosting as you go. Scrape off the excess frosting from your scraper into a separate “crumb-filled” bowl. Do not put the crumb-filled frosting back into your main frosting bowl! This coat does not need to be perfect. It will look a bit messy and translucent. That’s okay.
Step 7: The Big Chill (The Most Important Step!) This is the moment of truth. Carefully place your “ugly duckling” cake into the refrigerator for at least 30 minutes, or until the frosting is firm to the touch. This hardens the crumb coat, effectively locking all those pesky crumbs into their sugary jail. DO NOT SKIP THIS STEP.
After chilling, your cake is now a smooth, stable, crumb-free canvas, ready for its beautiful final coat of frosting!
Calories & Nutritional Info (Spoiler: It’s a Technique)
Let’s get one thing straight.
- Calories in this technique: 0
- Fat, Carbs, Sugar: Also 0

Why? Because this is a process, not a food item. The calories are in the cake and frosting you choose to use, but that’s a conversation for another day. The crumb coat itself is just a very thin layer of frosting, so its contribution to the final calorie count is minimal. Think of it as a necessary, and delicious, part of the infrastructure.
Common Mistakes to Avoid (Learn From My Pasty… I Mean, Past Mistakes)
- Frosting a Warm Cake: I will say it again for the people in the back. NEVER FROST A WARM CAKE. It will melt the frosting, tear the cake, and result in a soupy, crumbly mess. Patience is a virtue.
- Skipping the Chill: I know, you want to get to the pretty part. But if you skip the chilling step, the crumbs from your first layer will just mix into your second layer, and this entire exercise will have been for nothing. Your cake will laugh at your impatience.
- Making the Crumb Coat Too Thick: This isn’t the final coat! You want a thin, almost see-through layer. Its job is to trap crumbs, not to be the star. Save the generous frosting application for the final coat.
- Double-Dipping Your Spatula: Once your spatula has touched the crumb-filled cake, do not dip it back into your clean bowl of frosting. This is how you contaminate your entire batch. Use a separate small bowl for the crumb-coat frosting.
- Stressing About Perfection: The crumb coat is supposed to look a little rough. It’s the “undergarment” of the cake world—it’s not meant to be seen, but it makes the final outfit look so much better.
When to Use This Pro Technique (Hint: Always)
While you can crumb coat any cake, here are a few scenarios where it’s an absolute, non-negotiable lifesaver.
- For Naked and Semi-Naked Cakes: A crumb coat is essentially the final look for a “semi-naked” cake. For this style, you apply the crumb coat and then use your bench scraper to scrape most of it off, leaving just a whisper of frosting with the cake layers peeking through.
- Before Covering with Fondant: If you’re using fondant, a perfectly smooth under-layer is essential. A crumb coat (often made with a sturdy buttercream or ganache) provides that flawless surface, ensuring your fondant doesn’t have any weird lumps or bumps.
- For High-Contrast Cakes: Are you frosting a dark chocolate cake with pristine white vanilla buttercream? A crumb coat is your best friend. It prevents those dark crumbs from turning your beautiful white frosting into a muddy gray mess.
FAQ Section (Your Crumb-Coating Curiosities, Answered)
How long should a crumb-coated cake chill?
A minimum of 30 minutes in the refrigerator is recommended. You want the frosting to be firm to the touch. You can even pop it in the freezer for about 15 minutes if you’re in a hurry.
What’s the best frosting for a crumb coat?
Any sturdy frosting works well. American buttercream is a popular choice because it firms up nicely in the fridge. Swiss meringue buttercream and ganache are also excellent options.
Do I really have to crumb coat every cake?
You don’t have to do anything, but if you want a smooth, clean, professional-looking finish without wanting to tear your hair out, then yes. It makes the final decorating step infinitely easier and more enjoyable.
How thin should the crumb coat be?
Think very thin. You should be able to see the cake through it in places. Its only job is to be a sticky trap for crumbs.
My frosting is tearing the cake as I spread it! What’s wrong?
A few things could be happening: your cake is too warm or delicate, your frosting is too stiff, or you’re applying too much pressure. Try chilling the cake layers first, thinning your frosting with a little milk, and using a lighter touch with your offset spatula.
Can I leave a cake with just a crumb coat?
You can! That’s called a “naked” or “semi-naked” cake, and it’s a very popular and beautiful rustic style.
Do I use a different frosting for the crumb coat and the final coat?
You can use the exact same frosting. Just remember to keep your “clean” frosting and your “crumb-filled” frosting in separate bowls to avoid contamination.
Final Thoughts
You are now officially in on one of the biggest secrets of the baking world. You’ve learned the technique that will elevate your cakes from “homemade” to “hom-OMG-where-did-you-buy-that?!” No longer will you fear the dreaded crumb. You will look them in the eye, spatula in hand, and say, “Not today.”
So go forth and bake with confidence. Embrace the “ugly duckling” stage, trust the chill, and enjoy the blissful experience of applying a perfectly smooth final coat of frosting. Your cakes (and anyone who eats them) will thank you. Happy decorating!