From Zero to Dough Hero: The Ultimate Guide to Making Seriously Good Rolls
Have you ever reached for a store-bought roll and thought, “This is… fine?” Fine isn’t good enough, my friend. Life’s too short for mediocre bread. That’s why we’re tackling how to make rolls from scratch. Trust me, the aroma alone will make you feel like a domestic god or goddess. And the taste? Fuggedaboutit. These aren’t just rolls; they’re edible clouds of happiness. So, ditch the doughy disappointment and let’s bake some magic.
Why These Rolls Are Basically Culinary Superheroes
Okay, so why should you spend your precious time making rolls when you can just grab a bag at the supermarket? Let me enlighten you.
First, flavor. Homemade rolls have a depth and richness that commercially produced ones can only dream of. We’re talking warm, yeasty goodness that melts in your mouth. It’s a flavor experience, not just sustenance.
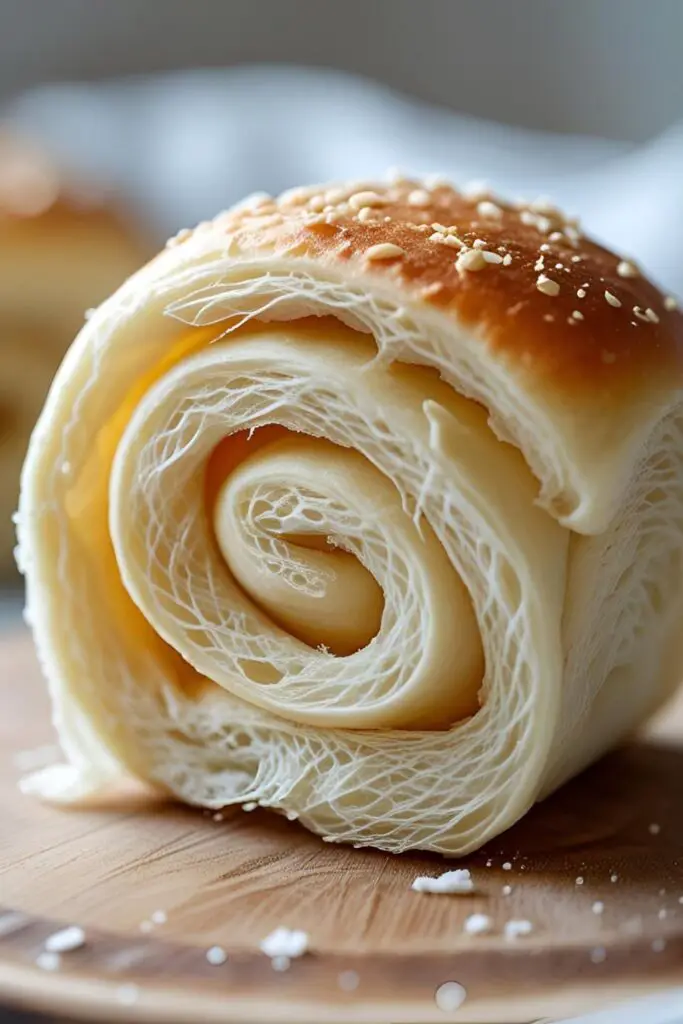
Second, texture. Ah, the texture! These rolls are soft and tender on the inside with a beautifully golden crust. They practically beg to be slathered in butter or used to soak up delicious gravy. Can a store-bought roll offer that kind of temptation? I think not.
Third, impressive factor. Imagine presenting a basket of warm, freshly baked rolls to your dinner guests. Instant rockstar status, guaranteed. They’ll think you’re some kind of culinary wizard. And you will be, thanks to this recipe!

Finally, it’s easier than you think! Sure, baking with yeast might sound intimidating, but I promise this recipe is straightforward and foolproof (as long as you follow the instructions, unlike that one time…). So, are you ready to unleash your inner bread baker? Let’s do this!
The Dream Team: Ingredients for Roll Nirvana
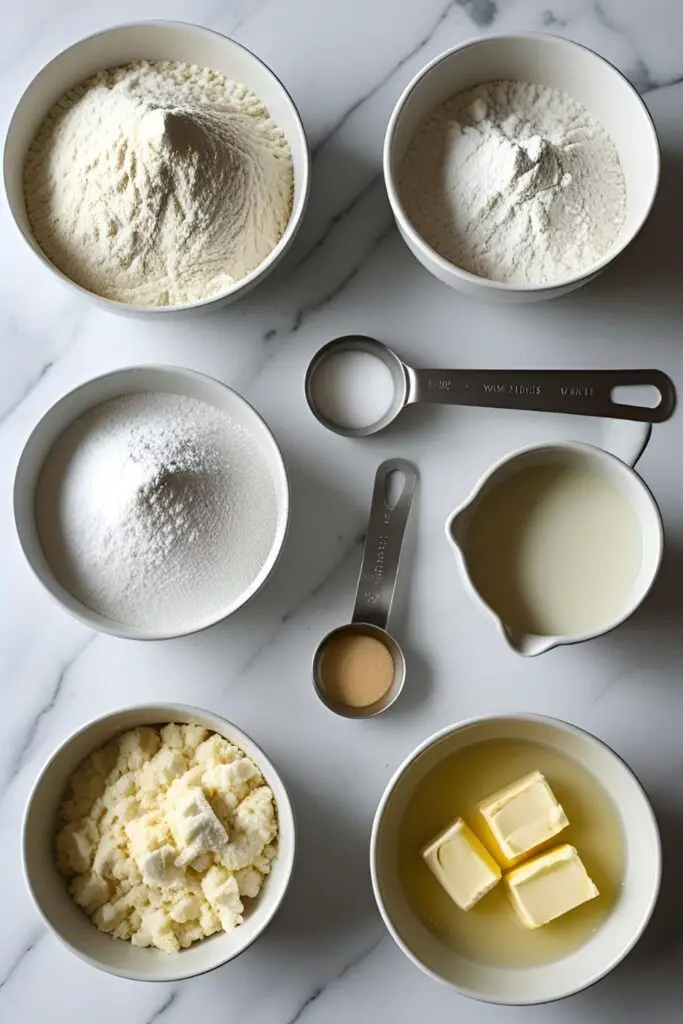
Here’s what you’ll need to create these pillowy wonders. Don’t skimp on quality – it makes a difference!
- Warm Water: 1 cup (about 105-115°F or 40-46°C). This activates the yeast, so make sure it’s not too hot (it’ll kill the yeast) or too cold (it won’t activate). Think lukewarm bathwater for a happy yeast party.
- Active Dry Yeast: 2 ¼ teaspoons (1 packet). The magic ingredient that makes our rolls rise to the occasion.
- Granulated Sugar: ¼ cup, plus 1 teaspoon. The teaspoon feeds the yeast, and the rest adds a touch of sweetness and helps with browning.
- Salt: 1 ½ teaspoons. Enhances the flavor and controls the yeast activity. Don’t forget it!
- Milk: ½ cup, warmed. Adds richness and tenderness to the rolls. You can warm it in the microwave or on the stovetop – just don’t boil it!
- Unsalted Butter: ¼ cup (4 tablespoons), melted and slightly cooled. Adds flavor and keeps the rolls soft.
- All-Purpose Flour: 3 – 3 ½ cups. The backbone of our rolls. Start with 3 cups and add more as needed until the dough is smooth and elastic but not sticky.
Key Substitutions
- Instant Yeast: If you’re using instant yeast, you can skip the initial proofing in warm water. Just whisk it directly into the dry ingredients. The rest of the recipe remains the same.
- Dairy-Free Milk: You can substitute with your favorite non-dairy milk like almond, soy, or oat milk. Just make sure it’s warmed.
- Vegan Butter: Vegan butter works as a great substitute for unsalted butter.
- Honey or Maple Syrup: You can replace the granulated sugar with an equal amount of honey or maple syrup for a slightly different flavor profile.
The Baker’s Arsenal: Tools & Kitchen Gadgets
Let’s gather the necessary gear for our roll-making adventure.
- Large Mixing Bowl: For bringing all the ingredients together.
- Measuring Cups and Spoons: Accuracy is your friend in baking.
- Whisk: To combine the wet ingredients.
- Wooden Spoon or Dough Hook (if using a stand mixer): For mixing the dough.
- Stand Mixer (optional but helpful): Makes kneading a breeze.
- Clean Kitchen Towel: For covering the dough while it rises.
- Lightly Oiled Bowl: For the dough to rise in.
- Rolling Pin (optional): For shaping the rolls, though you can easily do this by hand.
- Baking Sheet: For baking the rolls.
- Parchment Paper (recommended): Prevents sticking and makes cleanup easier.
- Pastry Brush (optional): For brushing with melted butter after baking.
Let’s Get Rolling: Step-by-Step Instructions
Alright, are you ready to transform simple ingredients into glorious rolls? Let’s do it!
Step 1: Wake Up the Yeast (The Activation Ceremony) In your large mixing bowl, combine the warm water and 1 teaspoon of sugar. Sprinkle the active dry yeast over the top. Let it sit for 5-10 minutes, or until it becomes foamy. This tells you the yeast is alive and ready to work its magic. If it doesn’t foam, your yeast might be past its prime – time for a new batch!
Step 2: Combine the Wet Wonders (The Flavor Foundation) Once the yeast is foamy, add the remaining ¼ cup of sugar, salt, warmed milk, and melted (and slightly cooled) butter to the bowl. Whisk everything together until well combined.

Step 3: Gradually Add the Flour (The Dough Formation) Start by adding 3 cups of all-purpose flour to the wet ingredients. Stir with a wooden spoon or the dough hook of your stand mixer until a shaggy dough forms.
Step 4: Knead for Dear Life (Developing the Gluten) Turn the dough out onto a lightly floured surface or continue kneading in your stand mixer for 8-10 minutes. The dough should become smooth and elastic. It should spring back lightly when you poke it. If it’s still sticky, gradually add more flour, about a tablespoon at a time, until it reaches the right consistency. Don’t add too much flour, or your rolls will be dry. Trust your instincts here!
Step 5: First Rise (The Cozy Nap) Lightly oil a clean bowl. Place the dough in the bowl, turning it once to coat. Cover the bowl with a clean kitchen towel and let it rise in a warm place for 1-1.5 hours, or until it has doubled in size. A warm oven (turned off!), a sunny spot, or even your microwave (not running!) can work. This is where the magic truly begins.
Step 6: Shape Those Beauties (The Roll Call) Gently punch down the risen dough to release the air. Turn it out onto a lightly floured surface. You can either divide the dough into 12-16 equal-sized pieces and shape them into round balls by tucking the edges underneath, or you can roll the dough into a rectangle and cut out uniform shapes with a knife or biscuit cutter. Place the shaped rolls on a baking sheet lined with parchment paper, leaving some space between them.
Step 7: Second Rise (The Final Flourish) Cover the baking sheet with the clean kitchen towel and let the rolls rise again in a warm place for another 30-45 minutes, or until they look puffy. They should almost double in size again.
Step 8: Bake to Golden Glory (The Grand Finale) Preheat your oven to 375°F (190°C). Bake the rolls for 15-20 minutes, or until they are golden brown on top. Keep an eye on them – ovens can vary. You want them beautifully browned, not burnt offerings.

Step 9: The Butter Bath (Optional Indulgence) Once the rolls come out of the oven, you can brush them with melted butter for extra flavor and a beautiful sheen. This step is highly recommended, IMO.
Step 10: Serve and Devour (The Sweet Reward) Let the rolls cool slightly before serving. They are best enjoyed warm! Prepare for happy sighs and requests for seconds (and maybe thirds).
Calories & Nutritional Info (The Numbers Game)
Here’s a rough estimate per roll (based on 12 rolls):
- Calories: ~180-220 kcal (depending on size and butter)
- Fat: ~5-8g
- Carbohydrates: ~30-35g
- Protein: ~4-5g
- Sodium: Varies depending on salt level.
Important Note: These are just estimates. The exact nutritional content will depend on the specific ingredients and their amounts. Homemade is generally better as you control what goes in!
Common Mistakes to Avoid (Don’t Be a Dough Disaster!)
Let’s learn from the bread-making blunders of the past.
- Water Too Hot or Cold: Remember, lukewarm is the magic temperature for yeast activation. Too hot kills it; too cold won’t wake it up.
- Old or Inactive Yeast: Always check the expiration date on your yeast. If it doesn’t foam in the first step, it’s time to say goodbye and get a fresh batch.
- Adding Too Much Flour: This is a classic mistake that leads to dry, dense rolls. Add flour gradually until the dough is smooth and elastic but still slightly tacky.
- Not Kneading Enough: Kneading develops the gluten, which gives the rolls their structure and chewiness. Don’t skimp on this step!
- Rushing the Rising Process: Yeast needs time to work its magic. Be patient and let the dough rise in a warm place until it doubles in size. Rushing this can result in dense, underproofed rolls.
- Over-Baking: Keep an eye on the rolls in the oven. Over-baking will make them dry and hard. They should be golden brown on top.
- Not Storing Properly: If you have any leftover (unlikely, TBH), store them in an airtight container at room temperature for a day or two, or in the freezer for longer storage.
Variations & Customizations (Roll Your Own Way!)
Want to get creative? Here are a few fun ways to customize your rolls:
- Garlic Herb Rolls: Add 2-3 cloves of minced garlic and 1-2 tablespoons of chopped fresh herbs like rosemary, thyme, or parsley to the dough before the first rise. These are amazing with pasta or roasted meats.
- Sweet Rolls: Increase the sugar to ½ cup and add the zest of one lemon or orange to the dough. After the first rise, roll the dough out, spread with softened butter and cinnamon sugar, roll up, and cut into swirls before the second rise and baking. Hello, breakfast bliss!
- Sesame or Poppy Seed Rolls: Brush the tops of the shaped rolls with a beaten egg before the second rise and sprinkle with sesame seeds, poppy seeds, or everything bagel seasoning. Adds a nice visual appeal and flavor.
- Cheese Rolls: Add ½ – ¾ cup of shredded cheddar, Parmesan, or your favorite cheese to the dough during the kneading process. These are great on their own or as sandwich rolls.
FAQ Section (Your Burning Roll Questions Answered)
Why are my rolls not rising?
Several reasons: your water might have been too hot or cold, your yeast could be old or inactive, or the rising environment might not have been warm enough.
How do I make my rolls softer?
Using milk and melted butter in the dough contributes to softer rolls. Also, avoid adding too much flour during kneading.
Can I make the dough ahead of time?
Yes! After the first rise, punch down the dough, cover it tightly with plastic wrap, and refrigerate for up to 24 hours. Let it come to room temperature for about 30-60 minutes before shaping and proceeding with the second rise and baking.
How do I reheat rolls and keep them soft?
Wrap the rolls in foil and reheat in a preheated oven at 300°F (150°C) for about 10-15 minutes. You can also microwave them briefly, but they might lose some texture.
Can I freeze baked rolls?
Yes! Let the baked rolls cool completely. Wrap them individually in plastic wrap and then place them in a freezer-safe bag or container. They can be frozen for up to 2-3 months. Thaw them at room temperature or reheat gently in the oven.
Why are my rolls dense?
Possible culprits include not kneading enough, not allowing enough time for rising, or adding too much flour.
Can I use whole wheat flour?
Yes, you can substitute up to half of the all-purpose flour with whole wheat flour for a nuttier flavor and added fiber. Keep in mind that whole wheat flour can make the rolls slightly denser, so you might need to add a little more liquid.
Final Thoughts
There you have it! You’ve officially embarked on the journey of becoming a roll-making extraordinaire. Forget those sad, squishy supermarket versions. From now on, your table will be graced with warm, fragrant, and utterly delicious homemade rolls.
So, go forth, gather your ingredients, and don’t be afraid to get a little flour on your hands. The reward – those perfect, pillowy rolls – is totally worth it. And hey, if your first batch isn’t absolutely perfect? Don’t sweat it! Baking is a learning process. Just keep practicing, and soon you’ll be rolling like a pro. Now, who wants a warm roll? 🙂