The Ultimate Guide on How to Make Freeze Dried Candy at Home
You’ve seen it all over social media. Those viral videos of someone biting into a Skittle that has magically puffed up to three times its size and become a light, airy, crunchy ball of concentrated flavor. You’ve wondered, “What sorcery is this?” and “Where can I get some?” Well, today, my friend, we’re pulling back the curtain on the magic. This is your definitive guide on how to make freeze dried candy, and it’s going to change the way you look at a bag of gummy worms forever. But first, a reality check: this isn’t a recipe, it’s a science experiment, and you’re going to need a very special machine to become the mad candy scientist you were born to be.
Why This Is the Coolest Kitchen Project Ever
So, why would anyone dedicate counter space and cash to a machine that just… zaps candy? Because it’s not just zapping; it’s transforming. We’re talking about a complete textural and sensory revolution. Chewy, tooth-sticking caramels become light, airy puffs that melt in your mouth. Gummy bears puff up into crunchy, flavorful clouds. The process of sublimation (that’s the fancy science word for it) removes all the water, which weirdly intensifies the flavor.
This is your chance to play Willy Wonka in your own kitchen. The “wow” factor is off the charts. Hand a friend a bag of your homemade crunchy “space Skittles,” and watch their brain short-circuit with delight. It’s fun, it’s fascinating, and tbh, it’s a pretty cool side hustle if you’re so inclined.
The Ingredients List (Spoiler: It’s Short)
Ready for the most complicated ingredients list you’ve ever seen? I hope you have a pen.
- Candy: Yep, that’s it. Your favorite chewy, gummy, or taffy-like candies.
Best Candy Candidates for Freeze-Drying:
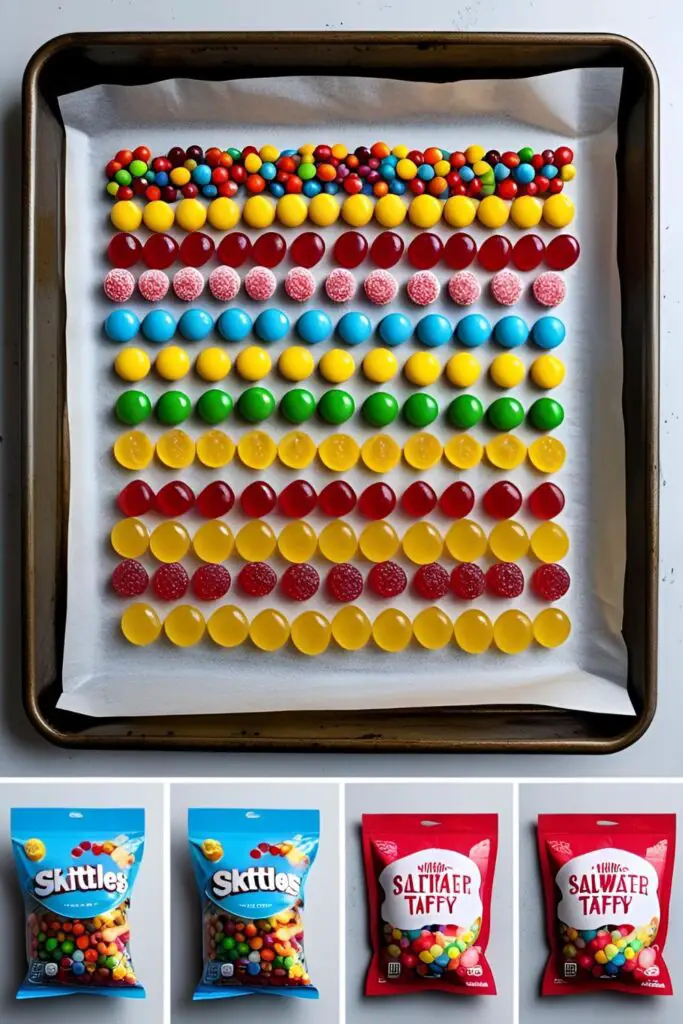
- Skittles: The undisputed king. They puff up perfectly and become incredibly crunchy.
- Gummy Worms/Bears: These turn into light, airy, styrofoam-like puffs of flavor.
- Salt Water Taffy: Transforms from a jaw workout into a delicate, melty cloud.
- Bit-O-Honey / Caramels (like Milk Duds): These explode into crunchy, porous nuggets of goodness.
- Marshmallows & Peeps: They get even lighter (if that’s possible) and develop a satisfying crunch.
- Ice Cream Sandwiches: Not technically candy, but they are a must-try! They become a solid, crunchy bar that tastes exactly like an ice cream sandwich but doesn’t melt.
The Not-So-Secret Weapon & Other Gadgets
Okay, this is the most important part. You can’t just pop candy in your freezer and hope for the best. You need a specific, powerful machine to make this happen.
- A Home Freeze Dryer: This is the star of the show and a non-negotiable piece of equipment. Brands like Harvest Right are the most common for home use. It’s an investment, but it’s the only tool that performs the magic of sublimation.
- Freeze Dryer Trays: These come with the machine, but you’ll be using them for every batch.
- Parchment Paper or Silicone Mats: Essential for lining the trays to prevent your precious candy from sticking.
- Mylar Bags: If you want to store your candy long-term (or sell it), these are the gold standard. They block light and moisture.
- Oxygen Absorbers: Little packets that you toss into the Mylar bags to remove any residual oxygen, keeping your candy fresh for, like, ever.
- Impulse Sealer: To get a perfect, airtight seal on your Mylar bags.
Step-by-Step Instructions: The Path to Crunchy Glory

Alright, future candy mogul, let’s fire up the spaceship.
Step 1: Prep Your Candy
Line your freeze dryer trays with parchment paper. Now, arrange your chosen candy on the trays. The most important rule? Give them space! These little guys will puff up, expand, and inflate like you wouldn’t believe. If they’re too close, they’ll merge into one giant candy monster (which, okay, sounds kinda cool, but it’s not what we’re going for).
Step 2: The Pre-Freeze (Optional But Smart)
While your machine can do all the freezing, you can speed up the process by pre-freezing your trays of candy in your regular deep freezer for a few hours. This can shave some time off the total machine cycle.
Step 3: Load the Machine and Engage!
Place your trays of candy into the freeze dryer. Make sure the chamber is clean, close the door, and latch it securely. Double-check that the drain valve is closed. Now, press the start button on the screen. The machine will whir to life, and the magic will begin.
Step 4: The Waiting Game
The freeze dryer will now take over. It will freeze the candy to a super-low temperature (around -40°F / -40°C), then a powerful vacuum pump will kick on. The machine will then slightly warm the trays, causing the frozen water in the candy to turn directly into vapor (sublimation!). This process takes a while. For candy, a cycle can be anywhere from 4 to 10 hours. Go live your life. The machine’s got this.
Step 5: Check for Doneness
The machine will tell you when the cycle is complete. To be sure, you can take a piece out and break it in half. It should be completely dry and crunchy all the way through. If it feels cold in the center or is still chewy, it needs more time. You can add more dry time through the machine’s interface.
Step 6: Store It Immediately!

This is CRITICAL. Freeze-dried food is extremely hygroscopic, meaning it wants to suck up any and all moisture from the air. As soon as the cycle is done, get that candy into an airtight container. A glass jar with a good seal works for short-term enjoyment. For long-term storage, Mylar bags with an oxygen absorber are the only way to go.
Calories & Nutritional Info

I have some hilarious news for you regarding the nutritional information.
- Calories: Exactly the same as the original candy.
- Sugar: Exactly the same.
- Fat: Exactly the same.
- The Deception: By removing the water, the candy becomes significantly lighter. This can trick your brain into thinking you’re eating less. You are not. You are eating the same amount of sugar and calories, just in a crunchier, more concentrated form. Proceed with this knowledge accordingly. 🙂
Common Mistakes to Avoid (The Crunchy Killers)
Don’t let these simple slip-ups ruin your batch of candy gold.
- Overcrowding the Trays: I’m saying it again. Give your candy room to breathe and expand. If you don’t, you’ll have a fused-together blob.
- Trying to Freeze-Dry the Wrong Things: Pure chocolate, oily candies, or super hard candies (like Jolly Ranchers) don’t work. Chocolate gets oily and messy, and hard candies don’t have enough water to sublimate. Stick to gummies, chews, and taffies.
- Improper Storage: Leaving your finished candy out in a bowl is a recipe for disaster. Within hours, it will start absorbing moisture from the air and will turn into a weird, stale, chewy version of its former self. Airtight storage is not a suggestion; it’s a command.
- Pulling It Out Too Soon: Patience, young grasshopper. If the candy isn’t fully dry, it won’t have that signature crunch and won’t be shelf-stable. Always break a piece in half to check for a cold or chewy center.
Variations & Customizations
Here’s where you can get really creative.
- Spicy & Sweet: Before you freeze-dry them, toss gummy worms or peach rings in a light dusting of Tajín or a chili-lime seasoning. The freeze-drying process locks in the flavor, creating a mind-bending sweet, sour, and spicy crunch.
- Extreme Sour Patch: Love sour candy? Take your Sour Patch Kids and dust them with extra citric acid powder before the cycle. It creates a pucker-inducing flavor explosion that will test the limits of your enamel.
- The Ice Cream Sandwich Experience: This is a must-try. Cut ice cream sandwiches into quarters and freeze-dry them. They become crunchy, portable, no-mess treats that are perfect for hiking, camping, or just impressing your friends.
FAQ: Your Freeze-Drying Questions, Answered
Let’s clear up some of the most common queries.
1. Can you make freeze-dried candy without a freeze dryer?
In a word: No. Dehydrating is not the same thing. A dehydrator uses low heat to remove water, which melts candy. A freeze dryer uses cold and vacuum pressure to sublimate the water, which is what creates the puffy, crunchy texture.
2. What’s the best candy to freeze-dry for a beginner?

Skittles. They are the most reliable, most dramatic, and most forgiving. They are the gateway drug to the world of freeze-dried candy.
3. How long does the process actually take?
It varies depending on the candy’s water content, but most candy cycles run between 4 and 10 hours. This is much shorter than most foods, like fruits or meats, which can take 24+ hours.
4. Why didn’t my candy puff up?
Some candies just don’t have the right structure to puff. If you tried a reliable candy like Skittles and it didn’t work, there could be an issue with your machine’s vacuum pump.
5. How long does freeze-dried candy last?
If stored properly in a sealed Mylar bag with an oxygen absorber, it can last for up to 25 years. In a mason jar, it will last for several weeks to months, depending on the seal and humidity.
6. Is it cheaper to make your own freeze-dried candy?
The initial investment in the machine is high (think thousands of dollars). However, bags of freeze-dried candy sell for a premium. If you plan to make a lot for your family or as a business, it becomes significantly cheaper per ounce to make it yourself.
7. Does it taste different?
Yes! The flavor becomes more concentrated and intense because all the water is gone. A freeze-dried strawberry Skittle tastes, somehow, even more intensely strawberry-ish.
Final Thoughts
You are now armed with the knowledge to embark on a crunchy, sweet, and slightly scientific adventure. You’ve peeked behind the curtain and seen that the magic is really just physics. The world of candy is now your oyster… or, well, your puffy, crunchy Skittle.
Go forth and experiment! Try new candies, mix flavors, and become the candy wizard of your social circle. Just be prepared for everyone to ask, “Whoa, how did you make this?!” You can just smile and say, “It’s magic.”