The Ultimate Garlic and Herb Butter That Makes Everything Better
Let’s have a real talk about butter. It’s great, right? But most of the time, it’s just… there. A plain, pale slab you slather on toast without a second thought. What if I told you that with about 10 minutes of effort, you could transform that boring block into a flavor-packed log of culinary gold? This is your official guide on how to make garlic and herb butter, and trust me, it’s the ultimate kitchen hack you never knew you needed. Say goodbye to bland and hello to your new secret weapon.
Why This Recipe Is a Certified Game-Changer
So, why bother making your own fancy butter? Because this little log of goodness is pure, unadulterated magic. It’s the difference between a good steak and a steakhouse-worthy steak. It turns a simple piece of toasted bread into gourmet garlic bread. It makes roasted vegetables sing and pan-seared chicken weep with joy.
This isn’t just butter; it’s a statement. It says, “I’m a person who appreciates flavor, and yes, I am just this cool.” Plus, it’s ridiculously easy to make, stores beautifully in the fridge or freezer, and impresses guests like you wouldn’t believe. You’ll look like a culinary wizard, and all you did was stir a few things together. It’s the definition of working smarter, not harder.
The Simple, Glorious Ingredients
No weird, hard-to-find stuff here. Just pure, simple flavor. This is what you’ll need to create your masterpiece.
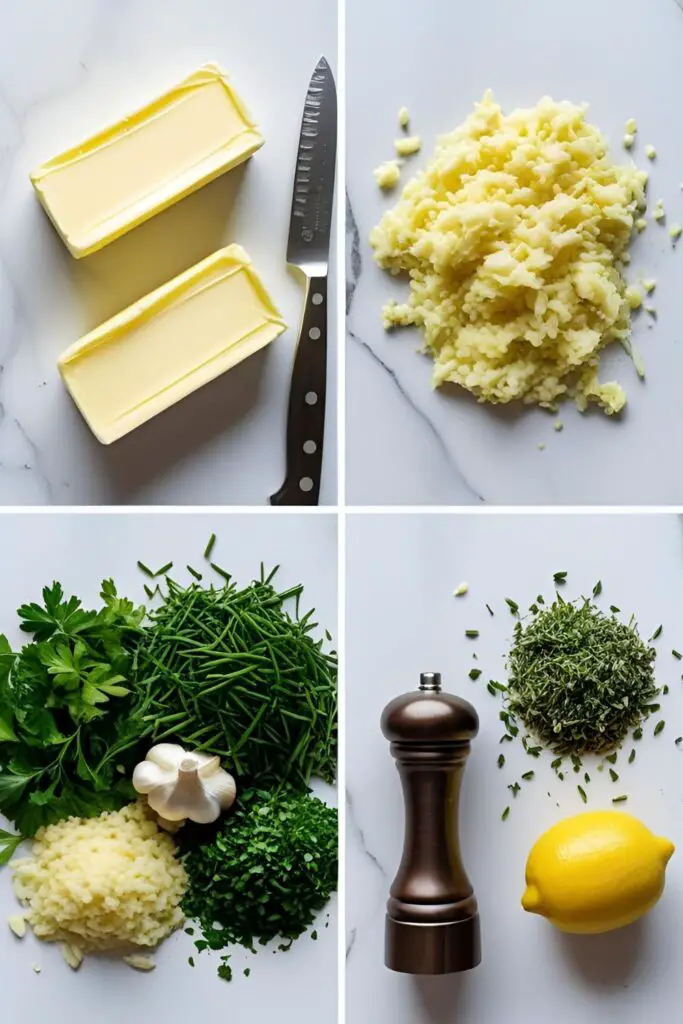
- Unsalted Butter (1 cup / 2 sticks): It’s crucial that it’s softened to room temperature. Don’t even think about using melted butter, or you’ll have a greasy mess. Unsalted lets you control the salt level.
- Fresh Garlic (3-4 cloves): Please, for the love of all that is good, use fresh garlic. Mince it as finely as you possibly can. The pre-minced jarred stuff has a weird tang we don’t want here.
- Fresh Herbs (1/4 cup, finely chopped): A classic mix is parsley, chives, and thyme. But feel free to go wild! Rosemary, basil, or dill would also be amazing.
- Kosher Salt (1/2 teaspoon): Essential for bringing all the flavors together.
- Black Pepper (1/4 teaspoon): Freshly cracked, if you can. It makes a difference.
- Lemon Zest (optional, from 1/2 lemon): A little bit of zest adds a bright, fresh kick that cuts through the richness. Highly recommended.
Tools & Kitchen Gadgets for Butter Domination
You don’t need a professional kitchen, but a few key items will make this process a breeze. Here’s your checklist.
- Mixing Bowl: A medium-sized bowl is all you need to combine your ingredients.
- Silicone Spatula: The perfect tool for mixing and scraping every last bit of delicious butter from the bowl.
- A Sharp Chef’s Knife: For getting that super-fine mince on your garlic and herbs. A sharp knife is a safe knife!
- Sturdy Cutting Board: To protect your countertops and provide a stable surface for chopping.
- Parchment Paper or Plastic Wrap: This is what you’ll use to roll your butter into that classic, professional-looking log.
Step-by-Step Instructions: Your Path to Butter Bliss

Ready? This is so easy you can do it with your eyes half-closed. (But please don’t, there are knives involved).
Step 1: Prep Your Flavor Agents
First, get chopping. Mince your fresh garlic until it’s practically a paste. The smaller the pieces, the better the flavor distribution. Next, finely chop your fresh herbs. If you’re using the optional lemon, zest it now. Set it all aside.
Step 2: The Butter Foundation
Make sure your butter is truly softened. You should be able to press a finger into it easily without it feeling greasy or melted. Plop your two sticks of softened butter into your mixing bowl.
Step 3: Mix It All Together
Add the minced garlic, chopped herbs, salt, pepper, and lemon zest (if using) to the bowl with the butter. Now, using your trusty spatula, get in there and mix. Scrape the sides and bottom of the bowl, ensuring everything is thoroughly combined. You want to see those beautiful green and white specks evenly distributed throughout.
Step 4: The Roll & Chill
Lay down a sheet of parchment paper or plastic wrap on your counter. Scrape the butter mixture out of the bowl and onto the center of the sheet, forming it into a rough log shape. Fold one side of the paper over the butter, pulling it tight to shape it into a uniform cylinder. Roll it up, twist the ends like a candy wrapper to seal it, and pop it in the refrigerator for at least 2 hours to firm up. This allows the flavors to meld together beautifully.
Step 5: Slice and Serve
Once your butter log is firm, you’re ready for glory. Simply unwrap it and slice off coins of deliciousness as needed. Prepare for your taste buds to thank you.
Calories & Nutritional Info

This is butter, so let’s be real—it’s an indulgence. Here’s a general idea for a 1-tablespoon serving.
- Calories per serving (1 tbsp): Approximately 100-110 kcal
- Fat: Around 11-12g (mostly saturated, because, well, butter)
- Sodium: About 60mg if you follow the recipe.
- Flavor Power: The real nutritional benefit comes from the fresh garlic and herbs, which contain antioxidants and vitamins. So, it’s practically health food, right? 😉
Common Mistakes to Avoid (Don’t Be That Person)
We’ve all been there. Here’s how to sidestep the common pitfalls on your journey to compound butter perfection.
- Using Melted Butter: The biggest mistake of all. If you melt the butter, it will never re-solidify with the right texture. You’ll get a separated, greasy mess. Use properly softened, room-temperature butter only.
- Not Mincing Finely Enough: No one wants to bite into a huge chunk of raw garlic. Take the extra minute to mince your garlic and herbs as finely as possible for a smooth, pleasant texture and balanced flavor.
- Using Dried Herbs (Without Adjusting): Fresh herbs are always superior here for their bright flavor. If you must use dried, remember the rule of thumb: use 1/3 the amount of dried herbs as you would fresh. So, for this recipe, about 1.5 to 2 tablespoons total of dried herbs.
- Being Impatient: Don’t skip the chilling step! Chilling the butter log is essential for it to firm up properly for slicing and, more importantly, for the flavors to marry. Good things come to those who wait.
Variations & Customizations
Mastered the classic? Let’s get creative. Compound butter is a blank canvas!
- Spicy Chili Lime Butter: Ditch the parsley and thyme. Instead, mix in 1/4 cup chopped fresh cilantro, the zest of one lime, and 1/2 teaspoon of red pepper flakes. This is absolutely killer on grilled corn, chicken, or fish.
- Sun-Dried Tomato & Basil Butter: Swap the herbs for 1/4 cup of finely chopped sun-dried tomatoes (the kind packed in oil, drained well) and fresh basil. It’s a taste of Tuscany and is incredible melted over pasta or on a crusty baguette.
- Sweet Cinnamon Honey Butter: Who says it has to be savory? For a sweet version, mix your softened butter with 3 tablespoons of honey, 1 teaspoon of ground cinnamon, and a pinch of salt. Perfect for cornbread, pancakes, or warm dinner rolls. TBH, this is dangerously good.
FAQ: Your Burning Butter Questions, Answered
Let’s tackle some of the most common questions about making this liquid gold.
1. Can I use salted butter instead of unsalted?
Yes, you can. If you use salted butter, reduce the added salt to 1/4 teaspoon, or even omit it entirely and salt to taste.
2. How long does garlic herb butter last?
Stored in an airtight container or tightly wrapped, it will last for up to 2 weeks in the refrigerator. For longer storage, you can freeze it for up to 3 months.
3. How do you freeze compound butter?

After you’ve rolled it into a log and it’s firm, you can slice it into individual portions (coins), place them on a baking sheet to flash freeze for 30 minutes, then transfer the frozen coins to a freezer bag. This way, you can grab one or two servings at a time!
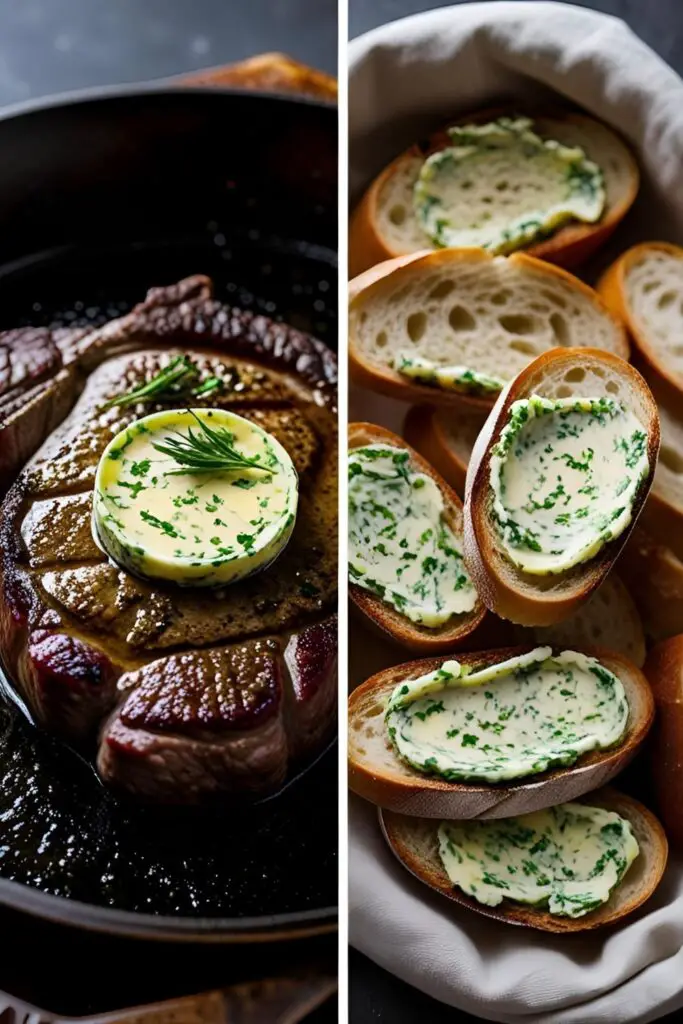
4. What are the best ways to use compound butter?
Oh, let me count the ways! Top a steak, melt it over roasted vegetables, toss it with pasta, smear it on corn on the cob, slip it under the skin of a chicken before roasting, or just spread it on warm bread.
5. Help! I forgot to soften my butter. How can I do it quickly?
Don’t microwave it! The best way is to cut the cold butter into small cubes. They’ll come to room temperature much faster, in about 15-20 minutes. You can also place the wrapped sticks in a bowl of lukewarm (not hot!) water for about 10 minutes.
6. Can I use a food processor to make this?
You sure can! It’s a great shortcut. Just toss all the ingredients into the food processor and pulse until everything is combined. Just be careful not to over-mix, which can make the butter gummy.
7. What’s the best combination of herbs to use?
The classic French fines herbes mix of parsley, chives, tarragon, and chervil is fantastic. A simple rosemary and garlic combo is perfect for steaks. Honestly, whatever fresh herbs you love will probably taste great. Experiment!
Final Thoughts
And there you have it! You are now fully equipped to enter a new, more flavorful phase of your life. Once you start making your own compound butter, you’ll wonder how you ever lived without it. It’s the simplest little touch that makes everything feel a bit more special.
So go on, grab some butter and get mixing. Your toast, your steak, and your dinner guests will thank you for it. Enjoy being the culinary rockstar you were always meant to be.