The Ultimate Guide: How to Make Caramelized Onions That Will Change Your Life
Let’s be honest. You think you know how to cook onions. You chop them, you throw them in a hot pan with some oil, you stir them for five minutes until they’re kinda soft and maybe a little brown in spots, and you call it a day. I’m here to tell you, with all the love in my foodie heart, that you’ve been living a lie. That sad, limp pile isn’t even in the same universe as the deep, jammy, sweet-and-savory perfection that is true caramelized onions. This guide will teach you how to make caramelized onions the right way—the patient way, the life-altering way. Ready to level up your entire cooking game with one simple ingredient? Let’s do this.
Why This Recipe Is the GOAT (Greatest of All Time)
So, why should you dedicate the better part of an hour to… well, onions? Because this isn’t just a recipe; it’s a culinary transformation. We’re talking about turning a sharp, pungent vegetable into a sweet, complex, melt-in-your-mouth flavor bomb.
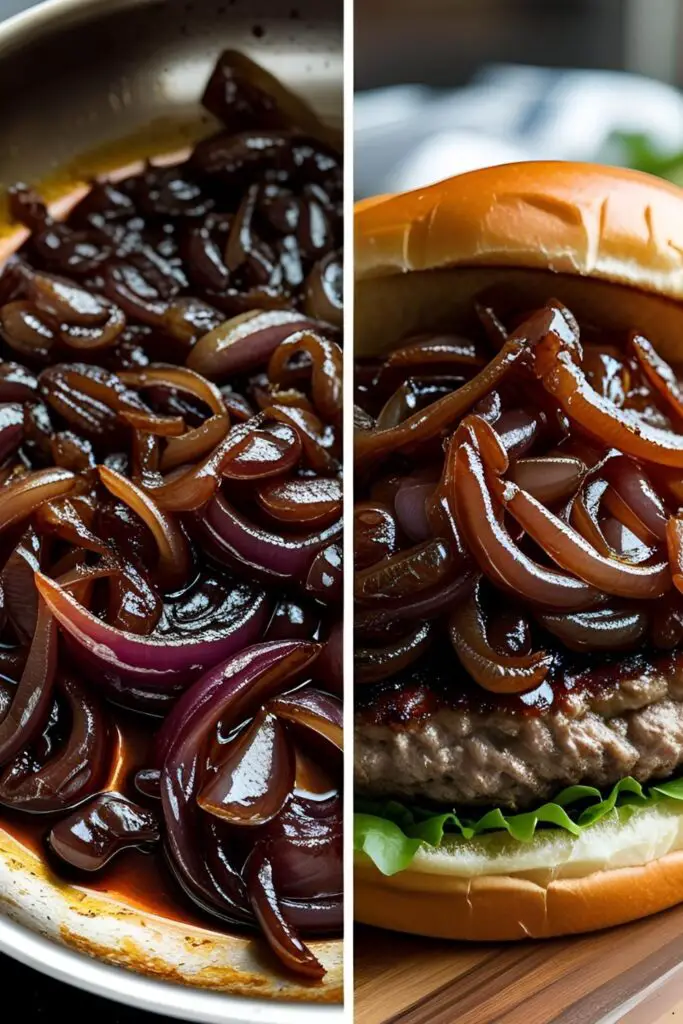
These onions are your secret weapon. They elevate a simple burger to gourmet status. They make a grilled cheese sandwich feel like a five-star meal. They can be stirred into dips, piled onto pizza, or folded into an omelet to make your brunch guests weep with joy. Seriously, you’ll be looking for excuses to put them on everything.
Plus, it’s ridiculously easy. The only real ingredient is patience. Can you handle that? You’ll look like a culinary genius, and all you did was slice some onions and stir them occasionally. It’s the ultimate low-effort, high-reward kitchen hack.
The Ridiculously Simple Ingredients List

You’re going to laugh at how simple this is. It’s barely a recipe, more of a technique. But the results? Chef’s kiss.
- Onions (3 large): Yellow onions are the gold standard here. They have a great balance of sugar and sulfur, making them perfect for caramelizing. Sweet onions (like Vidalia or Walla Walla) work too, but they’ll be even sweeter and caramelize a bit faster. White onions are sharper and less sweet, but still work in a pinch.
- Unsalted Butter (2 tablespoons): This adds richness and helps with that beautiful golden-brown color.
- Olive Oil (1 tablespoon): Mixing oil with butter raises the smoke point, preventing the butter from burning. A beautiful, delicious partnership.
- Salt (1/2 teaspoon): Crucial for drawing out moisture and enhancing flavor. Use kosher or sea salt.
- Water or Broth (a few tablespoons): This is your secret weapon for deglazing the pan and preventing any tragic burning incidents.
Key Substitutions:
- For a Vegan Version: Simply swap the butter for your favorite plant-based butter or use 3 tablespoons of olive oil instead.
- No Olive Oil? Use another neutral oil with a high smoke point, like avocado or grapeseed oil.
Tools & Kitchen Gadgets You’ll Need

Having the right tools makes the process smoother and, frankly, more enjoyable. Here’s what I recommend to achieve onion nirvana.
- A Heavy-Bottomed Pan: A large, wide skillet or sauté pan is non-negotiable. Stainless steel or cast iron is ideal because it conducts heat evenly and helps develop that glorious fond (the tasty brown bits) on the bottom of the pan. A 12-inch pan is perfect for 3 large onions.
- A Sharp Chef’s Knife: A dull knife will bruise the onions and, more importantly, make you cry more. Do yourself a favor and use a sharp knife for clean, even slices.
- A Sturdy Cutting Board: You need a stable surface for all that slicing. A large wooden or plastic cutting board will do the trick.
- A Wooden Spoon or Silicone Spatula: Something that won’t scratch your pan and is perfect for scraping up all those delicious brown bits from the bottom.
Step-by-Step Instructions: The Path to Golden Glory
Deep breaths. We’re going on a journey of patience and flavor. Don’t rush it. The onions will know.
Step 1: Prep Your Onions (and Your Tear Ducts)
First things first, slice your onions. Cut them in half from pole to pole (root to stem), then lay them flat and slice them into thin, uniform half-moons, about 1/8 to 1/4-inch thick. Consistency is key here for even cooking. And yes, you’ll probably cry. Embrace it. It’s a rite of passage.
Step 2: The Initial Sizzle
Place your large skillet over medium heat. Not high heat! We’re coaxing, not blasting. Add the butter and olive oil. Once the butter is melted and foaming a bit, add your mountain of sliced onions. It will look like an insane amount of onions. Don’t panic. They cook down… a lot. Sprinkle the salt over the top and give everything a good stir to coat the onions in fat.
Step 3: The “Sweating” Phase (First 10 Minutes)
For the first 10 minutes, stir the onions every couple of minutes. You’re not looking for color yet. The goal is to soften them and release their moisture. They’ll become translucent and lose a significant amount of volume. This is where the magic begins.
Step 4: The Low-and-Slow Caramelization (The Next 30-50 Minutes)
Now, turn the heat down to medium-low. This is the most crucial part. For the next 30-50 minutes (yes, really), let the onions do their thing. Stir them every 5-7 minutes, scraping the bottom of the pan. You’ll start to see a brown film, the fond, forming on the pan. This is pure flavor! Don’t let it burn.
Step 5: Deglaze, Deglaze, Deglaze!

When you see that beautiful brown fond on the bottom of the pan, add a tablespoon of water or broth. Scrape the bottom of the pan with your wooden spoon to lift all those caramelized bits and incorporate them back into the onions. This adds an incredible depth of flavor and color. Repeat this process whenever the pan looks like it’s getting too dark or dry.
Step 6: Know When They’re Done
How do you know when you’ve reached caramelized nirvana? They should be a deep, rich brown color (like amber or mahogany), incredibly soft, and jammy in texture. They will have shrunk down to about 20% of their original volume and smell intoxicatingly sweet. The whole process takes 45-60 minutes. Don’t let anyone tell you it can be done in 15. They are lying.
Calories & Nutritional Info
Here’s a rough breakdown for this recipe, which yields about 1.5 cups. A serving is about 2 tablespoons.
- Calories per serving (2 tbsp): Approximately 35-45 kcal
- Fat: Around 2g
- Carbohydrates: Roughly 4g
- Sugar: About 3g (this is natural sugar from the onions!)
- Fiber: A decent source of fiber, which is always nice.
- Nutrient Power: Onions are a source of Vitamin C and antioxidants like quercetin. So, you can feel slightly virtuous while piling them on your steak. 🙂
Common Mistakes to Avoid (Or, How Not to Fail)
I’ve made all these mistakes so you don’t have to. You’re welcome.
- Using High Heat: The #1 sin. You will not get caramelized onions; you will get burnt onions. The sugars need time to break down slowly. Keep that heat on medium-low, my friend.
- Crowding the Pan: If you pile too many onions into a small pan, they will steam instead of caramelize. Use a wide pan and give them some breathing room. If you need to make a huge batch, do it in two separate pans.
- Forgetting to Stir (and Scrape!): Ignoring your onions is a recipe for disaster. Those browned bits on the bottom of the pan are flavor gold. If you don’t scrape them up (deglaze!), they will burn and make everything taste bitter.
- Slicing Unevenly: Tiny slivers will burn while thick chunks remain raw. Take a minute to slice them uniformly. Your patience will be rewarded.
Variations & Customizations
Once you’ve mastered the classic, why not get a little wild? Here are a few ideas.
- Balsamic & Thyme: During the last 10 minutes of cooking, add a splash of balsamic vinegar (about 1-2 tablespoons) and a teaspoon of fresh thyme leaves. This adds a tangy, herbaceous kick that’s incredible on crostini or with steak.
- Spicy & Smoky: Want some heat? Add a pinch of red pepper flakes and a 1/4 teaspoon of smoked paprika along with the salt at the beginning. Perfect for spicing up tacos or a boring chicken breast.
- Rich & Boozy: Deglaze the pan with a splash of red wine, sherry, or even bourbon instead of water. This adds an insane depth and complexity. Just let the alcohol cook off for a minute before stirring it in. IMO, this is a must-try for French onion soup.
FAQ: Your Caramelized Onion Questions, Answered
Let’s clear up some common queries from the internet ether.
1. What are the best onions for caramelizing?

Yellow onions are the undisputed champion. They have the perfect sugar content. Sweet onions (like Vidalia) are a close second, but they cook faster and can be very sweet. Red onions work but will result in a darker, slightly less sweet, and more jammy product.
2. Do you have to add sugar to caramelize onions?
Absolutely not! That’s a common misconception. The “caramelization” comes from the natural sugars within the onion breaking down. Adding sugar is a shortcut that, frankly, cheats you out of the complex flavor development.
3. How long does it really take to caramelize onions?
Plan for at least 45 minutes, and up to an hour. Anyone promising you “10-Minute Caramelized Onions” is selling you sautéed onions. They’re not the same. Patience is the secret ingredient.
4. Why are my onions burning instead of caramelizing?
Your heat is too high. Period. Turn it down to medium-low or even low. The browning should be a slow, gradual process happening over a long period. If things get dark too quickly, you’re burning, not caramelizing.
5. Can I make caramelized onions in a slow cooker?
Yes, you can! Slice the onions, toss them in the slow cooker with the butter/oil and salt, and cook on low for 8-10 hours or high for 4-5 hours, stirring occasionally if you can. It’s a great “set it and forget it” method, though you won’t get the same deep fond development as the stovetop method.
6. How do I store caramelized onions?
Let them cool completely, then store them in an airtight container in the refrigerator for up to a week. They get even better after a day or two!
7. Can you freeze caramelized onions?
Heck yes! This is my favorite meal prep hack. Let them cool, then portion them into an ice cube tray. Once frozen, pop the cubes out and store them in a zip-top freezer bag. They’ll last for up to 3 months. Just thaw a cube or two whenever you need a blast of flavor.
Final Thoughts
There you have it. You are now armed with the knowledge to create something truly magical from the humblest of ingredients. You will never look at an onion the same way again. Go forth, caramelize, and be prepared to put this liquid gold on absolutely everything.
Once you make a batch, you’ll swear off store-bought forever. Fair warning: your friends might start inviting themselves over for dinner a lot more often. Don’t say I didn’t warn you. Now go make some magic!