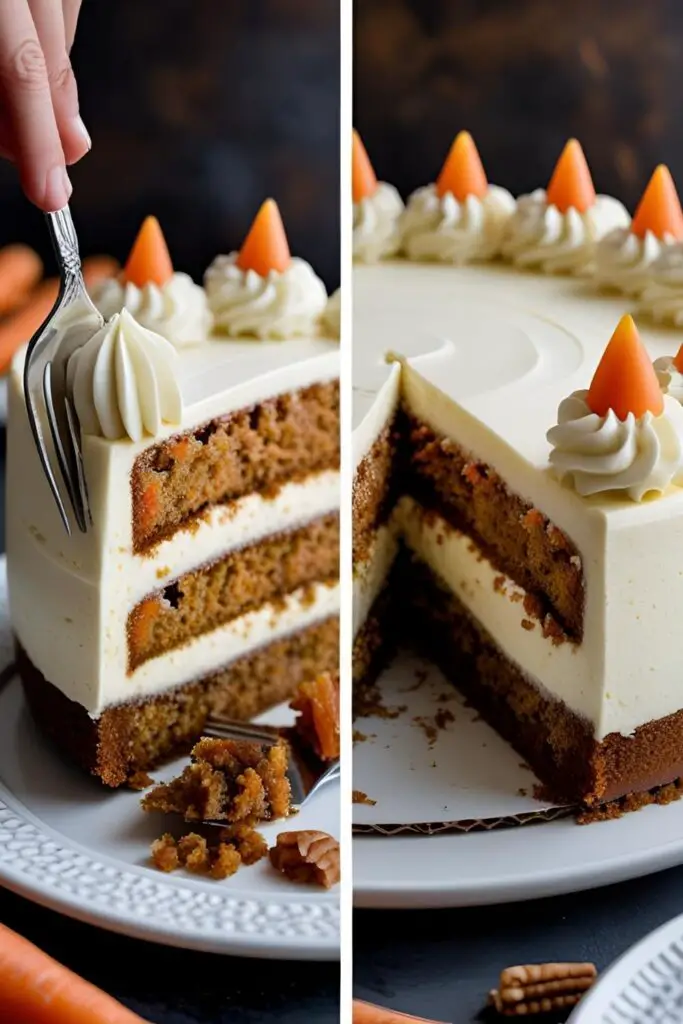
The Ultimate Carrot Cake Cheesecake Recipe
So why, you might ask, should you devote your precious time to creating this masterpiece? Because it is, without exaggeration, the best of both worlds. You get two layers of incredibly moist, perfectly spiced carrot cake that hug a thick, luxurious, creamy cheesecake center. It’s all crowned with a tangy cream cheese frosting that ties everything together in a symphony of flavor.
This isn’t just a cake; it’s an event. It’s the cake you make when you want to blow everyone’s socks off at a holiday gathering or birthday party. It looks like it came from a high-end bakery, but guess what? You made it. You’re the dessert champion now.
Ingredients
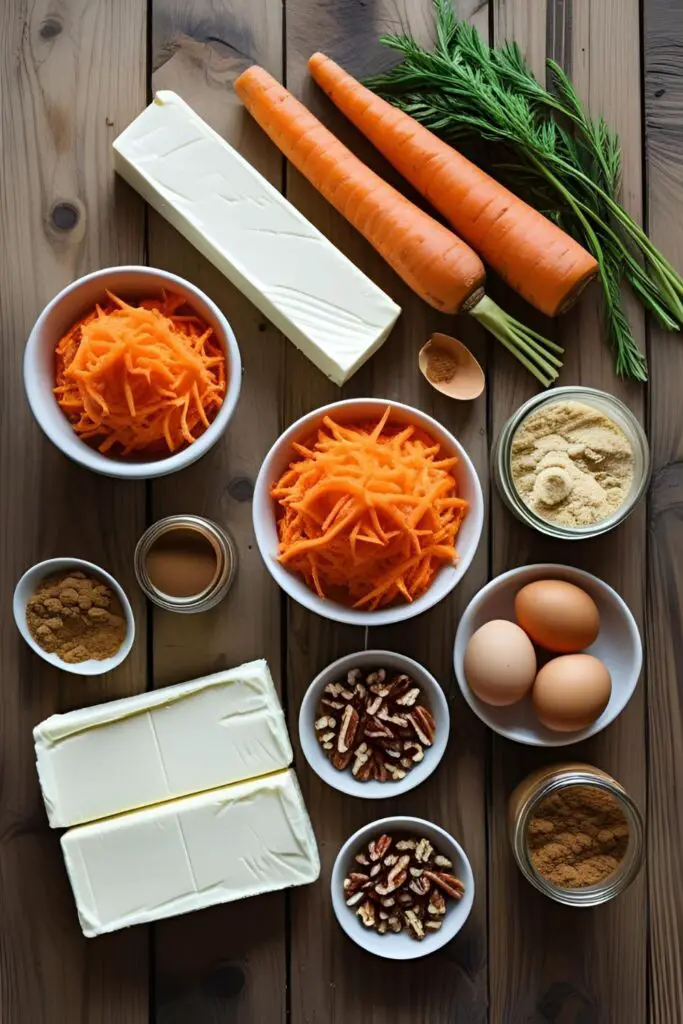
Don’t let the list scare you. We’re breaking it down into three manageable parts. You’ve got this.
For the Carrot Cake Layers:
- 2 cups all-purpose flour
- 2 teaspoons baking soda
- 2 teaspoons ground cinnamon
- 1/2 teaspoon ground ginger
- 1/2 teaspoon ground nutmeg
- 1/2 teaspoon salt
- 1 1/2 cups granulated sugar
- 1 cup vegetable oil (or other neutral oil)
- 4 large eggs, at room temperature
- 3 cups finely grated carrots (about 4-5 medium carrots, and yes, you have to grate them yourself)
- 1 cup chopped pecans or walnuts (optional, but highly recommended)
For the Cheesecake Filling:
- 24 oz (three 8-oz blocks) full-fat cream cheese, softened to room temperature (this is non-negotiable)
- 1 cup granulated sugar
- 3 large eggs, at room temperature
- 1/4 cup full-fat sour cream, at room temperature
- 2 teaspoons vanilla extract

For the Cream Cheese Frosting:
- 8 oz (one 8-oz block) full-fat cream cheese, softened
- 1/2 cup (1 stick) unsalted butter, softened
- 4 cups powdered sugar
- 2 teaspoons vanilla extract
Tools & Kitchen Gadgets Used:
To assemble this titan of treats, you’ll need the right gear.
- 9-inch Springform Pan (the kind with removable sides, absolutely essential)
- Stand Mixer or a reliable Hand Mixer
- Multiple Mixing Bowls (at least 3 of various sizes)
- Box Grater or a food processor with a grating attachment
- Rubber Spatula
- Whisk
- Measuring Cups and Spoons
- Parchment Paper
- Aluminum Foil (for the water bath)
- Roasting Pan (large enough to hold the springform pan)
Step-by-Step Instructions
Deep breath. Let’s walk through this one step at a time. It’s easier than it looks, promise.
- Prep for Glory: Preheat your oven to 350°F (175°C). Grease your 9-inch springform pan and line the bottom with a circle of parchment paper. Now, take a large sheet of heavy-duty aluminum foil and wrap the outside of the pan tightly. This is to waterproof it for the water bath later.
- Make the Carrot Cake Batter: In a medium bowl, whisk together the flour, baking soda, spices, and salt. In a separate, large bowl, beat the sugar, oil, and eggs until well combined. Gradually add the dry ingredients to the wet ingredients, mixing on low speed until just incorporated. Fold in the grated carrots and chopped nuts with a spatula.
- The First Layer: Pour half of the carrot cake batter into the prepared springform pan and spread it evenly. Bake for 20-25 minutes, until a toothpick inserted into the center comes out clean. Let this layer cool for about 15 minutes while you make the cheesecake filling. Keep the oven on.
- Whip Up the Cheesecake Filling: In a large bowl (make sure it’s clean!), beat the softened cream cheese on medium speed until it’s completely smooth and has no lumps. Scrape down the sides of the bowl. Gradually add the sugar and beat until smooth. Add the eggs one at a time, mixing on low speed just until the yolk disappears. Finally, mix in the sour cream and vanilla. Do not overmix this filling! Overmixing adds too much air, which causes cracks.
- Assemble and Bake: Pour the cheesecake filling evenly over the baked carrot cake layer in the pan. Now, carefully spoon the remaining half of the carrot cake batter over the cheesecake filling. Don’t worry about covering it perfectly; it will spread as it bakes.
- The Water Bath Is Your Friend: Place the foil-wrapped springform pan into a large roasting pan. Carefully pour hot water into the roasting pan until it comes about halfway up the sides of the springform pan. This water bath creates a steamy environment, which is the secret to a creamy, crack-free cheesecake.
- Bake Low and Slow: Carefully place the whole setup into the oven. Bake for 60-75 minutes. The cheesecake is done when the edges are set, but the center still has a slight jiggle to it (like Jell-O).
- The Crucial Cool Down: Turn off the oven, crack the door open, and let the cheesecake cool in the oven for 1 hour. This gradual temperature change also prevents cracks. After an hour, remove it from the water bath, take off the foil, and let it cool completely on a wire rack. Then, cover it and refrigerate for at least 6 hours, but overnight is best.
- Frost It Like You Mean It: The next day, make the frosting. Beat the softened cream cheese and butter until smooth. Gradually add the powdered sugar and beat until fluffy. Mix in the vanilla. Once the cheesecake is thoroughly chilled, run a knife around the edge and release the springform collar. Slather that glorious frosting all over the top and sides.
Calories & Nutritional Info (Estimated)
Let’s be real, you’re not eating this for your health. But if you must know… (per very generous slice):
- Calories: In the ballpark of 700-850 kcal. (Worth it.)
- Fat: A considerable amount.
- Sugar: Yes. Lots.
- Joy: 1000% of your daily recommended value.
- Note: This is a celebration cake. Celebrate and enjoy every single bite.
Common Mistakes to Avoid
Avoid these dessert disasters to ensure your cake is the talk of the town for all the right reasons.
- Using Cold Ingredients: If your cream cheese, eggs, and sour cream are not at room temperature, your cheesecake filling will be lumpy. No one wants lumpy cheesecake. Let them sit out on the counter for at least an hour.
- Overmixing the Cheesecake Filling: I’m saying it again because it’s that important. Beating too much air into the batter is the #1 cause of cracks. Mix on low speed and stop as soon as everything is combined.
- Skipping the Water Bath: I know it seems like a fussy extra step, but the water bath is your insurance policy against a dry, cracked cheesecake. Just do it.
- Using Pre-Shredded Carrots: Those bagged, pre-shredded carrots are dry, thick, and sad. They will not bake up nicely. Take the 5 minutes to grate your own carrots—it makes a world of difference.
Variations & Customizations
Once you’ve mastered the original, feel free to go wild.
- Tropical Carrot Cake Cheesecake: Add 1/2 cup of well-drained crushed pineapple and 1/2 cup of toasted shredded coconut to the carrot cake batter. You’re basically on vacation now.
- Add Raisins: For the carrot cake purists, feel free to fold in about 1/2 cup of raisins (soak them in hot water for 10 minutes first to make them plump) along with the carrots and nuts.
- Brown Butter Cream Cheese Frosting: Before making the frosting, brown the butter in a saucepan (cook until it smells nutty and has brown specks), then let it cool and solidify. Use this brown butter in your frosting for an insane depth of flavor.
FAQ Section

You have questions, I have answers. Let’s tackle them.
Q1: Is this the same as the Cheesecake Factory carrot cake cheesecake? It’s a very close cousin! This is a “copycat” or “inspired by” recipe designed to give you that same amazing layered experience right from your own kitchen.
Q2: Do I really need a water bath? Yes, I highly recommend it. It provides moist, even heat, which is the key to a creamy texture and preventing those dreaded cracks on the surface.
Q3: Why did my cheesecake crack? The most common culprits are overmixing the batter, not using room temperature ingredients, or cooling the cake too quickly. Follow the cool-down steps religiously!
Q4: How do I store this cake? It must be stored in the refrigerator due to the cream cheese. Keep it in an airtight container (or tented with foil) for up to 5 days.
Q5: Can I freeze carrot cake cheesecake? Yes! It freezes beautifully. Freeze individual slices or the whole cake (unfrosted is best for freezing) by wrapping it tightly in plastic wrap and then foil. It will last for up to 3 months. Thaw in the fridge overnight.

Q6: Can I make this in a regular cake pan instead of a springform pan? I would strongly advise against it. A springform pan’s removable sides are essential for getting the tall, delicate cake out without destroying it.
Q7: How do I know for sure when the cheesecake is done baking? The edges should look set and slightly puffed, but the very center (about a 2-inch circle) should still have a slight wobble when you gently nudge the pan. It will continue to set as it cools.
Final Thoughts
Congratulations, you culinary daredevil. You’ve successfully combined two of the world’s most perfect desserts into one towering monument of deliciousness. You’ve stared indecision in the face and said, “Not today.” Now go forth, slice up your creation, and accept the thunderous applause you so richly deserve.