How to Make a Wedding Cake (A Brave Beginner’s Step-by-Step Guide)
So. You’ve decided to make your own wedding cake. My first question is: are you okay? My second question is: congratulations, you glorious, brave, possibly unhinged baker. Most people see a multi-tiered confection of buttercream and dreams and wisely decide to write a very large check to a professional. You see it and say, “Hold my beer. I can do that.”
And you know what? You can. But let’s be crystal clear: this is not just a recipe; it’s a mission. It’s a project management challenge. It’s a test of your will, your patience, and the structural integrity of your refrigerator shelving. Today, we’re not just learning how to make wedding cake; we’re creating a detailed project plan for a work of edible engineering. Let’s get started, you magnificent lunatic.
Why This Project Is the Ultimate Act of Awesome
Why on God’s green earth would you take on the Everest of home baking for one of the most important days of your life? The reasons are as layered and complex as the cake itself.
First and foremost, it is the ultimate act of love. Making a wedding cake for yourself, a friend, or a family member is one of the most deeply personal and meaningful gifts you can possibly give. Every layer, every crumb coat, every piped shell border is infused with your care and affection. It’s a true labor of love.
Second, you have complete and utter creative control. You choose the flavors. You design the look. You decide if you want three tiers of classic vanilla or a quirky tower of spice cake with salted caramel. You are the architect of your own confectionary destiny.
Finally, the bragging rights are eternal. For the rest of your life, you will be known as “the person who made their own wedding cake.” It is a legendary, awe-inspiring move. People will whisper your name with a mixture of reverence and fear. It’s a title you will carry with pride.
The “Ingredients” (aka The Building Materials)

This isn’t just a shopping list; it’s a bill of materials for a major construction project. This recipe is for a sturdy, reliable vanilla cake that can handle being stacked, and a stable buttercream that won’t melt under pressure.
For the Sturdy Vanilla Cake Layers (This makes one 8-inch tier; scale up or down as needed):
- Cake Flour: 3 cups, sifted.
- Granulated Sugar: 2 cups.
- Baking Powder: 4 teaspoons.
- Salt: 1 teaspoon.
- Unsalted Butter: 1 cup (2 sticks), softened to room temperature.
- Whole Milk: 1 cup, at room temperature.
- Vegetable Oil: ½ cup.
- Large Eggs: 4, at room temperature.
- Vanilla Extract: 1 tablespoon.
For the Stable Swiss Meringue Buttercream (Enough for a 3-tier cake):
- Large Egg Whites: 10 of them.
- Granulated Sugar: 2 ½ cups.
- Unsalted Butter: 2 ½ cups (5 sticks!), softened and cubed.
- Vanilla Extract: 1 tablespoon.
- Salt: ½ teaspoon.
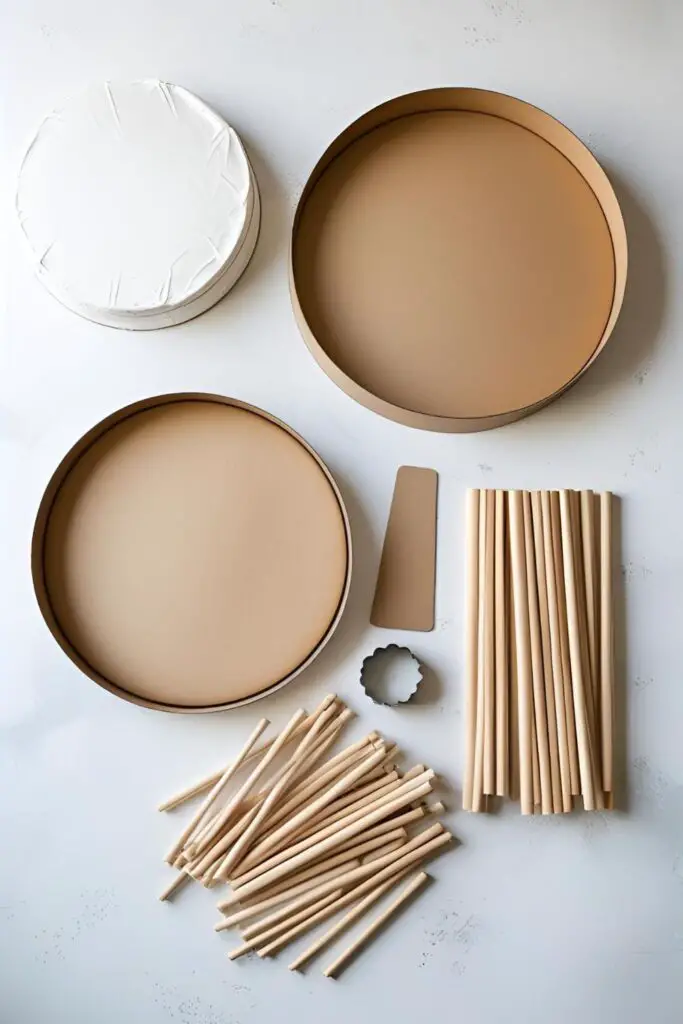
For the All-Important Structure:
- Cake Dowels: Wooden or thick plastic dowel rods.
- Cake Drums and Boards: One thick cake drum for the base (2 inches wider than your bottom tier) and thin cardboard cake rounds for each of the upper tiers (the exact same size as the cake).
The Construction Equipment (Your Toolkit)
You are now a general contractor. You need the right tools for the job.
- A Heavy-Duty Stand Mixer: This is non-negotiable. You will be making large batches of batter and a meringue buttercream that needs to be whipped for a long time.
- High-Quality, Straight-Sided Cake Pans: You’ll need sets of 6-inch, 8-inch, and 10-inch pans for a classic three-tier cake.
- A Cake Turntable: The single most important tool for getting a smooth, professional finish.
- An Arsenal of Spatulas: A large and small offset spatula and a tall, metal bench scraper.
- A Cake Leveler or a Long Serrated Knife: For creating perfectly flat cake layers.
- Dowel Cutters or a Small Saw: For cleanly and precisely cutting your support dowels.
- A Bubble Level: Yes, the kind from the hardware store. To ensure your tiers are perfectly level. It’s not extra; it’s essential.
- Cake Boxes: For safe and sanitary transportation.
The Project Timeline: Your Step-by-Step Guide to Not Having a Meltdown
Forget a simple recipe. This is a multi-day operation. Read this timeline, respect it, and live by it.
ONE WEEK BEFORE THE WEDDING:
- Finalize your cake design. Be realistic!
- Go shopping. Buy all your non-perishable ingredients and your structural components (dowels, boards, boxes).
- Clear out your freezer and refrigerator. You’re going to need a lot of space.
3-4 DAYS BEFORE THE WEDDING: BAKE DAYS
- This is when you bake all of your cake layers. Don’t try to do it all in one day unless you enjoy chaos.
- Follow the cake recipe, scaling it as needed for each of your tier sizes.
- Let the cakes cool completely in their pans, then turn them out onto a wire rack.
- Once completely cool, level each cake layer by slicing off the domed top.
- Wrap each individual layer tightly in two layers of plastic wrap and one layer of aluminum foil. Place them on a flat surface in your freezer. Freezing the cakes makes them incredibly moist and much, much easier to handle and frost.
2 DAYS BEFORE THE WEDDING: BUTTERCREAM DAY
- This is the day to make your big batch of Swiss Meringue Buttercream.
- Combine the egg whites and sugar in the bowl of your stand mixer. Place it over a saucepan of simmering water (a double boiler) and whisk constantly until the sugar has dissolved and the mixture is hot to the touch (160°F on a thermometer).
- Transfer the bowl to your stand mixer and whip with the whisk attachment on high speed until you have a stiff, glossy meringue and the outside of the bowl is completely cool to the touch.
- Switch to the paddle attachment. With the mixer on low speed, add your softened butter, one cube at a time. The mixture might look curdled and terrible. Do not panic! This is normal. Just keep mixing, and it will magically come together into a silky-smooth buttercream.
- Mix in the vanilla and salt. Store the buttercream in an airtight container in the refrigerator.

1 DAY BEFORE THE WEDDING: ASSEMBLY DAY
- Prep: Take your buttercream out of the fridge and let it come to room temperature. You will need to re-whip it in your stand mixer for a few minutes to get it back to a smooth, fluffy consistency. Take your frozen cake layers out of the freezer.
- Assemble Each Tier SEPARATELY:
- Place your bottom tier cake board (e.g., the 10-inch drum) on your turntable.
- Unwrap your 10-inch cake layers. Fill and stack them, applying a thin layer of buttercream between each layer.
- Apply a thin crumb coat of buttercream to the entire tier and chill for 30 minutes.
- Apply the final, smooth coat of buttercream.
- REPEAT THIS ENTIRE PROCESS for your middle tier (on its own cardboard round) and your top tier (on its own cardboard round). You should now have three beautiful, perfectly frosted, individual cakes. Keep them refrigerated.
WEDDING DAY: FINAL ASSEMBLY & TRANSPORT
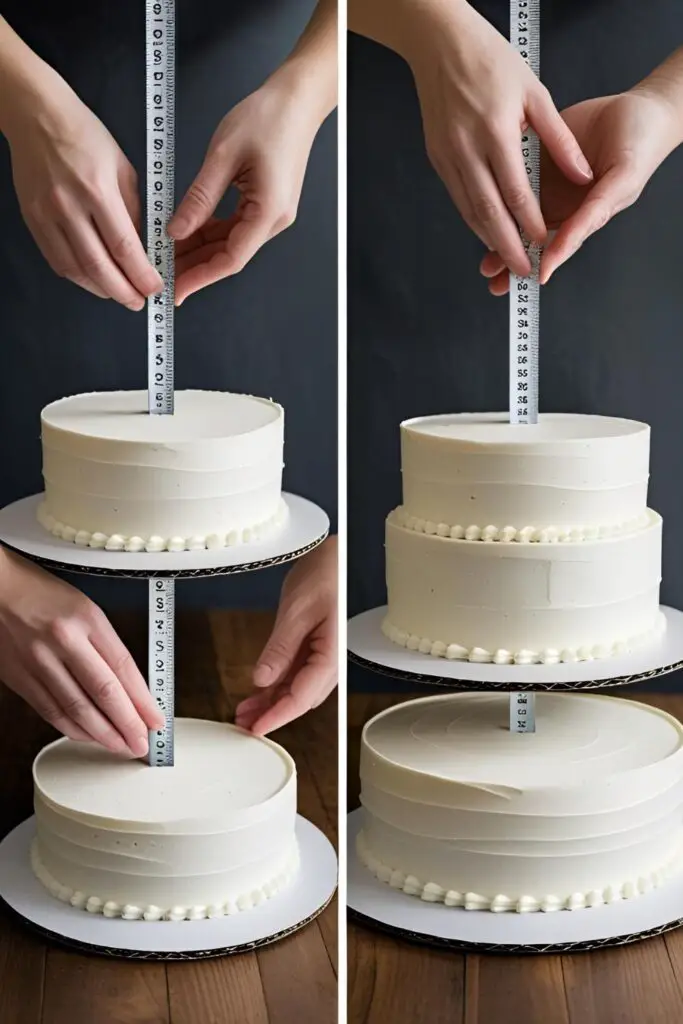
- Dowel the Tiers:
- For your bottom tier (the 10-inch cake), carefully insert one dowel straight down into the center. Mark it right at the level of the frosting, pull it out, and cut it. Cut 6-8 more dowels to this exact same height. Insert them into the bottom tier in a wide circle.
- Repeat this process for your middle tier, using fewer dowels (about 5-6).
- The Final Stack (Preferably On-Site!):
- Carefully place your doweled middle tier on top of your doweled bottom tier.
- Carefully place your top tier on top of the doweled middle tier.
- The Central Dowel: For security, you can drive one long, sharpened dowel down through the center of the entire cake, from top to bottom.
- Decorate: Add your final touches, like fresh flowers or a cake topper.
The Engineering Principles (The “Nutrition”)
This isn’t about calories; it’s about physics.
- Structure is Everything: The dowels and cake boards are the hidden skeleton of your cake. They transfer the weight of the upper tiers down to the table, not onto the soft cake below.
- Level is the Law: If your cake layers are not perfectly flat, your entire structure will be tilted and unstable from the very beginning.
- Cold is Your Co-pilot: Chilling and freezing your cake layers makes them firm, dense, and a thousand times easier to handle, level, and frost without them breaking apart.
Common Wedding Cake Catastrophes to Avoid
Don’t let your masterpiece become a viral “cake fail” video. Avoid these mistakes.
- Choosing a Flimsy, Delicate Cake Recipe. A light, airy angel food cake is lovely, but it will be crushed into a sad, dense pancake under the weight of another tier. You need a sturdy cake recipe with butter or oil, like the one provided, that can handle the weight.
- Grossly Underestimating the Timeline. Thinking you can just whip this up the day before the wedding is a one-way ticket to a full-blown, stress-induced meltdown. This is a multi-day project. You must create a schedule and stick to it.
- The “Freestyle” Doweling Approach. The dowels are not decorative; they are the load-bearing columns of your cake skyscraper. They must be measured and cut to the exact same height, and they must be placed strategically to support the tier above.
- The Terrifying Car Ride. Unless you have a refrigerated van and nerves of steel, never transport a fully stacked, three-tier cake. The safest method by far is to transport each tier in its own separate, chilled box and do the final stack on-site at the venue.
Variations & Customizations (Simple, Elegant Designs for Beginners)
You’re already making your own wedding cake; you don’t need to be a fondant artist too.
- The Rustic “Naked” or “Semi-Naked” Cake: This is a very popular and forgiving style for beginners. You apply a very thin, almost see-through layer of frosting, which allows the cake layers to peek through. It’s rustic, beautiful, and doesn’t require a perfectly smooth finish.
- The Simple Ribbon & Fresh Flower Design: A classic and elegant look. Frost your cake as smoothly as you can, and then wrap a beautiful satin or grosgrain ribbon around the base of each tier. Top with a small, artful arrangement of a few non-toxic, food-safe fresh flowers.
- The Textured Buttercream Finish: This is much easier than a perfectly smooth finish. After you’ve applied your final coat of buttercream, use the back of a spoon or your small offset spatula to create beautiful, rustic swirls and swoops all over the cake.
Your Burning Wedding Cake Questions, Answered
Let’s tackle some of the most common questions from brave bakers like yourself.
How do I know how much cake I need to make for my number of guests?

There are many helpful charts online! Search for a “wedding cake serving chart.” It will give you an estimate of how many servings you can get from different sized tiers. Always make a little more than you think you’ll need.
What is the best, most stable frosting for a wedding cake?
A Swiss Meringue Buttercream (like the one in this recipe) or an Italian Meringue Buttercream are fantastic choices. They are very stable, not overly sweet, and hold up well. A crusting American buttercream can also work, but can sometimes be too sweet for some.
How do you support the tiers of a wedding cake?
With a system of cardboard cake rounds and internal dowel rods. The board supports the cake, and the dowels support the board.
Seriously, how do I transport this thing?
In separate, chilled boxes. Place each fully frosted and chilled tier in its own box. Place the boxes on a flat, level surface in your car (like the floor of the trunk), preferably on a non-slip mat. Drive like you’re transporting a live organ for transplant.
Can I make a wedding cake with a box mix?
You can, but you should “doctor” it to make it sturdier. There are many great recipes online for “doctored cake mixes” that add ingredients like an extra egg, sour cream, and butter to make the cake denser and more stable.
How far in advance can I really make the cake?
You can bake the layers up to a month in advance if you wrap and freeze them properly. The buttercream can be made up to a week in advance and refrigerated. The cake should be fully assembled and frosted no more than 1-2 days before the wedding.
How do I get my buttercream frosting perfectly white?
To get a pure white buttercream, use all butter (not one that is yellow from a specific brand of butter), a clear vanilla extract instead of a brown one, and you can add a minuscule, pin-prick amount of violet gel food coloring to the finished buttercream to counteract any yellow tones.
Final Thoughts
You did it. You took on the Everest of home baking, and you planted your flag at the summit. You faced down dowel rods and bubble levels and endless bowls of buttercream. This cake is more than just a dessert; it’s a testament to your love, your patience, and your sheer, unadulterated audacity.
So go on, get married. And for goodness sake, after all that work, make sure you get the first and biggest slice. You’ve more than earned it.