How to Make a Cake From Scratch (The Easiest One-Bowl Recipe!)
Let’s be honest, the phrase “baking from scratch” can strike fear into the hearts of even the most capable adults. It conjures images of complicated, multi-page recipes, a kitchen dusted in a fine layer of flour, a mountain of dirty dishes, and the very real possibility of a sad, flat, brick-like outcome. The box mix aisle starts to look pretty tempting, doesn’t it?
But what if I told you that you could make a rich, moist, incredibly delicious chocolate cake from scratch in just one bowl? What if I told you that the primary tool you needed was a simple whisk? Today, you’re going to learn how to make a cake, and it’s going to be so easy, so foolproof, that it almost feels like cheating. This is your official gateway into the wonderful world of baking.
Why This Recipe Is Your New Best Friend
So, why is this particular cake the one that will turn you into a confident, from-scratch baker for life? The reasons are simple and glorious.
First, it is genuinely, truly foolproof. This is what’s known as a “dump and stir” or one-bowl cake. There’s no complex creaming of butter and sugar. There’s no carefully alternating between wet and dry ingredients. You basically put everything in a bowl and mix. It’s a recipe that is specifically designed for success.
Second, the cleanup is an absolute dream. Did I mention it’s a ONE-BOWL recipe? You will spend approximately two minutes washing up. One bowl, one whisk, one spatula. That’s it. You’ll spend more time eating the cake than you will cleaning up after it, which is the correct life ratio, IMO.

Finally, the result is an insanely moist and chocolatey cake. The use of oil instead of butter guarantees a tender crumb that stays incredibly moist for days. And we have a little secret weapon (hot coffee!) that deepens the chocolate flavor into something truly spectacular. People will think you’re a baking prodigy.
The A-List Ingredients
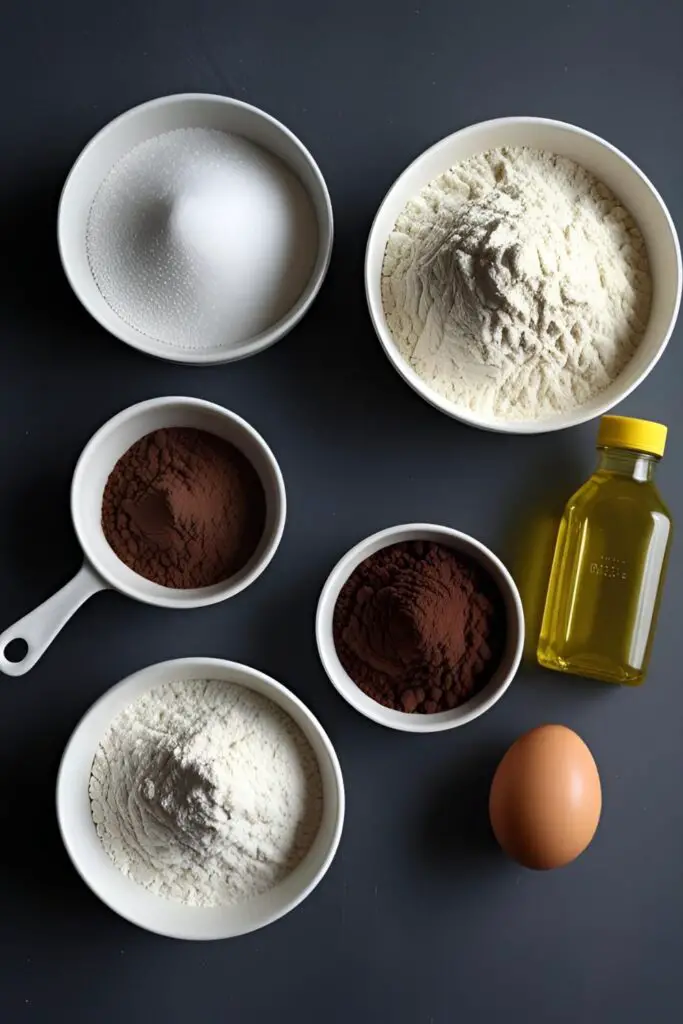
This recipe uses simple, straightforward pantry staples. No need for a special shopping trip!
- All-Purpose Flour: 1 ½ cups.
- Granulated Sugar: 1 cup.
- Unsweetened Cocoa Powder: ½ cup. Make sure it’s the unsweetened kind, not hot cocoa mix!
- Baking Soda & Baking Powder: 1 ½ teaspoons of baking soda and ¾ teaspoon of baking powder.
- Salt: ¾ teaspoon.
- Large Egg: 1, at room temperature.
- Buttermilk: ¾ cup, at room temperature. (See note below for a super easy substitute!)
- Vegetable Oil (or other neutral oil): ½ cup.
- Vanilla Extract: 2 teaspoons.
- Hot Coffee or Hot Water: ¾ cup. This is a crucial ingredient!
Don’t have buttermilk? No problem! Make your own in two minutes. Pour 1 tablespoon of white vinegar or fresh lemon juice into a liquid measuring cup. Add enough regular milk to reach the ¾ cup line. Give it a quick stir and let it sit for 5-10 minutes. It will curdle slightly and be ready to use!
The Baker’s (Minimalist) Toolkit
You’ll be delighted by how few tools you need to create this masterpiece.
- A Large Mixing Bowl: The undisputed star of our one-bowl show.
- A Whisk: For all your mixing needs.
- Measuring Cups and Spoons: Baking is a science, so let’s be precise.
- An 8-inch or 9-inch Cake Pan: A round or square pan works perfectly.
- A Rubber Spatula: For scraping the bowl to make sure you get every last drop of that precious batter.
- Parchment Paper: Your best friend for ensuring the cake doesn’t stick.
- A Wire Cooling Rack: For letting your beautiful cake cool properly.
Step-by-Step: The Path to One-Bowl Glory
This is so easy, you’ll have it memorized after making it once. Let’s do this.
Step 1: Get Your Prep On Preheat your oven to 350°F (175°C). Grease your cake pan, line the bottom with a circle of parchment paper, and then grease the parchment paper. This might seem like overkill, but it’s a 30-second insurance policy against a stuck cake.

Step 2: The Dry Ingredient Dump In your large mixing bowl, add the flour, sugar, cocoa powder, baking soda, baking powder, and salt. Use your whisk to mix them all together for about 30 seconds. This is an important step as it evenly distributes the leavening agents and ensures you don’t get a salty bite.
Step 3: The Wet Ingredient Plunge To the same bowl with the dry ingredients, add the egg, buttermilk, oil, and vanilla extract. Using your whisk, mix everything together until it is just combined. The batter will be thick. Do not over-mix! A few small lumps are perfectly fine.
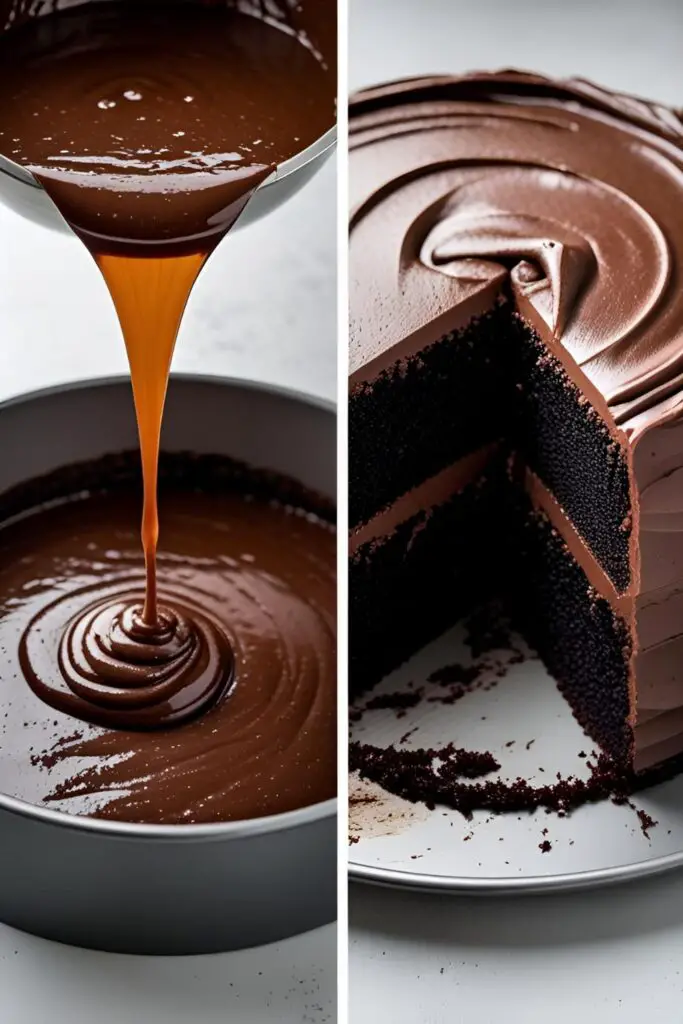
Step 4: The Secret Weapon Now, for the magic trick. Very slowly, pour the hot coffee or hot water into the batter while whisking gently. The batter will transform from a thick paste into a very thin, liquidy batter. This is correct. The hot liquid “blooms” the cocoa powder, which releases its deep, rich flavor, and it’s a key to the cake’s incredible moistness.
Step 5: Bake to Perfection Pour the thin batter into your prepared cake pan. Bake for 30 to 40 minutes. You’ll know it’s done when a wooden skewer or toothpick inserted into the center comes out clean or with a few moist crumbs attached.
Step 6: The Cool Down Let the cake cool in the pan on a wire rack for about 20 minutes. Then, carefully run a knife around the edges and invert the cake onto the rack to cool completely before you even think about frosting it.
Calories & Nutritional Info (The Delicious Details)
This is for the unfrosted cake, assuming you cut it into 12 reasonably sized slices.
- Estimated Calories: Around 250-290 kcal per slice.
- A Moist Masterpiece: The oil and buttermilk make this cake incredibly tender and it stays that way for days.
- Chocolate Fix: It’s a fantastic source of happiness, which is a very important nutrient.
Common Cake-Making Mistakes to Avoid

Even with a foolproof recipe, there are a few ways to go astray. Let’s keep you on the path to success.
- The Over-Mixing Overlord. I know I keep saying it, but it’s the #1 mistake new bakers make. Even in a simple one-bowl cake, over-mixing the flour develops gluten, which will make your cake tough and rubbery instead of tender and moist. Mix until the ingredients are just combined, and then put the whisk down.
- The Lumpy Cocoa Catastrophe. If your cocoa powder is old and has clumps, you must sift it with the other dry ingredients. No one wants to bite into their slice of cake and get a surprise mouthful of bitter, dry cocoa powder.
- Forgetting to Prep the Pan. You went to all the trouble (all five minutes of it) to make this beautiful cake from scratch. Don’t let your victory be ruined by half of it sticking to the bottom of the pan. Grease and flour your pan, or better yet, use parchment paper.
- Skipping the Hot Liquid. It might seem weird to pour hot coffee into your cake batter, but this step is crucial. The hot liquid blooms the cocoa for a richer flavor and helps create that signature moist crumb. Using cold liquid will result in a less flavorful, less tender cake.
Variations & Customizations (The Fun Part!)
This simple chocolate cake is a perfect canvas for your creative genius.
- The “Mocha-Licious” Upgrade: If you’re a coffee lover, this is a must. Use the hot coffee (instead of water) and add 1-2 teaspoons of instant espresso powder to the dry ingredients. This will supercharge the chocolate flavor into another dimension.
- The Mint Chocolate Marvel: Swap the vanilla extract for 1 teaspoon of peppermint extract. It’s a classic flavor combination that tastes like a thin mint in cake form. Perfect for the holidays!
- The Crowd-Pleasing Sheet Cake: This recipe doubles perfectly. Just double all the ingredients and bake it in a greased and floured 9×13 inch pan for about 35-45 minutes. It’s the perfect, easy cake for a party.
Your First-Time Baker Questions, Answered
Let’s tackle some of the most common questions you might have.
The batter seems really thin and watery. Is that right?
Yes, absolutely! This is a hallmark of this type of oil-based chocolate cake. The thin batter is what creates the incredibly moist and tender final product. Trust the process!
Can I use melted butter instead of oil?
You can, but the cake will be slightly less moist. Oil is a liquid at room temperature, which helps the cake stay moister for longer. Melted butter will solidify as the cake cools, resulting in a slightly denser crumb.
I don’t have any buttermilk. What can I use?
The easiest substitute is the milk and vinegar/lemon juice trick mentioned in the ingredients list. You can also use plain yogurt or sour cream, thinned with a little milk to get the right consistency.
Why use hot coffee? Will my cake taste like coffee?
Coffee has a magical ability to enhance and deepen the flavor of chocolate without making the cake taste overtly like coffee. It just makes it taste more intensely chocolatey. If you’re sensitive to coffee flavor or are serving it to kids, hot water works perfectly well too.
Can I make this recipe as cupcakes?
Yes! This recipe will make about 12-15 standard-sized cupcakes. Line a muffin tin with paper liners and fill them about two-thirds full. Bake at 350°F for about 18-22 minutes, or until a toothpick comes out clean.
What is the best frosting to pair with this cake?
A classic American chocolate buttercream is a fantastic choice for a rich, chocolate-on-chocolate experience. A simple vanilla buttercream or even a tangy cream cheese frosting would also be delicious.
How do I know when the cake is really done?
The toothpick test is your best friend. Insert a wooden skewer or toothpick into the very center of the cake. If it comes out clean, or with a few moist crumbs attached, it’s done. If it comes out with wet, gooey batter, it needs a few more minutes.
Final Thoughts
See? You did it. You took a pile of simple pantry staples and, in one single bowl, you created a magnificent, moist, deeply chocolatey cake from scratch. You are officially a baker. The box mix aisle no longer holds any power over you. You have conquered the kitchen.
So go on, let that masterpiece cool, slather it with your favorite frosting, and cut yourself a giant slice. You’ve earned it. Welcome to the wonderful, and surprisingly easy, world of from-scratch baking.