How to Make Chips at Home (Crispier Than Anything in a Bag!)
Let’s talk about the sound. That deceptive crinkle of a brand-new chip bag, bursting with promises of salty, crispy, crunchy delight. You tear it open with unbridled optimism, only to be greeted by… air. A whole lot of sad, empty air, a few intact chips huddled at the top for safety, and a graveyard of broken potato shards at the bottom. It’s the ultimate snack betrayal.
What if you could bypass the disappointment? What if you could have a heaping bowl of still-warm, shatteringly crisp, perfectly seasoned chips that you conjured from an actual potato? Today, my friend, you are going to learn how to make chips at home. This isn’t just a recipe; it’s a life skill that will forever change your snacking standards.
Why Homemade Chips Are a Superior Life Choice
So, why go to the “trouble” of making something you can so easily buy? Oh, let me count the ways this is not trouble, but a triumph.
First, the CRUNCH is on another level. There is absolutely nothing on this planet that compares to the crisp, shattering texture of a potato chip fresh from the fryer or oven. It’s a sound that reverberates through your soul. Store-bought chips can only dream of this kind of crispiness.
Second, you are the undisputed Flavor God. You are in complete control. Want them extra salty? Do it. Craving a dusting of smoky paprika and garlic? The power is yours. Want to get weird with some rosemary and parmesan? Who’s going to stop you? You can create your perfect chip, every single time.

Finally, there’s a wholesome satisfaction in turning a humble potato into the world’s most perfect snack. You know exactly what’s in them: potatoes, oil, and salt. That’s it. No mysterious ingredients you can’t pronounce. It just feels better.
The (Gloriously Short) Ingredients List
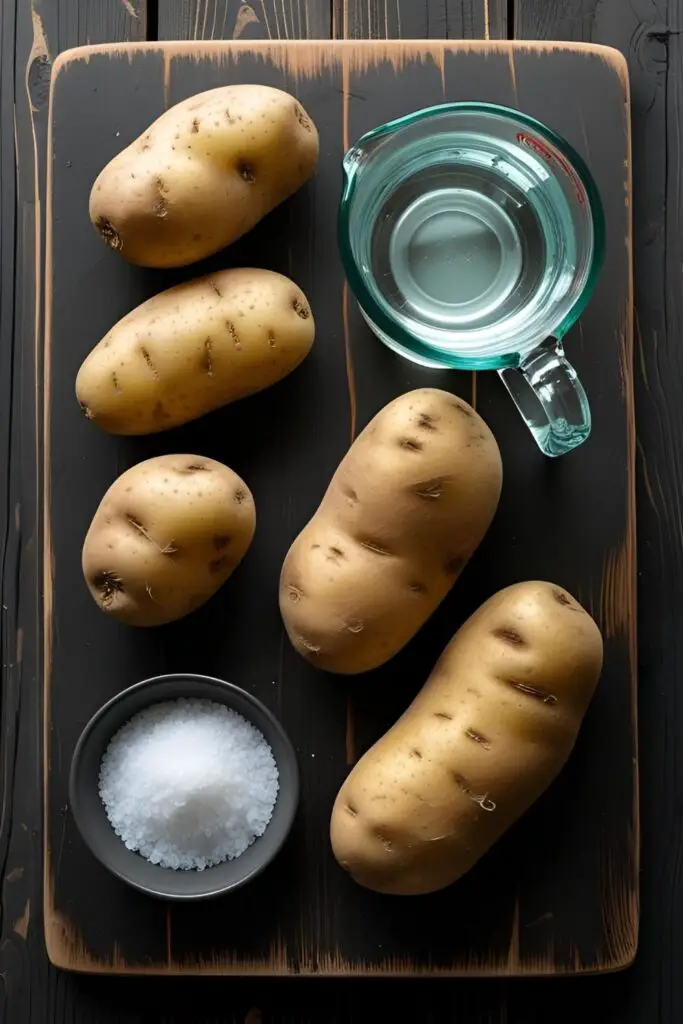
The beauty of this recipe is its profound simplicity. You need, at minimum, three things.
- Potatoes: About 2-3 medium-sized potatoes. High-starch potatoes like Russet or Idaho are the absolute best choice for crispy chips. Waxy potatoes will result in chewier, less-crisp chips.
- Oil for Frying: A few cups of a neutral oil with a high smoke point. Canola, peanut, or vegetable oil are perfect. (If you’re baking, you’ll only need a couple of tablespoons).
- Salt: Fine sea salt is ideal for sticking to the warm chips.
- Ice Water: For soaking the potatoes. This is not optional!
The Chip-Making Toolkit
To achieve chip nirvana, a few key tools will make your life much, much easier.
- A Mandoline Slicer: This is the #1 secret to perfect, uniform, paper-thin chips. If you are serious about making chips, this tool is non-negotiable. Please use the hand guard!
- A Deep, Heavy-Bottomed Pot or a Deep Fryer: If you’re frying, you need a sturdy vessel that holds heat well.
- A Candy/Deep-Fry Thermometer: Takes all the guesswork out of getting your oil to the perfect temperature.
- A Spider Strainer or a large Slotted Spoon: For safely retrieving your golden-brown chips from the hot oil.
- Large Mixing Bowls: For soaking your potato slices.
- Plenty of Paper Towels or a Wire Rack: For draining your finished chips.
Step-by-Step: The Path to Ultimate Crispiness
The most important part of this whole process happens before you even think about cooking. Pay attention to the prep!
Phase 1: The All-Important Potato Prep (For Both Methods)
- The Thin Slice: Set your mandoline slicer to its thinnest setting (usually 1/16th of an inch). Carefully slice your potatoes into paper-thin rounds. Use the hand guard that came with your mandoline. Seriously. Your fingertips will thank you.
- The Starch-Removal Soak: As you slice the potatoes, immediately place the slices into a large bowl of cold water. This prevents them from browning and begins the crucial process of rinsing off the surface starch.
- Rinse and Repeat: Once all your potatoes are sliced, drain the cloudy water. Refill the bowl with fresh, cold water and swish the slices around. Drain and repeat this process until the water runs almost completely clear. This step is the secret to super crispy chips. Starch makes chips gummy and causes them to stick together.
- Dry, Dry, and Dry Again: This is incredibly important, especially if you are frying. Drain the potatoes thoroughly. Lay them out in a single layer on a clean kitchen towel or paper towels and pat them completely dry. Water and hot oil are mortal enemies.
Phase 2: Choose Your Cooking Adventure
- Method A: Deep-Frying (The Gold Standard for Crunch)
- Pour about 2-3 inches of oil into your heavy-bottomed pot. Attach your deep-fry thermometer to the side and heat the oil over medium heat to exactly 350∘F (175∘C).
- Carefully add a handful of your dry potato slices to the hot oil. Do not overcrowd the pot! The chips need space to fry evenly.
- Fry for 3-5 minutes, stirring gently, until they are golden brown and have stopped bubbling furiously.
- Use your spider strainer to remove the chips from the oil and transfer them to a wire rack or a paper-towel-lined plate.
- IMMEDIATELY sprinkle them with salt. The salt will stick best to the hot, fresh-out-of-the-fryer chips. Repeat with the remaining batches, making sure your oil comes back up to temperature each time.
- Method B: Baking (The Healthier, Hands-Off Approach)
- Preheat your oven to 400∘F (200∘C).
- In a large bowl, toss your dry potato slices with 1-2 tablespoons of oil until they are lightly coated.
- Arrange the potato slices in a single layer on a parchment-lined baking sheet. Do not let them overlap, or they will steam instead of crisp.
- Bake for 10 minutes, then flip the chips over.
- Bake for another 7-10 minutes, until they are golden brown and crispy. Keep a close eye on them, as they can go from golden to burnt very quickly.
- Remove from the oven and sprinkle with salt immediately.
Calories & Nutritional Info (A Tale of Two Chips)


Here’s a rough comparison for a standard serving size (about 1 ounce or 28g).
- Deep-Fried Chips:
- Estimated Calories: Around 160-180 kcal.
- Rich in deliciousness and, well, fat from the frying oil.
- Baked Chips:
- Estimated Calories: Around 120-140 kcal.
- Significantly lower in fat since they are only lightly tossed in oil.
- The Potato Power: In either form, you’re getting some potassium and Vitamin C from the potatoes! See? It’s practically a health food. 😉
Common Chip-Making Crimes to Avoid
Don’t let these simple mistakes stand between you and crispy perfection.
- The Thick and Uneven Slice. If you try to do this by hand with a knife, you will fail. I’m sorry, but it’s true. You’ll get a mix of thick, thin, and wedge-shaped pieces that will cook into a sad medley of burnt, raw, and soggy. Use a mandoline.
- Skipping the Starch Soak. Feeling lazy? Think you can skip the rinsing step? Don’t do it. The surface starch on the potatoes will cause them to stick together in a giant, gummy clump in the fryer and will prevent them from ever getting truly crispy.
- Frying Wet Potatoes. This is not just a mistake; it’s a safety hazard. Adding wet potatoes to a pot of 350-degree oil will cause a violent, splattering reaction. Dry your potato slices completely before they go anywhere near that hot oil.
- Overcrowding the Pot. It’s tempting to dump them all in at once. Resist! Frying too many chips at a time causes the oil temperature to plummet, resulting in greasy, limp, soggy chips. Fry in small batches and let the oil recover its temperature between each batch.
Variations & Customizations (Become a Flavor Artist)
Plain salt is classic, but why stop there?
- Classic Salt and Vinegar Chips: After you’ve rinsed and dried your potato slices, toss them in a bowl with about ¼ cup of white vinegar. Let them sit for 20-30 minutes, then drain and pat them completely dry again before frying or baking.
- Smoky BBQ Chips: Immediately after the chips come out of the oil, toss them in a bowl with a seasoning blend of 1 tsp smoked paprika, ½ tsp garlic powder, ½ tsp onion powder, ½ tsp brown sugar, and a pinch of cayenne pepper, along with your salt.
- Garlic & Herb Sweet Potato Chips: Use sweet potatoes instead of Russets. Bake them as directed, and for the last 2 minutes of baking, toss them with a little olive oil, finely minced fresh rosemary, and garlic powder.
Your Burning Chip Questions, Answered
Let’s tackle some common chip queries.
What are the absolute best potatoes for making chips?
High-starch potatoes are your best bet. Russet potatoes are the undisputed king. Idaho and King Edward potatoes are also excellent choices. Avoid waxy varieties like red potatoes or new potatoes.
How do I keep my homemade chips crispy for more than an hour?
First, make sure they are cooked properly and not greasy. Second, let them cool completely. Finally, store them in a paper bag, not a sealed plastic container or bag. A paper bag allows them to breathe and prevents moisture from building up and making them soggy.
Do I really have to use a mandoline slicer?

For the best, most consistent results, yes. It’s the only way to get those uniform, paper-thin slices. If you are very skilled with a very sharp knife you can try, but it’s incredibly difficult.
Why are my chips always soggy and greasy?
This is almost always an oil temperature problem. Either your oil wasn’t hot enough to begin with, or you overcrowded the pot, which caused the temperature to drop dramatically. Use a thermometer and fry in small batches!
Can I make these in an air fryer?
Yes! An air fryer is fantastic for this. After soaking and drying the slices, toss them with a tiny bit of oil (about 1 tsp). Arrange them in a single layer in the air fryer basket and cook at 375°F (190°C) for 10-15 minutes, shaking the basket every 5 minutes, until crispy and golden.
How long do homemade chips last?
When stored properly in a paper bag at room temperature, they can stay reasonably crispy for 2-3 days. But let’s be real, they’re not going to last that long.
Why is soaking the potatoes in water so important?
Soaking and rinsing removes the excess starch from the surface of the potato slices. This starch, if left on, would cause the chips to brown too quickly, stick together, and have a gummy rather than a crispy texture.
Final Thoughts
You’ve done it. You’ve looked at a lumpy, dirt-covered potato and seen its true potential. You have transformed it, through slicing, soaking, and sizzling, into the planet’s most perfect snack. You now possess the power to create warm, crispy, perfectly seasoned potato chips on demand.
So go on, grab that bowl of golden-brown glory you just made. Listen to that magnificent crunch. You’ll never look at that sad, half-empty bag of air in the grocery store the same way again. Welcome to your new, far crispier reality.