The Ultimate Chocolate Lava Cake Recipe (And It’s Almost Too Easy)
You know that moment. You’re at a nice restaurant, you’ve finished your meal, and the dessert menu comes out. Your eyes scan past the cheesecake, you ignore the sorbet, and you land on two magic words: Lava Cake. Someone at the table orders it, and when it arrives, the whole world seems to stop for that first glorious forkful—the one that pierces the cakey exterior and unleashes a river of warm, molten chocolate. It feels like a secret, a piece of culinary magic only available for $14 plus tip.
Well, I’m about to let you in on that secret. The chocolate lava cake, the king of decadent restaurant desserts, is a magnificent impostor. It looks fancy, it sounds fancy, but it’s one of the fastest, easiest, and most rewarding desserts you will ever make in your own kitchen. Today, I’m going to teach you how to master the perfect chocolate lava cake, and frankly, your life will never be the same.
Why This Recipe Is Your New Secret Weapon
So, why is this the recipe you’ll make again and again? Why will it become your go-to for everything from date night to “I need chocolate immediately”?
First, let’s talk about the effort-to-impression ratio, which is wildly skewed in your favor. This dessert takes about 10 minutes to whip up and another 12-14 minutes to bake. For 25 minutes of your time, you get a dessert that looks like you’ve been training with French pastry chefs your whole life. It’s the definition of working smarter, not harder.
Second, the payoff is that spectacular, ooey-gooey, molten chocolate center. It’s not just a cake; it’s an event. The contrast between the tender, firm cake on the outside and the warm, liquid chocolate river on the inside is pure, unadulterated bliss. It’s an interactive dessert, and the main interaction is pure joy.
Finally, they’re perfectly portioned. No messy slicing, no arguments over who got the bigger piece. Everyone gets their own personal chocolate volcano. It’s civilized, it’s special, and it makes anyone you serve it to feel like the most important person in the world.
The (Shockingly Simple) Ingredients List
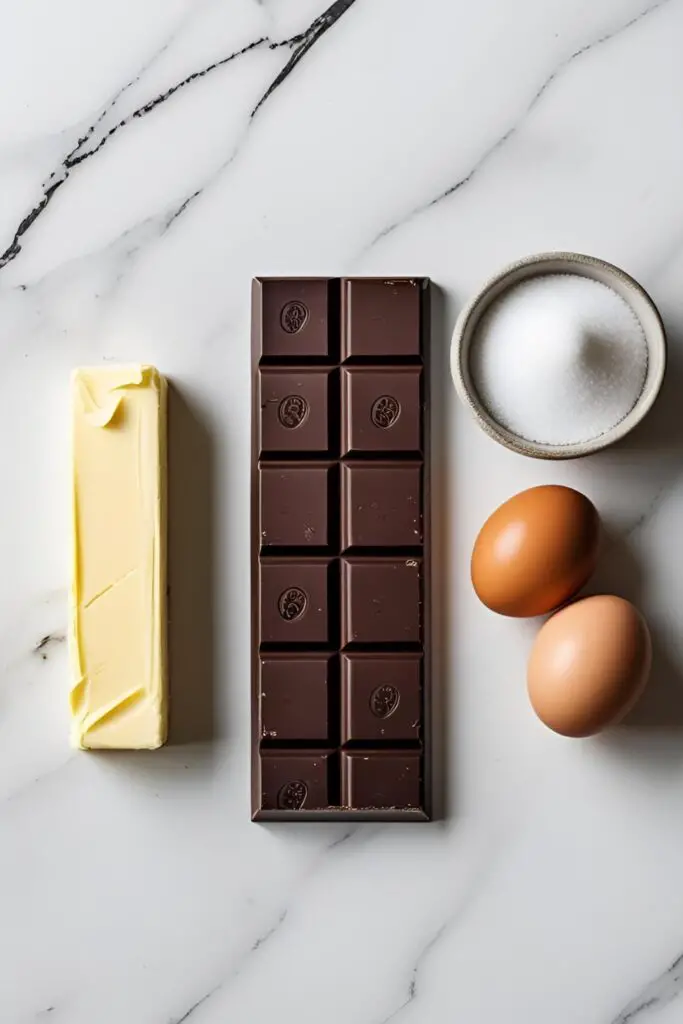

You’re looking at a dessert with fewer ingredients than most cookie recipes. But because the list is short, quality matters.
- Good Quality Dark or Semisweet Chocolate: 4 ounces (113g), finely chopped. Do not use chocolate chips; they have stabilizers that prevent smooth melting. Use a good baking bar (60−70% cacao is perfect).
- Unsalted Butter: 1/2 cup (1 stick), plus more for greasing the ramekins.
- Large Eggs: 2 of them, at room temperature.
- Large Egg Yolks: 2 of them, also at room temperature. The extra yolks are key for richness.
- Granulated Sugar: 1/4 cup.
- All-Purpose Flour: 2 tablespoons. Yes, that’s it!
- Salt: A pinch (about 1/8 teaspoon).
- Unsweetened Cocoa Powder or Flour: For dusting the ramekins.
- Vanilla Extract (Optional): 1 teaspoon for an extra layer of flavor.
A Quick Note: I know I sound like a broken record in all my recipes, but room temperature eggs are important. They whip up with more volume and incorporate into the batter more smoothly than cold eggs. Just set them on the counter for an hour before you start.
The Tools of the Lava Trade
You don’t need much to create this magic. Here’s your simple toolkit.
- Ramekins: Four 6-ounce or six 4-ounce ramekins are ideal for this recipe.
- A Baking Sheet: To place your ramekins on for easy transport in and out of the oven.
- A Heatproof Bowl: For melting your chocolate and butter.
- A Whisk: A good old-fashioned whisk is all you need for this batter.
- A Rubber Spatula: For scraping the bowl and making sure no chocolate gets left behind. (Leaving chocolate behind is a crime).
Step-by-Step: Unleashing the Molten Magic
This process is fast. Read through the steps first, get everything ready, and then go for it.
Step 1: Prepare the Volcanoes (This Is Critical!) Preheat your oven to 425∘F (220∘C). Now, for the most important step of this entire recipe: generously grease your ramekins with softened butter. Get into every nook and cranny. Then, dust them with either flour or unsweetened cocoa powder, tapping it around to coat the entire inside surface. Tap out any excess. If you skimp on this step, you will be eating your lava cake out of the dish with a spoon in quiet frustration.
Step 2: Melt the Good Stuff In a medium, heatproof bowl, combine your chopped chocolate and butter. Melt them together either in the microwave in 30-second intervals (stirring in between) or over a saucepan of simmering water. Stir until the mixture is completely smooth and glossy. Set it aside for a moment.

Step 3: Whip the Eggs In a separate, larger bowl, combine the whole eggs, egg yolks, and sugar. Whisk them together vigorously for about 2-3 minutes. You’re not trying to get to stiff peaks, but you want the mixture to become pale, slightly foamy, and thicker. This is where you whip in that optional vanilla extract.
Step 4: Combine and Fold Gently pour the slightly cooled chocolate-butter mixture into the egg mixture. Using your spatula, fold them together until just combined. Now, sprinkle the flour and salt over the top and fold again until you no longer see streaks of flour. Do not over-mix! You want to keep the air you whipped into the eggs.
Step 5: Fill and Bake (The Moment of Truth) Place your prepared ramekins on a baking sheet. Carefully divide the batter evenly among them. Now, slide them into your preheated oven and bake for 12-14 minutes. This is not the time to get distracted. The difference between a perfect lava cake and a sad little brownie is about 60 seconds.
How do you know when they’re done? The edges of the cake will look firm and set, but the very center (about the size of a quarter) will still be soft and look slightly jiggly. That jiggle is your lava.
Step 6: The Great Inversion Carefully remove the baking sheet from the oven. Let the ramekins sit on the counter for exactly one minute. Any longer and the center will keep cooking. Place a dessert plate upside down over a ramekin, take a deep breath, and confidently flip it over. Lift the ramekin off, and behold your glorious creation. Serve immediately!
Calories & Nutritional Info (A Moment of Honesty)
This is an intensely rich, single-serving chocolate dessert. Let’s just call it what it is: a delicious indulgence.
- Estimated Calories: Around 400-450 kcal per cake.
- A Treat to Be Savored: It’s made of chocolate, butter, and eggs. It’s meant to be a special treat, and it’s worth every single calorie.
- Portion Control is Built-in: The good news is that it’s hard to overeat. One cake is so rich and satisfying that it’s the perfect amount.
Common Lava Fails (And How to Avoid Them)

I’ve seen it all. Here’s how to guarantee success.
- The Sticking Point. The number one reason for lava cake failure is improperly prepping the ramekins. I’m saying it a third time because it’s that important. Butter and dust them like your dessert’s life depends on it, because it does.
- The “No Lava” Letdown. This is heartbreaking, and it’s always because the cake was over-baked. Every oven is different, so start checking at 12 minutes. Look for set edges and a soft, wobbly center. When in doubt, it’s better to pull it a minute early than a minute late.
- Using the Wrong Chocolate. If you use standard chocolate chips, the stabilizers in them can make your melted chocolate center greasy or grainy. Use a good quality baking chocolate bar that you chop yourself. The flavor and texture will be infinitely better.
Variations & Customizations (Pimp Your Volcano)
Once you nail the basic recipe, it becomes a canvas for your creativity.
- Peanut Butter Molten Center: After you pour the batter into the ramekins, drop a small spoonful of creamy peanut butter or a mini peanut butter cup into the center of each one. The peanut butter will become part of the molten surprise.
- Spicy Mexican Chocolate Lava Cake: Add 1/4 teaspoon of ground cinnamon and a tiny pinch of cayenne pepper to the batter along with the flour. The subtle warmth and spice paired with the deep chocolate flavor is absolutely incredible.
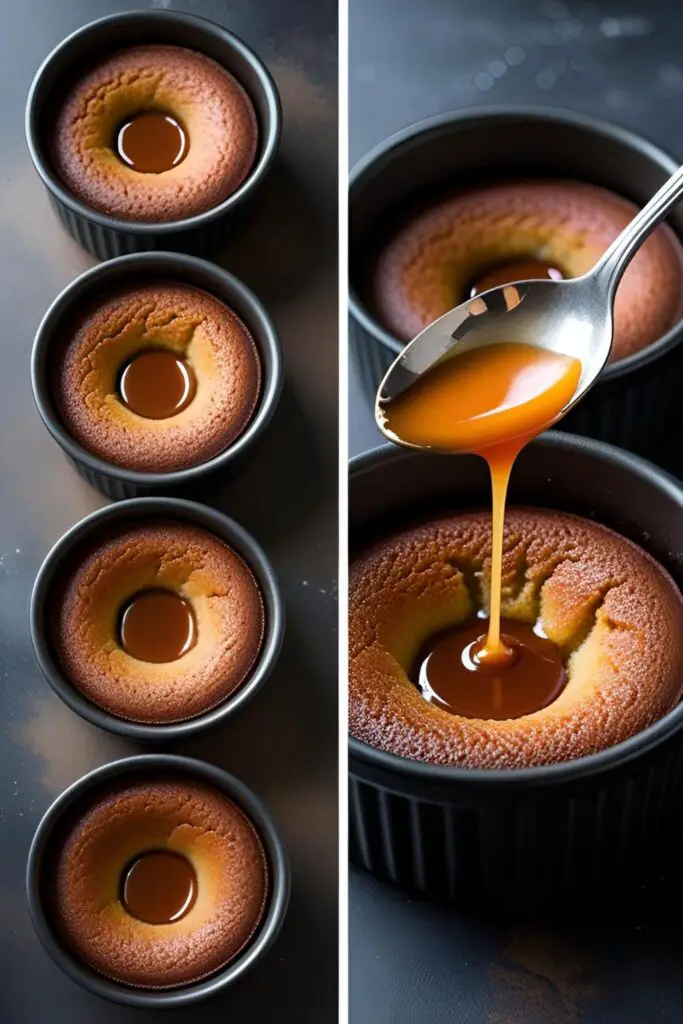
- Salted Caramel Surprise: Before baking, gently push a soft caramel candy (like a Werther’s Soft Caramel) into the center of each cake. As it bakes, it creates a pocket of molten salted caramel along with the chocolate.
Your Burning Lava Cake Questions, Answered
Let’s tackle the FAQs.
Why didn’t my lava cake have any lava?
It was over-baked. Even 60-90 seconds too long in a hot oven can cook the center through. Next time, pull them out as soon as the edges are set and the center is still visibly soft.
Can I make chocolate lava cakes ahead of time?
Yes! This is one of the best parts. You can prepare the batter, pour it into the prepared ramekins, cover them with plastic wrap, and refrigerate them for up to 24 hours. When you’re ready, just pop them straight from the fridge into the preheated oven and add 1-2 minutes to the baking time.
What’s the absolute best way to grease the ramekins?
Use softened (not melted) butter and a pastry brush or your fingers to get a thick, even layer over the entire inside surface. For the dusting, I prefer using unsweetened cocoa powder instead of flour because it blends in with the color of the cake.
Can I make this recipe without ramekins?
You can bake them in a standard muffin tin! Just be sure to grease and dust the cups extremely well. The baking time will be shorter, likely around 8-10 minutes, so watch them very closely.
What kind of chocolate should I really use?
A semisweet or bittersweet chocolate bar with 60% to 72% cacao content is ideal. It provides a deep, rich flavor that isn’t overly sweet. Brands like Ghirardelli, Scharffen Berger, or even a good quality store brand baking bar will work well.
Can I make this recipe for just two people?
Absolutely. This recipe is incredibly easy to halve. Just use 1 whole egg and 1 egg yolk, and halve all the other ingredients.
How do I know exactly when they are done baking?
It takes practice, but the best visual cue is that the outer 1/2-inch edge of the cake looks cooked and slightly puffed, while the very center looks soft, wet, and jiggles when you gently nudge the pan.
Final Thoughts
You now possess one of the most powerful dessert recipes known to humankind. You have the ability to conjure up a fancy, molten, mind-blowingly delicious chocolate cake in under 30 minutes. This is a dangerous amount of power.
Use it for good. Use it to impress a date. Use it to celebrate a win. Or, just use it to make a random Tuesday feel like the most special day of the year. You deserve it. Now go forth and let the lava flow.