The Ultimate Chocolate Mousse Cake Recipe (Decadence Guaranteed)
Ever scroll through your social feed, stumble upon a photo of a glossy, impossibly perfect chocolate mousse cake, and immediately think, “Nope. That’s for professional pastry chefs and people who own more than one type of spatula”? We’ve all been there. It looks like a dessert that requires a culinary degree, a French accent, and an unreasonable amount of patience.
Well, I’m here to pull back the curtain and tell you a secret: it’s a magnificent fraud. This cake looks like a million bucks and tastes like a billion, but it’s shockingly straightforward to make. I’m here to be your spirit guide on a journey to creating the most incredible, surprisingly achievable chocolate mousse cake you’ll ever make. Your friends are about to be seriously impressed.
Why This Recipe Is Pure Awesome-Sauce
So, what makes this cake worthy of your time, effort, and finest chocolate? Let me lay out the case.
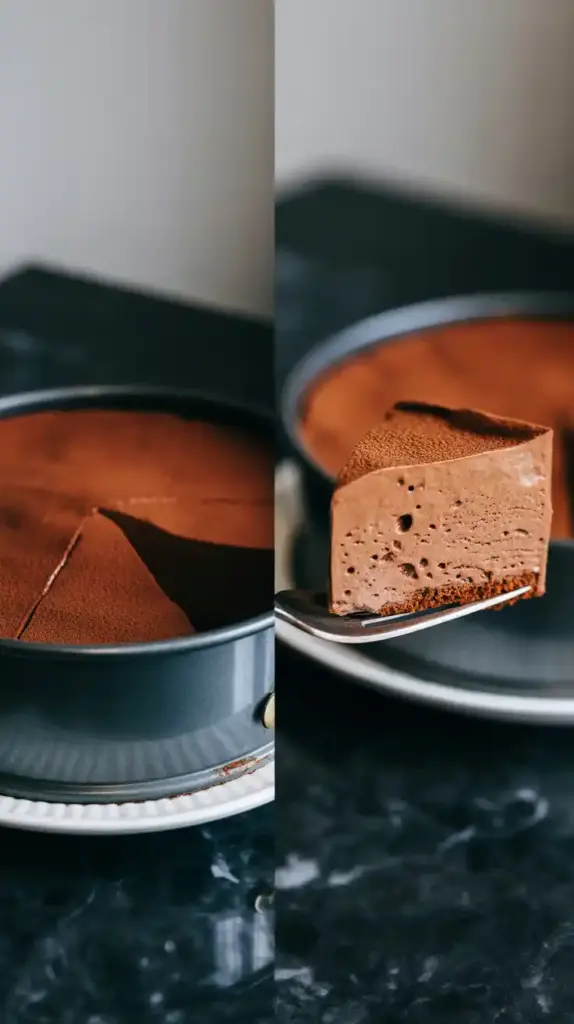
First, the texture is a masterclass in contrasts. It starts with a dense, fudgy, flourless chocolate cake base—rich and intense like a brownie’s sophisticated older sibling. Then, it’s topped with a cloud of light, airy, silky-smooth chocolate mousse that melts in your mouth. It’s two distinct, perfect chocolate experiences in one glorious forkful.
Second, the “wow” factor is off the charts. This is not the cake you bring to a casual bake sale; this is the cake you make when you want to silence a room. It’s elegant, it’s decadent, and it screams, “I am a person who has their life together.” Whether it’s a birthday, an anniversary, or just a Tuesday you want to make fabulous, this cake is the answer.

Finally, it’s all about technique, not torture. While it has a couple of components, each step is simple. There’s no complex pastry layering or finicky decorating required. If you can melt chocolate and whip cream, you can make this cake. IMO, it’s the definition of a high-reward dessert.
The Decadent Ingredients List
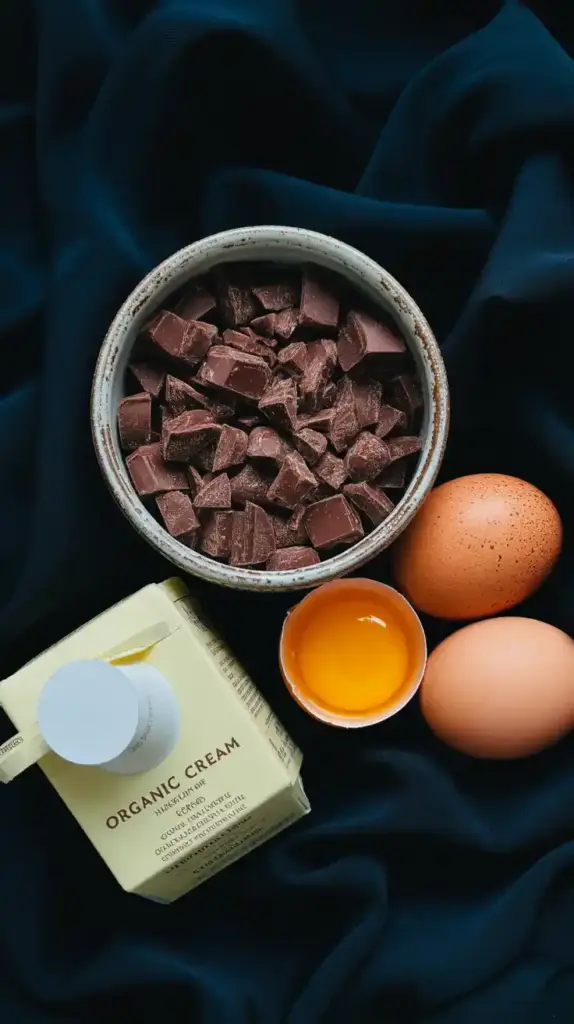
This cake has two main parts. Don’t be intimidated! We’ll tackle them one by one. The most important rule? Use good quality chocolate. It’s the star of the show, so this is not the time for cheap chocolate chips.
For the Fudgy Flourless Chocolate Base:
- Good Quality Dark Chocolate (60-70% cacao): 4 ounces (113g), chopped.
- Unsalted Butter: 1/2 cup (1 stick), cut into pieces.
- Granulated Sugar: 1/2 cup.
- Large Eggs: 2 of them, at room temperature.
- Unsweetened Cocoa Powder: 2 tablespoons.
- Vanilla Extract: 1 teaspoon.
- Salt: 1/4 teaspoon.
For the Silky Chocolate Mousse:
- Good Quality Dark Chocolate (60-70% cacao): 8 ounces (226g), finely chopped.
- Heavy Whipping Cream: 11/2 cups, very cold.
- Large Eggs: 4 of them, separated into yolks and whites, at room temperature.
- Granulated Sugar: 1/2 cup, divided.
- Vanilla Extract: 1 teaspoon.
- Cream of Tartar (Optional but recommended): 1/4 teaspoon, for stabilizing the egg whites.
The Essential Tools for Your Chocolate Masterpiece
The right equipment will make you feel like a pastry chef, even if you’re just wearing pajamas in your kitchen.
- A 9-inch Springform Pan: This is absolutely essential. It allows you to release the cake perfectly without having to flip it over.
- A Stand Mixer or a reliable Hand Mixer: You’ll be doing a fair bit of whipping (cream, egg whites), and a mixer will be your best friend.
- Heatproof Glass or Metal Bowls: You’ll need a few for melting chocolate and mixing components.
- A good Rubber Spatula: For folding, scraping, and ensuring you don’t waste a single drop of chocolatey goodness.
- An Offset Spatula: Not strictly necessary, but it helps create that perfectly smooth, flat top on your mousse.
- Parchment Paper: To line your springform pan for a flawless base.
Step-by-Step: Your Path to Chocolate Nirvana
Deep breaths. We’re going to build this masterpiece in a few logical phases. It’s easier than it looks.
Phase 1: The Fudgy Cake Base
- Prep Your Pan: Preheat your oven to 350∘F (175∘C). Grease your 9-inch springform pan, line the bottom with a circle of parchment paper, and grease the parchment.
- Melt the Good Stuff: In a heatproof bowl set over a saucepan of simmering water (a double boiler), melt the 4 ounces of chocolate and the butter together, stirring until smooth. Remove from the heat and let it cool slightly.
- Mix the Batter: In a separate bowl, whisk the eggs and sugar together for a minute. Whisk in the slightly cooled chocolate mixture, followed by the cocoa powder, vanilla, and salt. Whisk until everything is just combined and smooth.
- Bake the Base: Pour the batter into your prepared springform pan and spread it evenly. Bake for 20-25 minutes. It will look slightly underdone and a bit puffy—that’s perfect. Let it cool completely in the pan on a wire rack. The cake will deflate as it cools; this is normal!
Phase 2: The Heavenly Mousse
- Melt More Chocolate: While the base cools, melt the 8 ounces of finely chopped chocolate in a large heatproof bowl over a double boiler. Once smooth, remove from heat and let it cool until it’s just barely warm to the touch.
- Whip the Cream: In your mixer, whip the very cold heavy cream until it forms stiff peaks. Stiff peaks mean that when you lift the beaters, the cream stands up straight. Gently transfer the whipped cream to another bowl and set it aside in the fridge.
- The Egg Yolks: In your now-empty mixer bowl (no need to clean it!), beat the egg yolks with 1/4 cup of the sugar until the mixture is pale yellow and thick, about 2-3 minutes. Beat in the vanilla extract.
- Combine Yolks and Chocolate: Gently fold the egg yolk mixture into the cooled, melted chocolate until just combined.
- Whip the Egg Whites: In a separate, scrupulously clean bowl, beat the egg whites and cream of tartar on medium speed until foamy. Gradually add the remaining 1/4 cup of sugar and increase the speed to high. Beat until stiff, glossy peaks form.
- The Grand Fold: This is the most delicate step. Gently fold about one-third of the whipped egg whites into the chocolate mixture to lighten it. Then, carefully fold in the remaining egg whites, followed by the whipped cream. Fold until just barely combined. You want to see a few streaks remaining. Do not stir or you will deflate all the air you just whipped in!
Phase 3: Assembly and The Crucial Chill
- Pour and Smooth: Pour the finished mousse over the completely cooled cake base inside the springform pan. Use your offset spatula to gently smooth the top.
- Chill Out: Cover the pan loosely with plastic wrap and transfer it to the refrigerator. Chill for at least 6 hours, but overnight is even better. This time is non-negotiable; it’s when the mousse sets and the flavors meld.
Calories & Nutritional Info (Aka, Don’t Ask)
This cake is the definition of a decadent treat. It’s here for a good time, not a long time (on your plate, anyway).
- Estimated Calories: Around 500-600 kcal per slice. It’s rich, so a small slice is very satisfying.
- Rich in Chocolate, Rich in Joy: This is a high-fat, high-sugar dessert. It’s meant to be savored on special occasions or whenever you feel you deserve something truly spectacular.
- Quality Ingredients: The upside of making it from scratch is that you know exactly what’s in it: good chocolate, real butter, and fresh eggs.
Common Mousse Mistakes (And How to Dodge Them)
I’ve made these errors so you don’t have to. You’re welcome.
- The Seized Chocolate Nightmare. Getting even a tiny drop of water into your melting chocolate will cause it to seize into a grainy, unusable lump. Be incredibly careful with your double boiler. Dry your bowls and spatulas thoroughly.
- The Deflated Mousse Tragedy. The #1 mousse killer is aggressive mixing. When you combine the whipped cream and egg whites with the chocolate base, you must fold, not stir. Use a large spatula to gently scrape from the bottom of the bowl up and over the top. You’re trying to keep all that precious air you incorporated.
- The Sin of Impatience. I know, the cake looks amazing and you want to eat it NOW. But if you try to slice it before it has chilled for at least 6 hours, you won’t have a cake; you’ll have a bowl of delicious chocolate soup. Respect the chill time.
Variations & Customizations (The Remix)

Once you’ve mastered the classic, why not get a little wild?
- No-Bake Oreo Crust Version: Don’t want to turn on the oven? Swap the flourless cake base for a simple Oreo crust. Crush about 24 Oreo cookies into fine crumbs, mix with 6 tablespoons of melted butter, and press firmly into the bottom of your springform pan. Chill for 30 minutes before topping with the mousse.
- Spicy Aztec Chocolate Mousse Cake: Add a teaspoon of ground cinnamon and a pinch (1/8 teaspoon) of cayenne pepper to both the cake base batter and the melting chocolate for the mousse. The subtle warmth and spice are an incredible complement to the dark chocolate.
- Magnificent Mocha Mousse Cake: Dissolve 2 tablespoons of instant espresso powder in the vanilla extract before adding it to both the cake base and the mousse. Coffee deepens the flavor of chocolate, making it taste even more intensely chocolatey.
Your Most Pressing Mousse Cake Questions
Let’s clear up some common curiosities.
What’s the best kind of chocolate to use?
Use a high-quality dark chocolate bar with a cacao percentage between 60% and 72%. Baking chocolate bars (like Ghirardelli or Scharffen Berger) are far superior to chocolate chips, which contain stabilizers that prevent them from melting smoothly.
I’m worried about raw eggs. Is there a substitute?
The classic mousse texture comes from the eggs. If you are concerned, you can use pasteurized eggs, which are available in cartons at most grocery stores. Alternatively, you can find egg-free mousse recipes online that use gelatin and whipped cream for structure, though the texture will be slightly different.
How do I get those perfectly clean, neat slices?
The secret is a hot, clean knife. Fill a tall glass with hot water. Dip a long, sharp knife into the water, wipe it completely dry with a towel, and then make one clean slice. Repeat the process—dip, wipe, slice—for every single cut.
Can I make this cake ahead of time?
Yes! In fact, you have to. This cake is perfect for making a day in advance, as it needs that long chilling time to fully set. It takes all the stress out of day-of party prep.
How should I store the cake?

Store it, loosely covered, in the refrigerator. It will keep for up to 4 days, though the mousse texture is best in the first 2 days.
Why did my mousse turn out grainy or runny?
A grainy texture can happen if your melted chocolate was too hot when you combined it with the other ingredients, causing parts of it to cook or seize. A runny mousse is usually a result of under-whipping your cream/egg whites or deflating the mixture by over-mixing.
Can I freeze chocolate mousse cake?
Yes, it freezes beautifully! Wrap the whole cake or individual slices tightly in plastic wrap and then foil. It can be frozen for up to 2 months. Let it thaw in the refrigerator for a few hours before serving.
Final Thoughts
You did it. You stared into the face of a fancy French dessert and didn’t blink. You have created a work of art that is as ridiculously delicious as it is beautiful. You are now a certified dessert legend.
So go ahead, grab a fork, and slice into that masterpiece. The dense, fudgy base giving way to that impossibly light mousse is a moment of pure, unadulterated bliss. You’ve earned it.