The Best Moist Yellow Cake Recipe (That Will Ruin Box Mixes for You)
Let’s have a little heart-to-heart about yellow cake. For many of us, the term conjures up a very specific image: a cardboard box from the grocery store aisle, promising quick, easy, and… well, yellow cake. It’s the reliable old friend of bake sales and last-minute birthday parties. But let me ask you this: is it ever truly spectacular? Does it make you close your eyes and savor the rich, buttery flavor? I’m guessing not.
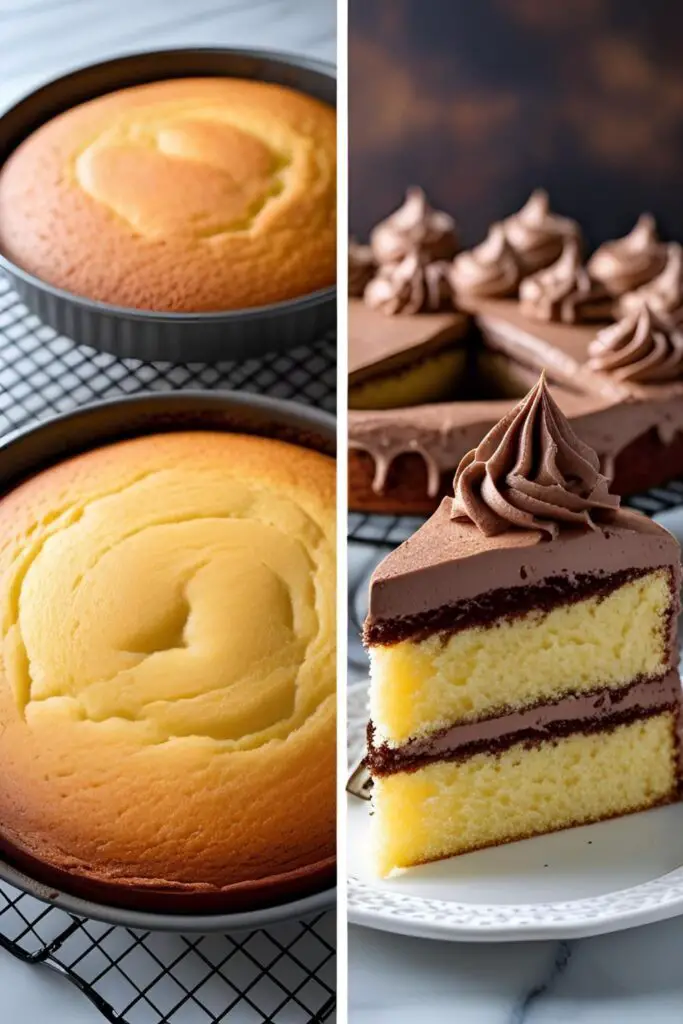
Today, we’re ditching the box and breaking up with mediocrity. We are diving headfirst into the ultimate from-scratch yellow cake recipe that is so profoundly moist, buttery, and flavorful, it will fundamentally change your definition of what yellow cake can be. Prepare to become a cake snob.
Why This Recipe Is Genuinely Awesome
So why go to the “trouble” of baking from scratch when a box is so easy? Oh, let me count the ways.
First and foremost: the flavor is unbeatable. This cake boasts a rich, buttery taste with deep notes of vanilla that you simply cannot find in a mix. It tastes like pure, unadulterated nostalgia, but a thousand times better than you remember. It’s the flavor of pure celebration.
Second, the texture is absolute perfection. Thanks to a few secret-weapon ingredients, this cake has a tender, plush crumb that is unbelievably moist, yet it remains sturdy enough to be stacked into glorious layers without crumbling under pressure. It’s the perfect canvas for any frosting you can dream of.

Finally, there’s the sheer satisfaction. Placing a beautiful, golden, homemade cake on the table and watching your friends’ and family’s eyes light up? Announcing, “Oh this? Yeah, I just whipped it up from scratch,” is a power move. You’re not just a baker; you’re a dessert hero.
The A-List Ingredients

The magic is in the details. Using the right ingredients—at the right temperature—is the key to unlocking yellow cake nirvana.
- Cake Flour: 21/2 cups. Cake flour has a lower protein content than all-purpose flour, which yields a much more tender, delicate crumb. It’s worth seeking out!
- Baking Powder & Baking Soda: 2 teaspoons of baking powder and 1/2 teaspoon of baking soda. This dynamic duo provides the perfect lift.
- Salt: 1 teaspoon of fine sea salt to balance all the flavors.
- Unsalted Butter: 1/2 cup (1 stick), softened to room temperature. This is for that essential buttery flavor.
- Vegetable Oil: 1/2 cup. This is a secret weapon! The oil ensures the cake stays incredibly moist for days.
- Granulated Sugar: 13/4 cups.
- Eggs & Egg Yolks: 3 large whole eggs + 2 additional egg yolks, all at room temperature. The extra yolks add richness, moisture, and that beautiful golden-yellow color.
- Buttermilk: 1 cup, at room temperature. The acidity in buttermilk creates an exceptionally tender cake.
- Pure Vanilla Extract: 1 tablespoon. Don’t skimp here; use the good stuff.
A Crucial PSA: I’m going to sound like a broken record, but your butter, eggs, and buttermilk MUST be at room temperature. Cold ingredients do not emulsify properly, which leads to a dense, heavy cake. Just set them on your counter for an hour or two before you begin. Trust me on this.
The Essential Tools & Kitchen Gadgets
You don’t need a professional bakery, but these tools will make the process a whole lot smoother.
- A Stand Mixer or Hand Mixer: Essential for properly creaming the butter and sugar, which is the foundation of a light and airy cake.
- Two 9-inch Round Cake Pans: The classic size for a perfect layer cake.
- Parchment Paper: To line the bottom of your pans and guarantee your cakes will never stick.
- A Sifter or Fine-Mesh Sieve: To ensure your dry ingredients are light, airy, and free of lumps.
- Wire Cooling Racks: Absolutely critical for allowing your cakes to cool properly without getting soggy.
- An Offset Spatula: For frosting your cake like a pro.
Step-by-Step: Your Guide to Cake Perfection
Follow these steps, and I promise you a flawless cake. Let’s bake!
Step 1: Get Your Prep in Order Preheat your oven to 350∘F (175∘C). Grease your two 9-inch cake pans with butter or baking spray, line the bottoms with circles of parchment paper, and then grease the parchment paper as well. Flour the pans, tapping out any excess. This triple-prep method is your insurance against sticking.

Step 2: Whisk the Dry Ingredients In a medium bowl, sift or whisk together the cake flour, baking powder, baking soda, and salt. Sifting makes the cake lighter, so don’t skip it if you can help it! Set this bowl aside.
Step 3: The Creaming Method (aka The Most Important Step) In the bowl of your stand mixer fitted with the paddle attachment, beat the softened butter, oil, and granulated sugar on medium-high speed for a full 4-5 minutes. The mixture should become very pale, light, and fluffy. You are literally whipping air into the fat, which creates a tender cake.
Step 4: Add the Eggs and Vanilla With the mixer on medium speed, add the eggs and extra egg yolks one at a time, allowing each to fully incorporate before adding the next. Scrape down the sides and bottom of the bowl, then beat in the vanilla extract.
Step 5: Alternate the Wet and Dry Turn the mixer to its lowest possible speed. Add one-third of the dry ingredient mixture, followed by half of the buttermilk. Repeat this process, ending with the final third of the dry ingredients. Mix only until the last streak of flour disappears. It’s better to have a few lumps than to over-mix.
Step 6: Bake and Cool It Down Divide the batter evenly between your two prepared pans and smooth the tops with your spatula. Bake for 28-32 minutes, or until the tops are lightly golden and a toothpick inserted into the center comes out clean. Let the cakes cool in the pans on a wire rack for 15 minutes before carefully inverting them onto the racks to cool completely.
Calories & Nutritional Info (Let’s Be Real)
This is a classic birthday cake, a vehicle for frosting and joy. It is not, nor has it ever claimed to be, health food.
- Estimated Calories: Around 350-400 kcal per slice (this is for the unfrosted cake).
- A Celebration Staple: This cake is rich in butter, sugar, and happiness. It’s meant for special occasions.
- The From-Scratch Advantage: The good news? You control the ingredients. There are no weird preservatives, artificial flavors, or ingredients you can’t pronounce.
Common Cake-tastrophes and How to Avoid Them

Baking is a science, and sometimes science goes wrong. Here’s how to avoid the most common cake fails.
- The Dense, Heavy Cake. This is almost always caused by using cold ingredients. When your butter, eggs, and buttermilk are cold, they don’t combine into a smooth emulsion, resulting in a heavy, greasy cake. Room temperature is not a suggestion; it’s a rule.
- The Tough, Rubbery Cake. The villain here is over-mixing the batter after adding the flour. Once you mix flour with liquid, you start developing gluten. The more you mix, the tougher your cake gets. Mix on low, and stop as soon as the flour is incorporated.
- The Sunken Center. Why did my beautiful cake sink? It could be a few things: opening the oven door too early (don’t do it!), under-baking your cake, or using expired baking powder/soda. Use an oven thermometer to ensure your oven is at the right temperature and trust the toothpick test.
Variations & Customizations (The Fun Part!)
This yellow cake is a perfect canvas. Feel free to get creative!
- Classic Yellow Sheet Cake: Pour the batter into a greased and floured 9×13-inch pan and bake for 35-40 minutes. Let it cool and frost it directly in the pan with a thick layer of classic chocolate buttercream. It’s pure childhood nostalgia.
- Bright Lemon Yellow Cake: Add the zest of two lemons to the sugar in the creaming step. Rub the zest and sugar together with your fingers to release the fragrant oils. This adds a beautiful, bright citrus note that pairs wonderfully with a simple lemon glaze or cream cheese frosting.
- Perfect Marble Cake: Prepare the batter as directed. Scoop out about 11/2 cups of batter into a separate bowl and gently stir in 1/4 cup of unsweetened cocoa powder. Drop alternating spoonfuls of the yellow and chocolate batter into your cake pans, then gently swirl with a knife just once or twice before baking.
Your Most Pressing Cake Questions, Answered
I’ve got your questions covered. Here’s the FAQ you’ve been looking for.
What’s the real difference between yellow cake and white cake?
The primary difference is the eggs! Yellow cake uses whole eggs plus extra egg yolks, which gives it its signature golden color, rich flavor, and moist crumb. White cake uses only egg whites, resulting in a lighter, snow-white color and a more delicate, spongy texture.
Can I use all-purpose flour instead of cake flour?
Yes, but for the most tender result, cake flour is best. If you only have all-purpose flour, you can make a substitute: For every 1 cup of cake flour required, measure out 1 cup of all-purpose flour, remove 2 tablespoons, and replace it with 2 tablespoons of cornstarch. Sift this mixture together a few times.
Why did my cake sink in the middle?
The most common culprits are opening the oven door too frequently (causing a drastic temperature drop), not baking the cake long enough, or using leavening agents (baking powder/soda) that have expired and lost their power.
How do I make sure my yellow cake is extra moist?
This recipe has you covered! The combination of oil and buttermilk is the secret to an incredibly moist cake that stays that way for days. Don’t substitute them!
Can I turn this recipe into cupcakes?
Absolutely! This recipe will make about 24 cupcakes. Line a cupcake tin with paper liners and fill them about two-thirds full. Bake at 350∘F for about 18-22 minutes, or until a toothpick comes out clean.
What frosting goes best with yellow cake?
The classic, undisputed champion is a rich, fudgy chocolate buttercream. It’s a match made in heaven. However, salted caramel, vanilla buttercream, or a tangy cream cheese frosting are also fantastic options.
Can I make this cake ahead of time?
Yes. You can bake the cake layers, let them cool completely, and then wrap them tightly in plastic wrap. They can be stored at room temperature for up to 2 days or frozen for up to 2 months. Frost the cake the day you plan to serve it.
Final Thoughts
Congratulations! You are now the proud owner of a truly perfect yellow cake recipe. You have officially graduated from the box mix and entered a world of rich, buttery, homemade goodness. You hold the key to creating the ultimate birthday cake, the most welcome potluck contribution, and the most comforting Tuesday night treat.
Go forth and bake. Be the hero of the next celebration. And please, for the love of all that is delicious, never settle for a mediocre cake again.