The Ultimate Strawberry Crunch Cake Recipe (A Nostalgic Dream!)
Remember that primal urge when you heard the faint, twinkling music of the ice cream truck? The mad dash for spare change, the breathless sprint down the driveway? All for that one, glorious prize: the Strawberry Shortcake ice cream bar. That soft, strawberry-ish center, the creamy vanilla, and that iconic, crumbly, crunchy coating. What if I told you that you could bake that exact feeling? Today, we are bottling that pure, unadulterated joy and turning it into a spectacular strawberry crunch cake.
This isn’t just dessert. It’s a time-traveling vessel to your happiest childhood memories, and it’s about to become the most requested cake in your baking arsenal. Prepare for legendary status.
Why This Recipe Is an Absolute Masterpiece
So, why should this cake immediately jump to the top of your “must-bake” list? Let’s break down the magic.
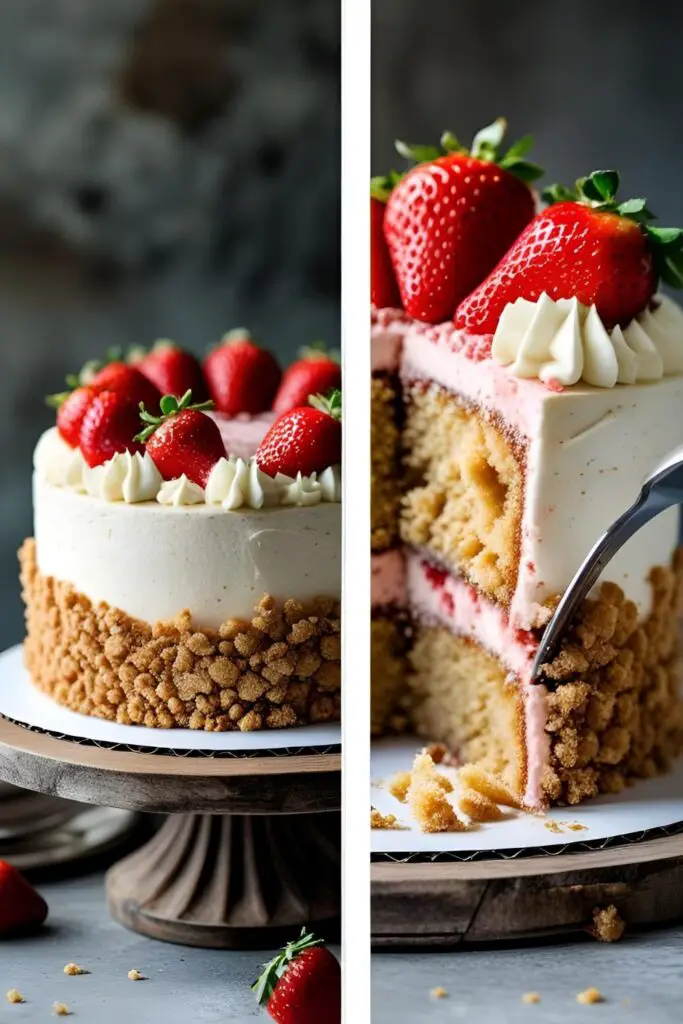
First, it’s a textural wonderland. Your fork glides through a tangy, luscious cream cheese frosting, then into a shockingly moist and tender strawberry cake, all while being enveloped by that sandy, buttery, crunchy crumble. The combination of soft, creamy, and crunchy in a single bite is nothing short of culinary bliss. It’s a party for your taste buds, and everyone’s invited.
Second, this cake is a visual stunner. It looks like it belongs in a fancy bakery window. The beautiful pink and white contrast, fully encased in that unmistakable crumble, makes it a perfect centerpiece for birthdays, potlucks, or just a random Tuesday when you feel like winning at life.

And finally, despite its impressive appearance, it’s incredibly achievable. I’ve broken the process into three simple acts: The Crunch, The Cake, and The Frosting. Follow along, and you’ll be amazed at the professional-looking masterpiece you can create right in your own kitchen.
The All-Star Ingredient Lineup
This cake is a team effort. Here are the players for each component. Read carefully, because quality matters here!
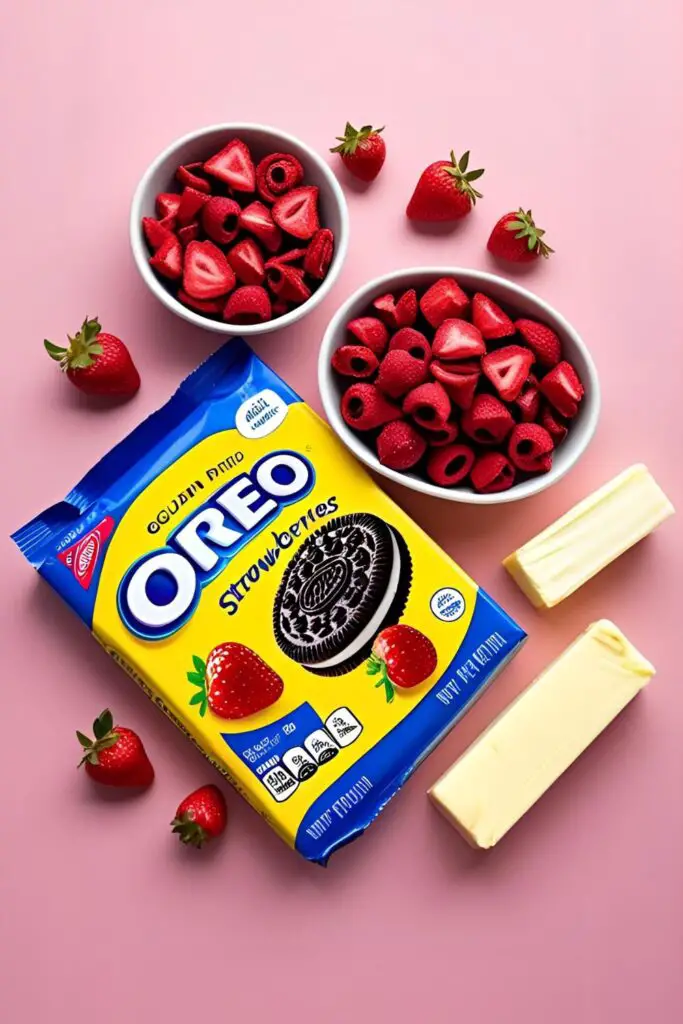
For the Legendary Strawberry Crunch Topping:
- Vanilla Sandwich Cookies: 1 12-ounce package (like Golden Oreos). The cream filling is part of the magic, so use the whole cookie!
- Freeze-Dried Strawberries: 1 cup. This is the undisputed champion for delivering intense, authentic strawberry flavor and color without making your crumble soggy.
- Unsalted Butter: 1/2 cup (1 stick), melted until it’s liquid gold.
For the Fluffy Strawberry Cake Layers:
- All-Purpose Flour: 21/2 cups.
- Granulated Sugar: 11/2 cups.
- Unsalted Butter: 1 cup (2 sticks), softened to a perfectly spreadable room temperature.
- Large Eggs: 4 of them, also at room temperature.
- Buttermilk: 1 cup, at room temperature. (Pro tip: No buttermilk? Just add one tablespoon of white vinegar or lemon juice to a cup of regular milk, stir, and let it sit for 5-10 minutes.)
- Freeze-Dried Strawberries: 1/2 cup, blitzed into a fine, fragrant powder using a blender or food processor.
- Pure Vanilla Extract: 2 teaspoons.
- Baking Powder: 2 teaspoons.
- Salt: 1/2 teaspoon.
- Pink or Red Gel Food Coloring (Optional, but recommended): Just a touch to achieve that nostalgic, vibrant pink.
For the Irresistible Cream Cheese Frosting:
- Full-Fat Block Cream Cheese: 16 ounces (2 blocks), softened. I cannot stress this enough: it must be the brick-style cream cheese, not the stuff in a tub.
- Unsalted Butter: 1 cup (2 sticks), softened.
- Powdered Sugar: 4 cups, sifted to avoid any pesky lumps.
- Pure Vanilla Extract: 1 tablespoon.
- Salt: 1/4 teaspoon, to balance the sweetness.
Your Kitchen Gadget Arsenal
Having the right tools is like having superpowers in the kitchen. Here’s what you’ll need to assemble this masterpiece with ease.
- A Stand Mixer or a trusty Hand Mixer: This is your workhorse for whipping up light, airy cake batter and dream-worthy frosting.
- Two 8-inch Round Cake Pans: The perfect size for creating impressive, sturdy layers.
- A Food Processor: The absolute best tool for pulverizing your cookies and strawberries into the perfect crunch topping.
- Offset Spatula & Bench Scraper: These tools are the secret to that smooth, professional frosting finish you see in bakeries.
- Baking Sheets: A must-have for toasting your crumble to crispy perfection.
- Parchment Paper: Your best friend for ensuring the cakes release from the pans without a fight.
- Wire Cooling Racks: Critical for allowing air to circulate around your cakes so they cool evenly.
Step-by-Step: The Journey to Crunch Cake Glory
Let’s do this! We’ll tackle it in three straightforward parts. You’ve got this.
Part 1: Crafting the Crunchy Topping
- Preheat and Prep: Get your oven preheating to 350∘F (175∘C). Line a large baking sheet with parchment paper.
- Create the Crumbs: In a food processor, add the entire package of vanilla sandwich cookies and the freeze-dried strawberries. Pulse them together until you have a mix of coarse crumbs. Don’t turn it into dust; texture is key!
- Butter it Up: Drizzle the melted butter over the crumb mixture. Pulse a few more times until everything is just moistened.
- Toast for Crunch: Spread the crumble evenly onto your prepared baking sheet. Bake for about 8-10 minutes. The crumble should be fragrant and feel dry to the touch. Let it cool completely on the pan. A hot crumble will melt your frosting, leading to a major disaster.
Part 2: Baking the Strawberry Cake
- Prep for Cake: Keep the oven at 350∘F (175∘C). Grease and flour your two 8-inch cake pans, then line the bottoms with parchment paper.
- Combine Dry Ingredients: In a separate bowl, whisk together the flour, baking powder, and salt. This ensures everything is evenly distributed.
- Cream the Fats and Sugar: In your mixer, beat the softened butter and sugar on medium-high speed for 3-4 minutes until the mixture is pale, light, and fluffy. This step whips air into the batter, which is crucial for a light cake.
- Add the Eggs: Add the room-temperature eggs one by one, mixing well after each addition. Scrape down the bowl, then mix in the vanilla.
- Bring on the Pink: Add the powdered freeze-dried strawberries and a few drops of food coloring. Mix on low until just combined.
- Alternate Wet and Dry: Turn the mixer to its lowest speed. Add about a third of the flour mixture, then half of the buttermilk, and repeat until you end with the last of the flour mixture. Mix only until the last streak of flour disappears. Over-mixing develops gluten and makes the cake tough!
- Bake Away: Divide the batter evenly between the two pans. Bake for 30-35 minutes, or until a wooden skewer inserted into the center comes out clean. Let the cakes cool in their pans for about 15 minutes before turning them out onto a wire rack to cool completely.
Part 3: Frosting and the Grand Assembly
- Whip the Frosting: In your mixer bowl, beat the softened cream cheese and butter until they are completely smooth. Add the sifted powdered sugar on low speed, then the vanilla and salt. Once combined, increase the speed to medium-high and whip for 2 minutes until the frosting is light and silky.
- Stack the Layers: Place one cooled cake layer on your serving plate or cake stand. Spread about a cup of frosting evenly over the top. Gently place the second cake layer on top.
- Apply a Crumb Coat: Cover the entire cake (top and sides) with a very thin layer of frosting. This traps any loose crumbs. Pop the cake in the refrigerator for 30 minutes to let this layer set firm.
- The Final Frosting: Cover the chilled cake with the remaining frosting, getting it as smooth as you can with your offset spatula and bench scraper.
- The Crunch-pocalypse! Now for the fun, messy part. Grab handfuls of your cooled crunch topping and gently press it onto the sides and top of the freshly frosted cake. Make sure it’s completely covered. Use a baking sheet underneath to catch the excess.
Calories & Nutritional Info (The Fine Print)
This cake is a glorious, unapologetic indulgence. It’s meant for celebration, joy, and treating yourself.
- Estimated Calories: Anywhere from 650-800 kcal per hefty slice.
- A Treat for the Soul: It’s rich in all the good stuff (sugar, fat, happiness) and should be enjoyed as the special occasion dessert that it is.
- Flavor from Real Food: By using freeze-dried strawberries, you are getting a punch of real fruit flavor in every bite.
Common Mistakes to Avoid (I Made Them So You Don’t Have To)
Save yourself the heartache by avoiding these common pitfalls.
- The Soggy Crumble Tragedy. Moisture is the mortal enemy of your crunch. This happens if you apply the crumble while it’s still warm or if your cake/frosting is not chilled enough. Patience is a virtue here. Ensure everything is cool and the crumble is completely dry.
- The Underwhelmingly Pale Cake. Using fresh strawberries can add too much moisture and result in a dense cake with a disappointingly faint pink color. Freeze-dried strawberries are the secret weapon for that intense, authentic flavor and a color that screams STRAWBERRY.
- The Tough, Chewy Cake Layer. The culprit is almost always over-mixing the batter once the flour is added. Be gentle! Mix only until you no longer see dry flour. A few small lumps are perfectly fine.
Variations & Customizations (Get Creative!)

Once you’ve mastered the original, feel free to play with your food.
- The “I’m Busy” Cake Mix Shortcut: No time to bake from scratch? No problem. Use a box of strawberry cake mix for the layers. Prepare the frosting and the crunch topping from scratch—they are what make this cake truly special. IMO, it’s a fantastic time-saver.
- Strawberry Crunch Cheesecake Hybrid: This is pure decadence. Prepare one strawberry cake layer. In another 8-inch pan, bake your favorite no-bake or baked cheesecake recipe. Layer as follows: cake, frosting, cheesecake, more frosting, and then coat the entire glorious tower in the crunch topping.
- Adorable Strawberry Crunch Cupcakes: Bake the strawberry cake batter as cupcakes. Once cool, pipe on a generous swirl of cream cheese frosting. Dip the tops into a bowl of the crunch topping for perfectly portioned, easy-to-share treats.
Your Burning Questions Answered (FAQ)
Here are the answers to the questions likely swirling in your head.
Can I use fresh or frozen strawberries?
For the cake and crumble, it’s highly recommended to stick with freeze-dried. Fresh or frozen strawberries contain a lot of water, which will make the cake heavy and the crumble topping soggy. You can, however, place a layer of thinly sliced fresh strawberries between the cake layers for an extra burst of freshness!
What’s a good substitute if I can’t find freeze-dried strawberries?
For the cake batter, you can substitute about 3-4 tablespoons of strawberry Jell-O powder. For the crumble, it’s tougher. The best bet is to omit them and have a delicious vanilla crumble.
How do you get the crumble to stick to the sides of the cake?
Apply it right after you put on the final layer of frosting, while it’s still sticky. Use your hands to gently cup and press the crumbs onto the sides. It’s a bit messy, but it’s the most effective method.
Can I prepare this cake in advance?
Yes. You can bake the cake layers up to 2 days ahead and store them tightly wrapped at room temperature. The crunch topping can also be made 2-3 days ahead and stored in an airtight container at room temperature. Assemble the cake the day you plan to serve it for maximum crunchiness.
Does this cake need to be refrigerated?

Absolutely, yes. The cream cheese frosting is perishable. The cake must be stored in an airtight container in the refrigerator. It’s best enjoyed within 3 days.
My crunch topping got soft in the fridge. How can I prevent this?
The refrigerator is a moist environment, so some softening is inevitable. The best defense is to make sure your crumble is very dry and well-toasted to begin with. Assembling the cake as close to serving time as possible will also ensure the best texture.
Can I use a different type of cookie for the topping?
Of course! While vanilla sandwich cookies are classic, you could use shortbread cookies, Nilla Wafers, or even sugar cookies for a different but equally delicious crumble.
Final Thoughts
You did it. You took a beloved ice cream truck jingle and turned it into an edible, awe-inspiring reality. You have created a dessert that is pure, unadulterated happiness.
So go ahead, cut a slice. Listen for that satisfying crunch. You’re not just eating a cake; you’re eating a memory. And trust me, it tastes even better than you remember.