How to Make Box Cake Taste Like Bakery Cake (The Ultimate Guide!)
Let’s be honest, there is absolutely no shame in the box cake mix game. It’s convenient, it’s reliable, and it has saved countless birthday parties from being cakeless. But… we can all admit that it can taste a little, well, boxy. It lacks a certain richness, a certain moistness, a certain je ne sais quoi that separates it from a true, decadent bakery cake.
What if I told you there are a few simple, almost magical, swaps and additions that can transform that humble box into a cake so moist, so rich, and so delicious, people will swear you bought it from a fancy bakery? Today, my friend, we are learning how to make box cake taste like bakery cake. This is your official guide to becoming a cake mix magician.
So, grab that box from your pantry. We’re about to give it a serious glow-up.
Why This “Recipe” (Technique) is Awesome
This isn’t a from-scratch recipe; it’s a brilliant, life-changing upgrade. Here’s why this is the best thing to happen to your baking life.
- It’s the Best of Both Worlds: You get the foolproof convenience and perfect structure of a box mix, but with the rich flavor and incredibly moist texture of a from-scratch bakery cake. It’s the ultimate low-effort, high-reward situation. You’re basically cheating at baking, and you’re going to win.
- You Will Fool Everyone (Including Yourself): Seriously. No one will ever know your secret started with a $2 box from the supermarket. You can just smile knowingly, accept all the gushing compliments, and take all the credit. You are a cake wizard, and they are your adoring fans.
- It Works for Any Flavor: These simple swaps are universal. They work for almost any flavor of cake mix you can find, from classic yellow to decadent devil’s food, from strawberry to lemon. You are about to become a master of all cake flavors.
Ingredients (The “Upgrades”)
This is where the magic happens. We’re going to look at the back of the box, then respectfully ignore most of it.
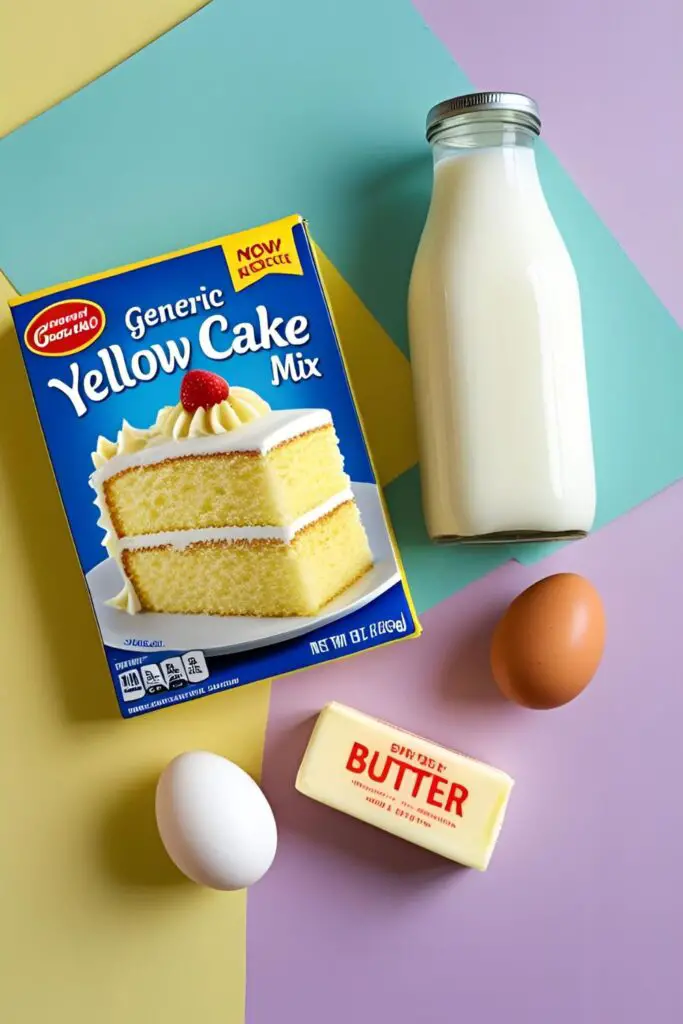
- 1 box of your favorite cake mix: (about 15.25 ounces) – Yellow, Chocolate Fudge, Devil’s Food, Funfetti… you choose your adventure!
- Instead of Water, Use Milk: Use the same amount of whole milk or buttermilk that the box calls for in water.
- Instead of Oil, Use Melted Butter: Replace the oil with an equal amount of melted unsalted butter. For an even richer, more decadent cake, you can double the amount of butter.
- The Egg Bonus: Use the same number of eggs the box calls for, PLUS ONE EXTRA EGG.
- The Flavor Boost: 1-2 teaspoons of pure vanilla extract.
- The Secret Weapon: A pinch of salt (about ¼ teaspoon).
- The Final Flourish: Your favorite homemade frosting. (Don’t worry, I’ll give you an easy recipe for that too!)
Tools & kitchen gadgets used
You don’t need anything fancy for this operation, just your standard baking gear.
- Your chosen Cake Pans (e.g., two 8-inch or 9-inch round pans, or one 9×13 inch pan)
- Parchment Paper
- A Large Mixing Bowl
- A Whisk and a Silicone Spatula
- A Stand Mixer or a powerful Hand Mixer (for the homemade frosting)
- An Offset Spatula (for frosting like a pro)
- A Wire Cooling Rack
Step-by-step instructions
This is less of a recipe and more of a secret mission. Your mission, should you choose to accept it, is to create an incredible cake.
Step 1: Read the Box… Then Ignore Most of It Look at the back of your cake mix box. Take note of the quantities of water, oil, and eggs it calls for. Now, take a deep breath, and prepare to give that cake mix a major promotion.
Step 2: The Great Ingredient Swap In your large mixing bowl, we will now perform the magical swaps.
- The Liquid Swap: Instead of the amount of water the box calls for, pour in the exact same amount of whole milk or buttermilk.
- The Fat Swap: Instead of the amount of oil the box calls for, pour in the exact same amount of melted unsalted butter. (Feeling decadent? Go ahead and double it. I won’t stop you.)
- The Egg Bonus: Crack in the number of eggs the box calls for, plus one glorious extra egg. That extra yolk adds incredible richness and moisture.
- The Flavor Boost: Add 1-2 teaspoons of good quality vanilla extract and a pinch of salt.
Step 3: Combine and Mix Now, dump the dry cake mix directly into the bowl with your upgraded wet ingredients. Using a hand mixer or a whisk, mix everything together just as the package directs, usually on a medium speed for about 2 minutes. Do not overmix!
Step 4: Bake as Directed Pour your beautifully upgraded batter into your prepared pans (greased, floured, and lined with parchment paper!). Bake for the time listed on the box for your pan size. The toothpick test is your best friend: it’s done when a wooden toothpick inserted into the center comes out clean or with a few moist crumbs attached.
Step 5: Cool It Down (Completely!) Let the cake cool in the pans for about 15 minutes before inverting it onto a wire rack to cool completely. I cannot stress this enough. You must not, under any circumstances, try to frost a warm cake.
Step 6: The Frosting Upgrade (The Most Important Part!) You’ve come this far. You’ve created a beautiful, moist, bakery-level cake. Do not disrespect its glory by slathering it with that sad, waxy frosting from a can. Making a simple buttercream takes five minutes and is a million times better.
- To make a simple vanilla buttercream: Beat 1 cup of softened butter until creamy. Gradually mix in 3-4 cups of sifted powdered sugar, 3-4 tablespoons of milk or cream, 1 teaspoon of vanilla, and a pinch of salt. Whip on high for 3 minutes until light and fluffy.
Calories & Nutritional Info
By adding more fat and an extra egg, we are adding more calories. And you know what? It’s worth every single one.
- Serving Size: 1 slice
- Estimated Calories: Expect about 50-100 more calories per slice than what the box indicates, due to the delicious upgrades.
- Contains: A significantly higher level of richness, moisture, and pure, unadulterated joy than the standard box cake.
Common Mistakes to Avoid
Avoid these simple mistakes to ensure your cake mix hack is a stunning success.
- Using the Wrong Milk: While any milk is better than water, using buttermilk is the ultimate pro move. The acidity in the buttermilk reacts with the leavening agents in the mix to create an incredibly tender and moist crumb.
- Forgetting That Extra Egg: Don’t skip it! That one extra egg is the secret to a richer, denser, moister cake that truly tastes homemade and not like it came from a box.
- Falling at the Final Hurdle with Canned Frosting: You’ve come this far. You’ve elevated your cake from a simple convenience food to a true masterpiece. Don’t ruin it now. Making a simple buttercream takes 5 minutes and is the difference between a good cake and a great one.
- Overmixing the Batter: Even with the safety net of a box mix, you can overdo it. Mix only for the time recommended on the box (usually 2 minutes). Overmixing will develop the gluten and can lead to a tough or rubbery cake.
Variations & Customizations (Even More Upgrades!)
Want to take your doctored cake mix to the next level? Of course you do.
- The “Coffee Shop” Upgrade: When using a chocolate cake mix, swap the water/milk for an equal amount of strong, cooled coffee or espresso. Coffee doesn’t make the cake taste like coffee; it just makes the chocolate taste more intensely and deliciously chocolatey.
- The “Bakery Emulsion” Hack: Add a tablespoon of a clear flavoring emulsion (like vanilla, lemon, or even Princess Cake and Cookie emulsion) in addition to your extract. Emulsions are water-based and their flavor doesn’t “bake out” as much as alcohol-based extracts, giving you a stronger, more professional flavor.
- The Sour Cream or Yogurt Trick: For an unbelievably moist and tender cake, replace half of the liquid (the milk) with an equal amount of full-fat sour cream or plain Greek yogurt. The extra fat and acidity work wonders.
FAQ Section
All your burning questions about becoming a cake mix magician, answered.
1. What can I add to a cake mix to make it taste better? The five key upgrades are: using milk instead of water, using melted butter instead of oil, adding an extra egg, adding a teaspoon of vanilla extract, and always making your own frosting!
2. Is it better to use milk or water in a cake mix? Milk is always better! The fat and protein in milk add richness, flavor, and a more tender crumb to your cake. Buttermilk is even better for a super soft texture.
3. Can I use butter instead of oil in a box cake mix? Yes, and you absolutely should! Butter provides a much richer, more delicious flavor. Just melt it and use it in the same quantity the box calls for in oil.
4. How many extra eggs should I add to a cake mix? One extra egg is the perfect amount to add extra richness and moisture without making the cake too dense or heavy.
5. What is the best box cake mix brand? This is a matter of personal preference, but brands like Duncan Hines, Betty Crocker, and Pillsbury are all reliable and work perfectly with these hacks.
6. How do I make a box cake less crumbly? The upgrades in this guide—especially using milk, melted butter, and an extra egg—will all help to create a moister, richer, and therefore less crumbly cake.
7. Can I add a box of instant pudding mix to my cake mix? Yes, this is another very popular hack! Adding a small (4-serving size) box of instant pudding mix (in a complementary flavor) to the dry cake mix will make the final cake incredibly moist and dense.
Final Thoughts
And there you have it. You are now a master of deception. A cake mix magician. A culinary illusionist. You can now produce a legitimate, bakery-quality cake on demand with a humble secret weapon from your pantry.
Go forth and accept your endless stream of compliments; your delicious secret is safe with me. They never have to know it came from a box.


