How to Make Puff Pastry Dough (The Easy Shortcut Method!)
Let’s be real for a moment. The phrase “homemade puff pastry” is a two-word horror story for most home bakers. It conjures images of multi-day projects, meticulously shaping a giant, frozen block of butter, and a series of folds so precise you feel like you need a protractor and a degree in engineering. It’s the kind of thing you see on a baking show right before a contestant has a nervous breakdown.
But what if I told you there’s a back-door entrance to flaky, buttery nirvana? A secret method that gives you hundreds of beautiful, puffy layers with about 10% of the work and 0% of the tears? Today, my friend, we are learning how to make puff pastry dough using a brilliant, life-changing shortcut called “rough puff,” and you will never look at that sad, frozen box in the grocery store the same way again.
This isn’t just a recipe; it’s a revolution. A flaky, buttery revolution.
Why This Recipe is Awesome
If “it won’t make you want to cry” isn’t enough of a selling point, here’s why this shortcut puff pastry is about to become your new best friend.
- It’s Flaky Heaven, Without the Hell: This “rough puff” or “blitz puff” pastry gives you a spectacular rise and hundreds of beautiful, buttery, flaky layers with a fraction of the time and effort of classic puff pastry. You get all of the glory, all of the compliments, and none of the existential dread.
- The Flavor is a Million Times Better: That frozen stuff in a box? It’s typically made with oils and fats that taste like… well, like the inside of a freezer. This recipe is made with one simple, glorious ingredient: real butter. The flavor is rich, nutty, and unbelievably delicious. It’s the difference between a good pastry and a mind-blowing one.
- It Makes You Look Like a Baking God: When you pull a golden, puffy, ridiculously flaky creation out of the oven and casually say, “Oh, this? I just whipped up the puff pastry from scratch this morning,” people will look at you with a mixture of awe and reverence. Let them. They don’t need to know your secret.
Ingredients
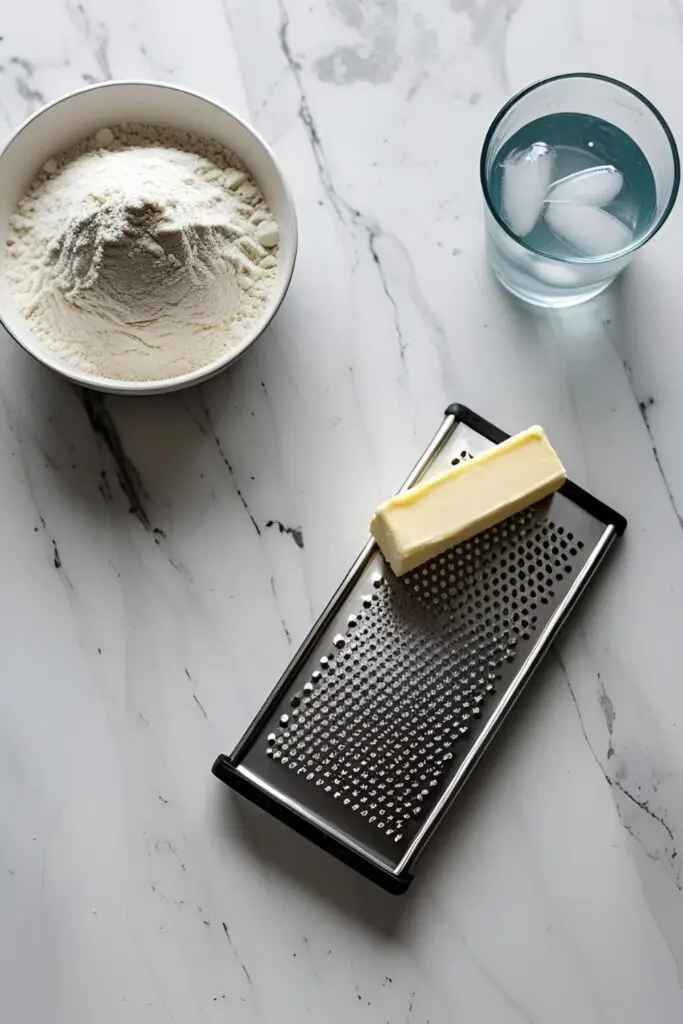
The ingredient list is deceptively simple. The magic is all in the technique and the temperature.
- 2 cups all-purpose flour
- 1 teaspoon salt
- 1 cup (2 sticks) unsalted butter, very cold and cut into ½-inch cubes
- ½ cup ice water, plus more as needed
Tools & kitchen gadgets used

You can do this by hand, but a few simple tools will make the process smoother.
- A Large Mixing Bowl
- A Pastry Blender or your own two hands
- A Rolling Pin
- A Bench Scraper (very helpful for folding and cleaning your surface)
- Parchment Paper
- Plastic Wrap
- A Ruler (optional, if you’re feeling particularly precise)
Step-by-step instructions
Read this through, take a deep breath, and remember your new mantra for the next hour: Cold. Cold. Cold.
Step 1: The Great Chill Before you do anything else, take your cubed butter and place it in a bowl in the freezer for at least 15 minutes. Fill a liquid measuring cup with water and a bunch of ice cubes and stick that in the fridge. Everything must be as cold as possible. This is non-negotiable.
Step 2: Cut in the Butter In your large mixing bowl, whisk together the flour and salt. Add your frozen butter cubes. Now, using your pastry blender or your fingertips, quickly cut the butter into the flour. Your goal is NOT to make fine crumbs like a pie crust. You want a very coarse, shaggy mixture with large, visible, walnut-sized chunks of butter still intact.
Step 3: Add the Water Drizzle about 4 tablespoons of your ice water over the mixture. Use a fork to toss it all together until a very shaggy, messy dough starts to form. If it’s too dry, add more ice water, one tablespoon at a time. Do not over-mix!
Step 4: The First Chill Turn the messy, shaggy dough out onto a clean work surface. It will look wrong. This is right. Gently press it together into a rough rectangle, about 1-inch thick. Wrap it tightly in plastic wrap and chill it in the refrigerator for 30 minutes.

Step 5: The First “Turn” (The Lamination Magic!) Lightly flour your work surface and your rolling pin. Unwrap your chilled dough. Roll it out into a long rectangle, roughly 15 inches by 8 inches. Now, we do our first “turn.” Fold the dough into thirds, like you’re folding a business letter. You’ve just created your first set of layers.
Step 6: Rotate and Repeat Rotate the folded dough 90 degrees (so the “seam” is on the side). Roll it out again into the same long rectangle. Do another letter fold. This completes your second “turn.” Wrap the dough tightly in plastic wrap and chill it in the refrigerator for another 30 minutes.
Step 7: Do It All Again Repeat the entire process: take the chilled dough out, do two more “turns” (roll, fold, rotate, roll, fold), and then wrap it up and chill it for a final 30 minutes (or up to 2 days). You should have completed a total of 4 to 6 “turns.”
Step 8: Ready to Bake! Your beautiful, multi-layered, buttery rough puff pastry is now ready to be used! Roll it out and use it in any recipe that calls for puff pastry, like turnovers, palmiers, or a fancy tart. Bake it in a hot oven (usually around 400°F / 200°C) for that glorious puff.
Calories & Nutritional Info

This is for the raw dough itself. The final count depends on what you make with it!
- Serving Size: 1 ounce (28g) of raw dough
- Estimated Calories: Around 120-140 kcal.
- Contains: A heroic amount of butter and the potential for infinite deliciousness.
Common Mistakes to Avoid

Avoid these flaky pastry pitfalls, and you’ll be a puff pastry pro.
- Using Soft or Room Temperature Butter: If your butter is soft, it will just blend into the flour, and you will get a tough, sad, dense pastry with zero layers. Your butter must be as cold as possible—preferably frozen—to create those steam pockets that make the pastry puff.
- Overworking the Dough: We are not making bread here. You want to see large, distinct chunks of butter in your initial dough. Handle the dough as little and as quickly as possible to keep it from getting tough.
- Skipping the Chilling Steps: I know it’s annoying. I know you’re impatient. But the chilling periods are not suggestions; they are the law. This time in the fridge allows the gluten in the flour to relax (making it easier to roll) and, most importantly, allows the butter to re-firm. Skipping the chills will result in a greasy, tough pastry that won’t puff.
- Rolling Too Aggressively: Be firm but gentle with your rolling pin. If you press down too hard, you can squeeze the beautiful layers of butter out of the sides of your dough, which is a tragedy of epic proportions.
Variations & Customizations
This dough is a fantastic canvas. Here’s how you can customize it.
- Savory Herb Rough Puff: Add 2 tablespoons of finely chopped fresh herbs like thyme, rosemary, or chives to the dry ingredients at the very beginning. This is incredible for making savory tarts, sausage rolls, or cheese straws.
- Cheddar & Black Pepper Rough Puff: Add 1 cup of finely grated, extra-sharp cheddar cheese and 1 teaspoon of coarsely ground black pepper to the dry ingredients before you cut in the butter. This makes the most amazing, savory cheese twists.
- Sweet Cinnamon Sugar Rough Puff: Add a few tablespoons of granulated sugar to the dry ingredients. Before each “letter fold,” sprinkle the rolled-out dough with a light, even dusting of cinnamon sugar. This is perfect for making sweet palmiers or morning pastries.
FAQ Section
All your puffy, flaky, buttery questions, answered.
1. What is the real difference between classic puff pastry and this “rough puff” pastry? Classic puff pastry involves meticulously wrapping a giant, flat block of butter inside a lean dough (a process called “lamination”). Rough puff, our shortcut method, incorporates large chunks of butter directly into the dough from the start. The result is slightly less uniform and has a slightly less dramatic rise, but it is a million times easier and still incredibly flaky and delicious.
2. Why didn’t my puff pastry puff up? The most likely culprits are that your butter wasn’t cold enough, you didn’t leave large enough chunks of butter in the dough, or you skipped the crucial chilling steps between folds.
3. Can I make this dough ahead of time? Yes! This dough is perfect for making ahead. You can store the wrapped dough in the refrigerator for up to 3 days, or in the freezer for up to 3 months. It’s a gift to your future self.
4. Can I use a food processor for this recipe? It’s generally not recommended for “rough puff,” because a food processor tends to break the butter down into pieces that are too small. You want those big, chunky pieces of butter to create the best layers, which is easier to achieve by hand.
5. What can I make with this rough puff pastry dough? The possibilities are endless! You can make sweet turnovers, palmiers (elephant ear cookies), cheese straws, the top crust for a chicken pot pie, savory tarts, sausage rolls… anything that calls for puff pastry!
6. How should I store my homemade puff pastry? Wrap it tightly in plastic wrap. It will keep in the refrigerator for up to 3 days or in the freezer, double-wrapped, for up to 3 months. Thaw it in the refrigerator overnight before using.
7. Why did a bunch of butter leak out of my pastry when I was baking it? This usually means the dough was too warm when it went into the oven, or the oven wasn’t hot enough. The dough needs to hit a hot oven quickly so the pastry can set and rise before the butter has a chance to just melt and leak out.
Final Thoughts
And there you have it. You are now officially a person who makes their own puff pastry. You are a flaky, buttery, baking god/goddess. You’ve taken on one of the most feared projects in the baking world and, with this brilliant shortcut, you have emerged victorious.
Now go forth and create something magnificent. Turn it into a savory appetizer or a sweet treat. The freezer aisle and its sad, flavorless, boxed imposters have been defeated. You’ve earned this.