The Ultimate Edible Brownie Batter Recipe (Safe to Eat!)
Let’s be honest. The best part of making brownies isn’t preheating the oven, waiting for them to bake, or the agonizing cooling period. The best part of making brownies is licking the spoon. It’s a primal, delicious, and slightly illicit act that connects us to our childhood selves. We were always warned not to, but we did it anyway.
What if we could have a whole bowl of that glorious, rich, fudgy goodness, without the nagging voice in our head whispering about raw eggs and flour? What if we could take the best part of the process and make it the only part? Friends, today we are making our dreams come true. This is the ultimate guide to a completely safe-to-eat edible brownie batter.
This isn’t just a recipe; it’s a rebellion. Grab a spoon, we’re breaking the rules.
Why This Recipe is Awesome
If “a bowl of pure brownie batter you can eat with a spoon” isn’t enough to sell you, let’s dive into the delicious details.
- It’s All the Best Parts, with None of the Waiting: This is pure, unadulterated brownie bliss. There is no preheating the oven, no waiting for it to bake, no agonizingly long cooling period where you stare at the pan like a hungry wolf. It’s instant gratification in its most decadent form.
- It’s Actually, Genuinely Safe to Eat: We’ve all been warned about the dangers of raw batter. This recipe smartly addresses both issues. We’re ditching the raw eggs entirely and performing one simple but crucial step to heat-treat the flour, making this a completely safe, worry-free indulgence.
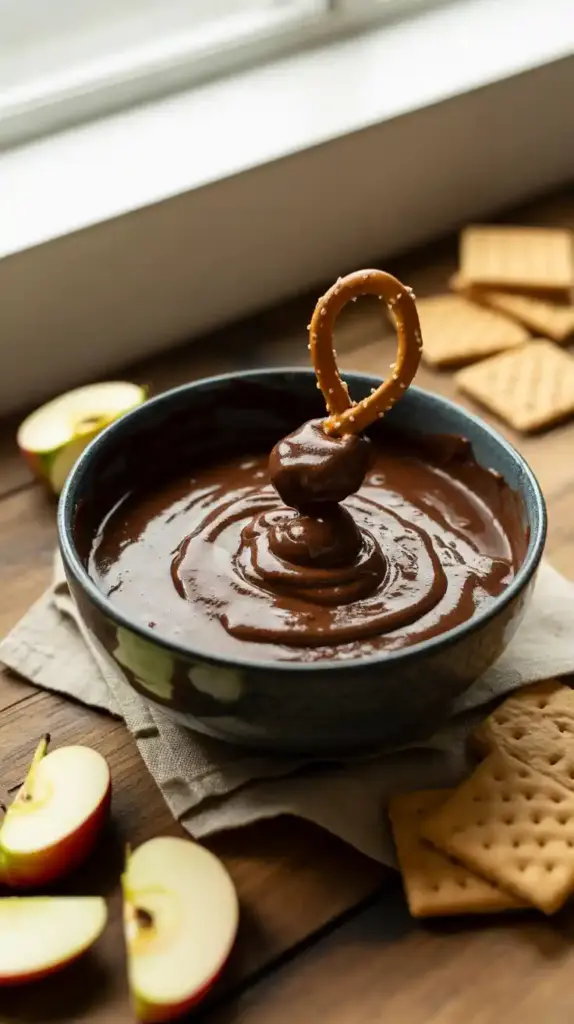
- It’s a Decadent, Shareable Dessert Dip: While eating this straight from the bowl with a spoon is a totally valid life choice, you can also serve it up as the most popular dessert dip at any party. With pretzels, cookies, or fruit for dipping, it’s a guaranteed showstopper.
Ingredients
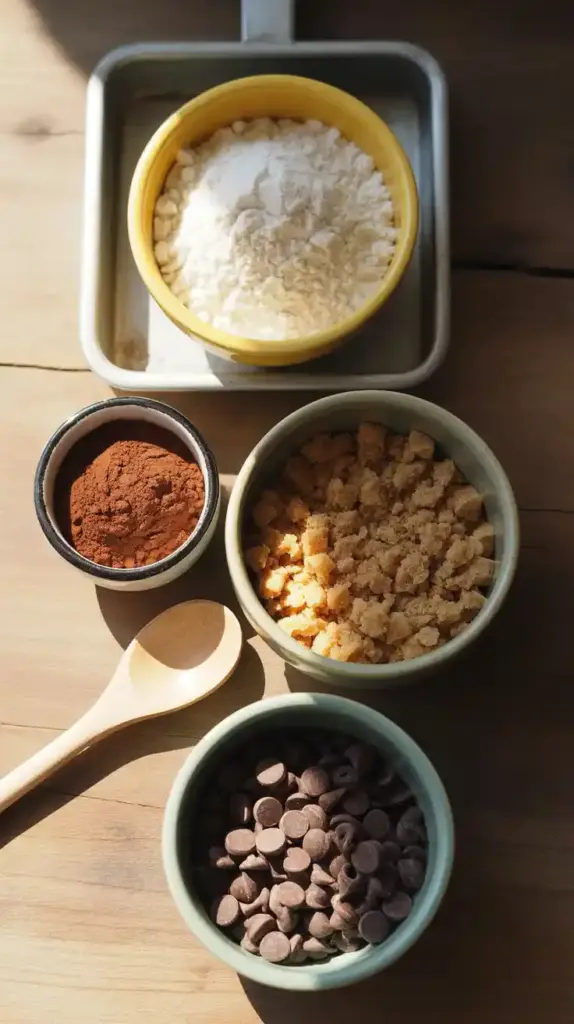
The ingredients are simple pantry staples, with one very important technique applied to the flour.
- 1 cup all-purpose flour
- ½ cup unsweetened cocoa powder, sifted
- ½ cup packed light brown sugar
- ¼ cup granulated sugar
- ½ teaspoon salt
- ½ cup (1 stick) unsalted butter, melted
- 1 teaspoon pure vanilla extract
- ¼ cup milk (or heavy cream for a richer batter)
- ½ cup mini chocolate chips
Tools & kitchen gadgets used

No stand mixer needed for this no-bake wonder.
- A Baking Sheet
- Parchment Paper
- An Oven (Yes, an oven! Just for a few minutes, I promise.)
- An Instant-Read Thermometer (optional, but helpful for the flour)
- A Large Mixing Bowl
- A Whisk
- A Silicone Spatula
- Measuring Cups and Spoons
Step-by-step instructions
This is less like baking and more like conducting a delicious science experiment.
Step 1: The Super-Important Safety Step – Heat-Treat Your Flour! Okay, listen up, because this is the most important step in the entire recipe. Raw flour can carry bacteria like E. coli. To make it completely safe to eat, we need to give it a quick toast.
- Preheat your oven to 350°F (175°C).
- Spread your 1 cup of flour in a thin, even layer on a parchment-lined baking sheet.
- Bake for 5 to 7 minutes. The flour is ready when it reaches an internal temperature of 160°F (71°C) on an instant-read thermometer. Let it cool completely before using.
Step 2: Combine the Dry Ingredients In a large bowl, whisk together your now-safe (and cooled!) flour, the sifted cocoa powder, both brown and granulated sugars, and the salt. Break up any lumps from the brown sugar.
Step 3: Add the Melted Goodness Pour in your melted butter and the vanilla extract. Use your silicone spatula to stir everything together. At this point, it will be very thick and crumbly, almost like a dry dough. You will think, “This isn’t batter.” Trust the process.
Step 4: Make It Creamy Now, it’s time to turn this from a crumble into a glorious, scoop-able batter. Slowly stream in your milk or cream, one tablespoon at a time, stirring well after each addition. You might not need all of it! Stop adding liquid when you reach a perfectly thick, glossy, spoon-able batter consistency.

Step 5: Fold in the Chocolate Pour in your mini chocolate chips and stir them into the batter until they are evenly distributed.
Step 6: Serve or Chill (The Ultimate Choice) Your edible brownie batter is now ready! You can dive in right now with a spoon and enjoy it at room temperature, or you can cover it and chill it in the refrigerator for about 30 minutes. Chilling will let the flavors meld and give it a firmer, more fudge-like texture. There is no wrong answer here.
Calories & Nutritional Info
This is a decadent, indulgent treat. Let’s just embrace it.
- Serving Size: ¼ cup
- Estimated Calories: Around 350-400 kcal.
- Contains: Pure, unadulterated joy and a significant amount of sugar and fat.
- Perfect for: A movie night, a breakup, a celebration, or just a Tuesday.
Common Mistakes to Avoid
Avoid these simple slip-ups to ensure your rule-breaking treat is both safe and delicious.
- SKIPPING THE FLOUR-TOASTING STEP: I am going to be very serious for a moment, because this is about food safety. You absolutely must heat-treat your flour. Eating raw, untreated flour carries a risk of E. coli and other nasty bacteria. It only takes 5 minutes in the oven to make it completely safe. Do not skip this step.
- FORGETTING THIS RECIPE IS EGGLESS: This recipe is specifically designed to be eggless so that it is safe to eat raw. Do not add an egg thinking it will make it better or more “authentic.” It will not. It will just make it unsafe to eat.
- DUMPING IN ALL THE MILK AT ONCE: You will go from a thick, controllable dough to a soupy, runny mess in the blink of an eye. Add the milk a little at a time, stirring well after each addition, until you reach that perfect, glossy, spoon-able batter texture. You are in control of the consistency.
- Starting with a Lumpy Base: For the smoothest, most luxurious batter possible, sift your dry ingredients (the heat-treated flour, cocoa powder, and even the sugars if they’re clumpy) together before you start mixing. This prevents any unpleasant lumps in your final product.
Variations & Customizations
This batter is your playground. Here are a few ideas to get you started.
- “Brookie” Batter Dip: Make a batch of this edible brownie batter and a batch of your favorite edible cookie dough (using heat-treated flour and no eggs, of course!). In a serving bowl, gently swirl the two together for the ultimate brownie-cookie hybrid dip.
- S’mores Edible Brownie Batter: Fold in a handful of mini marshmallows and some crushed graham crackers along with the mini chocolate chips. For extra flair, you can toast the mini marshmallows with a kitchen torch before folding them in.
- Vegan Edible Brownie Batter: This is an easy swap! Use a high-quality vegan butter substitute or melted coconut oil, your favorite unsweetened plant-based milk (like oat or almond), and make sure your chocolate chips are certified dairy-free.
FAQ Section
All your illicit batter-eating questions, answered.
1. Is it really, truly safe to eat raw flour? No, not straight from the bag. But it is 100% safe after you heat-treat it as described in this recipe. Baking the flour at 350°F for 5-7 minutes kills off any harmful bacteria.
2. How do you heat-treat flour to make it safe to eat? The easiest way is in the oven. Spread the flour on a parchment-lined baking sheet and bake at 350°F (175°C) for 5-7 minutes. You can also microwave it in short bursts, stirring in between, until it reaches 160°F (71°C).
3. What does edible brownie batter taste like? It tastes exactly like the rich, fudgy, decadent batter you sneak from the bowl, but without the slightly raw flour taste. It’s thick, chocolatey, and deeply satisfying.
4. Can I use a box brownie mix to make this? You can! You’ll need to heat-treat the dry brownie mix in the oven just like you would with plain flour. Then, follow the recipe on the box but omit the eggs and only add enough of the called-for liquid (water or oil) to reach a thick, batter-like consistency.
5. How long does this last, and how do I store it? Store your edible brownie batter in an airtight container in the refrigerator for up to one week. It will firm up in the fridge, so you may want to let it sit at room temperature for a few minutes to soften before serving.
6. What do you serve with edible brownie batter? The best dippers are things that are a little salty to contrast the sweetness! Pretzels, salty crackers, potato chips, and apple slices are all amazing. Graham crackers, Nilla Wafers, and strawberries are great, too. Or just a spoon. A spoon is a classic choice.
7. Can I bake this batter to make actual brownies? No. This recipe is not formulated for baking. Because it contains no eggs or chemical leaveners (like baking soda), it will not rise or set properly in the oven. It would likely just melt into a thin, greasy, and probably burnt mess.
Final Thoughts
And there you have it. You’ve officially hacked the best part of baking and made it the only part. You have taken a forbidden pleasure and made it a safe, legitimate, and ridiculously delicious dessert. You are a genius. You are a rebel.
Now go grab a spoon, put on your favorite movie, and live your best, no-bake life. You’ve more than earned it.