How to Make Popcorn on the Stove (And Ditch the Microwave Bag Forever!)
Let’s talk about that sad, beige bag of microwave popcorn. You know the one. It spins forlornly in your microwave, inevitably leaving you with a mix of burnt, smoking pieces, a weird chemical-butter smell that lingers for days, and a depressing number of un-popped kernels, or “old maids,” at the bottom. It’s a tragedy in a bag.
I am here today to stage an intervention. I am here to tell you that there is a better way. Today, we’re going to learn how to make popcorn the old-fashioned way—on the stovetop—and I promise, once you experience the crisp, clean flavor and the glorious, chaotic sound of this method, you’ll never go back to that sad little bag again.
This isn’t just a snack; it’s an experience. Get ready to elevate your movie night forever.
Why This Recipe is Awesome
If you’re still clinging to the convenience of the microwave bag, let me explain why you need to break free.
- The Flavor is Infinitely Better: This is the most important part. Real kernels, real oil, real butter, real salt. The taste is clean, crisp, nutty, and ridiculously addictive. It tastes like what popcorn is actually supposed to taste like, not like a science experiment gone wrong.
- You Are in Complete Control: You are the captain of your own popcorn destiny. You control the salt, the butter, the type of oil, and all the glorious toppings. Want it super healthy? Use a little coconut oil and a sprinkle of salt. Want it absurdly decadent and movie-theater-worthy? Go wild with the melted butter.
- It’s Dinner and a Show: There is nothing more satisfying than hearing those first few test kernels pop, followed by a glorious, frantic crescendo of popping that fills the whole pot. It’s a fun, sensory experience that is a million times more rewarding than pressing a button and walking away.
Ingredients
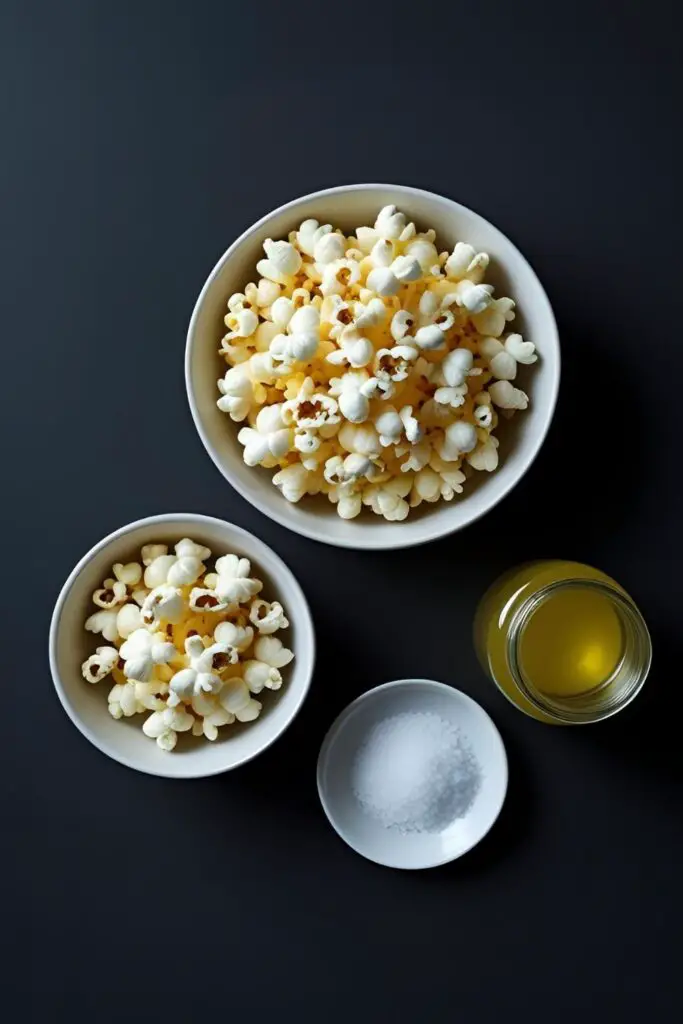
The beauty of this recipe is its glorious simplicity.
- ½ cup popcorn kernels: Yellow or white kernels both work beautifully.
- 3 tablespoons high smoke-point oil: Coconut oil is the secret to that “movie theater” flavor and aroma. Canola, vegetable, or grapeseed oil also work perfectly.
- ½ teaspoon fine-grained salt: Or more, to your taste.
- Optional, but is it really?: 3-4 tablespoons of unsalted butter, melted.
Tools & kitchen gadgets used

You don’t need a fancy air popper or any single-purpose gadgets. Just a good pot.
- A Large, Heavy-Bottomed Pot with a Lid: A 5 or 6-quart Dutch oven or a sturdy stockpot is perfect. A heavy bottom ensures the heat is distributed evenly and prevents scorching.
- A Large Serving Bowl: And I mean LARGE. You’re about to make a lot of popcorn.
- Measuring Cups and Spoons
- Oven Mitts (Things are gonna get shaky!)
Step-by-step instructions
This is a fast process that requires your full attention. Read the steps, get your station ready, and prepare for the pop-ocalypse.
Step 1: The Three-Kernel Test (The Secret to Success!) This is the most important step for no-fail, perfect popcorn. Pour your 3 tablespoons of oil into your cold pot. Add just three individual popcorn kernels. Put the lid on the pot and turn the heat to medium-high.
Step 2: Listen Carefully Now, you wait and listen. Stay by the stove. Don’t wander off. When you hear all three of those test kernels pop, you know with scientific certainty that your oil is at the perfect temperature for popping.
Step 3: The Main Event Immediately take the pot off the heat. Open the lid and pour in the rest of your ½ cup of popcorn kernels, giving the pot a little swirl to make sure they’re in a single, even layer. Put the lid back on and count to 30. This little off-heat vacation allows all the kernels to come to the same temperature, which means they will all pop more consistently at the same time.
Step 4: The Pop-ocalypse Begins! Return the pot to the medium-high heat. Within a minute or so, you’ll hear the popping begin. It will start slow, with a few timid pops, and then it will escalate into a frantic, beautiful, chaotic symphony of popping.

Step 5: Shake It Up! Once the popping is going strong, put on your oven mitts and grab the handles of the pot. Gently shake the pot back and forth over the burner every 10-15 seconds. This helps the un-popped kernels, the “old maids,” fall to the hot bottom of the pot so they have their chance to shine.
Step 6: The Final Countdown This is where your ears are your best tool. The popping will reach a furious peak and then begin to slow down. When the popping slows to the point where there are 2 to 3 seconds between pops, immediately remove the pot from the heat and take off the lid to release the steam. The residual heat will pop the last few stragglers.
Step 7: Dress It and Serve It Immediately pour the hot, fresh popcorn into your large serving bowl. This is the best time to season it. Drizzle your melted butter all over the popcorn and then sprinkle with the salt. Give it a good toss to combine everything. Serve immediately while it’s still warm and crispy.
Calories & Nutritional Info

Homemade popcorn can be a surprisingly healthy whole-grain snack!
- Serving Size: 1 cup, popped
- Estimated Calories:
- With Oil & Salt: Around 55 kcal
- With Oil, Salt & Butter: Around 80-100 kcal
- Good Source Of: Fiber!
- Note: It’s a blank canvas, so the nutritional info can change dramatically depending on your toppings.
Common Mistakes to Avoid
Avoid these common mistakes to go from a popcorn novice to a seasoned pro.
- Using the Wrong Kind of Oil: Do not use extra virgin olive oil or other oils with a low smoke point. They will burn, smoke, and make your whole house smell terrible and your popcorn taste bitter. You need a high smoke-point oil like coconut, canola, vegetable, or grapeseed oil.
- Being Afraid of the Heat: You need the heat to be consistently hot to make the moisture inside the kernels turn to steam and explode. Medium-high heat is your friend. If the heat is too low, you’ll end up with chewy, half-popped kernels.
- Walking Away From the Pot: This is a 5-minute, high-attention recipe. I’m serious. If you walk away to answer a text or check your email, you will almost certainly come back to a pot of burnt, sad, black popcorn cinders and a cloud of smoke. Stay with your pot.
- Dumping All the Kernels in at Once: The three-kernel test is the secret to success. It ensures your oil is perfectly hot when the bulk of the kernels go in. This simple step is the key to getting the maximum number of popped kernels and leaving very few “old maids” at the bottom of the pot.
Variations & Customizations
Once you’ve mastered the classic, you can get creative. The world is your popcorn bowl.
- Spicy Chili-Lime Popcorn: After popping, toss the hot popcorn with your melted butter. In a small bowl, mix together the zest of one lime, 1 teaspoon of chili powder, and a pinch of cayenne pepper. Sprinkle this mixture over the buttered popcorn and toss to combine.
- Easy Homemade Kettle Corn: This one is a little more advanced but so worth it. To your pot with the oil and 3 test kernels, also add 3 tablespoons of granulated sugar. Once the kernels pop, add the rest of your kernels and another 3 tablespoons of sugar. Shake the pot almost constantly as it pops to prevent the sugar from burning. Immediately dump it into a bowl when the popping slows.
- Garlic Parmesan & Herb Popcorn: This is dangerously addictive. Toss your hot, buttered popcorn with ¼ cup of finely grated Parmesan cheese, ½ teaspoon of garlic powder, and a ½ teaspoon of dried Italian herbs like oregano or parsley.
FAQ Section

All your popping good questions, answered.
1. What is the best oil to use for making stovetop popcorn? For that authentic “movie theater” flavor and smell, coconut oil is the undisputed champion. However, any neutral-flavored oil with a high smoke point, like canola, vegetable, or grapeseed oil, will work perfectly.
2. How do you get the salt to actually stick to the popcorn? The secret is to salt it when it’s hot and has just been coated in oil or melted butter. The fat gives the fine-grained salt something to cling to. Trying to salt plain, dry popcorn is a futile exercise.
3. Why are there so many un-popped kernels (“old maids”) at the bottom of my pot? This is usually a sign that your oil wasn’t hot enough when you added the main batch of kernels (which is why the 3-kernel test is so important!), or that your popcorn kernels are old and have dried out.
4. Can I make popcorn in any pot? A heavy-bottomed pot with a tight-fitting lid is best. A heavy bottom distributes the heat evenly, which prevents the kernels from scorching in one spot.
5. Is homemade stovetop popcorn healthier than microwave popcorn? A resounding, unequivocal YES. With homemade popcorn, you control everything. You can use a healthy oil, control the amount of salt, and use real butter. Microwave popcorn bags are often coated with chemicals and contain artificial flavors and a shocking amount of trans fats.
6. How do I store leftover popcorn? (As if that’s a thing…) In the unlikely event you have leftovers, let the popcorn cool completely, then store it in an airtight container or a sealed Ziploc bag at room temperature. It will lose some of its crispiness but should be good for a day or two.
7. How do you make popcorn without a stove? You can use an air popper, which uses hot air instead of oil. You can also make your own microwave version: place ¼ cup of kernels in a brown paper lunch bag, fold the top over a few times, and microwave for 2-3 minutes, or until the popping slows down.
Final Thoughts
And there you have it. You are now a popcorn purist. You’ve unlocked the simple secret to the perfect movie night snack, the ultimate afternoon treat, and the best-smelling kitchen on the block. The sad, greasy, perpetually-disappointing microwave bag has no power over you anymore.
Go forth and pop. You’ve earned this.