How to Make Cupcakes From Scratch (The Only Recipe You’ll Ever Need!)
Is there any dessert more pure, more joyful, than a cupcake? I think not. It’s a personal-sized party. A whole cake you don’t have to share. It’s the perfect vehicle for a glorious swirl of frosting and a cascade of sprinkles. But for too long, many of us have been held hostage by the box mix aisle, convinced that making them from scratch is some mystical, complicated art form.
Well, today the revolution begins. This is your definitive, no-fear guide on how to make cupcakes from scratch that are fluffy, moist, and approximately one million times better than anything you can get from a box. We’re going to demystify the process and turn you into a cupcake-baking legend.
So, are you ready to ditch the mix and discover your inner pastry pro? Let’s bake some happiness.
Why This Recipe is Awesome
In a sea of cupcake recipes, this one is your new ride-or-die. Here’s why:
- Unbelievably Fluffy & Moist: This is the holy grail of cupcakes. We’re talking a tender, delicate, melt-in-your-mouth crumb. This is a “no-dry-cupcakes-allowed” zone. This recipe is specifically engineered for a soft, moist, perfect texture every single time.
- The Perfect “Blank Canvas” Cupcake: Master this classic vanilla cupcake, and you have the key to an entire universe of flavors. It’s the little black dress of the cupcake world—timeless, versatile, and the perfect base for any frosting, filling, or occasion you can dream up.
- Way Easier Than You Think: I promise, this is not complicated. This recipe walks you through the fundamental techniques of baking in a simple, straightforward way. No weird ingredients, no scary steps. Just pure, simple, and ridiculously delicious results.
Ingredients
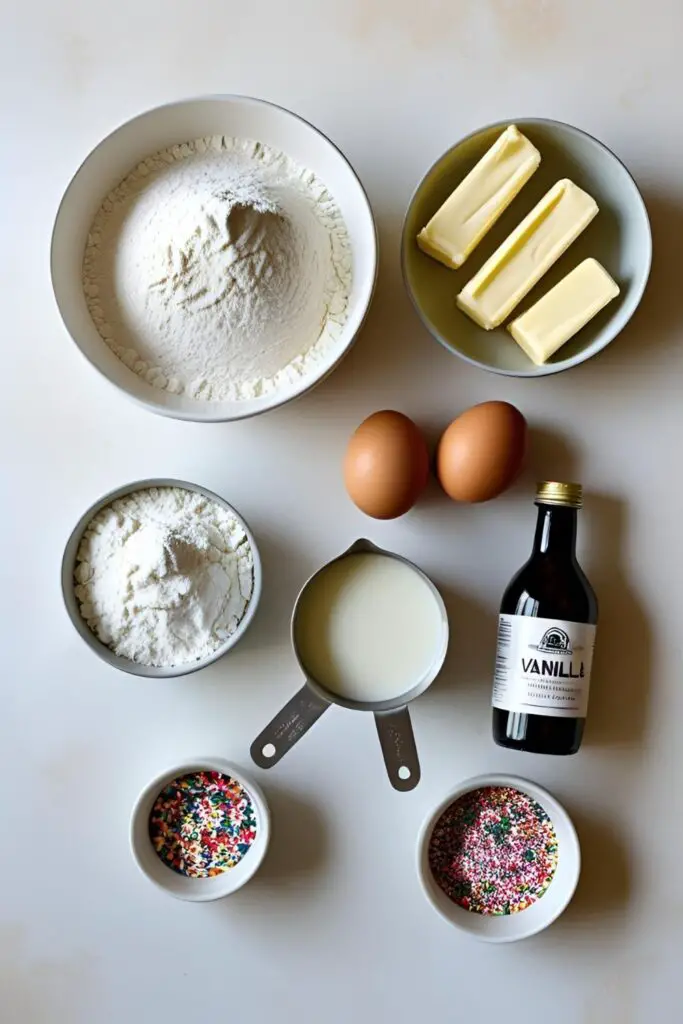
We’re using classic, simple ingredients to create something truly special. Quality matters!
For the Perfect Vanilla Cupcakes:
- 1 ½ cups all-purpose flour
- 1 ½ teaspoons baking powder
- ¼ teaspoon salt
- ½ cup (1 stick) unsalted butter, softened to room temperature
- 1 cup granulated sugar
- 2 large eggs, at room temperature
- 2 teaspoons pure vanilla extract
- ½ cup milk, at room temperature

For the Dreamy Vanilla Buttercream:
- 1 cup (2 sticks) unsalted butter, softened
- 3-4 cups powdered sugar, sifted
- 2-3 tablespoons heavy cream or milk
- 1 ½ teaspoons pure vanilla extract
- Pinch of salt
- Optional: Sprinkles, for making things festive!
Tools & Kitchen Gadgets Used
Having the right gear makes you feel like a pro and ensures your cupcakes come out perfectly.
- A Standard 12-cup Muffin Tin (also known as a cupcake pan)
- Paper Cupcake Liners
- A Stand Mixer or a reliable Hand Mixer
- Mixing Bowls
- A Whisk and a Silicone Spatula
- An Ice Cream Scoop (The #1 secret for perfectly uniform cupcakes!)
- A Piping Bag and a Star Tip (like a Wilton 1M, for those bakery-style swirls)
- A Wire Cooling Rack
Step-by-Step Instructions
Follow these simple steps, and you’ll be a cupcake champion.
Step 1: The Pre-Flight Check Preheat your oven to 350°F (175°C). Line your 12-cup muffin tin with paper liners. This simple 1-minute step ensures your cupcakes won’t stick and makes cleanup a breeze. Don’t skip it.
Step 2: The Dry Stuff In a medium bowl, whisk together the flour, baking powder, and salt. This little step is important because it distributes the leavening agents evenly, so all your cupcakes rise beautifully. Set this bowl aside.
Step 3: The Creaming Method (aka The Magic Step) In a large bowl, using your stand mixer or hand mixer, beat the softened butter and granulated sugar together on medium-high speed for a full 3-5 minutes. The mixture should become visibly lighter in both color and texture—pale, and super fluffy. You are whipping air into the base of your batter, which is the key to a light cupcake.

Step 4: Add the Wet Stuff Add the eggs one at a time, beating well after each one. Scrape down the sides of the bowl to make sure everything is incorporated. Beat in the vanilla extract.
Step 5: The Alternating Game Now, for the technique that guarantees a tender crumb. With your mixer on low speed, add about one-third of the dry ingredient mixture. Once it’s almost mixed in, pour in about half of the milk. Repeat the process, adding another third of the dry, the rest of the milk, and finishing with the last of the dry ingredients. Mix only until the last streak of flour disappears.
Step 6: The Perfect Portion Here’s the secret to getting cupcakes that are all the same size and bake evenly: use an ice cream scoop! A standard-sized scoop is the perfect tool for portioning batter. Fill each cupcake liner about two-thirds of the way full. Do not overfill!
Step 7: Time to Bake! Bake for 18-22 minutes. The cupcakes are done when they are lightly golden and a wooden toothpick inserted into the center comes out clean.
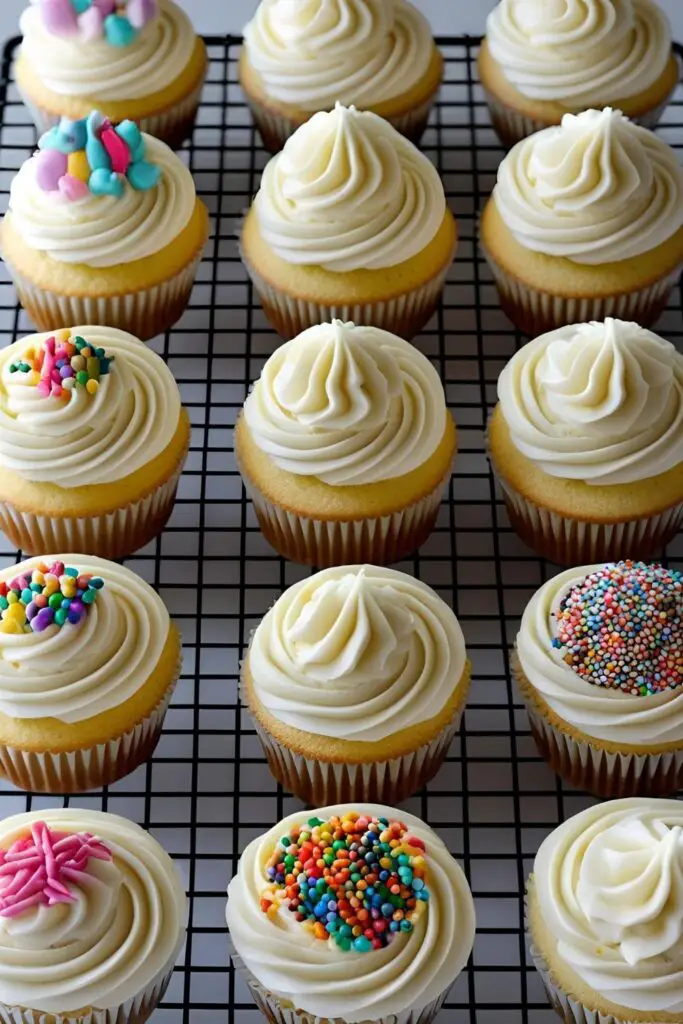
Step 8: The Cooling Protocol Let the cupcakes cool in the muffin tin for just a few minutes, then carefully transfer them to a wire rack to cool completely. You absolutely cannot frost a warm cupcake unless you enjoy watching your beautiful buttercream melt into a sad, soupy puddle.
Step 9: Frosting Time! While the cupcakes cool, make the buttercream. Beat the softened butter until creamy. Gradually mix in the powdered sugar, cream, vanilla, and salt. Once combined, whip on medium-high for 3-5 minutes until light and fluffy. Pipe or spread the frosting onto your completely cooled cupcakes and top with sprinkles!
Calories & Nutritional Info

It’s a cupcake. Let’s not get too caught up in the numbers and just enjoy the party.
- Serving Size: 1 frosted cupcake
- Estimated Calories: Around 300-350 kcal.
- A significant source of: Joy, celebration, and “I-made-this!” pride.
Common Mistakes to Avoid
Avoid these classic cupcake blunders, and you’ll be golden.
- Overfilling the Liners: I know it’s tempting to fill those little paper cups to the brim. Resist the urge! This will cause the batter to overflow, creating a messy, conjoined “muffin top” situation. Fill the liners only two-thirds full. This gives them the perfect amount of space to rise into a beautiful dome.
- Using Cold Ingredients from the Fridge: Baking is a science, and temperature matters! Cold butter won’t cream properly, and cold eggs and milk can cause the batter to curdle. This leads to dense, heavy cupcakes. Let everything sit on the counter for about an hour to come to room temperature.
- Overmixing the Batter: This is the #1 killer of a tender cupcake. As soon as you add the flour, your goal is to mix as little as possible. Stop mixing the moment the last streak of flour disappears. Overmixing develops gluten and will make your cupcakes tough and dry.
- Frosting a Warm Cupcake: I’m saying it again because it’s that important. It is a cardinal sin of baking. The residual heat from the cupcake will melt your beautiful, fluffy buttercream into a greasy, heartbreaking puddle. Your cupcakes must be 100% cool to the touch.
Variations & Customizations
Once you have this perfect vanilla base, you can take it anywhere.
- Chocolate Dream Cupcakes: Create a rich chocolate cupcake by replacing ½ cup of the all-purpose flour with ½ cup of high-quality unsweetened cocoa powder. Pair it with a classic chocolate buttercream.
- Lemon & Raspberry Surprise: Add the finely grated zest of one large lemon to the batter. Once the cupcakes are baked and cooled, use an apple corer or a small knife to remove the center, then fill it with a teaspoon of raspberry jam before frosting with a lemon buttercream.
- Birthday Party Funfetti: The easiest and most festive variation! Gently fold ¾ cup of rainbow jimmies (the long, skinny sprinkles) into the finished batter with a spatula before scooping. Do not use the little ball-shaped nonpareils, as their color will bleed into the batter.
FAQ Section
All your cupcake curiosities, answered.
1. Why did my cupcakes sink in the middle after baking? This is usually caused by underbaking or by opening the oven door too early and too often during the baking process, which causes the temperature to drop and the cupcakes to collapse.
2. Why are my cupcakes dry? The most common reasons for dry cupcakes are overbaking them or measuring the flour incorrectly (packing it into the measuring cup instead of spooning it in lightly). Stick to the baking time and check for doneness with a toothpick.
3. Can I make cupcakes without paper liners? You can, but you must grease and flour the muffin tin very, very well to prevent sticking. Liners make life so much easier and keep the cupcakes moist.
4. How do I get my cupcakes to have a nice, flat top for easy frosting? The secret is not to overfill the liners! Filling them just two-thirds of the way full allows them to rise into a gentle, slightly domed top that’s perfect for frosting, instead of a huge, cracked peak.
5. Can I make the cupcake batter ahead of time? It’s not recommended. The baking powder begins to react and create air bubbles as soon as it gets wet. For the best, fluffiest rise, you should bake the batter as soon as it’s mixed.
6. How should I store frosted cupcakes? Store them in an airtight container at room temperature for up to 2 days. If it’s very warm, or if you’re using a cream cheese frosting, store them in the fridge, but let them come to room temperature before serving for the best taste and texture.
7. How do I know for sure when my cupcakes are done? The toothpick test is your best friend. Insert a wooden toothpick into the center of a cupcake. If it comes out clean, or with a few moist crumbs attached, they’re ready. If it has wet batter on it, they need another minute or two.
Final Thoughts
You did it. You are officially a person who bakes cupcakes from scratch. You’ve conquered the creaming method, you’ve mastered the alternate additions, and you now possess the power to create a perfect, personal-sized party in a paper cup whenever you wish.
The box mix has no power here anymore. Go forth, frost with abandon, and spread joy, one perfectly fluffy, homemade cupcake at a time.