Cake Pops: How to Make Them Perfectly (A Beginner’s Guide!)
Ah, the cake pop. That perfect, bite-sized sphere of cake on a stick, enrobed in a shiny candy shell. They look so cute, so professional… so impossibly difficult to make, right? They seem like the kind of treat you only buy at a fancy bakery or a certain ubiquitous coffee chain. Wrong. I’m here to pull back the curtain on the world of cake pops: how to make them is way easier than you think.
In fact, the process begins with an act of glorious, therapeutic destruction. You get to take a perfectly good cake and absolutely demolish it. If that doesn’t sound like a fun afternoon project, I don’t know what does.
So, are you ready to transform a humble cake into an army of adorable, delicious treats on sticks? Let’s get popping.
Why This Recipe is Awesome
If the idea of therapeutically destroying a cake hasn’t already sold you, here are a few more reasons to love this recipe.
- It’s a Supremely Fun Project: This isn’t just baking; it’s a food craft. It’s the perfect activity for a rainy day, a kids’ party, or when you’re just feeling a little extra. Rolling, dipping, and decorating is surprisingly meditative.
- Endlessly Customizable: The world is your cake pop! Use chocolate cake, vanilla cake, or red velvet. Use cream cheese frosting or peanut butter frosting. Cover them in rainbow sprinkles, chocolate drizzles, or crushed nuts. They are the chameleons of the dessert world.
- The Ultimate Use for Leftovers: Got a cake that came out a little dry? Or maybe it broke while you were getting it out of the pan? Don’t you dare throw it out! Crumble it up and give it a glorious second life as a batch of delicious cake pops. It’s the ultimate baking glow-up.
Ingredients
We’re keeping it simple and accessible. No need to stress yourself out with a fully from-scratch cake if you don’t want to!
- One 9×13 inch cake, baked and completely cooled: Any flavor works! A box cake mix is your best friend here for simplicity.
- ½ to ¾ cup of frosting: Canned or homemade. This is the “glue” that holds our cake crumbs together.
- 1 bag (about 12 ounces) of Candy Melts: These are essential for a smooth, easy-to-work-with coating. You can find them in any color imaginable at craft or grocery stores.
- Lollipop Sticks: About 40-50, 6-inch sticks are a good size.
- Sprinkles, nonpareils, or sanding sugar: For decorating!
- Optional: 2 teaspoons of vegetable shortening or coconut oil (to help thin the candy coating if needed).
Tools & Kitchen Gadgets Used
Having the right setup makes the whole process a breeze.
- A Very Large Mixing Bowl
- Baking Sheet lined with Parchment or Wax Paper
- A Microwave-Safe Bowl (deep rather than wide is better for dipping)
- Silicone Spatula
- Cookie Scoop (about 1.5 tablespoons in size, for uniform cake balls)
- A Styrofoam Block, a cardboard box with holes poked in it, or a Cake Pop Stand (for drying the finished pops)
Step-by-Step Instructions
Alright, let’s get our hands dirty. This is a process, but each step is super simple.
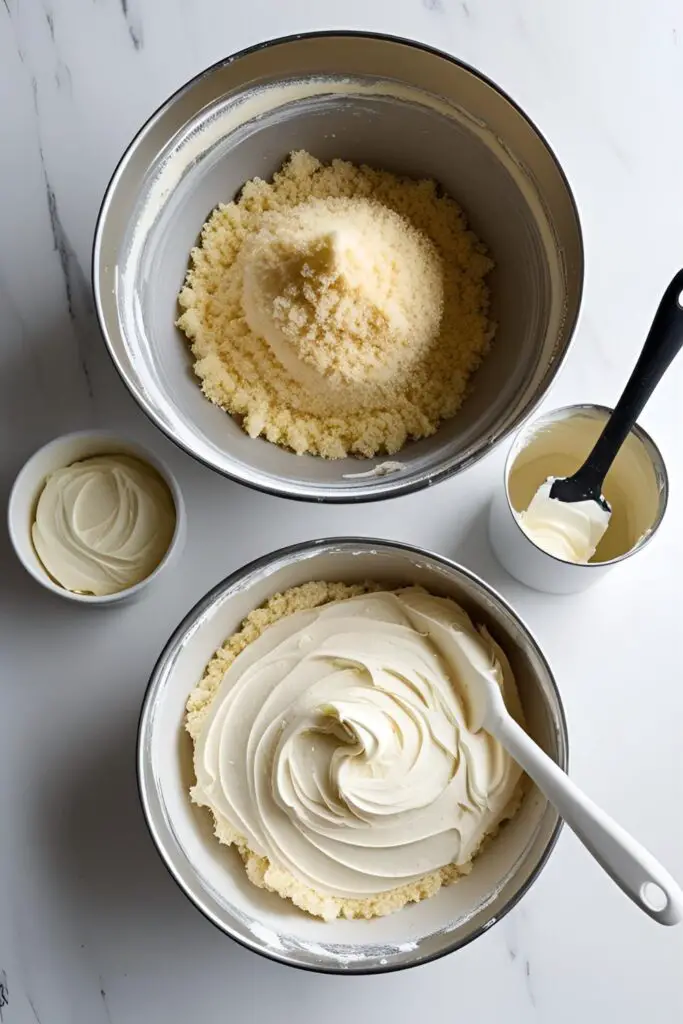
Step 1: Destroy the Cake (The Best Part!) Once your cake is completely cool, it’s time for demolition. Crumble the entire cake into your large mixing bowl. Get your hands in there and break it down until it resembles fine, sandy crumbs. No large chunks allowed!
Step 2: Make the “Dough” Add about ½ cup of frosting to the cake crumbs. Now, use your hands to mix it all together. You’re looking for a consistency like play-doh. It should be moist enough to hold together in a ball when you squeeze it, but not so wet that it’s mushy or greasy. If it’s still too crumbly, add another tablespoon of frosting at a time until you reach the right texture.
Step 3: Roll, Roll, Roll Your Cake Use your cookie scoop to portion out the cake “dough” to ensure all your pops are the same size. Roll each portion firmly between your palms to create smooth, round balls. Place the finished cake balls on your parchment-lined baking sheet.
Step 4: Mandatory Chill Time This is a non-negotiable step! Place the baking sheet of cake balls into the refrigerator for at least 30 minutes, or the freezer for 15 minutes. You want them to be firm and chilled, not frozen solid.
Step 5: Melt the Candy Coating Pour your candy melts into a deep, microwave-safe bowl. Microwave them in 30-second intervals, stirring well with a spatula after each interval, until they are completely melted and smooth. If the coating seems too thick for dipping, stir in 1-2 teaspoons of shortening or coconut oil to thin it out.
Step 6: The All-Important “Glue” Take one of your lollipop sticks and dip the tip about ½ inch into the melted candy coating. Immediately insert this “glued” end of the stick about halfway into a chilled cake ball. The melted candy will act like cement, securing the cake ball to the stick. Do this for all of your cake balls and let them set for a few minutes.
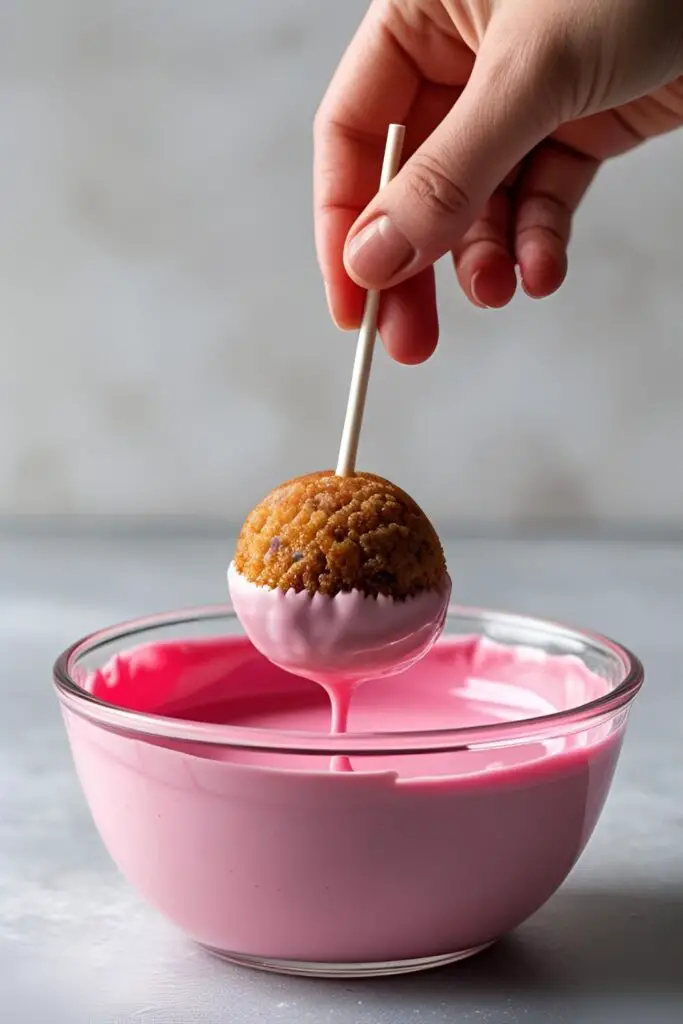
Step 7: The Final Dip Now for the main event. Hold the cake pop by the stick and dip it straight down into the bowl of melted candy until the entire cake ball is submerged. Lift it straight out. Do not swirl it around, as this can cause the cake ball to fall off. Gently tap the stick on the side of the bowl to let any excess candy drip off.
Step 8: Decorate and Dry While the candy coating is still wet, immediately add your sprinkles. The coating sets very quickly! Once decorated, stick the finished cake pop upright into your styrofoam block or cake pop stand to dry completely without smudging.
Calories & Nutritional Info
It’s a ball of cake, frosting, and candy on a stick. It’s a treat, and a delicious one at that.
- Serving Size: 1 cake pop
- Estimated Calories: Around 150-200 kcal, depending on the cake flavor and decorations.
- This is a good source of: Smiles. And pure, unadulterated sugar energy.
Common Mistakes to Avoid
Avoid these cake pop catastrophes for a smooth, stress-free experience.
- Using Too Much Frosting: This is the #1 sin of cake pop making. Too much frosting creates a heavy, greasy cake ball that is too soft to hold its shape and will slide right off the stick in a sad, gloopy mess. Start with less frosting than you think you need. You can always add more, but you can’t take it away.
- Skipping the Chill Time: A warm, soft cake ball will disintegrate the moment it hits the warm candy coating. Chilling the cake balls is mandatory. It makes them firm and stable, so they can handle the dip.
- Dipping a Super-Cold Pop into Super-Hot Candy: A drastic temperature difference between the chilled pop and the hot candy can cause the candy shell to crack as it cools and contracts. Let your melted candy cool for a minute or two, and let your cake balls sit at room temp for a few minutes before dipping.
- Forgetting to “Glue” the Stick: If you just jam a dry stick into the cake ball, it has nothing to hold onto. It will fall off, I guarantee it. Dipping the stick in candy first creates a strong bond that is essential for success.
Variations & Customizations
The sky’s the limit! Once you have the technique down, you can play around.
- Creative Flavor Combinations: Think outside the vanilla box! Try a red velvet cake with cream cheese frosting, a lemon cake with lemon frosting, a chocolate cake with peanut butter frosting, or a spice cake with cinnamon frosting.
- Shape Shifters: Who says they have to be round? After mixing the dough, gently mold it into other simple shapes before chilling—cubes, ovals, or even hearts.
- The “Surprise Inside” Cake Pop: Take your portion of cake dough, flatten it in your palm, and place a small treat in the center—like a mini marshmallow, a Rolo caramel, or a few chocolate chips. Then, carefully roll it up into a ball, enclosing the surprise inside.
FAQ Section
All your burning questions about these little balls of joy, answered.
1. Why do my cake pops keep falling off the stick? This is usually caused by one of three things: the cake balls have too much frosting and are too heavy/greasy, they weren’t chilled enough before dipping, or you forgot to dip the stick in melted candy first to act as glue.
2. Why is my candy coating cracking?This is almost always due to “thermal shock”—the temperature difference between your very cold cake pop and your very hot candy coating was too great. Let your pops warm up slightly and your candy cool slightly before dipping.
3. Can I use regular chocolate chips instead of candy melts? You can, but it’s trickier. Melted chocolate chips are very thick. You’ll need to stir in a good amount of shortening or coconut oil to thin them out enough for dipping. Candy melts are designed specifically for this purpose and give a much smoother, easier finish.
4. How far in advance can I make cake pops? You can make the cake balls (pre-dipping) up to 2 days in advance and keep them in an airtight container in the fridge. Fully assembled cake pops can be stored in an airtight container at room temperature (if your house is cool) or in the fridge for up to a week.
5. How do you store finished cake pops? Once they are completely dry, you can store them upright in their stand, or lay them down in a single layer in an airtight container. You can also wrap them individually in small cellophane bags for gifting.
6. My candy coating is too thick! How do I thin it? Stir in 1 teaspoon of vegetable shortening or coconut oil at a time until it reaches a smooth, fluid consistency that drips easily off a spoon.
7. What’s the best way to get a perfectly smooth finish? Tap off the excess! After dipping, gently but firmly tap the wrist of the hand holding the cake pop. This encourages the excess coating to drip off evenly, leaving you with a thin, smooth shell.
Final Thoughts
Look at you, a certified pop-star! You took a simple cake and turned it into an army of adorable, delicious, perfectly-portioned treats. You’ve conquered the cake on a stick. You’ve mastered the dip. You now hold the key to winning any bake sale and being the hero of any birthday party.
Now go on, share them with friends, give them as gifts, or just admire your incredibly professional-looking handiwork. You’ve totally earned it.


