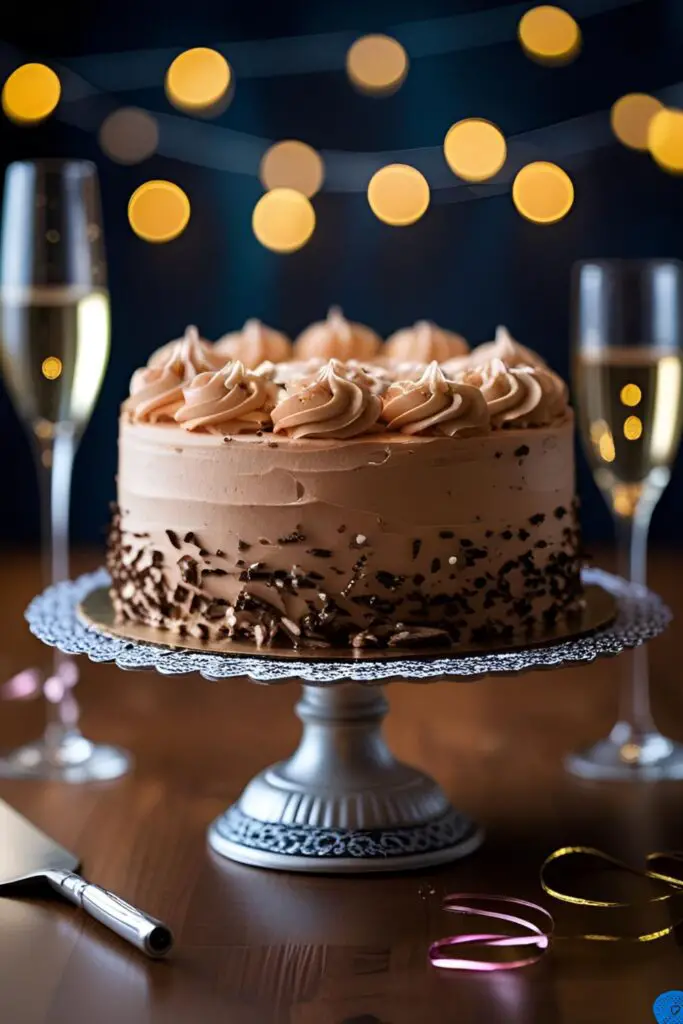
How to Make a Stunning Make Up Cake (That’s Easier Than It Looks!)
Let’s have a real talk. Have you ever scrolled through Pinterest, seen a cake decorated with perfect little lipsticks and shimmering eyeshadow palettes, and thought, “Well, that’s clearly witchcraft”? You assume it requires a fine arts degree and the patience of a saint. What if I told you that you, yes you, could create a fabulous make up cake that will have your friends asking for your baker’s number? And the best part? It’s more about clever tricks than actual skill.
Forget impossible fondant sculptures and stressful, multi-day projects. We are diving headfirst into the world of edible glam, and I promise to be your guide. This is your sign to host that girly brunch, plan that sweet sixteen, or just treat yourself to something that’s as fun to make as it is to eat.
So, are you ready to trade your whisk for a makeup brush (well, a food-safe one, anyway)? Let’s get this beauty tutorial started.
Why This Recipe is Awesome
If you’re still on the fence, let me contour the arguments for you. This recipe is a keeper because:
- It’s a Showstopper: Seriously. Plop this cake down on a table and watch people’s jaws drop. It looks incredibly intricate and expensive, which is a massive win in my book.
- Surprisingly Simple: The “makeup” is made from easy-to-handle fondant and clever candy placement. We’re not sculpting Michelangelo’s David here; we’re making a lipstick tube. You’ve got this.
- Deliciously Dependable: Underneath all that glam is a sturdy, moist, and delicious vanilla butter cake with creamy buttercream. No one wants a cake that’s all style and no substance. This one delivers on both. TBH, it’s the perfect combo.
Ingredients
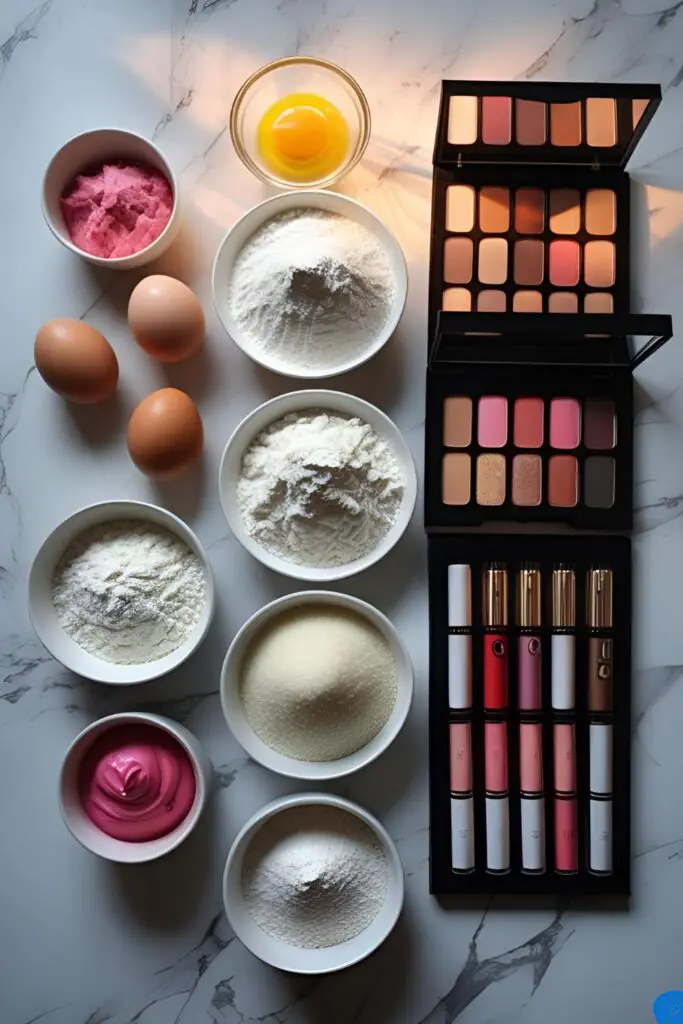
Let’s assemble your cosmetic kit… I mean, your ingredient list.
For the Sturdy Vanilla “Canvas” Cake:
- 3 cups all-purpose flour
- 1 ½ cups granulated sugar
- 1 tablespoon baking powder
- ½ teaspoon salt
- 1 cup (2 sticks) unsalted butter, cold and cubed
- 4 large eggs, at room temperature
- 1 cup whole milk, at room temperature
- 2 teaspoons vanilla extract

For the “Flawless Finish” Buttercream:
- 1 cup (2 sticks) unsalted butter, softened
- 4 cups powdered sugar, sifted
- ¼ cup heavy cream or milk
- 1 tablespoon vanilla extract
- Pinch of salt
- Pink or your choice of food coloring gel
For the “Edible Cosmetics” Decorations:
- Black Fondant: About 8 oz for lipstick tubes, mascara, and palettes.
- Colored Fondant: Small amounts of pink, red, purple, nude, brown—whatever shades you love!
- Edible Luster Dust or Glitter: Gold, silver, and pink are must-haves for that shimmer.
- Chocolate Bar: A simple Hershey’s bar or similar for the eyeshadow palette base.
- Pretzel Sticks: For makeup brush handles.
- Cornstarch: For dusting your work surface.
Tools & Kitchen Gadgets Used
Every artist needs their tools. Here’s what you’ll need to create your masterpiece.
- Stand Mixer or a powerful Hand Mixer
- Two 8-inch Round Cake Pans or one 9×13 inch Pan (to make a “makeup bag” shape)
- Parchment Paper
- Offset Spatula (your #1 tool for smooth frosting)
- Bench Scraper (the secret to sharp edges)
- Piping Bags and Tips
- Fondant Rolling Pin (the non-stick kind is your friend)
- Fondant Smoother
- Small, Sharp Craft Knife (used ONLY for food)
- Small, Food-Safe Paintbrushes (for applying luster dust)
- Cake Turntable (not essential, but makes frosting SO much easier)
Step-by-Step Instructions
Time to get gorgeous! Follow this routine for flawless results.
Step 1: Prep Your Canvas (Bake the Cake) Preheat your oven to 350°F (175°C). Grease your cake pans and line the bottoms with parchment paper. In the bowl of your stand mixer, combine the flour, sugar, baking powder, and salt. Add the cold, cubed butter and mix on low speed until the mixture resembles coarse sand.
Step 2: Get Mixing In a separate bowl, whisk together the eggs, milk, and vanilla. With the mixer on low, slowly stream the wet ingredients into the dry ingredients. Mix until just combined, then increase the speed to medium and beat for about 30 seconds to aerate the batter. Do not overmix!

Step 3: Bake and Cool Divide the batter evenly between your prepared pans. Bake for 30-35 minutes, or until a wooden skewer inserted into the center comes out clean. Let the cakes cool in their pans for 10 minutes before inverting them onto a wire rack to cool completely. This is non-negotiable!
Step 4: Create the “Foundation” (Buttercream) While the cakes cool, beat the softened butter in your mixer until pale and fluffy. Sift in the powdered sugar and mix on low until incorporated. Add the heavy cream, vanilla, and salt, then beat on medium-high for 3-5 minutes until the buttercream is incredibly light and smooth. Tint it with your food coloring gel to your desired shade.
Step 5: Crumb Coat & Chill Once the cakes are cool, level them if needed. Place one layer on your cake stand and apply a thin, messy layer of buttercream. This is the crumb coat, and it traps all the loose crumbs. Chill the cake in the fridge for at least 30 minutes until the frosting is firm.
Step 6: Final Frosting Apply a generous final coat of buttercream. Use your offset spatula and bench scraper to get the sides and top as smooth as possible. A cake turntable makes this a million times easier. Chill the cake again while you work on the decorations.
Step 7: Create Your Edible Makeup This is where the magic happens!
- Lipstick: Roll a cylinder of black fondant for the tube. For the “lipstick” part, roll red or pink fondant into a smaller cylinder, cut one end at an angle, and attach it to the tube with a dab of water.
- Eyeshadow Palette: You can use a small, flat rectangle of black fondant or cut a piece from a chocolate bar. For the “shadows,” cut tiny squares or circles from different colored fondants. Arrange them on the palette, securing with a tiny bit of water.
- Makeup Brushes: Gently press a piece of shaped black or brown fondant onto the end of a pretzel stick to create the bristles.
- Add Sparkle: Use a dry, food-safe paintbrush to gently dust your lipstick and eyeshadows with edible luster dust. This takes them from cute to glamorous!
Step 8: The Final Reveal Carefully arrange your fondant makeup on top of your chilled cake. Place them artfully. Think flat-lay photo, not a makeup bag explosion. And… you’re done! You literal cake artist.
Calories & Nutritional Info

Look away if you don’t want to know. This is a “treat yourself” moment, not a “count every calorie” moment.
- Serving Size: 1 slice (assuming a 2-layer, 8-inch cake is cut into 12 slices)
- Estimated Calories: Approximately 550-650 kcal.
- Glam Factor: 100%.
- Nutritional Value: Contains sugar, butter, and happiness. Primarily happiness.
- FYI: The fondant adds extra sugar, but you’re not eating a whole block of it (I hope).
Common Mistakes to Avoid
Don’t let these common beauty blunders ruin your look.
- Using a “Delicate” Cake Recipe: A light, airy chiffon cake will collapse under the weight of fondant. You need a sturdy cake like the butter cake in this recipe or a pound cake to support your decorations.
- Not Chilling Your Cake: Trying to get a smooth finish on a room-temperature cake is a nightmare. The buttercream will slide around. Chill between the crumb coat and the final coat for a flawless, professional finish.
- Fighting with Fondant: If your fondant is sticky, dust your hands and work surface lightly with cornstarch or powdered sugar. If it’s dry and cracking, knead in a tiny bit of vegetable shortening. Don’t drench it in water.
- Skipping the Crumb Coat: I see you, trying to take a shortcut. Don’t do it. A crumb coat is the single most important step for getting a clean, professional-looking cake free of pesky crumbs.
Variations & Customizations
Ready to customize your beauty kit?
- Chocolate Glamour: Swap the vanilla cake for a rich chocolate cake and use chocolate buttercream. Make your decorations from modeling chocolate for a double-dose of cocoa.
- Luxe Brand Theme: Pick your favorite makeup brand and run with it! Use gold luster dust and nude/rose gold tones for a Charlotte Tilbury vibe, or bright, bold colors and shimmer for a Fenty Beauty-inspired cake.
- The “Makeup Bag” Cake: Use a 9×13 inch cake. After frosting, you can use a zipper pull mold with fondant or simply pipe a zipper detail across the top. Pile all your edible makeup on top as if it’s spilling out of the bag.
FAQ Section
Your most burning beauty questions, answered.
1. How do you make fondant makeup decorations? It’s like playing with edible clay! You roll, cut, and shape fondant into makeup items. Use black for packaging (lipstick tubes, palettes) and colored fondant for the products (lipstick, eyeshadow). A tiny bit of water acts as glue.
2. Can I make a makeup cake without fondant? Yes! It requires some creativity. You can pipe lipstick shapes with stiffly colored buttercream and chill them until hard. Use candy melts poured into small rectangular molds for eyeshadow palettes and M&M’s for the “shadows.”
3. What’s the best cake for carving into a makeup bag shape? A pound cake or a sturdy butter cake (like this recipe) is your best friend for carving. They are dense and produce fewer crumbs, making them easier to shape without falling apart.
4. How do I get my buttercream so smooth? The secret is a combination of a good recipe, a crumb coat, chilling the cake, and using a bench scraper. After applying the final coat, hold the bench scraper straight against the side and turn the cake (ideally on a turntable) to smooth it out.
5. How far in advance can I make the fondant decorations? This is a great time-saver! You can make fondant pieces up to a week in advance. Let them dry and harden in a cool, dry place on parchment paper. Store them in an airtight container away from sunlight.
6. How do you make edible glitter? While you can make it with gum arabic and luster dust, it’s so much easier and more effective to buy pre-made edible glitter. It’s specifically designed for consumption and gives the best sparkle.
7. How do I store the finished cake? Store the cake in a cake box or a tall, covered container in the refrigerator to keep the buttercream firm. Let it sit at room temperature for about 30-60 minutes before serving for the best flavor and texture.
Final Thoughts
Congratulations, you’ve officially created a work of art that’s almost too pretty to eat. Almost. You’ve proven that you don’t need a professional kitchen to make something truly special and Insta-worthy. This cake isn’t just dessert; it’s an accessory.
Now go on, take that picture, post it, and bask in the glory. You’ve earned every last crumb of it.