How to Bake a Red Velvet Cake That’s More Aesthetic Than Your Entire Feed
Let’s talk about Red Velvet Cake. It’s not just a dessert; it’s a personality. It’s the mysterious, alluring main character of the cake world. It’s not quite chocolate, not quite vanilla—it’s just… velvet. And let’s be honest, you’re not just here for a recipe. You’re here because you want to capture that elusive red velvet cake aesthetic: the dramatic, deep red crumb against a stark, minimalist white frosting. You want a cake that looks like it belongs in an art gallery.
Well, you’ve come to the right place. Forget those garish, bright red cakes from the supermarket that taste vaguely of chemicals. We’re about to create a masterpiece from scratch that is as breathtakingly beautiful as it is ridiculously delicious. This is your guide to baking a cake so gorgeous, your camera will eat first, and no one will blame you.
Why This Recipe is Your New Obsession
So, why this particular recipe? What makes it worthy of your time and your feed?
First, the flavor is sublime. We are talking about a legitimately moist, tender crumb with that signature, subtle tang and a hint of cocoa. This is paired with a silky, luxurious cream cheese frosting that is perfectly balanced—not cloyingly sweet, just pure, tangy perfection. It’s the flavor combination that legends are made of.
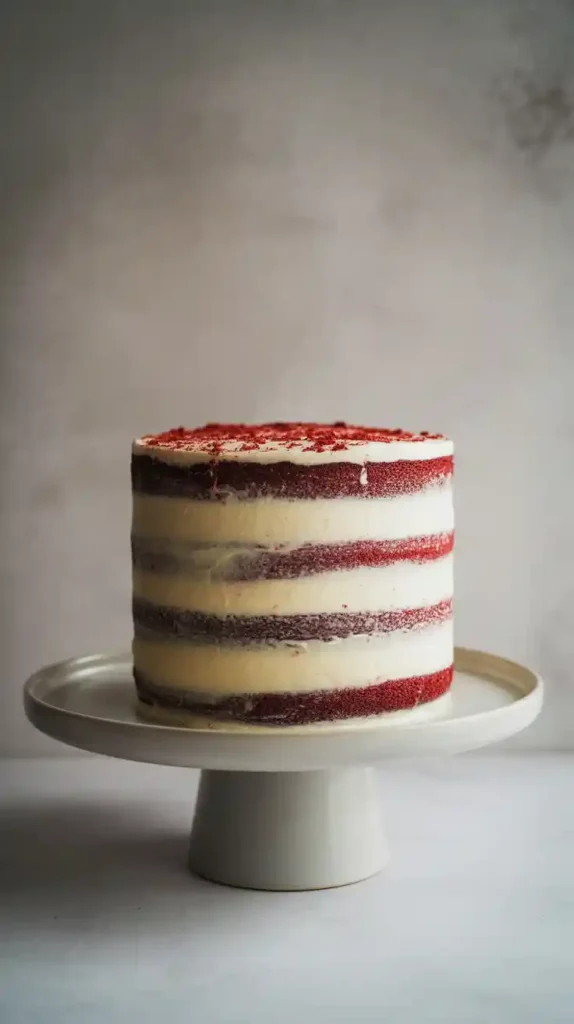
But let’s get to the point: the aesthetic. This recipe is designed to help you create that coveted “semi-naked” look. It’s chic, it’s modern, and it’s surprisingly forgiving for beginners. It lets the stunning red cake peek through the frosting, creating a rustic-yet-elegant vibe that will make everyone think you secretly moonlight as a professional pastry chef.
The “A-List” Ingredients
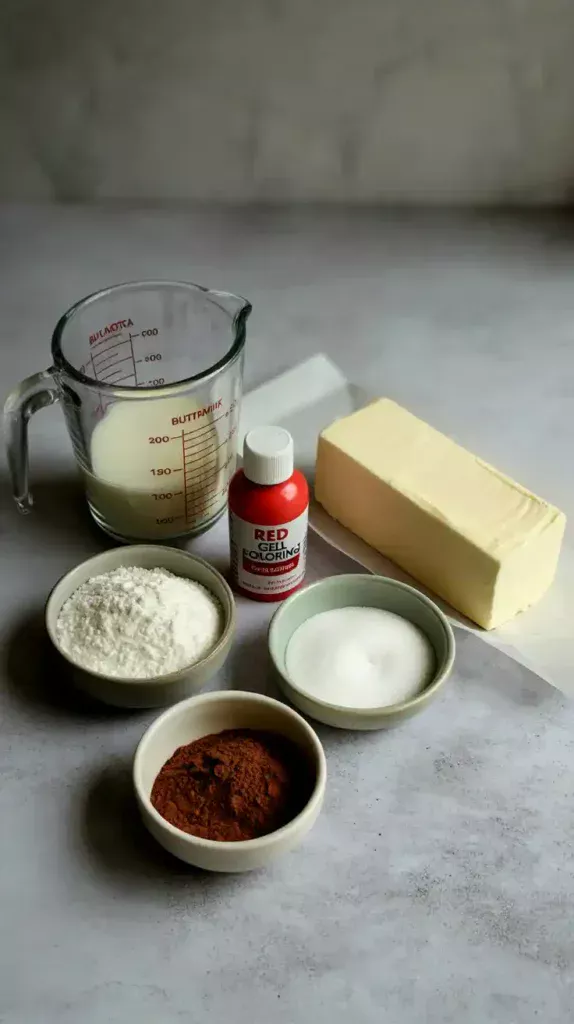
To create art, an artist needs the right materials. This is your palette. Don’t substitute unless I say you can, or the cake gods may smite you.
For the Iconic Red Velvet Cake:
- Cake Flour: 221 cups (300g). Cake flour is key for that velvety texture. You can use all-purpose, but it won’t be quite the same.
- Unsweetened Cocoa Powder: 2 tablespoons. Just enough for a hint of chocolate.
- Baking Soda: 1 teaspoon.
- Salt: 1 teaspoon.
- Unsalted Butter: 1/2 cup (113g), softened to room temperature.
- Granulated Sugar: 121 cups (300g).
- Vegetable Oil: 1/2 cup (120ml). Oil brings the moisture!
- Eggs: 2 large, at room temperature.
- White Vinegar: 1 tablespoon. This is for the chemical magic that creates the tender crumb.
- Vanilla Extract: 1 tablespoon.
- Buttermilk: 1 cup (240ml), at room temperature. This is non-negotiable for that classic tang.
- Red Gel Food Coloring: 1-2 tablespoons. Use gel, not liquid! I recommend a “Super Red” for a deep, rich color.
For the Non-Negotiable Cream Cheese Frosting:
- Cream Cheese: 16 ounces (452g), full-fat, block-style, cold from the fridge. Do NOT use the stuff in a tub.
- Unsalted Butter: 1 cup (227g), softened to room temperature.
- Powdered Sugar: 4 cups (480g), sifted.
- Vanilla Extract: 2 teaspoons.
- Pinch of Salt.
Your “Aesthetic” Toolkit

To get that flawless look, you need a few essential gadgets. These are the tools that separate the hobbyists from the artists.
- Stand Mixer or Electric Hand Mixer: For achieving that perfectly smooth batter and light-as-air frosting.
- Three 8-inch Round Cake Pans: That three-layer height is essential for the aesthetic.
- Sifter or Fine-Mesh Sieve: Absolutely crucial for lump-free cake and frosting.
- Parchment Paper: For lining your pans to prevent any tragic sticking situations.
- Cake Turntable: This is the MVP for decorating. It makes frosting so much easier and more professional.
- Bench Scraper: The magic wand you need to achieve that perfectly smooth or semi-naked finish.
- Offset Spatula: For applying and swooping frosting like a pro.
Let’s Create Some Art: The Step-by-Step Guide
Deep breath. You are about to become a cake artist. Let’s do this.
Step 1: Prep Your Canvas
Preheat your oven to 350°F(175°C). Grease your three 8-inch cake pans, line the bottoms with parchment paper, and grease the parchment paper too. In a medium bowl, sift together the cake flour, cocoa powder, baking soda, and salt. Set it aside.
Step 2: Mix the Velvet Batter
In a small bowl, whisk together the buttermilk, eggs, vanilla extract, and white vinegar. In another small bowl, mix your red gel food coloring with the oil until it’s uniform. Combining it with the oil first helps it disperse evenly.
In the large bowl of your stand mixer, beat the softened butter and sugar on medium-high speed for about 3-4 minutes until it’s light and fluffy. Stream in the red oil mixture and beat until combined.
Reduce the mixer speed to low. Add one-third of the dry ingredients, followed by half of the buttermilk mixture. Repeat, ending with the dry ingredients. Mix until just combined. Overmixing is the enemy of a tender cake!
Step 3: Bake and Cool Completely

Divide your stunningly red batter evenly among the three prepared pans. Bake for 30-35 minutes, or until a wooden skewer inserted into the center comes out with moist crumbs attached, but not wet batter.
Let the cakes cool in their pans for 15 minutes before turning them onto a wire rack to cool completely. I mean it. Not even a little bit warm. We’re talking hours. Patience is part of the aesthetic.
Step 4: Whip the Perfect Cream Cheese Frosting
This is where magic happens. In your mixer bowl, beat the softened butter on high speed for 5 minutes until it’s very pale and fluffy. Add the COLD, cubed cream cheese and beat on medium-high for another 2 minutes until fully combined and smooth.
Turn the speed to low and slowly add the sifted powdered sugar. Once incorporated, add the vanilla and salt. Beat on medium-high for 3-4 minutes until the frosting is thick, smooth, and glorious. Do not overbeat, or it can become runny.
Step 5: Achieve the “Semi-Naked” Aesthetic
Once your cakes are fully cooled, you can trim the tops to make them level. Save these scraps! Place your first cake layer on the turntable. Top with about a cup of frosting and spread it evenly. Repeat with the second layer. Place the final layer on top.
Now, apply a thin coat of frosting all over the top and sides of the cake. This is your “crumb coat,” but it’s also the final coat for this look. Grab your bench scraper, hold it vertically against the side of the cake, and spin the turntable. As you spin, gently press the scraper against the frosting to scrape most of it off, letting the red cake layers peek through. The goal is a rustic, “less is more” vibe.
Step 6: The Finishing Touches

Crumble up the cake scraps you saved. Gently press them around the bottom border of the cake, or sprinkle them artfully on top. For that extra touch of class, you can top the cake with a few fresh raspberries or a couple of elegant French macarons.
The Health Report (Spoiler: It’s Cake)
Because you asked.
- Serving Size: 1 slice of pure elegance
- Estimated Calories: ~680 kcal
- Sophistication Index: Off the charts
- Aesthetic Value: Priceless
- Note: This cake is high in fat, sugar, and the ability to generate likes on social media. Consume responsibly. 🙂
Common Aesthetic Fails (And How to Avoid Them)
- A Brown, Not Red, Cake: You used liquid food coloring or not enough gel. The Fix: Invest in a quality “Super Red” gel food coloring. It makes all the difference and you won’t get a bitter chemical taste.
- A Tough, Dry Crumb: You overmixed the batter. The Fix: Mix your batter only until the ingredients are just combined. A few small streaks of flour are okay.
- Runny, Weeping Frosting: You used cream cheese from a tub, or your butter and/or cream cheese were too soft. The Fix: Use full-fat, block-style cream cheese, straight from the fridge. Your butter should be room temp, but not melty. If the frosting gets too soft, chill it for 15-20 minutes.
- The Leaning Tower of Velvet: You tried to frost a warm cake. The Fix: I cannot stress this enough: your cake layers must be 100% completely cool before a single bit of frosting touches them.
The Multiverse of Velvet: Fun Variations
Once you master the classic, why not play with the aesthetic?
- Dark Academia Red Velvet: Use black cocoa powder instead of regular for a super dark, moody, almost-black cake. The contrast with the white frosting is incredibly dramatic. Garnish with deep-red pomegranate seeds.
- Red Velvet Cupcake Aesthetic: For individual servings of art. Bake red velvet cupcakes. Use an apple corer to remove the center, fill with a dollop of cream cheese frosting, then top with a single, elegant swirl of frosting and a delicate sprinkle of cake crumbs.
- The “Fully Dressed” Classic: If the naked look isn’t for you, apply a second, thicker coat of frosting after chilling your crumb coat. Use your bench scraper for a perfectly smooth, flawless white finish. It’s a different, more traditional kind of beautiful.
Your Burning Questions, Answered
What flavor is red velvet, really?
It’s the million-dollar question! Red velvet is not just a vanilla cake with red food coloring. It’s a distinct flavor profile with buttermilk and vinegar providing a slight tang, and a hint of unsweetened cocoa powder giving it a very light chocolatey note.
Can I make this cake with beets instead of food coloring?
You can, but manage your expectations. Roasted beet purée will give you a more natural, maroon-ish color, not the vibrant red of a classic red velvet. It will also add a subtle earthy flavor.
Why did my cake turn out brownish?
This usually happens for two reasons: you used liquid food coloring instead of a potent gel, or the cocoa powder you used had a high pH which reacted with the other ingredients. Sticking to a good gel color is the best way to ensure a vibrant red.
My cream cheese frosting is a soupy mess! How do I fix it?
First, try chilling it. Pop the whole bowl in the fridge for 20-30 minutes, then try re-whipping it. If it’s still too runny, you can try adding more sifted powdered sugar, but be careful not to make it overly sweet. This is almost always caused by using spreadable cream cheese or ingredients that are too warm.
Can I make this red velvet cake ahead of time?
Yes! The cake layers can be baked, cooled, and wrapped tightly in plastic wrap a day or two in advance. The fully frosted cake is actually best after it sits in the fridge for a few hours (or overnight) to set up.
What’s the real difference between red velvet and a chocolate cake?
A chocolate cake has a deep, rich chocolate flavor from a large amount of cocoa powder or melted chocolate. A red velvet cake has only a whisper of cocoa and gets its primary flavor from the tangy combination of buttermilk and vinegar.
Does the vinegar make the cake taste sour?
Not at all! You won’t taste the vinegar. It’s there to react with the baking soda to help the cake rise and to contribute to that ultra-tender, “velvety” crumb.
Final Thoughts: You Are an Artist
You did it. You’ve created more than a cake; you’ve created a mood. You’ve baked a vibe. You are now a purveyor of edible aesthetics.
So go ahead, take that picture. Find the perfect lighting. Post it without a filter because this cake needs no help. Then, gather your favorite people and destroy your masterpiece by eating every last, delicious crumb.