So, You Think You Can Handle Cloud-Like Pancakes? The Ultimate Guide on How to Make Fluffy Pancakes Japanese Style
Ever scrolled through your feed, stopped dead in your tracks, and stared at a towering, wobbly, impossibly fluffy stack of pancakes? Yeah, me too. You probably thought, “That’s culinary witchcraft,” or “My pancakes look like sad, flat discs of despair.” Well, my friend, I’m here to tell you that you, yes you, can master the magic. This guide is your ticket to learning how to make fluffy pancakes Japanese style, and trust me, it’s a game-changer.
Forget everything you know about just adding water to a box mix. We’re ascending to a higher plane of breakfast existence. These aren’t just pancakes; they’re soufflé pancakes. They’re edible clouds. They’re jiggly little towers of happiness that will make you question all your previous life choices.
Why You Absolutely, Positively Need These in Your Life
Still on the fence? Let me paint a picture. Imagine presenting these at your next brunch. Your friends’ jaws will drop. They’ll whip out their phones. You’ll be hailed as a breakfast deity. Seriously, the “wow” factor is off the charts.
But beyond the ‘gram-worthy aesthetics, the taste and texture are what will hook you for life. They’re light, airy, and practically melt in your mouth with a subtle, eggy sweetness. They’re surprisingly easy once you get the hang of it, and the process is actually… fun? It feels like a cool science experiment that you get to eat. What’s not to love?
The “Secret” Ingredients (Spoiler: They’re Not That Secret)
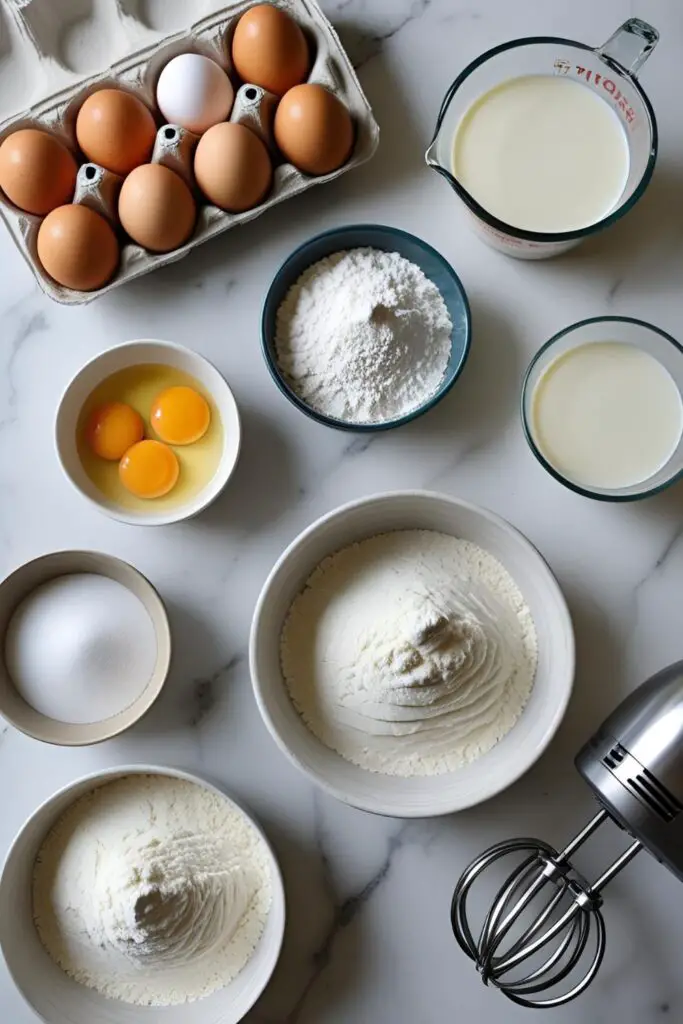
Here’s the shopping list for your journey to pancake nirvana. Don’t skimp on the quality here; good ingredients make all the difference.
- Eggs: 2 large, separated. And for the love of all that is fluffy, make sure they are at room temperature. This is non-negotiable.
- Cake Flour: 1/4 cup (30g). Cake flour gives the most tender, delicate crumb. In a pinch, you can use all-purpose flour, but it won’t be quite as magical.
- Sugar: 2 tablespoons (25g), granulated. We’ll divide this.
- Milk: 2 tablespoons (30ml). Whole milk works best for richness.
- Baking Powder: 1/2 teaspoon. This gives our pancakes their initial lift.
- Vanilla Extract: 1/2 teaspoon. Because everything is better with vanilla.
- Cream of Tartar: 1/4 teaspoon. This is our meringue’s best friend. It stabilizes the egg whites so they don’t cry and collapse on you. You can sub with a few drops of lemon juice or white vinegar if you must.
- Neutral Oil or Butter: For greasing the pan and molds.
Your Arsenal: Tools of the Trade

To create these masterpieces, you’ll need a few key gadgets. Having the right tools makes the difference between fluffy clouds and flat frisbees.
- Electric Hand Mixer: Unless you have the bicep power of a Greek god, you need this for the meringue. Whipping egg whites by hand is a path to madness.
- Large Non-Stick Skillet with a Lid: The lid is crucial for steaming the pancakes, which helps them cook through and rise to their full potential.
- Pancake Ring Molds: These are the secret to getting that signature height and perfect circular shape. Look for ones that are about 3 inches (7.5 cm) in diameter and at least 1.5 inches (4 cm) tall.
- Fine-Mesh Sifter or Sieve: To ensure your dry ingredients are lump-free and airy.
- Multiple Mixing Bowls: You’ll need at least two: one for the yolk mixture and a larger, very clean one for the meringue.
- Silicone Spatula: Essential for the gentle art of folding.
- Measuring Cups and Spoons: Precision is your friend here.
Let’s Get Jiggly With It: The Step-by-Step Guide
Alright, deep breath. You can do this. Follow these steps, and you’ll be in fluffy town in no time.
Step 1: Prep Your Batter Base
First, separate your eggs. Put the yolks in one medium bowl and the whites in a separate, large, and spotlessly clean bowl. Any trace of fat or yolk in the whites will prevent them from whipping up properly. Seriously, wipe that bowl down like you’re preparing for surgery.
To the yolk bowl, add the milk and vanilla extract. Whisk them together until they’re smooth and pale yellow. Now, sift your cake flour and baking powder directly into the yolk mixture. Sifting is not optional; it’s what keeps lumps out! Mix with your spatula until just combined. Do not overmix! A few small lumps are fine. Set this bowl aside.
Step 2: The Meringue Magic Show
This is the main event, folks. The part that makes or breaks your souffle pancakes. Grab your bowl of egg whites and the cream of tartar. Using your electric hand mixer on medium speed, beat the whites until they get foamy, like bubble bath.
Once foamy, gradually add the 2 tablespoons of sugar while mixing continuously. Turn the mixer up to high and whip until you have a stiff, glossy meringue. What does “stiff” mean? When you lift the beaters out, the peak that forms should stand straight up and not flop over. It should look like shiny, thick shaving cream. TBH, this is the most critical step.
Step 3: The Fold is Gold

Now, we marry our two mixtures. Take about one-third of your beautiful meringue and plop it into the yolk batter. Use your spatula to fold it in. Don’t stir! Use a gentle “scoop from the bottom, fold over the top” motion. This lightens the yolk base, preparing it for the rest of the meringue.
Once that’s incorporated, add the remaining meringue. Continue to fold gently and patiently until just a few white streaks remain. Be careful not to deflate all that air you just whipped in! The final batter should be light, airy, and voluminous.
Step 4: Time to Cook!
Heat your non-stick skillet over the lowest possible heat. This is a low-and-slow game. Lightly grease the pan and the inside of your ring molds with butter or oil. Place the molds in the pan.
Carefully spoon or pipe the batter into each mold, filling them about three-quarters full. Don’t overfill, or they’ll spill over.
Place the lid on the skillet and cook for about 9-12 minutes. Add a tablespoon of water into the pan (away from the batter) before closing the lid to create steam. This helps them cook evenly.
Step 5: The Flip and Finish
After about 10 minutes, gently lift the lid. The pancakes should have risen significantly. Use a spatula to carefully flip the entire mold over. Be swift and confident!

Place the lid back on and cook for another 4-6 minutes on the second side. Once done, use tongs to carefully remove the hot molds, and slide your perfect, fluffy pancakes onto a plate. Serve immediately!
The Damage Report: Calories & Nutrition

Let’s be real, you’re not eating these for your health. But if you must know…
- Serving Size: 2 pancakes
- Estimated Calories: ~280 kcal
- Protein: ~10 g
- Carbohydrates: ~35 g
- Fat: ~11 g
- Note: This is an estimate and will vary based on your specific ingredients and toppings. Who’s counting anyway? 🙂
Common Pancake Pitfalls (And How to Dodge Them)
I’ve made the mistakes so you don’t have to. Here are the most common ways people mess this up.
- The Flat Pancake Tragedy: Your pancakes deflated into sad, flat discs. The Culprit: You either overmixed the batter when folding, or your meringue wasn’t stiff enough. That meringue needs to be able to hold its own!
- Burnt Outside, Raw Inside: You cooked them on heat that was too high. The Fix: Patience, young grasshopper. Use the lowest heat setting on your stove. It feels wrong, but it’s oh-so-right.
- Rubbery Texture: You probably overmixed the yolk batter after adding the flour. The Fix: Mix only until the flour is just combined. A few lumps are your friends. Overmixing develops gluten, which is great for bread, but terrible for delicate pancakes.
- The Meringue Won’t Whip: There was probably a speck of yolk or grease in your bowl or on your beaters. The Fix: Be meticulous about clean bowls and utensils. It’s the diva of the baking world.
Mix It Up: Fun Variations
Once you’ve mastered the classic, why not get a little wild?
- Matcha Soufflé Pancakes: Add 1 teaspoon of high-quality matcha powder to your dry ingredients for an earthy, vibrant green tea flavor. It pairs beautifully with a dollop of whipped cream and some red bean paste.
- Decadent Chocolate Pancakes: Sift 1 tablespoon of unsweetened cocoa powder in with the flour. For extra indulgence, you can fold in a few mini chocolate chips right at the end. Serve with chocolate sauce and a dusting of powdered sugar.
- Lemon & Blueberry Burst: Add the zest of one lemon to your yolk mixture for a bright, citrusy kick. After cooking, top the pancakes with a fresh blueberry compote and a drizzle of maple syrup.
Frequently Asked Questions (Because You’re Not the Only One)
Why do my Japanese pancakes deflate?
This is the number one issue! It’s almost always due to an unstable meringue or from overmixing the batter and knocking all the air out. Make sure your meringue has stiff peaks and be incredibly gentle when folding.
Can I make Japanese pancakes without ring molds?
You can try, but they won’t be as tall or perfectly round. You can try to free-form them by spooning tall mounds of batter onto the pan, but expect them to spread more. The rings are really worth it for the classic look.
What’s the difference between Japanese pancakes and regular pancakes?
The main difference is the preparation of the eggs. Japanese soufflé pancakes use whipped egg whites (a meringue) folded into the batter, which gives them their signature light, airy, and tall structure. Regular American pancakes use a simpler, denser batter.
Can I make the batter ahead of time?
Absolutely not. The meringue will begin to deflate the second you stop mixing. This batter needs to be made and cooked immediately for maximum fluffiness.
What flour is best for Japanese pancakes?
Cake flour is the best choice because its lower protein content results in a more tender and delicate pancake. All-purpose flour can work, but the texture won’t be as cloud-like.
Why are my pancakes rubbery?
You overmixed the batter after adding the flour. This develops gluten, which makes the pancakes tough and chewy instead of light and melt-in-your-mouth. Mix until just combined.
How do I get my pancakes so tall?
The height comes from two things: a strong, stable meringue and using tall ring molds to contain the batter as it rises and steams.
Final Thoughts
You did it. You stared into the fluffy abyss and came out a champion. Now go forth and build your tower of pancake glory. Top it with powdered sugar, fresh fruit, a drizzle of maple syrup, or just a glorious pat of butter.
Once you’ve tasted these, you’ll never look back at those sad, store-bought mixes again. Welcome to the fluffy side. We’re glad to have you. Now go share your creations—or don’t, I wouldn’t blame you for keeping them all to yourself. 😉