How to Make a Magical Elsa Cake (Without Having a Frozen Meltdown)
So, it happened. Your beloved child looked at you with those big, hopeful eyes and uttered the six words that strike fear into the hearts of parents everywhere: “I want an Elsa cake frozen.” You nod, you smile, you promise them the world, and then you immediately retreat to the pantry to have a quiet, stress-induced panic attack. You’ve seen the pictures online—the towering, sparkling dress, the perfect ombré frosting, the smugly perfect smile on Elsa’s face.
Deep breaths. I’m here to tell you that you can absolutely do this. You don’t need to be a professional pastry chef, and you don’t need to sell your soul for a bakery-priced cake. Making an Elsa doll cake is just a series of simple steps that, when combined, create something truly magical.
Think of me as your friendly guide to Arendelle. We’ll tackle this project together, with a bit of butter, a whole lot of sugar, and a healthy dose of edible glitter. Let’s let go of the fear and bake a cake that will make you the undisputed hero of the birthday party.
Why This DIY Elsa Cake Is the Best
First of all, the look on your kid’s face when they see this cake will be worth every second you spend on it. It’s a total showstopper, the centerpiece of any Frozen-themed party. It’s not just a cake; it’s an interactive, edible toy (well, kind of).
Second, you have complete control over the ingredients. You can choose your favorite cake flavor and make a buttercream that actually tastes good, unlike some of the waxy stuff you find on store-bought cakes. Plus, making it yourself is WAY cheaper than ordering a custom cake. We’re talking “buy yourself a nice bottle of wine with the savings” cheaper.

And honestly? It’s fun! Once you get past the initial “what have I gotten myself into?” phase, piping those little blue rosettes is surprisingly therapeutic. It’s like arts and crafts, but you get to eat the results. What could be better?
Your Royal Decree of Ingredients
This is a project with a few key components. Let’s break down what you’ll need to build your ice palace.
For the “Ice Palace” Vanilla Cake (The Dress):
- 3 cups all-purpose flour
- 2 cups granulated sugar
- 1 tablespoon baking powder
- ½ teaspoon salt
- 1 cup unsalted butter, softened and cut into cubes
- 4 large eggs, room temperature
- 1 cup whole milk, room temperature
- 2 teaspoons pure vanilla extract
- Pro Tip: In a hurry? Two boxes of your favorite white or vanilla cake mix will work perfectly. No judgment here.
For the “Blizzard” Buttercream (The Frosting):
- 2 cups unsalted butter, softened
- 6-8 cups powdered sugar, sifted
- ¼ cup heavy cream or whole milk
- 2 teaspoons pure vanilla extract
- A pinch of salt
- Sky Blue and Royal Blue gel food coloring (gel is a must!)
For the Royal Decorations:
- An Elsa Doll (a real one, about 11.5 inches tall)
- White and blue sprinkles (snowflakes, nonpareils, sanding sugar)
- Edible glitter or pearl dust. This is non-negotiable for achieving maximum Elsa sparkle.
The Essential Tools for Building a Snow Queen
For this specific cake design, a few special tools are your best friends.
- Wilton Wonder Mold Doll Cake Pan Set: This is the easiest way to get that perfect dress shape. Alternatively, a large oven-safe glass bowl (about 2-quart capacity) can work.
- An Elsa Doll: Make sure it’s one you don’t mind getting a little frosting on. The kind where the dress comes off is ideal.
- Stand Mixer or a powerful Hand Mixer: You’ll be making a LOT of frosting. Your arm will thank you.
- Piping Bags: You’ll need at least two.
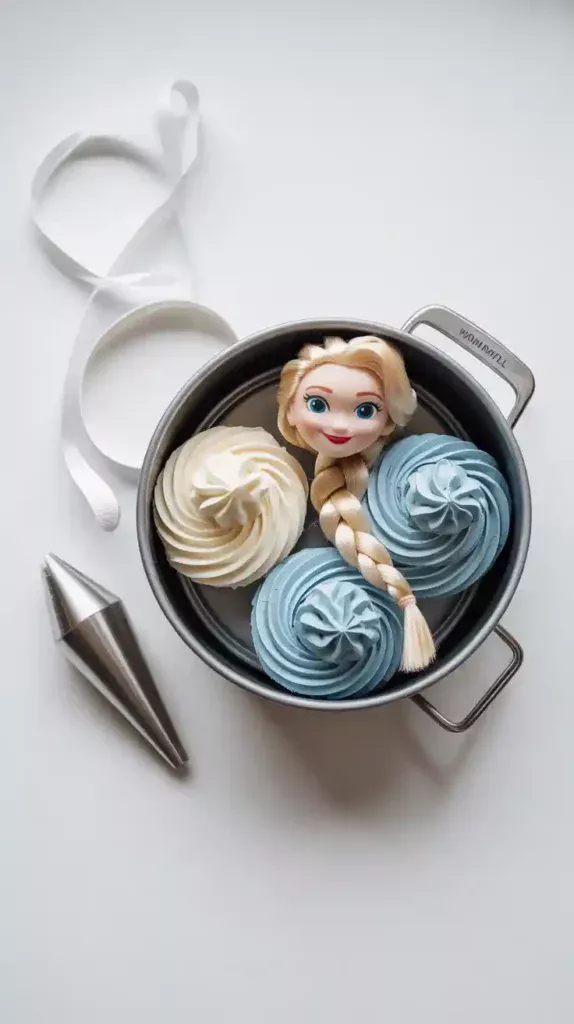
- Large Star Piping Tip: A Wilton 1M or 2D tip is perfect for making the dress rosettes.
- Plastic Wrap: For food safety! This is very important.
- Cake Turntable: Will make decorating the dress so much easier.
- Offset Spatula: For your crumb coat and general frosting management.
Step-by-Step: The Path to Arendelle

Alright, let’s build a snowman… I mean, a snow queen cake.
Step 1: Prep Your Queen
First things first, let’s get Elsa ready for her cake debut. Remove her clothes (scandalous!). Clean the doll thoroughly with soap and water and dry her completely. Then, tightly wrap the bottom half of the doll—from the waist down—in several layers of plastic wrap. This is for food safety and keeps her legs from getting caked in, well, cake.
Step 2: Bake the Dress
- Preheat your oven to 350°F (175°C). Generously grease and flour your Wonder Mold pan or oven-safe bowl. This is a big cake, so you don’t want it to stick.
- In your stand mixer, combine the flour, sugar, baking powder, and salt. Add the cubed, softened butter and mix on low until the mixture looks like wet sand.
- In a separate bowl, whisk together the eggs, milk, and vanilla. Pour this into the flour mixture in three additions, mixing on medium speed for about 30 seconds after each addition. Scrape down the bowl.
- Pour the batter into your prepared pan. If using the Wonder Mold, use the heating core that comes with it to ensure the center bakes properly.
- Bake for 50-60 minutes. This cake is deep, so it takes a while. It’s done when a long wooden skewer inserted into the thickest part comes out clean.
Step 3: Cool, Carve, and Assemble
- Let the cake cool in the pan for 15 minutes before carefully turning it out onto a wire rack to cool completely. This will take a couple of hours. Do not rush this!
- Once cool, level the bottom (the wide part) with a serrated knife so it sits flat.
- Now, carve a hole in the center of the cake, from the top (the narrow part) down. Make it just wide enough to snugly fit the wrapped doll.
- Carefully insert the wrapped doll into the cake until she is waist-deep. You now have the basic shape of your Elsa cake!
Step 4: Make the Blizzard Buttercream
- In your stand mixer, beat the softened butter for 2-3 minutes until light and fluffy.
- Gradually add 6 cups of sifted powdered sugar, the vanilla, and the salt. Mix on low until combined.
- Add the heavy cream, then increase the speed to medium-high and beat for another 3-4 minutes until the frosting is smooth and airy. If it’s too stiff, add more cream; if it’s too soft, add more powdered sugar.
- Divide the frosting into 3 bowls. Leave one white. Add a little bit of sky blue gel to the second bowl for a light blue. Add more sky blue and a touch of royal blue to the third bowl for a darker blue.

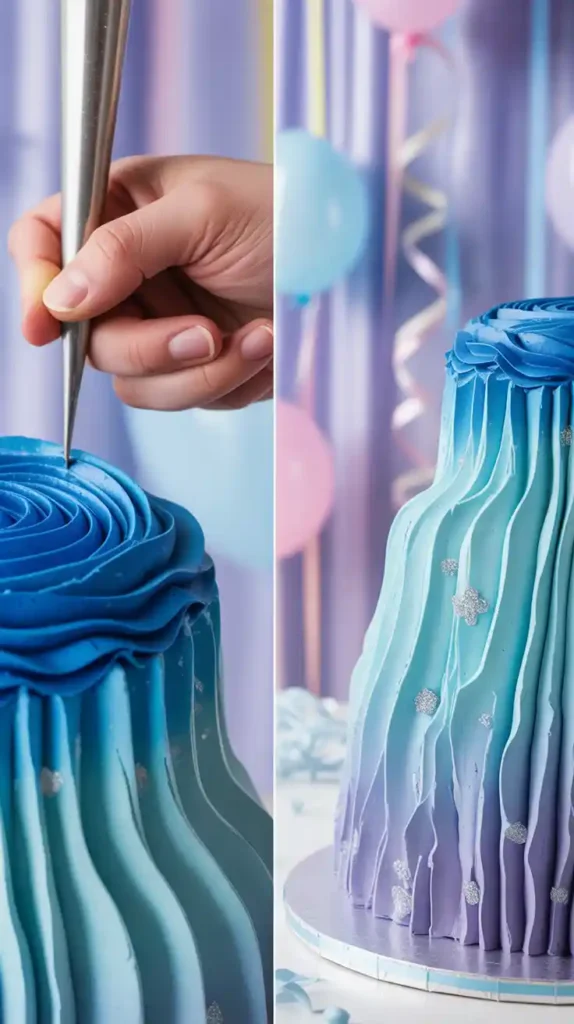
Step 5: Decorate the Dress!
- Apply a very thin layer of frosting (any color) all over the cake “dress.” This is your crumb coat. Chill the cake for 20 minutes to set it.
- Time for the ombré! Start at the bottom. Using your star tip, pipe rosettes or stars of the darkest blue frosting in a row around the base of the dress.
- Move up to the next row and use the light blue frosting.
- Finish the top half of the dress with the white frosting, blending into the light blue.
- Let it sparkle! This is the final, magical touch. Go to town with your white and blue sprinkles, and finish with a generous dusting of edible glitter. The more sparkle, the better.
Calories & Nutritional Info (A Royal Guesstimate)
- Estimated Calories per Slice: Look, it’s a giant cake made of butter and sugar, for a child’s birthday. Let’s call it 500-700 calories and agree that the joy it brings is nutritionally priceless.
- Main Vitamin: Vitamin M (for Magic).
- Allergen Info: Contains gluten, dairy, and eggs. And probably a little bit of your sanity.
Common Mistakes to Avoid (Or, How Not to Let It Go… Off the Rails)
- Using Liquid Food Coloring: Do not use the little liquid drops from the grocery store! They will thin out your buttercream and turn it into a soupy mess. You must use concentrated gel food coloring.
- Forgetting to Grease the Pan Well: This is a big, dense cake. Be very thorough with your greasing and flouring, or you’ll be serving a pile of “deconstructed Elsa cake.”
- The Dreaded Raw Center: Dome cakes are notorious for being raw in the middle. Use a long skewer to test for doneness, and don’t be afraid to lower the oven temp slightly and bake it longer if needed.
- Ignoring the Crumb Coat: If you skip the crumb coat and chill step, you’ll get little cake crumbs all mixed into your beautiful blue rosettes. It’s a small step that makes a huge difference.
Variations & Customizations
Feeling adventurous? Let’s mix it up.
- Arendelle’s Anna Cake: Make the same cake, but use a dark blue/black frosting for the bottom of the dress and a deep magenta for the top. Pipe little green vines and flowers on the skirt to mimic Anna’s coronation dress.
- A “Frozen” Surprise Inside: Before you insert the doll, scoop out a little extra cake from the center cavity and fill it with a cascade of blue and white sprinkles and edible pearls. When you cut the first slice, you’ll get a magical sprinkle avalanche!
- Winter Berry Wonderland: Add a delicious filling! After you bake and core the cake, slice the dome in half horizontally. Spread a layer of raspberry or strawberry jam on the bottom half before reassembling. It’s a delicious surprise that cuts through the sweetness.
Frequently Asked Questions (From Panicked Parents Everywhere)
H3: Is it really safe to stick a Barbie doll in a cake? Yes, as long as you take two precautions: 1) Clean the doll very well with soap and water, and 2) Wrap the part that goes into the cake tightly with food-safe plastic wrap.
H3: Can I just use a box cake mix for this? 100% yes. I highly encourage it if you want to save a step. You’ll need about two standard-sized boxes of cake mix to fill the Wonder Mold pan. Just prepare it according to the package directions.
H3: What if I don’t have a special doll cake pan? You can use a large, oven-safe glass bowl (like a Pyrex bowl). It will take longer to bake, so turn the oven down to 325°F (160°C) and check it frequently. You may also need to bake a small 8-inch round cake to place underneath the dome to give it more height.
H3: How do I get that perfect ombré look with the frosting? The key is to use three separate bowls. Start with your base white frosting, then add a tiny bit of blue gel to one bowl for light blue. Then add more blue to the third bowl for the darker shade. Pipe the colors in distinct horizontal bands.
H3: My buttercream is melting and sliding off! What did I do wrong? Your cake was likely still a little warm, or your kitchen is too hot. A crumb coat and a good chill in the fridge are essential to prevent this. If your frosting itself feels too soft, pop it in the fridge for 15-20 minutes to firm up before piping.
H3: How far in advance can I make this cake? You can bake the cake layer a day or two ahead, let it cool, and wrap it well. You can make the buttercream a few days ahead and store it in the fridge. For best results, assemble and decorate the cake the day of or the day before the party.
H3: How do I store the finished Elsa cake? Due to its height and the buttercream, it should be stored in the refrigerator. Let it sit out at room temperature for about 30-60 minutes before serving to allow the buttercream to soften.
Final Thoughts
You did it. You faced the ultimate kids’ birthday party challenge and emerged victorious. You have created a sparkling, magical Elsa cake that is destined to be the star of the party. Now, take approximately one thousand pictures from every possible angle.
Go on, pour yourself a celebratory beverage. You’ve navigated the treacherous fjords of character cake baking and built an edible ice palace. You are, without a doubt, the coolest parent in all of Arendelle.