This is going to sound a little strange, but we’re not making a cake today. Stay with me. We’re making the thing that holds the cake. Because let’s be honest, you’ve spent hours baking and decorating a masterpiece, a true work of art. And how are you going to transport it? In a sad, flimsy cardboard circle with a tinfoil hat? Your cake deserves better. It deserves a stunning, custom cake box design that screams, “The inside is just as good as the outside.”
You’ve spent all that effort on the bake, so why let the presentation fall flat? A beautiful box isn’t just for transport; it’s the opening act for your delicious headliner. It builds anticipation. It makes your homemade gift look like it came from a high-end patisserie. And TBH, it’s a super fun and easy craft project.
So, forget the recipe for a moment. Today, we’re following a blueprint. We’re becoming architects of confectionary conveyance. Ready to build something awesome?
Why a DIY Cake Box is a Total Game-Changer
Still not convinced you should trade your whisk for a ruler? Let me break it down for you. First, it’s personal. A custom-made box shows you went the extra mile. It’s the difference between a generic greeting card and a heartfelt, handwritten letter. It says, “I thought about this, from the first egg I cracked to the ribbon on the box.”
Second, it’s incredibly impressive. Hand someone a cake in a box you made yourself, and watch their jaw drop. They’ll think you’re some kind of domestic god or goddess, a master of all crafts. We won’t tell them it only took you 30 minutes.

Finally, it’s practical! It protects your precious cargo from bumps, smudges, and the dreaded sideways slide in the car. It’s structure, it’s style, and it’s your new secret weapon in the world of gifting.
Your “Blueprint” Materials List
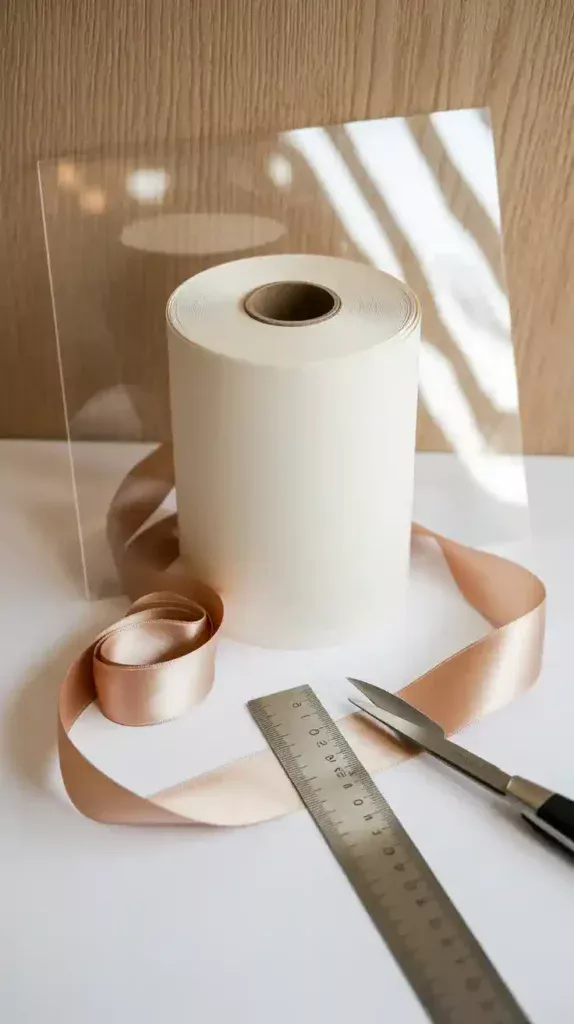
This isn’t a recipe, it’s a construction project. So, here are the materials you’ll need to create a basic, beautiful cake box.
- Heavy Cardstock: This is non-negotiable. You need paper that’s at least 250-300 gsm (grams per square meter). Anything less is basically printer paper, and it will buckle under the weight of your cake. Look for it in the scrapbooking or papercraft aisle.
- Acetate Sheets (Optional): If you want to create a fancy window so everyone can peek at your creation, you’ll need a sheet of this clear plastic.
- Strong Adhesive: A glue gun works, but for clean, professional seams, I recommend either strong double-sided craft tape or a quick-drying craft glue like Beacon 3-in-1.
- Decorative Flair: This is the fun part!
- Ribbon
- Stickers
- Custom stamps and ink pads
- Washi tape
- Markers or paint pens
Essential Crafting Tools for Your Workshop
Having the right tools is the difference between a crisp, professional box and something that looks like a preschool art project. No offense to preschoolers.
- Cutting Mat: Protects your table and helps you make straight cuts. A large self-healing one is a fantastic investment.
- Craft Knife (X-Acto Knife): For clean, precise cuts that scissors just can’t deliver. Be careful with your fingers!
- Metal Ruler: Don’t use a plastic one. Your craft knife will chew it up. A metal ruler with a cork back is the gold standard for staying put.
- Scoring Tool or Bone Folder: This is the secret to crisp, perfect folds. You can use the back of a butter knife in a pinch, but a real scoring tool is a game-changer.
- Pencil and Eraser: For marking your measurements lightly.
Step-by-Step Instructions: Building Your Box
Let’s start with a simple box for an 8-inch round cake. The principles are the same for any size—just adjust your measurements!
Part 1: The Box Base
- Measure Your Cake: First, measure your cake on its cake board. Let’s say your 8-inch cake on its board is actually 8.5 inches wide and 4 inches tall. We’ll build a box that’s 9 inches wide and 4.5 inches tall to give it some breathing room.
- Cut Your Paper for the Sides: The circumference of a 9-inch circle is about 28.3 inches (C=πd). We’ll need a long strip of cardstock for the sides. Cut a strip that is 29 inches long and 4.5 inches tall.
- Score the Tabs: On one of the long edges of your strip, score a line about half an inch in. Snip into this tab every inch or so, stopping at the score line. These little tabs will be folded inward to form the base.
- Cut the Bottom Circle: Cut out a circle of cardstock that is 9 inches in diameter.
- Assemble the Base: Gently curve your long side strip into a circle. Overlap the ends by about half an inch and secure them with strong glue or double-sided tape. Now, place your 9-inch circle on your work surface, apply glue to the tabs of your side wall, and carefully press the wall onto the circle base, with the tabs on the inside.
Part 2: The Lid
- Cut the Lid Top: The lid needs to be slightly bigger than the base to fit over it. Cut a circle that is 9.25 inches in diameter.
- Cut the Lid Side: You need another long strip of cardstock for the side of the lid. Make this one about 30 inches long and 2 inches tall.
- Assemble the Lid: Apply a thin line of glue along one long edge of your 2-inch strip. Carefully attach it around the edge of your 9.25-inch circle top. Overlap and secure the end of the strip. Let it dry completely.

Voilà! You have a basic, functional, and surprisingly sturdy cake box. Now for the fun part.
Project Specs & Practicalities
- Skill Level: Ambitious Beginner. If you can use a ruler, you can do this.
- Estimated Time: About 30-45 minutes for your first one. You’ll get faster with practice.
- Approximate Cost: Pennies on the dollar compared to buying a fancy bakery box. You can make several boxes from a few large sheets of cardstock.
Common Crafting Fails to Avoid
- Using Flimsy Paper: I’m saying it again for the people in the back. Do not use cheap, thin paper. Your cake will end up on the floor, and you will be sad. Use heavy cardstock.
- Inaccurate Measurements: Measure twice, cut once. This isn’t just a saying for carpenters. A box with wonky measurements won’t fit together properly. Be precise.
- Messy Gluing: Use glue sparingly. Big globs will warp the paper and look messy. Double-sided tape is your friend if you have a heavy hand with glue.
- Skipping the Scoring: If you just fold the cardstock, you’ll get a soft, rounded, and often cracked edge. Scoring the paper before you fold it breaks the fibers just enough to give you a sharp, professional-looking crease.
Level-Up Your Cake Box Design
Got the basic box down? Let’s get fancy.
- The Peekaboo Window: Before assembling the lid, draw a shape on the top circle (a circle, square, or heart works well). Use your craft knife to carefully cut it out. Then, cut a piece of acetate sheet that is slightly larger than the hole and glue it to the inside of the lid. Instant professional upgrade!
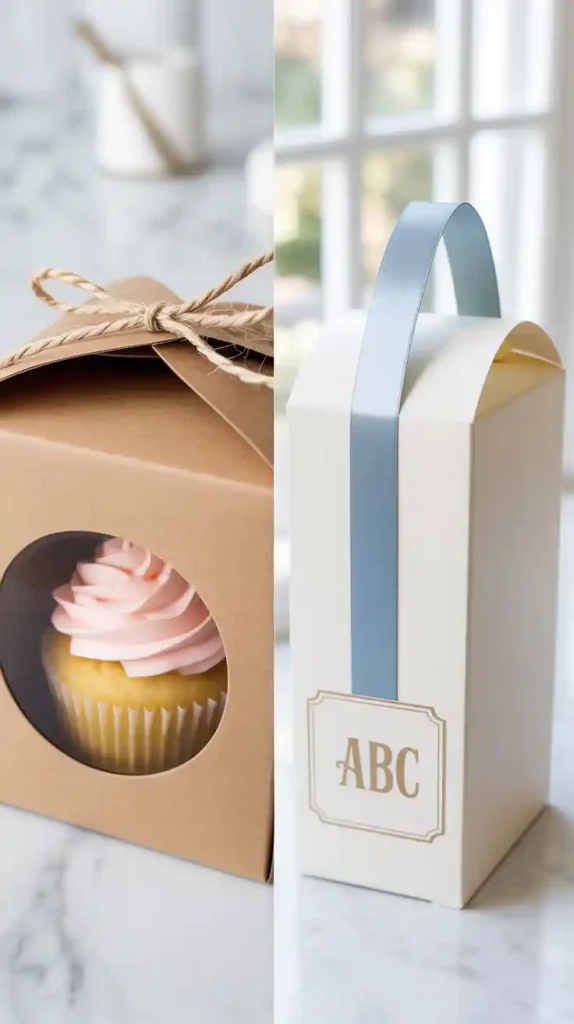
- The Custom Monogram: Get a set of alphabet stamps and an ink pad. You can stamp a monogram, the recipient’s name, or a cute message like “Eat Me” directly onto the box before you assemble it. It’s a simple touch that looks incredibly chic.
- Add a Handle: For smaller cakes or cupcake boxes, you can add a handle. Before putting the lid on, punch two holes on opposite sides of the box’s side wall, about an inch from the top. Thread a sturdy, wide ribbon through the holes and tie knots on the inside to secure it.
Frequently Asked Questions
H3: What kind of paper or cardboard is best for cake boxes? You’re looking for food-safe paperboard or heavy cardstock, ideally 250 gsm or heavier. If the paper isn’t explicitly food-safe, just make sure your cake is on a good-quality cake board so it doesn’t directly touch the box.
H3: How can I make my DIY cake box stronger? Use the heaviest cardstock you can find. You can also reinforce the bottom by gluing a second circle of cardboard inside. Making sure your glue/tape is strong and your folds are crisp also adds to the structural integrity.
H3: Can you make a cake box without glue? Yes, by using an interlocking tab design. You can find templates for these online, often as SVG files for cutting machines. However, for a truly secure box that you can trust with a heavy cake, IMO, glue or strong tape is the way to go.
H3: Can I use my Cricut or Silhouette for this? Absolutely! This is what those machines were made for. Search for “cake box SVG template” online. The machine does all the precise cutting and scoring for you, which is a massive time-saver.

H3: Where can I find good cake box templates? You can find tons of free and paid templates online by searching for “DIY cake box template” or “round cake box printable.” Etsy is also a great resource. Or, you can draft your own with a compass and ruler!
H3: How do you transport a cake safely in a DIY box? Always carry the box from the bottom! Never trust a handle or the sides alone, especially with a heavy cake. Place it on a flat, non-slip surface in your car, like the floor of the passenger seat.
H3: How can I add branding to my cake box design? Stickers with your logo are the easiest way. You can also get a custom stamp made with your logo or business name. Printing directly onto the cardstock is an option if you have a printer that can handle thick paper.
Final Thoughts
See? You’re not just a baker anymore; you’re a designer, an engineer, a packaging pro. You’ve created a custom vessel worthy of your culinary creation. Your cakes will now travel in the style they so rightly deserve.
So go on, give it a try. The next time you gift one of your amazing cakes, you’ll be handing over a complete, beautiful package. And the look on their face will be almost as sweet as the cake itself.