The “Your Burger Deserves Better” Guide on How to Make Burger Buns
Let’s talk about a silent tragedy that unfolds in backyards every summer. You’ve done it. You’ve sourced the perfect beef blend, you’ve mastered the art of the patty flip, you’ve got artisanal pickles and fancy ketchup. You’ve built a masterpiece. And then… you’re going to place that glorious creation between two sad, flimsy, cotton-ball-like buns from a plastic bag that will disintegrate upon first contact? Absolutely not. Today, we’re drawing a line in the sand. This is your ultimate guide on how to make burger buns, and it’s about to change your entire burger game forever.
Forget everything you know about those sad, squishy imposters. We are about to create a bun that is soft yet sturdy, rich yet light, and so unbelievably delicious that it’s not just a vehicle for your burger—it’s an all-star player. Get ready to become a true backyard BBQ legend.
Why This Recipe is an Absolute Game-Changer
So, why should you go to the “trouble” of making buns from scratch?
- The Texture is a Revelation: These are not your average buns. We’re making a brioche-style bun, which means the dough is enriched with milk, butter, and eggs. The result is an incredibly soft, pillowy, and fluffy bun with a rich, buttery flavor that is simply divine.
- They Are Structurally Sound: This is the most important part. A great burger is a juicy, messy affair. These buns are sturdy enough to stand up to a juicy patty and all the toppings you can throw at it, without turning into a soggy, disintegrating mess in your hands.
- You’ll Be a Certified Grill Master: There is no greater flex at a cookout than casually mentioning, “Oh yeah, I baked the buns myself.” It’s an immediate, undeniable power move that will earn you the respect and admiration of all your friends.
The Ingredient List: The Anatomy of a Perfect Bun
To build the perfect bun, we need an enriched dough that’s packed with flavor.
For the Best Burger Buns of Your Life:
- All-Purpose Flour: 3 ½ cups, plus more for dusting. You can also use bread flour for an even chewier bun.
- Instant or Active Dry Yeast: 2 ¼ teaspoons (one standard packet).
- Warm Milk: 1 cup. It should be lukewarm, like a baby’s bath (about 110°F / 43°C).
- Large Eggs: 2, at room temperature.
- Unsalted Butter: 6 tablespoons, softened to room temperature and cut into pieces.
- Granulated Sugar: ¼ cup.
- Salt: 1 ½ teaspoons.
For the Finishing Touch:
- 1 Large Egg, beaten with 1 tablespoon of water (for the egg wash).
- Sesame Seeds, Poppy Seeds, or Flaky Salt for sprinkling on top.
Tools & Kitchen Gadgets: Your Bun-Baking Brigade
You don’t need a professional bakery, but a stand mixer will make your life a whole lot easier here.
- A Stand Mixer with a Dough Hook: Highly recommended. An enriched dough like this is very sticky, and a stand mixer does all the hard work of kneading for you.
- A Large Mixing Bowl.
- A Kitchen Scale (optional but amazing): For dividing your dough into perfectly uniform buns.
- A Bench Scraper: Great for handling and dividing sticky dough.
- A Large Rimmed Baking Sheet.
- Parchment Paper.
- A Pastry Brush.
Step-by-Step Instructions: The Path to Bun Nirvana
Ready to create the foundation for the best burger of your life? Let’s do this.
Step 1: Wake Up the Yeast

In the bowl of your stand mixer, combine the warm milk and the sugar. Sprinkle the yeast over the top, give it a quick stir, and let it sit for 5-10 minutes. You’re looking for the mixture to get foamy and bubbly. This means your yeast is alive and ready to rock.
Step 2: Make the Enriched Dough
- To your foamy yeast mixture, add the eggs, flour, and salt.
- Using the dough hook attachment, mix on low speed until a shaggy dough forms.
- Increase the speed to medium and knead for about 5 minutes.
- Now, with the mixer still on medium speed, add your softened butter, one piece at a time, waiting for each piece to be mostly incorporated before adding the next.
- Once all the butter is in, continue to knead for another 5-7 minutes. The dough will be soft, slightly sticky, and should pull away from the sides of the bowl. It should be smooth and elastic.
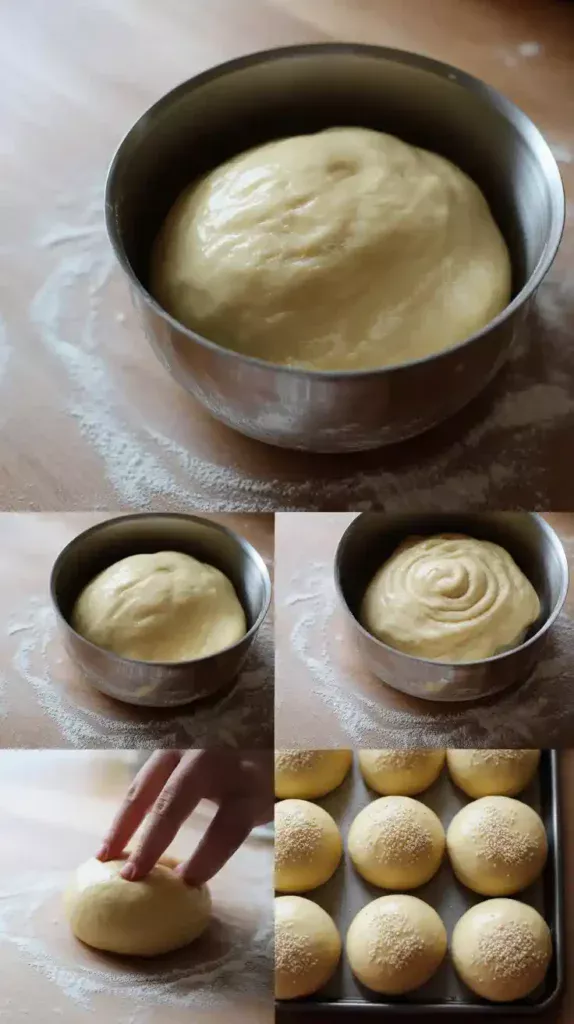
Step 3: The First Rise (The Big Fluff)
Form your dough into a ball and place it in a lightly oiled bowl. Cover it with a damp kitchen towel or plastic wrap. Let it rise in a warm, draft-free spot for 1 to 1.5 hours, or until the dough has doubled in size.
Step 4: The Shaping
Gently punch down the risen dough and turn it out onto a lightly floured surface. Divide the dough into 8 equal pieces. (A kitchen scale is your best friend here; each piece should be about 100g).
To shape each bun, flatten a piece of dough into a disc, then fold the edges into the center. Flip it over, seam-side down. Cup your hand over the dough ball and roll it on the counter to create a tight, smooth, round ball. This tension is key for a bun that rises up, not out.
Step 5: The Second Rise (The Final Puff)
Place your beautifully shaped buns on a parchment-lined baking sheet, leaving a few inches of space between them. Gently press down on each bun to flatten it slightly. Cover them loosely and let them rise in a warm spot for another 45-60 minutes, until they are puffy and have risen by about 50%.
Step 6: The Egg Wash and Bake
- Preheat your oven to 375°F (190°C).
- Gently brush the tops of your risen buns with the egg wash. This is the secret to a beautiful, shiny, golden-brown top.
- Sprinkle with sesame seeds or your desired topping.
- Bake for 15-18 minutes, until the buns are a deep golden brown. Let them cool on the pan for a few minutes before transferring them to a wire rack to cool completely.
Calories & Nutritional Info (The Foundation)
This is the glorious, buttery vessel for your burger masterpiece.
- Serving Size: One perfect, fluffy burger bun.
- Calories: Approximately 280-320 kcal.
- Good For: Holding up to a juicy burger, making all your friends jealous.
Common Mistakes to Avoid (Bun Blunders)
- Killing Your Yeast: If your milk is too hot, it will kill the yeast, and your dough will never rise. It must be lukewarm, just pleasantly warm to the touch.
- An Under-Kneaded Dough: Enriched doughs need a good amount of kneading to develop the gluten structure that makes them light and fluffy. Don’t cut the kneading time short! The dough should be smooth, elastic, and pass the “windowpane test” (you can stretch a small piece thin enough to see light through it).
- Flat, Sad Buns: If your buns spread out like sad little pancakes, you probably didn’t shape the dough balls tightly enough. Creating that surface tension by rolling them on the counter is the secret to a bun that rises up tall and proud.
- Forgetting the Egg Wash: Skipping this step is a crime against color and texture. The egg wash is what gives the buns their signature shiny, deep golden-brown, professional-looking finish.
Variations & Customizations: The Bun Bar

The classic brioche is a star, but you can customize it!
1. The Mighty Pretzel Bun
A salty, chewy, and incredible variation. After the second rise, give the buns a quick bath in a boiling baking soda and water solution for about 30 seconds per side. Place them back on the parchment, sprinkle with coarse pretzel salt, and bake as directed.
2. The “Everything” Bun
The perfect bun for a breakfast burger. Instead of sesame seeds, sprinkle your egg-washed buns generously with “everything bagel” seasoning. The combination of onion, garlic, and seeds is fantastic.
3. The Adorable Slider Buns
Hosting a party with sliders? This recipe is perfect. Instead of dividing the dough into 8 pieces, divide it into 16-20 smaller pieces and shape them into mini buns. The baking time will be a little shorter, so keep an eye on them.
Final Thoughts
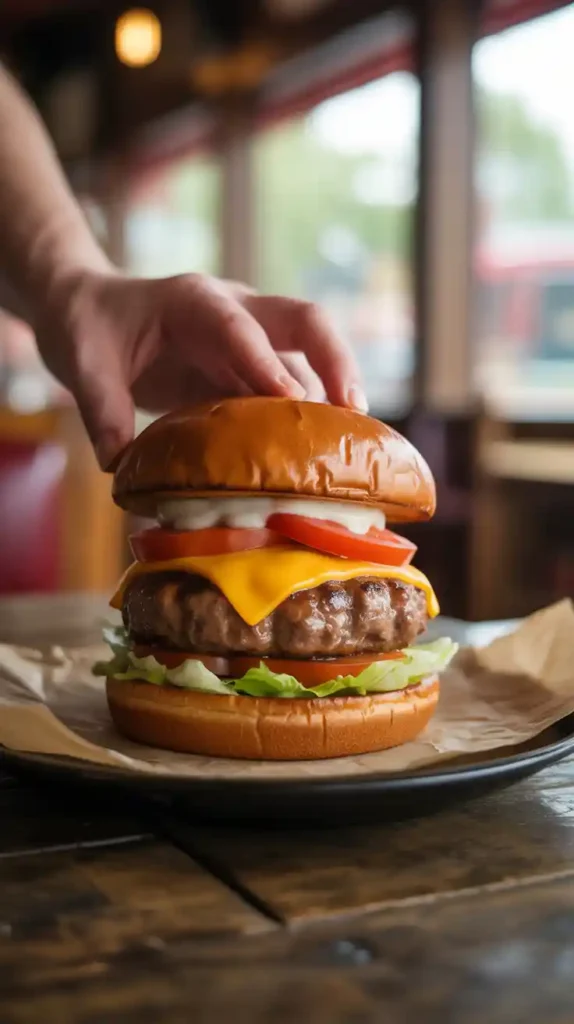
You’ve done it. You have officially graduated to the next level of burger mastery. You have created the most important, most overlooked, and most delicious component of the perfect burger. You have taken the time to craft a bun that is worthy of your burger creation.
So go on, fire up the grill. Toast those beautiful, buttery, homemade buns lightly on the grates. And as you take that first, perfect bite—the juicy burger, the crisp toppings, all held together by that soft yet sturdy, glorious bun—know that you have achieved true burger nirvana. Your friends will be talking about your buns for years to come.