The Easiest Race Car Cake Tutorial (Start Your Ovens!)
Alright, pit crew, listen up. You’ve got a birthday on the horizon for a little one with a serious need for speed. They dream in checkered flags and the roar of engines. This means you don’t just need a cake; you need a high-octane, show-stopping, “vroom vroom” masterpiece. You need a race car cake.
Before you have a panic attack picturing yourself trying to sculpt a Formula 1 car out of fondant, I’m here to wave the green flag on the easiest, most impressive cake hack on the planet. We are about to create an entire racetrack scene using one simple sheet cake, some delicious “dirt,” and the best decorating hack ever: real toys. Get ready to take a victory lap around the kitchen.
Why This Racetrack Cake is a Guaranteed Winner
So, why is this method going to put you in the winner’s circle? Let’s check the specs.
- It’s Incredibly Easy (No, Really): The most difficult part of this entire process is crushing cookies, which, let’s be honest, is more like therapy than baking. You’re essentially just frosting a cake and landscaping it with deliciousness. No special skills required.
- It’s a Cake and a Gift: The best part of this design is that the stars of the show are actual toy race cars. You don’t have to painstakingly create them, and the birthday kid gets a brand new set of wheels to play with after they blow out the candles. That’s a genius-level party move.
- Maximum “Wow” Factor: This cake is an entire scene in a pan. The vibrant “grass,” the dark “asphalt” track, and the cool cars create an action-packed centerpiece that will make every kid at the party go wild.
The Ingredient Lineup: Fuel for the Finish Line
To build our speedway, we need a solid foundation and some tasty-looking terrain.
For the Speedway Foundation (The Cake):
- All-Purpose Flour: 2 cups.
- Granulated Sugar: 2 cups.
- Unsweetened Cocoa Powder: ¾ cup. A chocolate cake makes the perfect “dirt” base.
- Baking Soda: 2 teaspoons.
- Baking Powder: 1 teaspoon.
- Salt: 1 teaspoon.
- Large Eggs: 2.
- Hot Coffee or Hot Water: 1 cup.
- Buttermilk: 1 cup.
- Vegetable Oil: ½ cup.
- Vanilla Extract: 1 teaspoon.
- The Pit Stop Shortcut: Overwhelmed with party planning? One box of chocolate cake mix, prepared according to the directions, works perfectly. No one will ever know.
For the Frosting & Grandstands:
- Unsalted Butter: 1 ½ cups (3 sticks), softened.
- Powdered Sugar: 5-6 cups, sifted.
- Milk or Heavy Cream: 4-5 tablespoons.
- Vanilla Extract: 1 ½ teaspoons.
- Salt: A pinch.
- Gel Food Colorings: Green is a must for the infield. White or yellow for the lane lines.
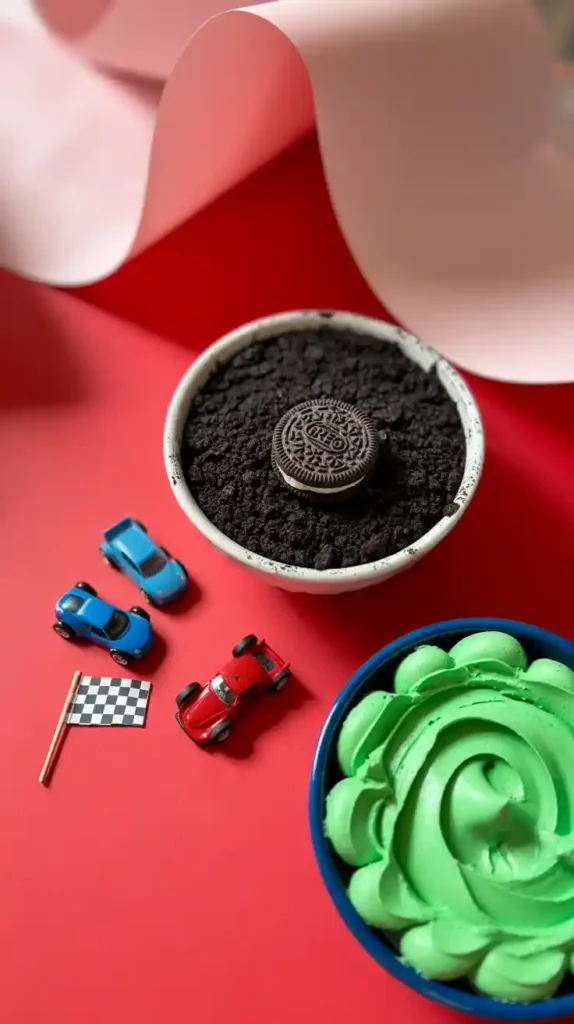
- The “Asphalt”: One package of Oreo cookies. The whole cookie, filling and all.
- The Racers: A few new, clean toy race cars.
Tools & Kitchen Gadgets: Your Pit Crew
Every good racer needs a solid pit crew and the right equipment.
- A 9×13 inch Rectangular Cake Pan: The perfect arena for our race.
- A Stand Mixer or Hand Mixer: To whip up your cake and frosting in record time.
- A Large Offset Spatula: For frosting your sheet cake like a pro.
- A Large Cake Board or a Cookie Sheet covered in foil: To display your creation.
- A Food Processor or a Ziploc Bag & a Heavy Object: For turning those Oreos into a road.
- Piping Bags and Tips (Optional but awesome): A grass tip (Wilton #233) makes amazing turf, and a small round tip is perfect for the lane markers.
- Checkered Flags: For that authentic finish-line feel.
Step-by-Step Instructions: Building the Speedway

On your mark, get set, BAKE!
Step 1: Lay the Foundation
- Preheat your oven to 350°F (175°C). Grease and flour your 9×13 inch pan.
- Mix your chocolate cake batter from scratch or a box. Pour it into the prepared pan.
- Bake for 30-35 minutes, until a toothpick inserted into the center comes out clean. Let the cake cool in the pan completely. A warm track is a sinking track.
Step 2: Landscape the Infield
- While the cake cools, prepare your buttercream. Once it’s whipped up, tint the majority of it a nice, vibrant grass green.
- Once the cake is totally cool, transfer it to your serving board. Frost the entire top surface with an even layer of the green frosting. This is your field of dreams… or, you know, grass.
Step 3: Pave the Track
- Turn your Oreo cookies into fine crumbs using a food processor or the Ziploc bag method. It should look like rich, dark asphalt.
- Now for the fun part. Carefully spoon the Oreo crumbs onto the green frosting to create your racetrack. An oval is classic, but a winding S-curve or a figure-eight looks extra cool. Gently pat the crumbs into the frosting to make them stick.
Step 4: Add the Finishing Details
- Using a small round piping tip with white or yellow frosting, pipe a dashed line down the middle of your Oreo track.
- If you have a grass tip, go around the edges of your track and pipe on some tufts of grass for a more realistic look.
- You can also pipe a little white square for a “Winner’s Circle” or write the birthday kid’s name.
Step 5: Position Your Racers!
This is the final, glorious step. Wash and thoroughly dry your new toy cars. Place them on the track, positioned for an epic race. Stick in your checkered flags at the finish line. Done!
Calories & Nutritional Info (High-Octane Fuel)

This cake is engineered for maximum party performance and a sugar rush worthy of a victory lap.
- Serving Size: One slice of pure joy.
- Primary Nutrients: Fun, excitement, and chocolate.
- Calories: Enough to fuel a champion.
Common Mistakes to Avoid (Spinouts and Pile-ups)
- A Hilly Racetrack: If your cake baked with a dome, your track will be a mess. Use a long serrated knife to level the top of the cake before you start frosting. A flat surface is key.
- Placing Dirty Toys on the Cake: This is a major party foul. Even if they are brand new out of the package, you must wash the toy cars with soap and water and dry them completely before they touch the cake.
- The Sinking Car Scenario: If your frosting is too soft or the room is warm, the cars might sink. After you frost the cake with the green buttercream, pop it in the fridge for about 20 minutes to firm up before you add the track and the cars.
- Oreo Crumb Chaos: Don’t just dump the crumbs on and hope for the best. Spoon them on carefully to create a neat track shape. It makes a huge difference in the final look.
Variations & Customizations (Pimp Your Racetrack)
Want to take a different route? Here are a few ideas.
1. The Dirt Track Derby
For a monster truck or motocross theme, make a “dirt” track instead of asphalt. Use a mix of crushed Graham crackers, brown sugar, and a few Oreo crumbs. Frost the infield with chocolate frosting to complete the muddy look.
2. The Formula 1 Circuit
For a sleeker, more sophisticated race, frost the entire cake a dark grey or black. Use a piping bag with a grass tip to pipe on green “turf” on the shoulders of the track. Use sleek, modern F1-style toy cars.
3. The Number-Shaped Speedway

If your child is turning a number that has a nice curve (like 3, 5, 6, or 8), you can bake the cake in a number-shaped pan and turn the entire number into the racetrack itself! It’s a fun and personalized twist.
FAQ: Your Pit Crew Questions, Answered
What’s the best and easiest way to make the black racetrack?
Hands down, crushed Oreo cookies. They give you the perfect color, a great texture, and they taste amazing with the chocolate cake. It’s a no-brainer.
Can I use a different flavor of cake, like vanilla?
Of course! A vanilla or funfetti cake would be fantastic. You’d just have a “dirt” road on a grassy field, which looks great.
How do I make the checkered flags?
You can buy pre-made checkered flag cupcake toppers at most party supply stores or online. Or, for a super easy DIY, just print out a small checkered flag pattern, cut it out, and tape it to a couple of toothpicks.
Can I make this cake ahead of time?
Yes. Bake the cake a day or two in advance and keep it well-wrapped at room temperature. You can frost and decorate it the day of or the day before the party. I recommend adding the toy cars right before serving so they stay clean.
My frosting seems too soft. What should I do?
Your butter might have been too soft, or your kitchen might be too warm. The easy fix is to just pop the whole bowl of frosting in the refrigerator for 15-20 minutes to let it firm up a bit. Give it a quick stir, and it should be perfect.
Is this cake design good for a beginner?

This is one of the best possible cake designs for a true beginner. It’s incredibly forgiving, doesn’t require any special skills, and the result is always a huge hit with kids.
Where is the best place to find cool toy race cars?
Toy stores, the toy aisle at big department stores like Target or Walmart, or online retailers like Amazon are all great places. Look for a multi-pack of small, die-cast cars for the best value.
Final Thoughts
You’ve done it. You’ve lapped the competition and taken the checkered flag on birthday cakes. You created a fun, action-packed, and delicious centerpiece without any of the stress or tears that usually come with character cakes.
So get ready to light the candles and hear the roar of the crowd. You’re about to be the MVP of the party. Prepare for your victory lap!