The Ultimate Cookie Monster Cake (A Guide to Edible Chaos)
Let us speak a universal truth: deep down, we are all Cookie Monster. That primal, uncontrollable urge to devour a delicious cookie? The single-minded focus? The sheer, unadulterated joy? It lives inside all of us. And today, my friends, we are going to honor our spirit animal in the most fitting way possible: by creating the ultimate, iconic, and lovably chaotic Cookie Monster cake.
This isn’t just a cake for a kid’s birthday party (though it is, and it will be a legendary hit). This is a cake for anyone who believes that “C is for Cookie” is a profound life philosophy. It’s a fuzzy, googly-eyed, cookie-stuffed masterpiece that is as much fun to make as it is to eat.
So, unleash your inner monster, silence your inner critic, and get ready to create a dessert that’s all about fun, fur, and a whole lot of cookies. OM NOM NOM NOM!
Why This Recipe Is a Monster Hit
In a world full of neat and tidy cakes, why should you embrace the glorious blue chaos of this Cookie Monster cake?
First and foremost, it is pure, unadulterated joy. It is impossible to look at this shaggy, blue, googly-eyed cake with a cookie hanging out of its mouth and not break into a massive grin. It’s a nostalgia bomb for adults and an absolute dream come true for kids. It’s a cake with a giant personality.
Second, the “fur” is incredibly forgiving. Are you terrified of getting perfectly smooth sides on a cake? Good news! For this cake, “perfectly smooth” is the enemy. The shaggy, piped fur is supposed to be a little random and messy, which makes it the perfect design for beginners and seasoned bakers alike.
Finally, it’s a cookie-lover’s dream, inside and out. We’re not just sticking cookies on top. We’re making a delicious, from-scratch Cookies and Cream cake, frosting it with a classic vanilla buttercream, and then stuffing it with more cookies. It’s a triple threat of cookie goodness.
The Monster’s Shopping List (Ingredients)

To build your monster, you’ll need a few key, delicious components.
For the Cookies & Cream Cake:
- 2 1/2 cups all-purpose flour
- 2 1/2 teaspoons baking powder
- 1/2 teaspoon salt
- 1 cup unsalted butter, softened
- 1 3/4 cups granulated sugar
- 4 large egg whites, room temperature (for a whiter cake to contrast the cookies)
- 1 tablespoon vanilla extract
- 1 cup buttermilk, room temperature
- 15 Oreo cookies, roughly crushed
For the “Fuzzy Blue Fur” Buttercream:
- 2 cups (4 sticks) unsalted butter, softened
- 7-8 cups powdered sugar, sifted
- 1/3 cup heavy cream or milk
- 2 teaspoons vanilla extract
- Pinch of salt
- Royal Blue gel food coloring
For the Signature Face:
- Black fondant or black frosting (for the mouth)
- 2 Oreo cookies (for the eyes)
- A little bit of white and black fondant/frosting (for the pupils)
- A handful of your favorite chocolate chip cookies!
The Monster-Making Toolkit
Every creator needs their tools. Here’s what you’ll need for this fuzzy project.
- A Stand Mixer: For a cake this fluffy and a frosting this voluminous, a KitchenAid Stand Mixer is your most valuable monster-making machine.
- Round Cake Pans: Two 8-inch round cake pans for a nice, tall, and stackable monster.
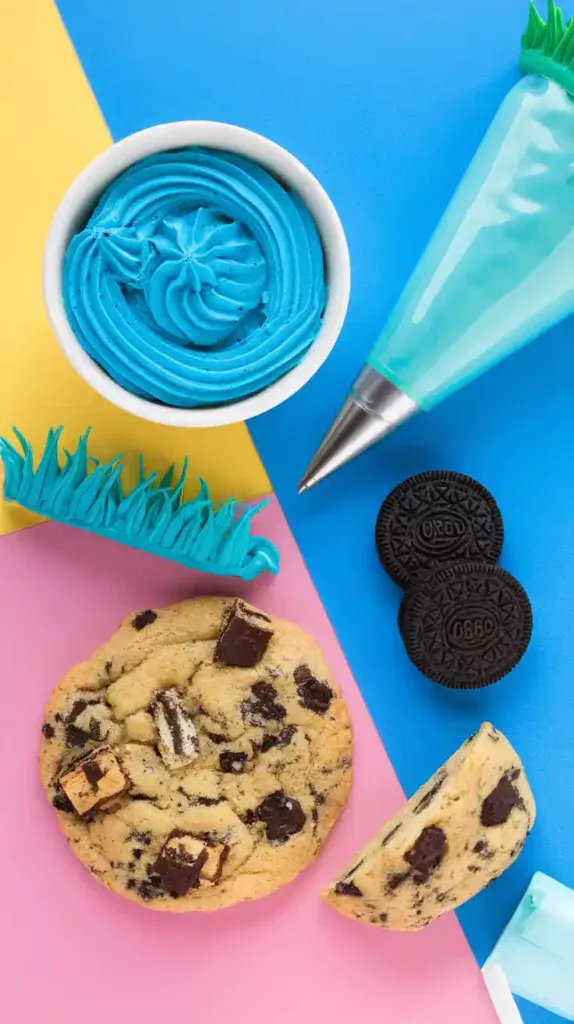
- A Grass Piping Tip: This is the most important tool for this cake. A Wilton #233 multi-opening tip (or grass tip) is the secret weapon for creating that iconic, shaggy fur texture.
- Piping Bags: You’ll need a large one for all that blue fur.
- Blue Gel Food Coloring: To get that classic, vibrant Cookie Monster blue, you need a good royal blue gel food coloring.
- Cookies!: A package of Oreo cookies for the eyes and a box of chunky chocolate chip cookies for the grand finale.
Step-by-Step: It’s Alive! (The Instructions)
Ready to create your lovable monster? Let’s get baking.
Part 1: The Cookie-Filled Core
Step 1: The Prep Preheat your oven to 350°F (175°C). Grease and flour your two 8-inch cake pans. In a medium bowl, whisk together the flour, baking powder, and salt.
Step 2: The Batter In your stand mixer, beat the softened butter and sugar for 5 minutes until very light and fluffy. On low speed, beat in the egg whites one at a time, followed by the vanilla. Alternate adding the dry ingredients and the buttermilk, ending with the dry. Mix until just combined. Gently fold in the crushed Oreo cookies with a spatula.
Step 3: The Bake Divide the batter between the pans and bake for 30-35 minutes, or until a toothpick comes out clean. Let the cakes cool completely on a wire rack.
Part 2: The Fur Coat and Face
Step 4: The Blue Buttercream Beat the softened butter until creamy. Gradually add the sifted powdered sugar, then the vanilla, salt, and cream. Beat on medium-high for 5 minutes until very light and fluffy. Your frosting needs to be a medium-stiff consistency to hold the fur shape. Now, add your royal blue gel food coloring until you achieve that perfect, vibrant Cookie Monster blue.
Step 5: The Assembly and Mouth Level and stack your cooled cakes with a thin layer of blue frosting in between. Apply a thin “crumb coat” of blue frosting all over the cake and chill for 20 minutes. Once chilled, use a knife to cut a half-moon shape for the mouth out of the front of the cake, about an inch deep. Fill this cavity with black frosting or a piece of black fondant.
Part 3: The Fuzzy Finale
Step 6: Pipe the Fur! Fit a large piping bag with your grass tip (#233) and fill it with your blue buttercream. Hold the bag perpendicular to the cake. Squeeze the bag to pipe a small tuft of “fur,” then pull away quickly. Repeat this motion, covering the entire cake in shaggy blue fur. Don’t try to make it perfect! A little bit of randomness is what makes it look authentic. This is the most fun part of making a Cookie Monster cake.
Step 7: The Googly Eyes To make the eyes, separate two Oreo cookies. Use the sides with the cream filling. Press a small dot of black fondant or frosting onto the center of each cream filling to create the pupils. Make them a little wonky and googly!
Step 8: The Grand Finale – “OM NOM NOM” Place your finished eyes on top of the cake, pressing them gently into the fur. And now, for the most important step of any Cookie Monster cake: take a few of your best chocolate chip cookies and strategically stuff them into the black mouth. Have one sticking out at a jaunty angle. You did it!
Nutritional Info (From the Letter C)
A formal report from the Sesame Street Test Kitchen.
- Serving Size: One monstrously large slice.
- Cookie Content: High.
- Calories: C is for Cookie, and that’s good enough for me. (But if you’re asking, it’s about 800 calories per slice. It’s a monster, after all.)
- Primary Benefit: The ultimate cure for cookie cravings.
Common Mistakes to Avoid (Don’t Be a Grouch)
Let’s keep your monster looking friendly, not frightening.
- The Sad, Flat Fur: Your buttercream is too soft, and your beautiful fur is slumping. Your buttercream must be a medium-stiff consistency. If it’s too soft, beat in a little more sifted powdered sugar until it holds its shape.
- The Wrong Kind of Blue: Your monster is a pale, baby blue or a weird teal. For that iconic look, you really need a royal blue or electric blue gel food coloring.
- The Cookie Collapse: You got too excited and tried to stuff a dozen cookies into the mouth, and now the front of your cake is caving in. Gently place 2-3 cookies for the perfect look without compromising the cake’s structural integrity.
- The Clogged Fur Tip: You didn’t do a good crumb coat, and now cake crumbs are getting into your piping bag and clogging the tiny holes of your grass tip. A thorough crumb coat and a chill in the fridge are non-negotiable!
Variations & Customizations
There’s more than one monster on Sesame Street!
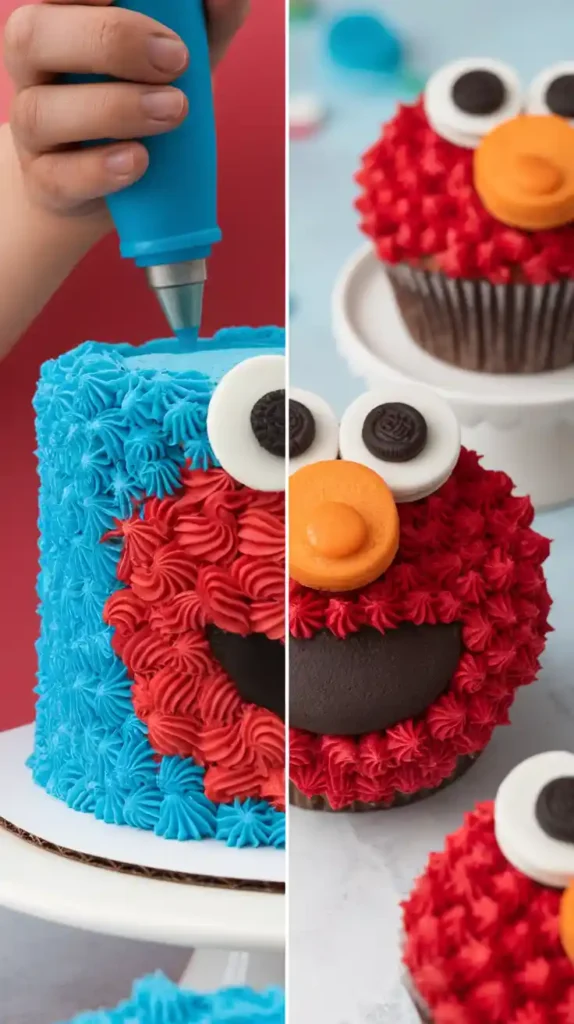
- The Elmo Edition: A perfect companion cake! Make a red velvet cake. Use the same fur-piping technique with red buttercream, a large orange gumdrop for the nose, and larger Oreo eyes for Elmo’s signature look.
- The “C is for Cookie” Cupcakes: This is a fantastic option for a party. Make a batch of cookies and cream cupcakes. Use the grass tip to cover each one in blue fur, add simple candy eyes, and stick a mini chocolate chip cookie in the “mouth” of each one.
- The Cookie Monster Smash Cake: Perfect for a first birthday. Make a smaller, 4-inch version of the cake. Use a lighter, less-sweet frosting (like a stabilized whipped cream, tinted blue) and use fruit for the eyes and mouth. It’s a healthier version of the Cookie Monster cake for a little monster.
Frequently Asked Questions (Your Monster Manual)
You’ve got questions about this lovable monster? I’ve got answers.
1. What is the best piping tip for the Cookie Monster fur? The Wilton #233 multi-opening tip, also known as the “grass tip,” is the absolute best tool for the job. It pipes multiple thin strands at once to create that perfect, shaggy texture.
2. How do you make the googly eyes? The easiest way is to use the cream-filled half of two Oreo cookies as the white part of the eye. Then, use a small dot of black frosting or a small, flattened ball of black fondant for the pupils.
3. How do you make the mouth? After crumb coating, simply use a sharp knife to carve a shallow half-moon shape out of the front of the cake. Fill this space with black frosting or a thin piece of black fondant before you pipe the fur.
4. What flavor should a Cookie Monster cake be? It has to be cookie-themed! A Cookies and Cream cake is the most popular and thematic choice. A classic chocolate chip cake is another great option.
5. Can I make this cake ahead of time? Yes. You can bake the cake layers a day or two in advance and store them well-wrapped. The fully decorated cake can be made the day before and stored in the fridge. Just add the fresh cookies to his mouth right before serving for the best look.
6. How do you get that vibrant Cookie Monster blue? Use a royal blue gel food coloring and don’t be shy with it! It will take a fair amount to get a deep, vibrant color in a large batch of white buttercream.
7. Can I make this design without the special grass piping tip? You can try! It’s much more difficult, but you can create a textured look by using a fork to pull up peaks in the frosting, or by using a small star tip to pipe many, many tiny individual stars. But honestly, the grass tip is worth it for this Cookie Monster cake.
Final Thoughts
Me want cake! And you made one! You have successfully created the most joyful, chaotic, and cookie-loving dessert on the planet. You’ve brought a beloved character to life with butter, sugar, and a whole lot of personality.
So go on, present your fuzzy blue masterpiece. Watch as everyone, from toddlers to grandparents, breaks into a huge smile. You’ve created more than just a cake; you’ve created a moment of pure, silly, nostalgic happiness. Now, go eat it. OM NOM NOM NOM!


