The Ultimate Homemade Birthday Cake (That Will Ruin Box Mixes For You Forever)
We’ve all been there. Standing in the baking aisle, staring at the wall of colorful cake mix boxes. They whisper sweet nothings to you: “I’m so easy,” “I’m only a dollar,” “You’re tired, you deserve this.” It’s a powerful siren song. But what if I told you that a truly spectacular, from-scratch, tastes-like-a-bakery-dream homemade birthday cake is not only within your reach, but is also secretly easy and a thousand times more satisfying?
Today, we’re breaking up with the box mix. We’re respectfully declining the services of the grocery store bakery. We are embracing the pure, unadulterated joy of creating the quintessential birthday cake from scratch.
This is your new go-to, your secret weapon, your never-fail recipe for the Perfect Yellow Cake with Chocolate Fudge Frosting. Get ready to become “the person who makes the good cake.” It’s a great reputation to have.
Why This Recipe Is a Certified Classic
In a world of fleeting trends, why is this classic homemade birthday cake the one you need to master?
First and foremost, the flavor is pure, unadulterated nostalgia. This is the cake of your childhood dreams. A moist, buttery, vanilla-scented yellow cake with a rich, fudgy, and intensely chocolatey frosting. It’s a timeless, can’t-go-wrong combination that is a guaranteed hit with every single person at the party, from age 5 to 95.

Second, the texture is simply superior. A from-scratch butter cake has a texture that a box mix just can’t replicate. It’s tender and moist, yet slightly dense and incredibly satisfying. You can feel the quality in every bite. This is what a real homemade birthday cake should feel like.
Finally, it comes with the ultimate bragging rights. There is a special kind of pride that comes from placing a completely homemade, beautiful, and delicious cake on the table. The “You made this from scratch?!” comments are the real icing on the cake. IMO, it’s the best feeling.
The “From-Scratch” Pantry (Ingredients)
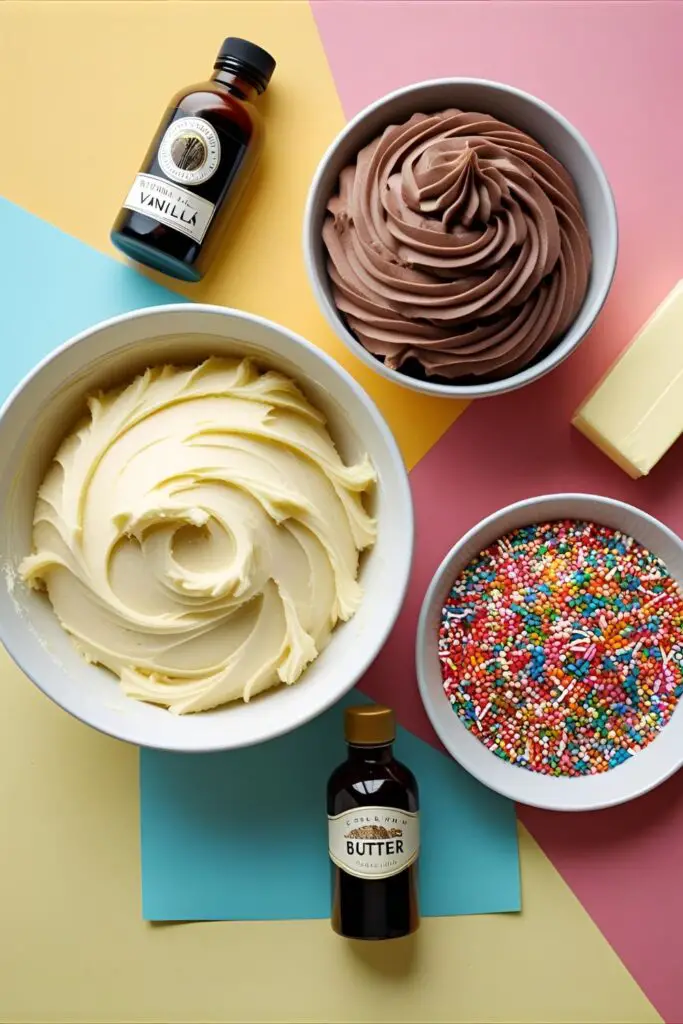
This cake uses simple, high-quality pantry staples to create something extraordinary. No weird stuff here.
For the Perfect Yellow Cake:
- 3 cups all-purpose flour, sifted
- 2 1/2 teaspoons baking powder
- 1/2 teaspoon salt
- 1 cup (2 sticks) unsalted butter, at room temperature
- 2 cups granulated sugar
- 4 large eggs, at room temperature
- 1 tablespoon high-quality vanilla extract
- 1 cup buttermilk, at room temperature
For the Fudgy Chocolate Buttercream:
- 1 1/2 cups (3 sticks) unsalted butter, softened
- 1 cup unsweetened cocoa powder, sifted
- 5-6 cups powdered sugar, sifted
- 2/3 cup heavy cream or whole milk, warmed
- 2 teaspoons vanilla extract
- A generous pinch of salt
For Decoration:
- Rainbow sprinkles. This is not a suggestion. It’s a requirement for a proper birthday cake.
The Baker’s Essential Toolkit

You don’t need a professional bakery, but these tools are the keys to success.
- A Stand Mixer: The creaming method is the heart and soul of this cake’s texture, and a KitchenAid Stand Mixer is the best tool for the job. A hand mixer will also work, but you’ll need patience.
- Round Cake Pans: Two 9-inch round cake pans are the classic size for a party-ready layer cake.
- A Sifter: For getting lump-free flour and cocoa powder. A simple mesh sieve works perfectly.
- An Offset Spatula and Bench Scraper: The dynamic duo for achieving a professional, bakery-style frosting finish.
- Rubber Spatula: For scraping the bowl and gently folding, ensuring you don’t overmix.
The “You Can Do This” Instructions
Ready to ditch the box for good? Let’s bake the best homemade birthday cake ever.
Part 1: The Art of the Cream (The Cake)
Step 1: Prep Your Station Preheat your oven to 350°F (175°C). Grease and flour your two 9-inch cake pans. In a large bowl, sift together the flour, baking powder, and salt.
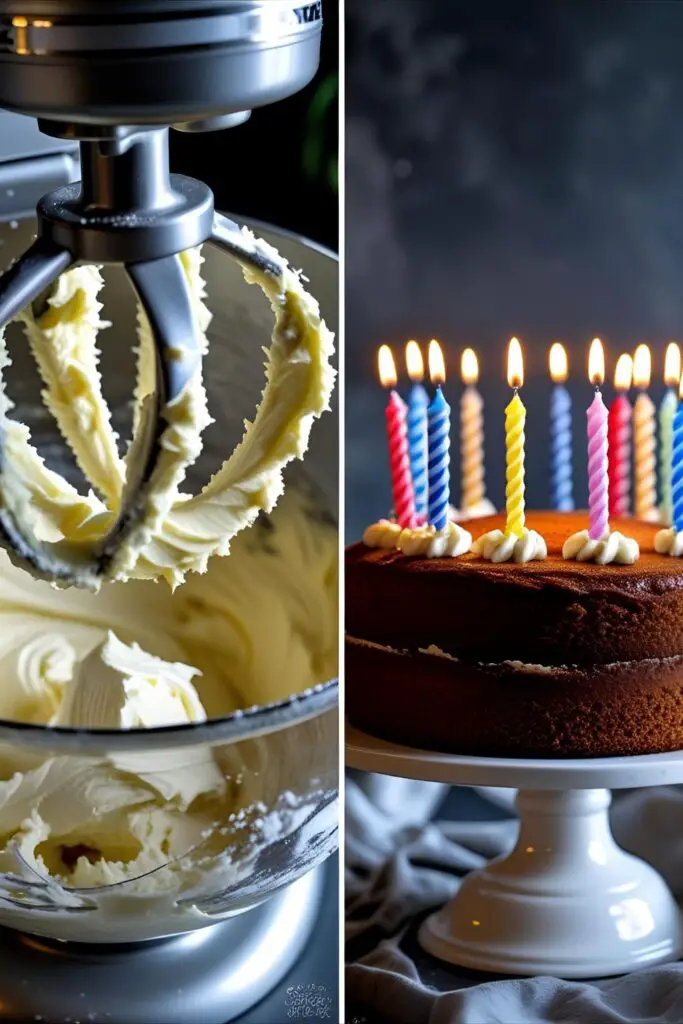
Step 2: The Creaming Method – The Most Important Step! In your stand mixer, beat the room temperature butter on its own for a minute to soften it. Add the granulated sugar and beat on medium-high speed for a full 5 to 7 minutes. I’m serious. Set a timer. The mixture should be very pale, light, and incredibly fluffy. This step is what creates the cake’s tender texture.
Step 3: The Batter Add the room temperature eggs one at a time, beating for a full minute after each addition. Scrape down the sides of the bowl, then beat in the vanilla.
Step 4: The Final Mix On low speed, alternate adding the dry ingredient mixture and the buttermilk in three additions, starting and ending with the dry ingredients (e.g., 1/3 dry, 1/2 wet, 1/3 dry, 1/2 wet, 1/3 dry). Mix only until the last streaks of flour disappear. Do not overmix!

Step 5: Bake and Cool Divide the batter evenly between your prepared pans. Bake for 30-35 minutes, or until a toothpick inserted into the center comes out clean. Let the cakes cool in the pans for 15 minutes before turning them out onto a wire rack to cool completely.
Part 2: The Frosting and Grand Assembly
Step 6: The Fudgy Dream Frosting While the cakes cool, beat the softened butter until creamy. Sift in the cocoa powder and powdered sugar and mix on low until just combined. Add the vanilla, salt, and warm cream, and then beat on medium-high for 5 minutes until it’s incredibly light, fluffy, and a rich chocolate color.
Step 7: The Assembly Level your completely cooled cake layers if needed. Place one layer on your cake stand. Top with a huge, generous pile of chocolate frosting (about 1.5 cups). Place the second layer on top.
Step 8: The Crumb Coat & Chill Apply a thin, messy layer of frosting all over the cake to trap any loose crumbs. This is your “crumb coat.” Chill the cake for at least 30 minutes. This step is the secret to a clean, professional finish.
Step 9: The Grand Finale Apply a final, generous coat of frosting. Use your bench scraper to get the sides perfectly smooth and your offset spatula for the top. Before the frosting sets, pipe a simple border and cover the whole thing in a glorious shower of rainbow sprinkles.
Calories & Nutritional Info
An official report from the “Treat Yourself” Committee.
- Serving Size: One happy-making slice.
- Satisfaction Level: 110%
- Calories: Let’s just say it’s made with love. And a lot of butter. (But if you’re tracking, expect around 700 calories for a generous party slice. It’s a birthday!)
- Primary Benefit: Will ruin grocery store cakes for you forever.
Common Mistakes to Avoid (Don’t Sabotage Your Success)
Let’s make sure your homemade birthday cake is a triumph.
- The Cold Butter Catastrophe: You used butter and eggs straight from the fridge. This is the #1 mistake. Using room temperature ingredients is non-negotiable for a smooth batter and a light, even crumb. Cold ingredients will cause the batter to curdle.
- The “Good Enough” Creaming: You only beat the butter and sugar for a minute or two. You must cream them for the full 5-7 minutes. This step whips air into the mixture and is the primary source of the cake’s leavening and tender texture.
- The Tough, Dry Cake: You overmixed the batter after adding the flour. Overmixing develops gluten and leads to a tough cake. Mix only until the last bit of flour is incorporated.
- The Warm Cake Meltdown: You tried to frost a cake that was even slightly warm. It will melt your frosting into a greasy, sad puddle. Your cake layers must be 100% cool to the touch.
Variations & Customizations
This classic homemade birthday cake is the perfect canvas.
- The Funfetti Upgrade: The easiest and most festive variation! Gently fold 1 cup of rainbow jimmies into the finished yellow cake batter before baking.
- The Sheet Cake Shortcut: Feeling a bit lazy? This recipe can be baked in a 9×13 inch sheet pan. It’s easier to frost, easier to transport, and just as delicious.
- The Chocolate Champion: For the ultimate chocolate lover, make a rich chocolate cake (use a one-bowl recipe for ease!) and pair it with this fudgy chocolate frosting.
Frequently Asked Questions (Your Baking Hotline)
You have questions about the perfect homemade birthday cake? I’ve got answers.
1. Why does a homemade birthday cake taste so much better than a box mix? Flavor and texture! A homemade cake uses real butter, eggs, and high-quality vanilla, which provides a depth of flavor that artificial flavorings in a box mix can’t replicate. The creaming method also creates a more satisfying, velvety crumb.
2. What does “room temperature” ingredients really mean, and is it important? It means your butter, eggs, and buttermilk should sit out on the counter for about 1-2 hours before you start. It is the most important step for a butter-based cake. Room temperature ingredients emulsify together to create a smooth, airy batter that traps air and bakes up light and fluffy.
3. How do I keep my homemade cake moist? Using ingredients with high fat and moisture content, like buttermilk and butter, is key. The other secret is to not overbake it! Check your cake a few minutes before the recipe says it’s done.
4. Can I make a homemade birthday cake ahead of time? Yes! You can bake the cake layers up to two days in advance. Let them cool completely, wrap them tightly in plastic wrap, and store them at room temperature. The fully frosted cake can be made a day in advance and stored in the fridge.
5. What is the “creaming method”? It’s the process of beating softened butter and sugar together for an extended period (5-7 minutes) until it’s very light and fluffy. This whips air into the mixture, which helps the cake rise and gives it a tender texture.
6. How can I make my frosting look professional? The two secrets are a crumb coat (a thin first layer of frosting that traps crumbs) and the right tools: a cake turntable and a bench scraper for getting perfectly smooth sides.
7. What’s the best all-purpose, crowd-pleasing cake flavor? You can truly never go wrong with a classic yellow cake with chocolate frosting. It’s the flavor almost everyone grew up with and loves.
Final Thoughts
And there you have it. You are now armed with the knowledge and the recipe to create the ultimate homemade birthday cake. You’ve officially graduated from the box mix aisle. You’re a from-scratch baker now, a creator of joy, a hero of celebrations.
So go on. Embrace the simple, satisfying process of creating something wonderful with your own two hands. And get ready to hear the words every baker loves to hear: “This is the best cake I’ve ever had.”