The Ultimate Guide to Nailing the “Aesthetic Cake Ideas” You See Everywhere
You know the cakes I’m talking about. They’re the supermodels of the dessert world, flooding your Pinterest boards and Instagram feeds. They’re effortlessly cool, with sharp edges, dreamy color palettes, and a certain minimalist magic that makes you whisper, “How?” Welcome, my friend, to the world of aesthetic cake ideas, where your dessert is not just a treat, but a whole entire vibe.
If you’ve ever felt a mix of awe and deep-seated envy looking at those works of art, I’m here to let you in on a little secret: you can make them. Yes, you. It’s less about having magical baking powers and more about knowing a few key techniques and embracing your inner artist.
Forget the generic sheet cakes. Today, we’re graduating. This is your masterclass in creating a cake that not only tastes incredible but is so beautiful, the camera will have no choice but to eat first.
Why This Guide Is Your New Best Friend
So, why dive into the world of trendy, aesthetic cake ideas? Why not just stick to the classic chocolate with sprinkles?
First, it’s a masterclass in modern baking. This guide isn’t just one recipe; it’s a foundation for countless designs. We’re going to teach you the core skills—like achieving a flawless smooth finish and playing with color—that are the building blocks for almost every stunning, modern cake you see online. You’re not just learning to make one cake; you’re learning to speak a whole new design language.
Second, the “wow” factor is off the charts. Showing up to a party with a dreamy watercolor cake or a chic, minimalist creation is a power move. It’s a guaranteed showstopper that makes you look like a seasoned pastry artist. Get ready for a chorus of, “You made that?!”

Finally, it’s an incredibly fun and creative outlet. This is where baking and art collide. It’s about playing with color, texture, and composition. It’s a chance to create something that’s a true reflection of your personal style, whether that’s minimalist chic, romantic, or moody and dramatic.
The Artist’s Palette (Ingredients)
Every great work of art starts with a perfect canvas and high-quality paints.
For the Perfect Vanilla Bean Canvas (The Cake):
- 3 cups cake flour, sifted
- 2 1/2 teaspoons baking powder
- 1/2 teaspoon salt
- 1 cup unsalted butter, softened
- 2 cups granulated sugar
- 4 large egg whites, room temperature
- 1 tablespoon vanilla bean paste or clear vanilla extract
- 1 cup buttermilk, room temperature
For the Silky Smooth “Paint” (Swiss Meringue Buttercream):
- 5 large egg whites
- 1 1/2 cups granulated sugar
- 2 cups (4 sticks) unsalted butter, cubed and cool
- 2 teaspoons clear vanilla extract
- A pinch of salt
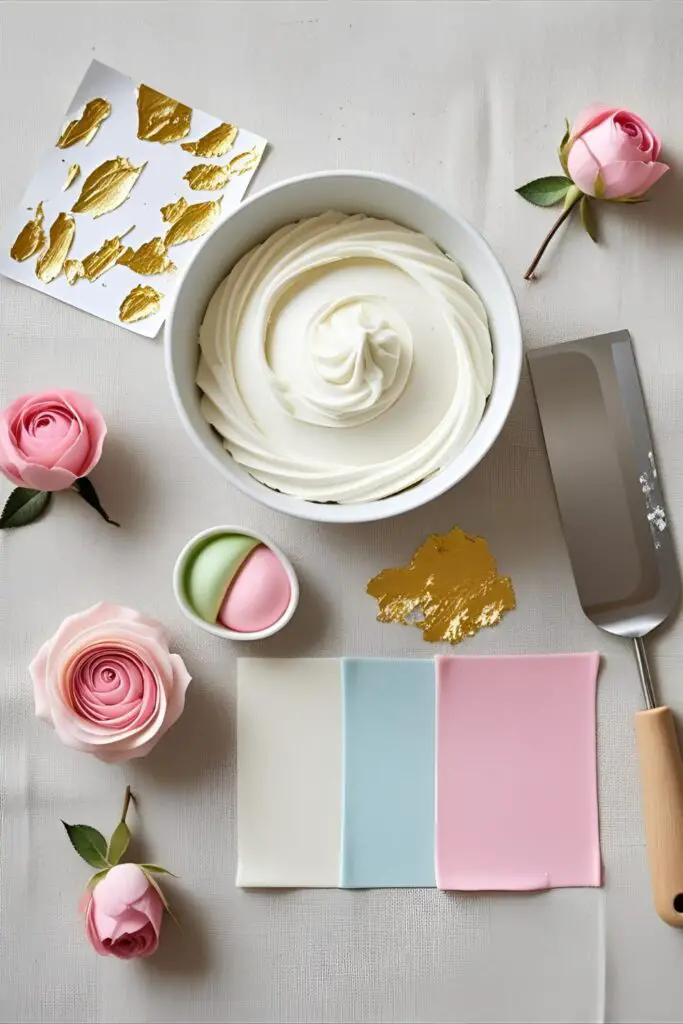
For the Finishing Touches (The Garnishes):
- Gel food coloring (in soft, muted, or pastel tones)
- Fresh, food-safe flowers (like roses, chamomile, or pansies)
- Fresh fruit (berries, figs, or thinly sliced citrus)
- Edible gold leaf
- High-quality, modern sprinkle mixes
The Design Studio (Tools & Gadgets)
To achieve these flawless, modern looks, a few key tools are non-negotiable.
- A Stand Mixer: A KitchenAid Stand Mixer is the hero of this story, essential for whipping up a stable, silky Swiss Meringue Buttercream.
- A Cake Turntable & Bench Scraper: This is your “Aesthetic Cake Starter Pack.” You cannot get those razor-sharp edges and flawlessly smooth sides without this dynamic duo.
- A Small Offset Spatula: For applying frosting, creating textures, and detailed work.
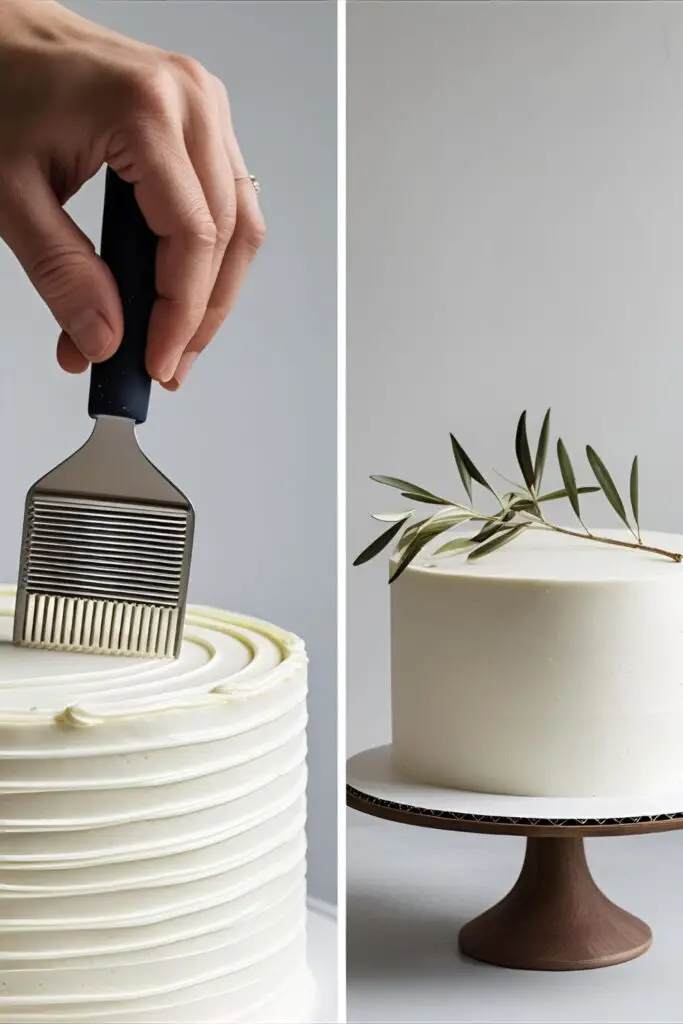
- An Icing Comb: A simple, inexpensive tool with different serrated edges for creating beautiful, minimalist textures on the sides of your cake.
- Food-Safe Tweezers and a Soft Brush: For the delicate and precise application of edible gold leaf.
The Masterclass: Your Guide to Aesthetic Cake Ideas

Ready to create something beautiful? Let’s walk through the artistic process.
Part 1: The Canvas and the Medium
Step 1: Bake the Cake First, create your canvas. Bake the vanilla bean cake layers using only egg whites and clear vanilla for a pure white crumb that won’t interfere with your color palette. Let the layers cool completely.
Step 2: Make the Buttercream Next, prepare your medium. Make the Swiss Meringue Buttercream by heating the egg whites and sugar over a double boiler to 160°F (71°C), then whipping it into a cool, stiff meringue before slowly beating in the butter. It’s the secret to that flawless, not-too-sweet, porcelain-like finish.
Part 2: The Foundational Skill
Step 3: The Flawless Base Coat This is the most important step for almost all modern aesthetic cake ideas. Level your cooled cakes, then stack them with a thin layer of buttercream between each. Apply a thin crumb coat and chill for 30 minutes. Apply a final, generous coat of buttercream. Now, use your bench scraper held flat against the side as you spin your turntable to create a perfectly smooth, sharp-edged surface. Chill the cake again until firm.
Part 3: Choose Your Aesthetic Adventure
With your perfect canvas ready, it’s time to choose your design!
H3: Design 1 – The Minimalist Textured Cake This is the epitome of chic. Take your chilled, smooth-frosted cake. Choose an icing comb with a pattern you like (simple stripes are a great start). Gently press it against the side of the cake and spin the turntable in one smooth, continuous motion. Garnish the top with a single, artfully placed sprig of a food-safe herb like rosemary or a few elegant sugar pearls.

H3: Design 2 – The Dreamy Watercolor Cake This one is a guaranteed showstopper. Take your remaining buttercream and tint small amounts into 2-3 soft, complementary colors (like blush pink and a dusty sage green). Randomly dab splotches of the colored frostings onto your chilled white cake. Then, take your clean bench scraper and do one or two smooth passes around the cake. The colors will blend and streak into a beautiful, ethereal watercolor painting.
H3: Design 3 – The Romantic Floral & Gold Leaf Cake Elegance, personified. Start with your flawlessly smooth white cake. Arrange a few beautiful, food-safe flowers (like a single rose and a few smaller buds) in a crescent shape on top of the cake. Then, using tweezers, carefully apply a few delicate flakes of edible gold leaf around the flowers and cascading down the side. It’s instant, effortless glamour.
Calories & Nutritional Info
An official analysis of your beautiful creation.
- Serving Size: One highly Instagrammable slice.
- Aesthetic Value: 10/10.
- Calories: Let’s be honest, you did this for the art. The calories are just the delicious price of admission. (But for those who must know, it’s around 650-750 per slice.)
- Primary Benefit: Will make you feel like a true artist.
Common Mistakes to Avoid (Don’t Ruin the Vibe)
Let’s keep your masterpiece looking like a dream, not a disaster.
- The Lumpy, Bumpy Canvas: You rushed the base coat. A perfectly smooth, chilled base is the foundation of every single one of these designs. A lumpy start will lead to a lumpy finish.
- The Neon Nightmare: Your colors are loud and garish, not soft and dreamy. Use high-quality gel food coloring and add it with a toothpick, a tiny bit at a time, to build up to the perfect pastel shade.
- The Over-Decorated Mess: You got excited and used flowers, and gold leaf, and sprinkles, and a drip. The key to most aesthetic cake ideas is restraint. Pick one or two design elements and let them be the star.
- The Poisonous Garnish: You used pretty flowers from a bouquet or your garden. This is a major safety hazard! You must use flowers that are certified food-safe and non-toxic.
Variations & Customizations
The world of aesthetic cake ideas is vast. Here are a few other vibes to explore.
- The Dark & Moody Aesthetic: For a dramatic, edgy look, make a rich black cocoa cake. Frost it with a deep gray, black, or dark blue buttercream. Decorate with a silver drip, dark berries like blackberries, or even black sugar flowers.
- The Vintage “Coquette” Aesthetic: This is maximalism at its finest. Make a heart-shaped cake and go wild with intricate, frilly, over-the-top Lambeth-style piping in shades of pastel pink and white. Top it with maraschino cherries.
- The “Kidcore” Aesthetic: Embrace nostalgia. Make a classic Funfetti cake and decorate it with bright, primary-colored buttercream, retro-style borders, and classic rainbow sprinkles.
Frequently Asked Questions (Your Design Q&A)
You’ve got questions about these trendy cakes? I’ve got answers.
1. What does “aesthetic cake” even mean? It refers to a cake where the visual style, or “aesthetic,” is a primary focus. It’s about creating a cake that fits a specific mood or trend, whether that’s minimalist, vintage, dark academia, or coquette, often with the goal of being highly photogenic.
2. How do I get my frosting perfectly smooth with sharp edges? The magic combo is a cake turntable and a bench scraper. A chilled crumb coat is also essential. For the top edge, you smooth the sides first, creating a “crown” of frosting, then use an offset spatula to pull that crown in toward the center of the cake.
3. What’s the best frosting for these sharp, modern designs?Swiss Meringue Buttercream is the gold standard. It’s incredibly silky, not too sweet, and holds a sharp edge beautifully.
4. Where can I find food-safe flowers for cakes? You can often find them in the produce or herb section of specialty grocery stores. The safest bet is to order them online from a farm that specializes in edible flowers.
5. How do you do the watercolor frosting effect? Apply dabs of colored frosting onto a chilled, smooth white base coat. Then, use a bench scraper to make one or two smooth passes around the cake, which smears and blends the colors together.
6. What are some popular aesthetic cake ideas right now? Minimalist cakes with textured combs, watercolor frosting, vintage Lambeth piping, and “fault line” cakes are all incredibly popular.
7. How can I make my cake photos look better?Natural light is your best friend. Shoot near a window. Choose a simple, uncluttered background that complements your cake. Take shots from multiple angles to find the most flattering one.
Final Thoughts
And there you have it. You are now a fully-fledged cake artist, a master of the modern aesthetic. You’ve learned that a cake can be more than just a dessert—it can be a statement, a mood, and a beautiful reflection of your own personal style.
So go on, find your vibe. Create a cake that makes you happy just by looking at it. And then, of course, cut a giant slice and enjoy the delicious fruits of your artistry. Your Instagram feed is waiting.