How to Make a Cake Worthy of “Happy Birthday Cake Pictures”
Let’s be honest about modern birthdays. The moment the cake comes out, it’s not just about the candles and the singing anymore, is it? It’s about the photo. It’s a full-blown paparazzi event. Phones come out, the perfect angle is sought, and for a fleeting moment, your dessert is a supermodel on a brightly lit runway. If you’ve ever scrolled through your feed, seen those impossibly perfect birthday cakes, and wondered how they get them to look so good, you’re in the right place. We’re not just making a cake today; we’re creating content. We’re making a cake specifically designed to result in stunning happy birthday cake pictures.
This is your ultimate guide to baking a cake that doesn’t just taste amazing but is also a certified stunner, ready for its close-up. We’re talking vibrant colors, sharp edges, a trendy drip, and a shower of glorious sprinkles.
Forget just baking a cake. We’re going to style a masterpiece. Let’s make a dessert that will have everyone asking for the recipe and your photography tips. The goal is to produce the best happy birthday cake pictures possible.
Why This Recipe Is an Instant Influencer
In a world of beige food, why is this photogenic cake the star you need in your life? Why is this the ultimate recipe for generating amazing happy birthday cake pictures?
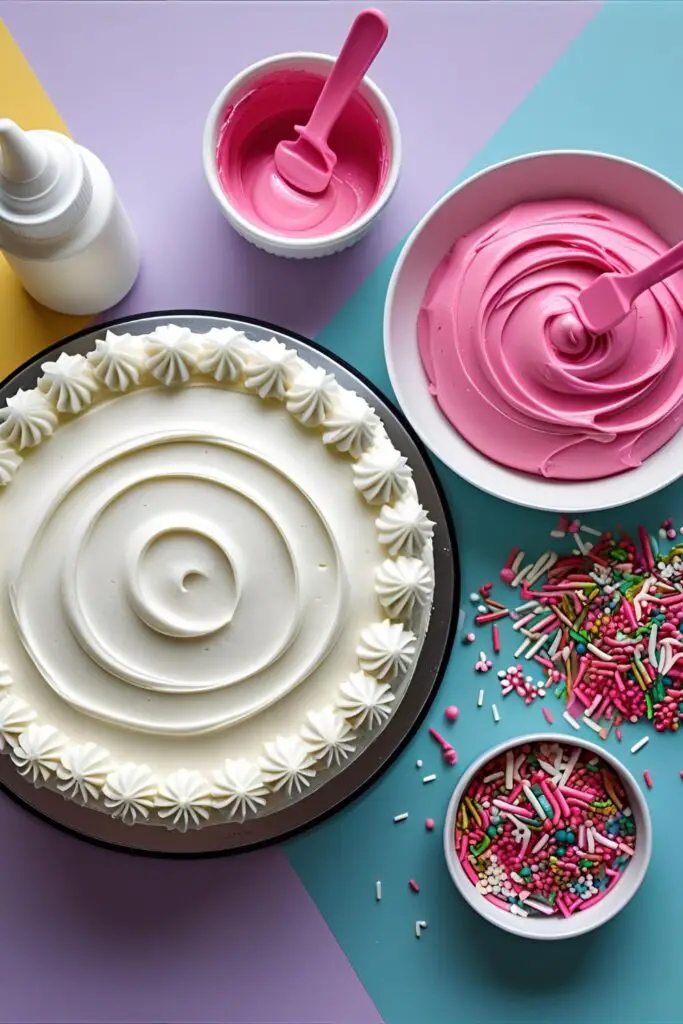
First, it’s engineered to be beautiful. Every element of this cake, from the sprinkle-packed Funfetti crumb to the pristine white buttercream and the vibrant, glossy drip, is chosen for maximum visual impact. It’s a symphony of color and texture that the camera absolutely loves.
Second, it tastes as good as it looks (shocking, I know). This isn’t just a pretty prop. We’re making a from-scratch, buttery vanilla Funfetti cake that is moist, tender, and ridiculously delicious. The sweet buttercream and rich white chocolate ganache are the perfect complements.

Finally, it uses pro-looking techniques that are secretly easy. That flawless drip? Those sharp edges? They look like they require years of training, but they’re actually super achievable with the right tools and a few simple tricks. You get to look like a baking rockstar with minimal stress. This is the secret to great happy birthday cake pictures.
The “Ready for My Close-Up” Ingredients
To create a cake that’s ready for the spotlight, you need ingredients that perform.
For the Photogenic Funfetti Cake:
- 3 cups cake flour, sifted (for a finer crumb)
- 2 1/2 teaspoons baking powder
- 1/2 teaspoon salt
- 1 cup unsalted butter, softened
- 2 cups granulated sugar
- 4 large egg whites, room temperature (for a whiter cake)
- 1 tablespoon clear vanilla extract
- 1 cup buttermilk, room temperature
- 1 cup rainbow jimmies (the long sprinkles that don’t bleed color)
For the Perfect White Buttercream Canvas:
- 2 cups (4 sticks) unsalted butter, softened
- 6-7 cups powdered sugar, sifted
- 1/4 cup heavy cream
- 2 teaspoons clear vanilla extract
- A pinch of salt
For the Viral Drip & Decor:
- 1 cup high-quality white chocolate chips
- 1/3 cup heavy cream
- Vibrant gel food coloring (pink, teal, or purple look amazing)
- A trendy, modern sprinkle mix (with different shapes, sizes, and metallic bits)
The Glam Squad (Tools & Gadgets)
For a photo-finish, you need the right glam squad in your kitchen.
- A Stand Mixer: A KitchenAid Stand Mixer will whip your batter and buttercream into submission for a flawless, professional texture.
- A Cake Turntable & Bench Scraper: This is the non-negotiable power couple for achieving the razor-sharp, smooth-as-glass sides that make cakes look so good in photos.
- A Squeeze Bottle: For the ultimate control over your drip application, a simple squeeze bottle is a game-changer.
- Good Lighting: Okay, not a kitchen gadget, but essential for taking those amazing happy birthday cake pictures. Natural light is your best friend.
- A Great Camera Phone: The final tool in your arsenal. Make sure your lens is clean!
The Photoshoot: Step-by-Step Instructions

Ready to direct this masterpiece? Let’s go.
Part 1: The Canvas
Step 1: Bake the Cake Preheat your oven to 350°F (175°C). Grease and flour two 8-inch round cake pans. Bake the Funfetti cake as directed, using only egg whites and clear vanilla for a pure white crumb that makes the sprinkles pop. Let the layers cool completely.
Step 2: The Flawless Foundation Make your buttercream using clear vanilla extract to keep it as white as possible. Level your cooled cakes. Stack them with a layer of buttercream. Apply a thin crumb coat and chill for 30 minutes.
Step 3: The Smooth Finish Apply a final, generous coat of white buttercream. Now, grab your bench scraper and turntable. Hold the scraper flat against the side and spin the turntable to create a perfectly smooth surface. This clean, sharp finish is the secret to professional-looking happy birthday cake pictures. Chill the cake again until firm.
Part 2: The Main Event
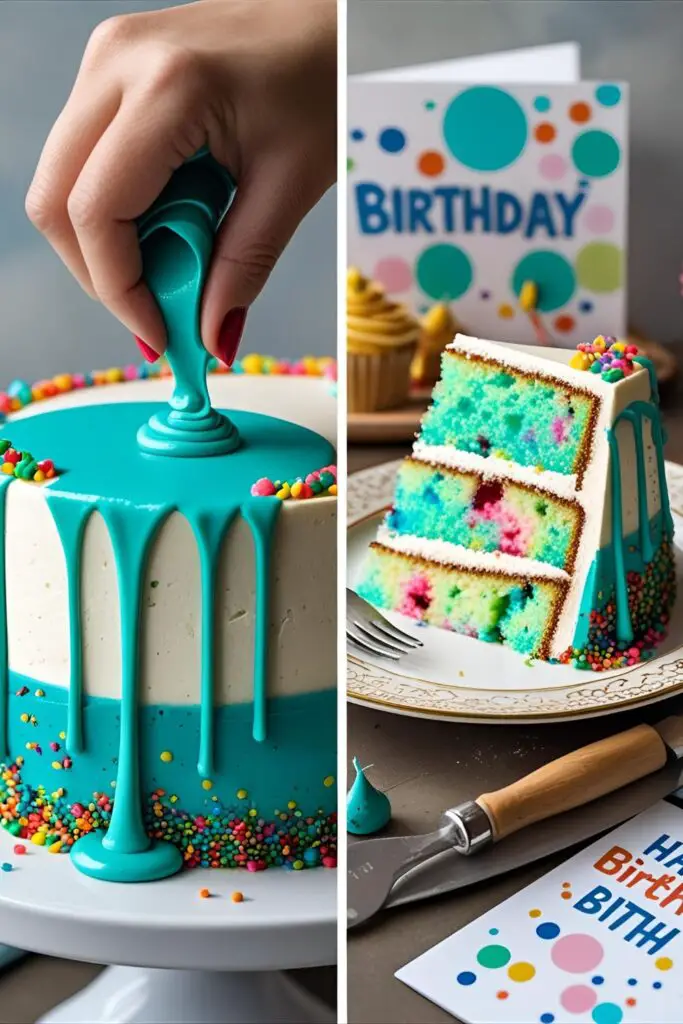
Step 4: The Colorful Drip Melt the white chocolate and heavy cream together gently. Stir until smooth. Let it cool until it’s lukewarm. Stir in your chosen gel food coloring until you have a vibrant, beautiful color.
Step 5: The Drip Test The temperature of your ganache and your cake is critical. Your cake should be cold and firm, and your ganache should be lukewarm. Do a test drip on the back of the cake. If it runs to the bottom in a puddle, the ganache is too hot. Let it cool more.

Step 6: The Action Shot Using your squeeze bottle, apply the drip around the top edge of your cold cake, letting it run down the sides in beautiful, artistic drips. Pour the rest on top and smooth it out. This is the moment that makes or breaks your happy birthday cake pictures.
Step 7: The Styling Before the drip sets, go wild! Create an artful, crescent-shaped pile of your modern sprinkle mix on top, letting some cascade down the sides. Less is sometimes more, but for a fun birthday cake, a little chaos is good.
Nutritional Info (For the Likes)
An official analysis of this edible content.
- Serving Size: One shareable slice.
- Engagement Rate: High.
- Calories: Let’s be honest, you didn’t make this cake for the vitamins. You did it for the glory. (But if you must know, it’s about 700 per slice. It’s a delicious investment in your social media presence.)
- Primary Benefit: Will make all your friends jealous.
Common Mistakes to Avoid (Don’t Ruin the Shot)
Let’s avoid these photo fails when creating your happy birthday cake pictures.
- The Yellow, Dingy Cake: You used whole eggs and brown vanilla. For a cake that pops on camera, a pure white canvas is best. Stick to egg whites and clear vanilla extract.
- The Messy, Sad Drip: Your ganache was too hot, or your cake was too warm. The cake must be cold, and the ganache must be lukewarm. This temperature contrast is what gives you those perfect, crisp drips.
- The Cluttered, Ugly Background: You baked a beautiful cake but forgot to move the dirty dishes and stack of mail out of the background of your photo. Style your shot! A clean, simple background lets the cake be the star.
- The Bad Lighting Fiasco: Your cake looks amazing in person, but in the photo, it’s dark and the colors are weird. Natural light is your best friend. Take your photos near a window for the best results. A bad photo can ruin even the best happy birthday cake pictures opportunity.
Variations & Customizations
This is your canvas! Here are a few other ideas for stunning happy birthday cake pictures.
- The Moody & Dramatic: For a different vibe, make a rich dark chocolate cake. Frost it with a deep chocolate buttercream. Use a shimmering gold or silver drip and top it with fresh figs, dark berries, and a touch of edible gold leaf.
- The Minimalist Chic: Sometimes, less is more. Frost a white cake with a beautiful textured pattern using an icing comb. Garnish with a single, elegant sprig of a food-safe herb like olive branch or rosemary.
- The Vintage Vibe: Embrace the maximalist trend with a heart-shaped cake covered in elaborate, frilly pink and white Lambeth-style piping. It’s a guaranteed showstopper.
Frequently Asked Questions (Your Photography Q&A)
You’ve got questions about creating perfect happy birthday cake pictures? I’ve got the answers.
1. How do you take good pictures of a cake? Lighting is everything. Use indirect natural light from a window. Choose a clean, uncluttered background. Shoot from a few different angles: straight on, from a 45-degree angle, and an overhead flat-lay shot.
2. How do you get cake frosting perfectly white? Use a recipe with all-butter or part shortening, as shortening is pure white. Most importantly, use clear vanilla extract, not the brown kind.
3. What makes a cake look professional in photos? Sharp edges and clean lines. A smooth finish achieved with a bench scraper makes a huge difference. A well-executed, simple design is always better than a messy, complicated one.
4. How do you make a colorful drip? The base is a white chocolate ganache. Once it’s smooth, you can stir in any color of gel food coloring you like.
5. What are the best sprinkles for photos? Modern sprinkle medleys are fantastic. They contain a mix of jimmies, nonpareils, sugar pearls, metallic rods, and different shapes, which adds a ton of texture and visual interest to your happy birthday cake pictures.
6. Can I make a cake a day before the party and still have it look good for pictures? Yes! A frosted cake stored in the fridge will hold up beautifully. The colors in the drip may deepen slightly. Just be sure to let it sit out for an hour before serving to let the frosting soften.
7. What are some popular trends for happy birthday cake pictures right now? Drip cakes, fault line cakes, vintage Lambeth piping, and minimalist cakes with textured finishes and natural garnishes are all very popular and highly photogenic.
Final Thoughts
And there you have it. You are now not just a baker, but a food stylist, a photographer, and a creator of viral-worthy content. You’ve learned the secrets to creating a cake that is engineered to be as beautiful as it is delicious. This is the ultimate happy birthday cake pictures experience.
So go on. Bake this masterpiece. Style it like you’re a magazine editor. And when you post that stunning photo, get ready for the flood of “OMG, you made that?!” comments. You sure did. Now go on and break the internet.