The Ultimate 13 Birthday Cake That’s Actually Cool
Baking for a 13-year-old. Is there any culinary task more fraught with peril? You are standing on the razor’s edge, a terrifying precipice between “cool” and “cringe.” One wrong sprinkle, one childish theme, and you could be met with the most soul-crushing eye-roll known to humankind. The pressure to create the perfect 13 birthday cake is real, my friends.
But what if I told you there’s a formula? A recipe for a cake so undeniably cool, so perfectly on-trend, that it will not only pass the teen inspection but might even elicit a grunt of genuine approval. That’s right, we’re not just making a cake; we’re crafting a legend.
Forget the cartoon characters and primary colors. Today, we’re making the “Official Teenager” Oreo Drip Cake. It’s sophisticated, it’s a little bit extra, and it’s the only guide to a 13 birthday cake you’re ever going to need. Let’s do this.
Why This Recipe Is the Only Choice
In the treacherous waters of teen birthdays, why is this specific cake your life raft? Let me count the ways.
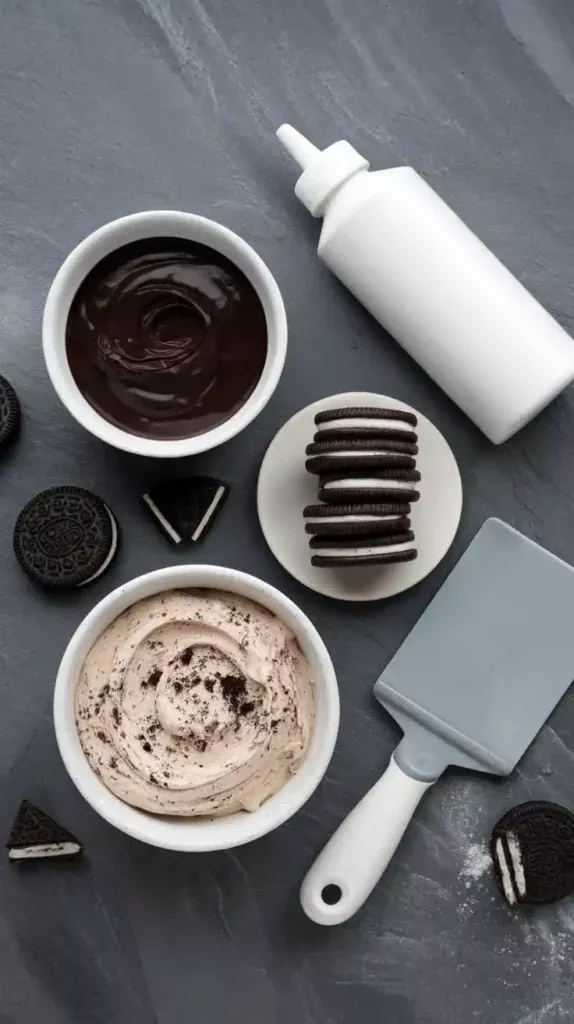
First, the flavor is a guaranteed win. We’re talking rich, moist chocolate cake packed with crushed Oreos, covered in a cookies-and-cream buttercream. There is no 13-year-old on this planet who will turn that down. It’s a classic, beloved flavor combination that feels a little more “grown-up” than a simple funfetti. This is the flavor profile of a successful 13 birthday cake.
Second, it looks incredibly impressive. That chocolate drip effect? It screams “I got this from a fancy, expensive bakery.” It looks complicated and professional, which instantly ups the cool factor. The fact that it’s actually super easy to do will be our delicious little secret.

Finally, it’s endlessly customizable. The black-and-white Oreo theme is a perfect starting point, but you can adapt the colors and toppings to match any teen’s current obsession. From gaming themes to glam aesthetics, this cake is a blank canvas for personality. You can adapt this recipe for any kind of 13 birthday cake you can imagine.
The “Official Teenager” Ingredients
This cake is all about indulgent, crowd-pleasing flavors. No weird ingredients here.
For the Oreo-Packed Chocolate Cake:
- 2 cups all-purpose flour
- 2 cups granulated sugar
- 3/4 cup unsweetened cocoa powder
- 2 teaspoons baking soda
- 1 teaspoon salt
- 1 cup buttermilk
- 1/2 cup vegetable oil
- 2 large eggs
- 1 teaspoon vanilla extract
- 1 cup hot coffee (deepens the chocolate flavor, I promise!)
- 15 Oreo cookies, roughly crushed
For the Cookies & Cream Buttercream:
- 1 cup unsalted butter, softened
- 4-5 cups powdered sugar, sifted
- 1/4 cup heavy cream or milk
- 1 teaspoon vanilla extract
- 1 cup finely crushed Oreo crumbs (from about 10 cookies)
For the Chocolate Drip:
- 1/2 cup semi-sweet chocolate chips
- 1/4 cup heavy cream
The Essential Gear
To build this masterpiece, you’ll need the right equipment in your arsenal.
- A Stand Mixer: For whipping up a perfectly fluffy buttercream, a KitchenAid Stand Mixer is your best friend.
- Round Cake Pans: Two 8-inch round cake pans are the perfect size for this recipe.
- A Cake Turntable & Bench Scraper: These are the non-negotiable secret weapons for getting the super-smooth sides required for a clean drip.
- Squeeze Bottle or Spoon: For applying the chocolate ganache drip. A squeeze bottle gives you more control, but a spoon works just fine for a more rustic look.
- Oreos and other toppings: For piling on top! More Oreos, chocolate bars, chocolate-covered pretzels—go wild.
Step-by-Step: The Path to Coolness

Let’s break down how to create the ultimate 13 birthday cake. No panicking allowed.
Part 1: The Foundation
Step 1: Get Baking Preheat your oven to 350°F (175°C). Grease and flour your cake pans. In a large bowl, whisk the flour, sugar, cocoa powder, baking soda, and salt.
Step 2: Mix It Up In a separate bowl, whisk together the buttermilk, oil, eggs, and vanilla. Pour the wet ingredients into the dry and mix until just combined. Carefully pour in the hot coffee and mix until smooth (the batter will be thin). Gently fold in the crushed Oreo cookies.
Step 3: Bake and Cool Divide the batter between the pans and bake for 30-35 minutes. Let the cakes cool in the pans for 15 minutes before turning them out onto a wire rack to cool completely. I cannot stress this enough.
Part 2: Frosting and Assembly
Step 4: Make the Frosting While the cakes cool, beat the softened butter until creamy. Gradually add the powdered sugar and vanilla. Add the cream a tablespoon at a time until you get a smooth, spreadable consistency. Finally, fold in the fine Oreo crumbs.
Step 5: Assemble and Smooth Level your cooled cakes. Stack them with a thick layer of frosting in between. Apply a thin crumb coat of frosting all over and chill for 30 minutes. This is the key to a crumb-free finish. Apply a final, generous coat and use your bench scraper and turntable to get the sides as smooth as possible. Chill the cake again until the frosting is firm.
Part 3: The Drip and Decoration

Step 6: Make the Ganache Drip Place the chocolate chips in a heatproof bowl. Heat the heavy cream in the microwave or on the stovetop until it’s just simmering. Pour the hot cream over the chocolate chips and let it sit for 5 minutes without stirring. Then, stir gently until you have a smooth, glossy ganache.
Step 7: The Drip Test Let the ganache cool for 10-15 minutes until it’s lukewarm. It should be thick enough to slowly drip down a spoon, not run off it. To be safe, do a test drip on the back of your chilled cake. If it runs too fast, let the ganache cool longer.
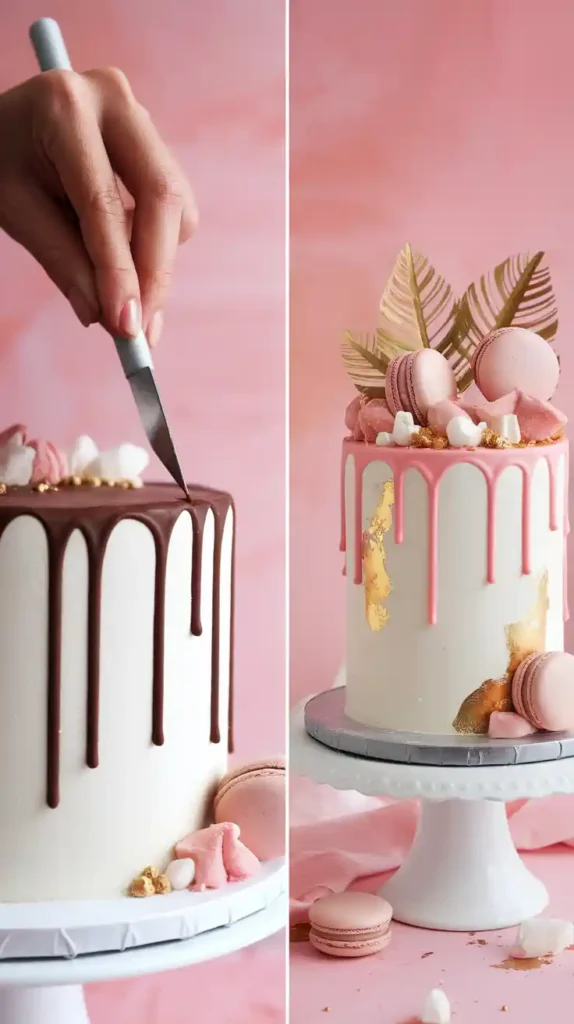
Step 8: Apply the Drip Using a squeeze bottle or the back of a spoon, apply the ganache around the top edge of the cake, gently pushing small amounts over the side to create drips. Once the drips are done, pour the remaining ganache on top and spread it evenly.
Step 9: Pile It High! Before the ganache sets, artfully pile on your remaining toppings. Whole Oreos, half Oreos, chocolate bars, chocolate-covered pretzels. More is more when it comes to this kind of 13 birthday cake.
Calories & Nutritional Info
A formal report on the “Official Teenager” fuel.
- Serving Size: 1 slice, probably eaten while scrolling on a phone.
- Cool Factor: 1000%
- Calories: Enough to fuel a marathon of gaming or gossiping. (Realistically, about 700-800 per indulgent slice. It’s a milestone, okay?)
- Contains: Chocolate, Oreos, and the sweet taste of not being a kid anymore.
Common Mistakes to Avoid (The Cringe Zone)
Let’s steer clear of these party fouls.
- The Waterfall Drip: Your ganache was too hot or too thin, and it pooled in a sad puddle at the bottom of your cake. You must let the ganache cool until it’s just slightly warm to the touch.
- The Stubby, Sad Drip: Your ganache was too cold and seized up, creating short, stumpy drips. If it gets too thick, you can gently reheat it in the microwave in 5-second bursts.
- The Leaning Tower of Teen Angst: You didn’t level your layers. For a drip cake, a level surface is everything. Level your cakes before you stack them.
- Trying Too Hard: The beauty of this 13 birthday cake is its effortlessly cool vibe. Don’t overthink the topping placement. A slightly chaotic pile looks better than one that’s too perfectly arranged.
Variations & Customizations
This is a great base for any awesome 13 birthday cake.
- Favorite Candy Bar Explosion: Not an Oreo fan? (Who are you?) Use their favorite candy bar instead! Crushed Butterfingers, chopped Snickers, or Reese’s Pieces all work beautifully in the cake and on top.
- The Gamer’s Delight: Use the same cake base, but tint the buttercream a vibrant green. Use black drip and top it with chocolate coins, a new controller, or other game-themed candies.
- The Glam Edition: For a different vibe, use a white chocolate ganache for the drip, which you can color with oil-based food coloring. A pink or gold drip on a white cake, topped with macarons, rock candy, and edible glitter is a whole mood.
Frequently Asked Questions (The Teen Survival Guide)
Navigating the 13th birthday? I’ve got your back.
1. What is a good theme for a 13th birthday? It depends on the teen! Popular themes include gaming, their favorite movie or artist, a “glow up” or spa theme, or a simple, “cool” color scheme like black and gold. The drip cake style fits almost any theme.
2. How do you make a cake look “cool” and not “kid-like”? Avoid primary colors and cartoon characters (unless it’s a specific request). Use more sophisticated color palettes, modern techniques like a chocolate drip, and personalized toppers. This is the key to a great 13 birthday cake.
3. What flavor cake do 13-year-olds like? You can’t go wrong with classics like chocolate, vanilla, or funfetti. A cookies-and-cream cake, like this one, feels a little special and is almost universally loved.
4. How do you make a perfect drip cake? The secrets are a well-chilled, smoothly frosted cake and a lukewarm ganache. The temperature contrast is what makes the drips set up perfectly.
5. Can I make a number “13” cake? Yes! You can buy number-shaped pans. Alternatively, you can bake a large sheet cake and use a printed “13” as a template to cut the numbers out.
6. What are some good color palettes for a 13 birthday cake? Black and white, black and gold, blush pink and rose gold, or a monochromatic scheme (different shades of blue, for example) all look very modern and cool.
7. Can this 13 birthday cake be made in advance? Absolutely. The cake layers can be baked and wrapped well for up to two days. The fully assembled and decorated cake can be made the day before and stored in the fridge.
Final Thoughts
You have officially graduated from the academy of teen-approved baking. You’ve faced the challenge, mastered the drip, and created a 13 birthday cake that is worthy of its momentous occasion. This cake is more than just a dessert; it’s a delicious, edible high-five, welcoming them to a new chapter.
So go on, light those candles. Get ready for the “whoa, you made that?!” comments. You have officially won the birthday. At least, until they turn 14.