The Ultimate Fairy Birthday Cake (That Looks Like Actual Fairies Made It)
Let’s be honest, at some point you’ve been tasked with creating a birthday cake that is simply described as “magical.” No pressure, right? Just whip up a confection that looks like it was lovingly crafted by woodland creatures, dusted with real fairy dust, and delivered by a unicorn. It’s enough to make you want to trade your spatula for a magic wand. Well, what if I told you that creating a truly enchanting fairy birthday cake is less about sorcery and more about embracing a little bit of beautiful, rustic chaos?
Forget trying to sculpt a perfect, shiny fondant fairy. We’re going in a different direction. We’re creating a cake that looks like it grew in an enchanted forest—a whimsical, wonderful centerpiece that’s as delicious to eat as it is beautiful to look at.
This is your official guide to making a fairy birthday cake that will have everyone believing you’ve got a direct line to the fairy queen. And the best part? It’s ridiculously fun and forgiving to make.
Why This Recipe Is Pure Magic
So why go to all the trouble of making a fairy birthday cake from scratch? Isn’t it easier to just buy one? Maybe, but you’d be missing out on all the fun and glory.
First, it’s naturally stunning. We’re using nature as our primary decorator. Think fresh berries, fragrant herbs, and beautiful, safe-to-eat flowers. The result is a cake that’s genuinely breathtaking without looking artificial or overdone. It has an organic elegance that you just can’t get from a plastic topper.

Second, imperfection is part of the charm. This is my favorite part. Is your frosting a little swoopy and uneven? Perfect, it looks like moss on a forest floor! Is a berry slightly askew? It was placed there by a mischievous pixie! A true fairy birthday cake shouldn’t look like it was made by a machine; it should look like it was made with magic.
Finally, the flavor is as enchanting as the look. We’re pairing a light, fragrant vanilla bean cake with a creamy, not-too-sweet buttercream. It’s a classic, crowd-pleasing combination that tastes like a sweet summer dream—the perfect flavor for this whimsical theme.
Ingredients from the Enchanted Pantry
You won’t need to forage for any mythical ingredients. Everything you need can be found in your local (non-magical) grocery store.
For the Vanilla Bean Cake:
- 2 1/2 cups all-purpose flour
- 2 teaspoons baking powder
- 1/2 teaspoon salt
- 1 cup unsalted butter, at room temperature
- 1 3/4 cups granulated sugar
- 4 large eggs, at room temperature
- 1 tablespoon pure vanilla extract or the seeds from one vanilla bean
- 1 cup whole milk, at room temperature
For the Dreamy Buttercream:
- 1 1/2 cups (3 sticks) unsalted butter, softened
- 5-6 cups powdered sugar, sifted
- 1/4 cup heavy cream
- 2 teaspoons vanilla extract
- Pinch of salt
- Optional: A tiny drop of green or pink gel food coloring for a pastel tint.
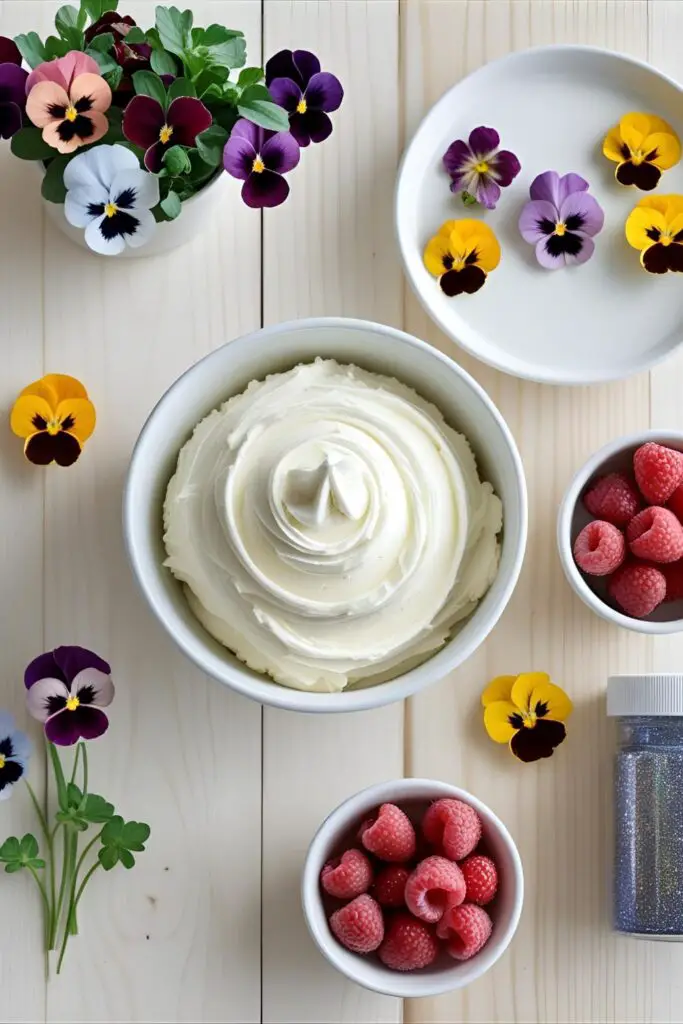
For the Magical Decorations:
- Fresh, edible flowers: This is critical! Use only flowers that are specifically sold as edible (like pansies, violas, chamomile, or rose petals).
- Fresh berries: Raspberries, blueberries, or small strawberries look beautiful.
- Fresh herbs: A few sprigs of rosemary or thyme can look like tiny pine branches.
- Edible glitter or luster dust: For that essential touch of fairy dust.
The Fairy Godmother’s Toolkit (Tools & Gadgets)

The right tools are like a magic wand for bakers. Here’s what will help you craft the perfect fairy birthday cake.
- A Stand Mixer: For whipping the cake batter and buttercream into a light, airy frenzy. A KitchenAid Stand Mixer is the ultimate kitchen fairy.
- Round Cake Pans: Two 8-inch round cake pans will give you a lovely, classic shape.
- An Offset Spatula: This is your primary tool for creating those beautiful, rustic swirls in the frosting.
- Edible Glitter & Luster Dust: To achieve that magical shimmer. A luster dust pump is great for applying a fine, even layer of sparkle.
- Fairy Figurines: A simple way to complete the theme. Small, charming fairy figurines can be placed on and around the cake.
- Piping Bags (Optional): If you want to add little details like leaves or vines, a piping bag with a small leaf tip is useful.
Step-by-Step: Assembling Your Enchanted Creation
Ready to make some real magic? Let’s get our aprons on and get to work.
Part 1: Baking the Enchanted Layers
Step 1: Prepare the Realm Preheat your oven to 350°F (175°C). Grease and flour two 8-inch round cake pans. In a bowl, whisk together the flour, baking powder, and salt.
Step 2: The Creaming Charm In a stand mixer, beat the room temperature butter and sugar together on medium-high speed for a full 5 minutes until it’s very pale, light, and fluffy. This step is crucial for a light cake!
Step 3: The Golden Potion Beat in the eggs one at a time, mixing well after each addition. Scrape down the sides of the bowl, then beat in the vanilla extract or vanilla bean seeds.
Step 4: The Final Mixture On low speed, alternate adding the dry ingredient mixture and the milk, beginning and ending with the dry ingredients. Mix only until the last streaks of flour disappear. Do not overmix, or your cake will be tough.

Step 5: The Trial by Fire Divide your beautiful batter evenly between the prepared pans. Bake for 30-35 minutes, or until a toothpick inserted into the center comes out clean. Let the cakes cool in the pans for 10 minutes before turning them out onto a wire rack to cool completely.
Part 2: Building Your Fairy Birthday Cake
Step 6: Whip the Frosting Cloud While the cakes cool, beat the softened butter in your stand mixer for 5 minutes until pale and fluffy. On low speed, gradually add the sifted powdered sugar. Add the vanilla and salt. Drizzle in the heavy cream until you reach a smooth, spreadable consistency. If you want a tinted frosting, add a tiny drop of gel food coloring now.
Step 7: Assemble Your Fairy Dwelling Once your cakes are completely cool, level them if needed. Place one layer on your cake stand. Top with a generous layer of buttercream. Place the second layer on top. Apply a thin crumb coat of frosting to the entire cake and chill for 30 minutes. This is the secret to clean decorating.
Step 8: Decorate with Magic Apply a final, generous coat of frosting. Use your offset spatula to create beautiful, rustic swoops and swirls. Now, for the fun part: arrange your edible flowers, fresh berries, and herb sprigs on top of the cake, perhaps in a crescent shape or a whimsical, scattered pattern. Finish with a generous dusting of edible glitter. Your fairy birthday cake is complete!
Calories & Nutritional Info

A dispatch from the gnomes in the accounting department.
- Serving Size: 1 slice of pure whimsy
- Magical Properties: High. Induces smiles and wonder.
- Calories: Fairies don’t count calories, and on a birthday, neither should you. (But for mortals, it’s around 600 per slice. It’s a worthy indulgence.)
- Contains: Joy, sparkle, and a touch of forest magic.
Common Mistakes to Avoid (Don’t Anger the Pixies)
Let’s avoid any unfortunate transformations into frogs, shall we?
- The Poison Garden: You used flowers from your garden or a florist. This is a huge no-no! Many common flowers are poisonous. You MUST use flowers that are specifically grown and sold as edible.
- The Bleeding Berries: You decorated the cake hours ago and now the juice from the berries is leaking all over your beautiful frosting. To keep your fairy birthday cake looking pristine, decorate with fresh fruit and flowers no more than an hour or two before serving.
- The Glitter Explosion: Your cake looks less like it was dusted by fairies and more like it was assaulted by a craft store. A little edible glitter goes a long way. Start with a light dusting; you can always add more.
- The Quest for Perfection: You tried to make the frosting perfectly smooth. The whole point of this rustic fairy birthday cake design is its natural, uneven texture! Embrace the swoops and swirls.
Variations & Customizations
Want to add your own chapter to this fairytale?
- The Fairy House Cake: Use a Bundt pan to bake your cake. The natural shape looks like a perfect little fairy house or a mushroom cap. You can decorate it with a little door made from a cookie and frosting vines.
- Flavor Enchantments: Lean into the theme with your flavors. A lemon-lavender cake, a rosewater-scented buttercream, or a raspberry-hibiscus filling would all be incredibly magical options for your fairy birthday cake.
- The Toadstool Garden: Make a few mini cupcakes alongside your main cake. Frost them with red buttercream and add little white nonpareil sprinkles to look like toadstools. Arrange them around the base of the main cake.
Frequently Asked Questions (Whispers from the Woods)
You have questions about the fey folk’s favorite dessert? I have answers.
1. What is a fairy cake? In the UK, a “fairy cake” is what Americans would call a small cupcake. However, a fairy birthday cake as a theme generally refers to a larger cake decorated in a whimsical, magical, nature-inspired style.
2. Where can I find safe, edible flowers? Many specialty grocery stores (like Whole Foods) now carry them in the produce section. You can also order them online from farms that specialize in edible flowers. Never eat flowers from a florist or nursery, as they are treated with pesticides.
3. How do you make a cake look like a fairy garden? Use a base of green or brown “mossy” frosting. Add crushed cookies for a “dirt” path, use sprigs of rosemary for tiny trees, and arrange edible flowers and berries. A few small, clean stones or some rock candy can also add to the effect.
4. What flavors are good for a fairy birthday cake? Light, floral, and fruity flavors work best. Think vanilla, lemon, lavender, rose, raspberry, strawberry, and elderflower.
5. Can I make a fairy birthday cake ahead of time? You can bake the cake and make the frosting a day or two in advance. You can even assemble and frost the cake the day before. However, wait to add the fresh flowers and fruit until right before you plan to serve it.
6. How do I make edible fairy dust? The easiest way is to buy edible luster dust or disco dust (which is non-toxic but not digestible, so use sparingly). You can mix a fine-grain sanding sugar with a bit of luster dust for a sparkly, textured fairy dust.
7. What are some easy decorating ideas for a beginner? The easiest fairy birthday cake involves frosting the cake with rustic swirls and then simply arranging fresh berries and a few edible flowers on top. Finish with a dusting of edible glitter. It’s high-impact and very low-skill.
Final Thoughts
And there you have it. You are no longer just a baker; you are a conduit for magic, a creator of whimsy, a veritable fairy godparent of confections. You’ve learned that the secret to a spectacular fairy birthday cake isn’t about perfection; it’s about channeling the beauty of the natural world and adding a healthy dose of sparkle.
So go on, create something magical. Make a cake that tells a story. And get ready for the gasps of wonder, because you’ve just baked a little bit of a fairytale.