Stunning Buttercream Cake Designs You Can Actually Master
Let’s talk about that moment of pure intimidation. You’re scrolling online, and you see it: a cake so beautifully decorated with swirls, rosettes, and textures that it looks like it belongs in a museum. Your first thought is, “A wizard made that.” Your second thought is, “I could never.” I’m here today to call shenanigans on that second thought. What if I told you the secret to those incredible buttercream cake designs isn’t magic, but a few simple techniques and a really good frosting recipe?
Forget that stiff, chewy fondant that tastes like sadness. We’re diving headfirst into the delicious, versatile, and stunning world of buttercream. This is your official permission slip to stop being afraid of the piping bag.
Today, you’re graduating from “person who slathers on frosting with a knife” to “person who creates edible art.” This is your comprehensive guide to creating jaw-dropping buttercream cake designs, and I promise, it’s more fun and less scary than you think.
Why Buttercream Is the Undisputed Champion
In the great cake-decorating battle, why are we firmly planted in Camp Buttercream? Oh, the reasons are as sweet as the frosting itself.
First, and most importantly, buttercream is delicious. Let’s be honest, nobody has ever said, “Ooh, I can’t wait to eat that thick layer of fondant!” Buttercream is part of the dessert, not just a decoration you peel off. A cake decorated with buttercream is 100% edible and 100% delightful.

Second, it’s incredibly versatile. With one batch of frosting and a few simple tools, you can create a huge variety of buttercream cake designs. From silky smooth finishes to rustic swirls, sharp stripes, delicate flowers, and intricate piping—buttercream can do it all. It’s the ultimate artistic medium for bakers.
Finally, it’s accessible and affordable. You don’t need to buy expensive, pre-made sheets of anything. The ingredients are likely in your kitchen right now: butter, sugar, vanilla, and a little milk. It’s a simple, humble concoction that can be transformed into something extraordinary. This accessibility makes exploring buttercream cake designs easy for anyone.
The Magic Ingredients
A great work of art starts with good materials. The same goes for our cake.
For the Perfect Vanilla Canvas (The Cake):
- 2 1/2 cups all-purpose flour
- 2 1/2 teaspoons baking powder
- 1/2 teaspoon salt
- 1 cup unsalted butter, softened
- 1 3/4 cups granulated sugar
- 4 large eggs, room temperature
- 1 tablespoon vanilla extract
- 1 cup whole milk, room temperature
For the Perfect Decorating Buttercream (The Paint):
- 2 cups (4 sticks) unsalted butter, softened but still cool to the touch
- 6-7 cups powdered sugar, sifted
- 1/4 cup heavy cream or milk
- 2 teaspoons clear vanilla extract (for a pure white base)
- 1/2 teaspoon salt
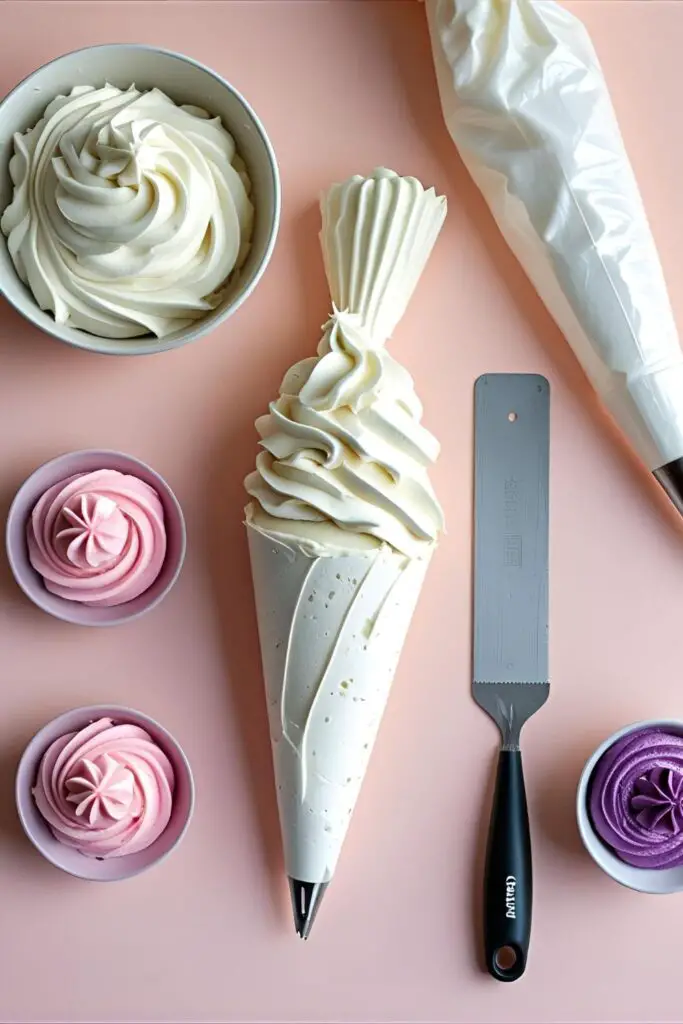
The Artist’s Toolkit (Tools & Gadgets)
You wouldn’t paint a masterpiece with a toothbrush. Let’s get the right gear for our buttercream cake designs.
- A Stand Mixer: For buttercream, this is almost non-negotiable. A KitchenAid Stand Mixer will beat your frosting into light, fluffy submission in a way your arms simply cannot.
- A Cake Turntable: The single most helpful tool for cake decorating. A good, sturdy cake turntable allows you to spin the cake for smooth sides and even piping.
- Icing Spatulas: You’ll want a long, straight icing spatula for the top and a small offset icing spatula for the sides and details.
- A Bench Scraper: This is the secret weapon for achieving those impossibly smooth sides. A simple, tall bench scraper is a game-changer.
- Piping Bags & Tips: Invest in a good set. For the designs below, you’ll specifically want a large open star tip (like a Wilton 1M), a large round tip, and various smaller tips for details.
The Masterclass: Creating Your Buttercream Cake Designs

Ready to create something amazing? Let’s walk through the process, from blank canvas to finished masterpiece.
Part 1: The Foundation
Step 1: Bake Your Canvas Preheat your oven to 350°F (175°C). Grease and flour two 8-inch round cake pans. In a bowl, whisk together the flour, baking powder, and salt. In your stand mixer, cream the butter and sugar until very light and fluffy (about 5 minutes). Beat in the eggs one at a time, then the vanilla. Alternate adding the dry mixture and the milk, starting and ending with the dry. Mix until just combined. Divide the batter between the pans and bake for 30-35 minutes. Let cool completely.
Step 2: Make the Magic Medium (The Buttercream) In your stand mixer, beat the softened butter on medium-high speed for 5-7 minutes until it’s very pale and fluffy. Turn the mixer to low and gradually add the sifted powdered sugar. Once incorporated, add the vanilla and salt. Slowly drizzle in the heavy cream until you reach your desired consistency. Finally, turn the mixer back up to medium-high and beat for another 3-5 minutes. For super smooth frosting, run the mixer on low for a final minute to push out any air bubbles.
Part 2: The Designs
First, level your cooled cakes. Stack them with a layer of frosting in between. Now, apply a thin “crumb coat” of frosting all over the cake to trap any loose crumbs. Chill the cake for at least 30 minutes. This is the most important step for clean buttercream cake designs.
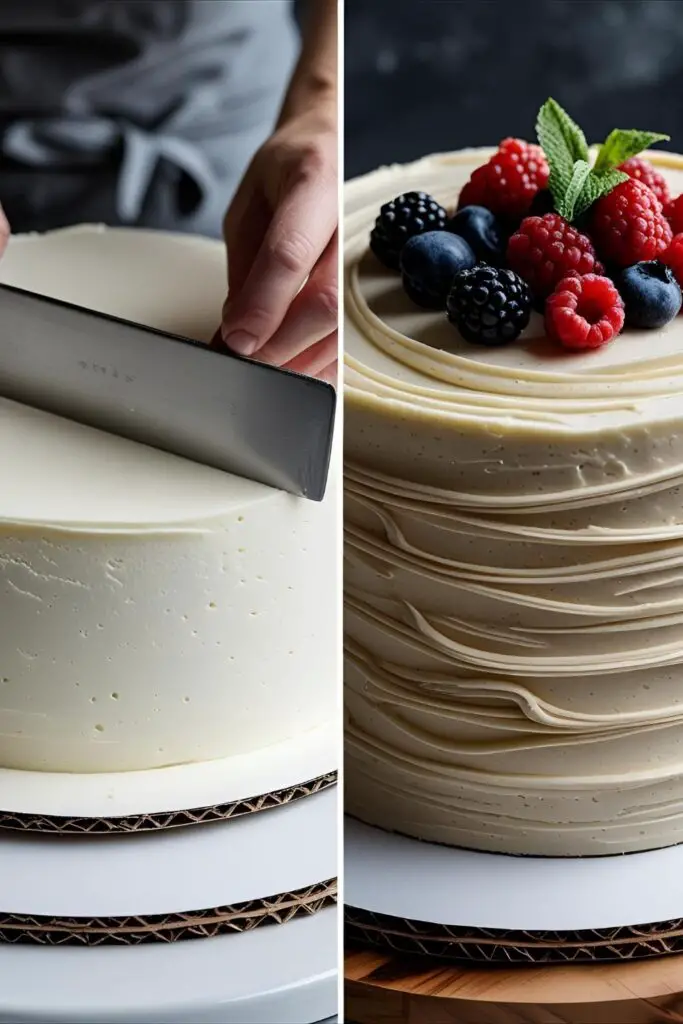
H3: Design 1 – The Impossibly Smooth Finish This is the foundation for countless other designs. After your crumb coat is chilled, apply a generous layer of frosting all over the cake. Place your bench scraper flat against the side of the cake, hold it steady, and use your other hand to spin the turntable. This will scrape off the excess frosting and leave a smooth finish. For the top, use a long, straight spatula, pulling it from the edge toward the center.
H3: Design 2 – The Rustic Spatula Swirls The most forgiving and charming of all buttercream cake designs! After your crumb coat, apply a thick, generous layer of frosting. Now, simply use the back of a small spoon or the tip of your small offset spatula to press into the frosting and create swoops, swirls, and peaks all over the cake. It’s effortlessly beautiful and perfect for beginners.

H3: Design 3 – The Stunning Ombre Rosette Cake This looks like it took hours, but it’s a simple, repeated motion. Divide your buttercream into three bowls. Leave one white, dye one a light pink, and one a darker pink. Frost the cake with a smooth crumb coat. Starting at the bottom with the darkest pink frosting in a piping bag fitted with a 1M tip, pipe rosettes all the way around the cake. Repeat with a middle row of the lighter pink, and a top row of the white. Cover the top with more rosettes. It’s a breathtaking effect.
Calories & Nutritional Info
A formal analysis of your work of art.
- Serving Size: 1 slice of pure beauty
- Artistic Merit: 10/10
- Calories: Art is food for the soul. The soul is not subject to caloric limits. (But okay, probably around 650 per slice. It’s mostly butter and joy.)
- Primary Benefit: Will make you the most popular person at any party.
Common Mistakes to Avoid (The “Nailed It!” Fails)
We’ve all seen the cake fail photos. Let’s make sure yours isn’t one of them.
- The Melty, Soupy Mess: Your buttercream is sliding off the cake. Your butter was too warm or your kitchen is too hot. The butter should be softened but still cool. If your frosting gets too soft, pop it in the fridge for 15 minutes.
- The Gritty, Sandy Texture: Your frosting feels grainy. You didn’t sift your powdered sugar. This is a small step that makes a huge difference. Sift it!
- The Crumb-tastrophe: There are little cake crumbs all through your beautiful white frosting. You skipped the crumb coat. That thin, sacrificial layer of frosting is what seals in the crumbs and gives you a clean final coat.
- The Dreaded Air Bubbles: Your frosting has little pockets of air, making it impossible to get a smooth finish. You over-whipped the frosting on high speed. After it’s whipped, run the mixer on the lowest speed for a minute or two with the paddle attachment to smooth it out.
Variations & Customizations
Once you master the medium, you can create endless buttercream cake designs.
- The Watercolor Effect: A close cousin of ombre. After your crumb coat, dot splotches of different colored frosting around the cake. Use your bench scraper to do one smooth pass, smearing and blending the colors into a beautiful, abstract design.
- Vintage Lambeth Piping: Feeling ambitious? Look up “Lambeth piping.” This super-trendy, over-the-top style involves layering intricate shells, swags, and frills. It’s a maximalist dream and a true test of your piping skills.
- Flavor Town: Buttercream is a blank canvas for flavor, too! Add cocoa powder for chocolate, cooled fruit reduction for berry flavors, or different extracts like lemon, almond, or peppermint to customize your cake completely.
Frequently Asked Questions (Buttercream University)
Class is in session. Let’s answer your burning buttercream questions.
1. What is the best buttercream for decorating? American Buttercream (the recipe here) is the easiest and most stable for beginners. Swiss Meringue Buttercream is silky smooth and less sweet but requires more steps (cooking egg whites).
2. How do you get super smooth buttercream? A chilled crumb coat is Step 1. Using a bench scraper on a turntable is Step 2. A final pass with a hot, dry spatula can melt the very surface for a glass-like finish.
3. Why is my buttercream yellow/gritty/runny?
- Yellow? Your butter is yellow. For a pure white, beat the butter for a very long time (5-7 minutes) until it’s pale, and use clear vanilla extract.
- Gritty? You didn’t sift the powdered sugar.
- Runny? Your butter was too soft, or you added too much liquid. Add more sifted powdered sugar to thicken it.
4. Can I make buttercream cake designs in advance? Yes. A fully frosted cake can be stored in the fridge for 2-3 days. Let it come to room temperature for about an hour before serving for the best flavor and texture.
5. How do you get vibrant colors in buttercream? Use concentrated gel food coloring. Liquid coloring will thin out your frosting. For deep colors like red or black, let the colored frosting sit for a few hours, as the color will deepen over time.
6. What’s the difference between American and Swiss Meringue Buttercream? American is a simple mix of butter, powdered sugar, and liquid. Swiss Meringue involves cooking egg whites and sugar over a double boiler before whipping them into a meringue and then adding butter. It’s more work but yields a silky, less sweet result.
7. What are some easy buttercream cake designs for beginners? The rustic spatula swirl design is the easiest and most forgiving. Sprinkles are also your best friend! A simple smooth cake covered in a fun sprinkle mix always looks festive and intentional.
Final Thoughts
You are now armed with the knowledge, the recipe, and the techniques to create stunning buttercream cake designs. The piping bag is no longer your enemy; it is your wand. The turntable is no longer a confusing kitchen gadget; it is your potter’s wheel.
So go forth and create. Make a cake that’s not just delicious to eat but a joy to look at. The only bad cake is the one you were too afraid to try to decorate. You’ve got this.