The “HAPPEE BIRTHDAE” Harry Potter Birthday Cake You Can Actually Make
Let’s set the scene. A rickety hut on a rock in the middle of a stormy sea. A giant of a man kicks the door down. And a young, bewildered boy is presented with a slightly squashed box containing a cake that would become nothing short of legendary. If you’ve ever wanted to bring a piece of that magic into your own kitchen, you’re in the right place. This is your ultimate guide to making the iconic harry potter birthday cake.
Forget perfectly smooth fondant and intricate, professionally piped flowers. The beauty of this cake is in its heartfelt imperfection. It’s a symbol of pure, unadulterated affection, made by someone who cares more about the gesture than the presentation. And frankly, that’s a baking philosophy I can get behind.
We are about to create the one, the only, the “HAPPEE BIRTHDAE HARRY” cake. And trust me, it’s so much fun to make, you’ll feel like you’ve just gotten your own letter from Hogwarts.
Why This Recipe Is Pure Magic
So, why should you make this specific harry potter birthday cake? Oh, let me count the ways, my friend.
First and foremost, it is gloriously forgiving. Are you a novice baker? Do your cakes sometimes lean a little to the left? Is your handwriting… questionable? PERFECT. This cake thrives on being a little bit clumsy and rustic. The goal is heartfelt, not flawless.
Second, the nostalgia is off the charts. Every single Harry Potter fan will instantly recognize this cake. Placing this on the table at a birthday party guarantees a chorus of delighted gasps. You’re not just serving a cake; you’re serving a core memory from one of the most beloved stories of all time.

And finally, despite its humble appearance, it’s genuinely delicious. We’re talking about a rich, moist chocolate cake layered with a sweet, creamy buttercream frosting. It’s the kind of classic, comforting cake that everyone actually wants to eat. This isn’t just a prop; it’s a top-tier dessert.
The Potion Ingredients (No Gillyweed Required)
This recipe uses simple, easy-to-find ingredients. No need to visit Diagon Alley, your local grocery store will do just fine.
For the Rich Chocolate Cake:
- 2 cups all-purpose flour
- 2 cups granulated sugar
- 3/4 cup unsweetened cocoa powder (the good stuff, if you can!)
- 2 teaspoons baking soda
- 1 teaspoon baking powder
- 1 teaspoon salt
- 1 cup buttermilk, at room temperature
- 1/2 cup vegetable oil
- 2 large eggs, at room temperature
- 1 teaspoon pure vanilla extract
- 1 cup freshly brewed hot coffee (or hot water, but coffee deepens the chocolate flavor!)
For the “Hagrid-Style” Buttercream:
- 1 cup unsalted butter, softened to room temperature
- 4-5 cups powdered sugar, sifted
- 1/4 cup heavy cream or whole milk
- 2 teaspoons vanilla extract
- Pinch of salt
- Pink gel food coloring
- Green gel food coloring
Essential Magical Artifacts (aka Tools & Gadgets)
Every witch or wizard needs a good wand. Here are the tools that will make this process spellbindingly simple.
- Round Cake Pans: You’ll need two 8-inch round cake pans. This is a standard size and a great staple to have in your kitchen.
- A Stand Mixer or Hand Mixer: While you could mix by hand, a KitchenAid Stand Mixer or a powerful hand mixer will make whipping up the batter and frosting much, much easier.
- An Offset Spatula: This is the secret weapon for getting that perfectly imperfect, swoopy frosting look. A small offset spatula is ideal for this project.
- Piping Bags and Tips: You’ll need a piping bag and a small round tip (like a Wilton #4 or #5) to pipe the iconic green lettering.
- Gel Food Coloring: I can’t stress this enough. Gel food coloring provides vibrant hues without thinning out your frosting. Liquid food coloring is the enemy of good buttercream.
Step-by-Step Spellcasting (The Instructions)
Alright, grab your apron. It’s time to make some magic happen.
Part 1: Brewing the Cake Batter

Step 1: Combine Your Dry Ingredients Preheat your oven to 350°F (175°C). Grease and flour your two 8-inch cake pans. In a large bowl (or the bowl of your stand mixer), whisk together the flour, sugar, cocoa powder, baking soda, baking powder, and salt.
Step 2: Mix the Wet Ingredients In a separate medium bowl, whisk together the buttermilk, oil, eggs, and vanilla.
Step 3: Combine and Conquer Pour the wet ingredients into the dry ingredients and mix on low speed until just combined. Do not overmix! The batter will be thick. With the mixer still on low, slowly and carefully pour in the hot coffee. The batter will become very thin – this is normal! This is what makes the cake so moist.
Step 4: Bake the Layers Pour the batter evenly between your two prepared pans. Bake for 30-35 minutes, or until a toothpick inserted into the center comes out clean. Let the cakes cool in the pans for 10 minutes before inverting them onto a wire rack to cool completely.
Part 2: Creating the Iconic Frosting
Step 5: Whip the Buttercream In a large bowl, beat the softened butter until it’s light and creamy, about 2 minutes. Gradually add the sifted powdered sugar, alternating with the heavy cream, until it’s smooth and fluffy. Beat in the vanilla and salt.
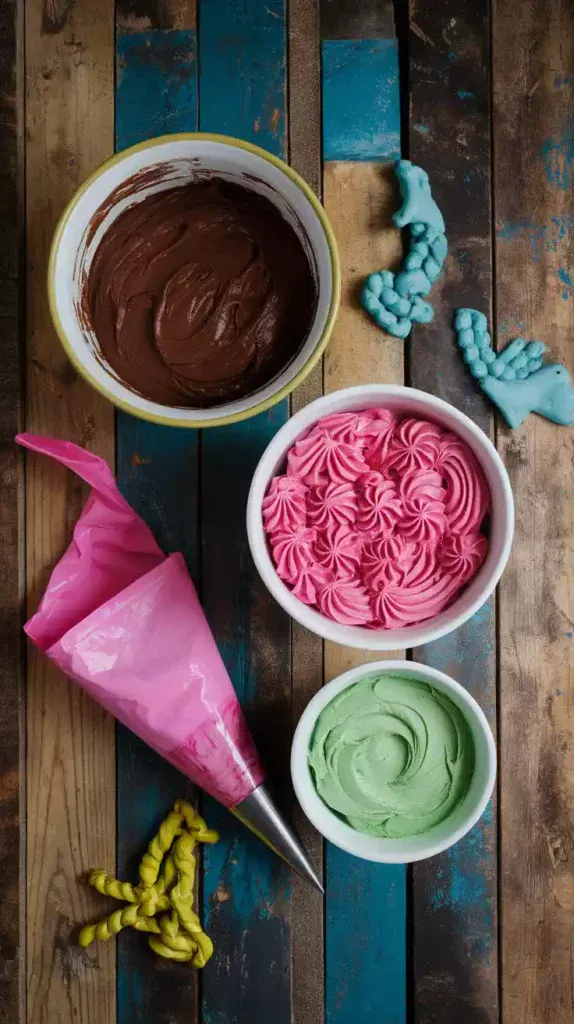
Step 6: Color Your Frosting Scoop out about 2/3 of the buttercream into a separate bowl. Use pink gel food coloring to dye this larger portion a vibrant, bubblegum pink. Use green gel food coloring to dye the remaining 1/3 a bright, grassy green. This green portion will be used for writing your iconic message.
Part 3: Assembling Your Masterpiece

Step 7: The Messy Frosting Job Place one cooled cake layer on your serving plate. Spread a layer of the pink frosting on top. Place the second cake layer on top of that. Now, using your offset spatula, generously cover the entire cake—top and sides—with the rest of the pink frosting. Embrace the rustic look! Make swoops and swirls. It should look like it was frosted with love, not a laser level.
Step 8: Create the Crack This is a key feature of the harry potter birthday cake! Take the tip of your clean offset spatula and gently drag it in a zig-zag line across the top of the cake to create the famous “crack.”
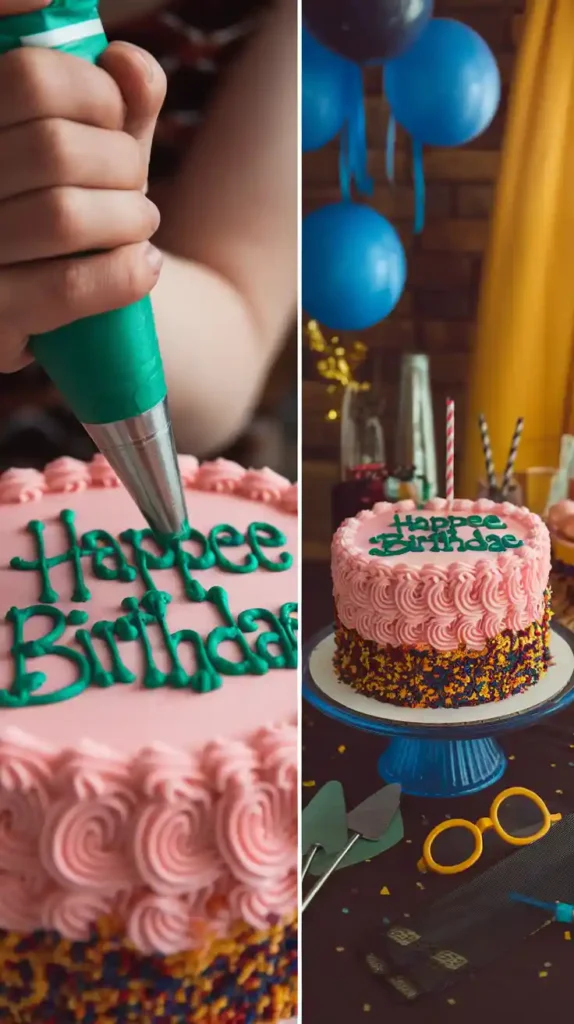
Step 9: The “HAPPEE BIRTHDAE” Moment Transfer your green buttercream to a piping bag fitted with a small round tip. Now, carefully pipe “HAPPEE BIRTHDAE HARRY” onto the cake. Remember, the spelling and slightly shaky lettering are crucial! Place the name “HARRY” below the first two words, just like in the movie.
Calories & Nutritional Info
Let’s be real, a cake from Hagrid doesn’t have a nutrition label. But for all you Muggles who are curious…
- Serving Size: 1 generous slice (or one whole cake, if you’re Hagrid)
- Calories: We’ll say it’s “magical” and leave it at that. (Okay, fine, probably around 500-600 per slice).
- Sugar Content: Enough to make a Mandrake scream.
- Primary Benefit: Induces extreme happiness and nostalgia.
Common Mistakes to Avoid (Mischief Mismanaged!)
Even the best wizards make mistakes. Here’s how to avoid some common pitfalls when making your harry potter birthday cake.
- Striving for Perfection: This is the biggest mistake you can make. This cake is MEANT to be messy, slightly squashed, and charmingly imperfect. If you make it too neat, you’ve missed the point!
- Correcting the Spelling: Do. Not. Spell. “Happy Birthday” correctly. It’s “HAPPEE BIRTHDAE.” It’s non-negotiable. This is the law.
- Using Liquid Food Coloring: You will thin out your frosting and end up with a pastel, watery mess. You must use gel food coloring for that vibrant pink and green.
- Forgetting the Crack: The crack across the middle is an essential detail! Don’t forget to gently carve it into the frosting before you pipe the letters.
Variations & Customizations (Charms Class)
Want to put your own spin on this classic? Here are a few fun ideas.
- House Pride Edition: Instead of pink and green, decorate your harry potter birthday cake in house colors! A scarlet and gold Gryffindor cake, a green and silver Slytherin version, a blue and bronze Ravenclaw cake, or a yellow and black Hufflepuff cake would all be fantastic.
- Butterbeer Bonanza: Infuse some extra magic into the flavor! Add 1-2 teaspoons of butterscotch extract to the buttercream frosting for a delicious Butterbeer flavor.
- The “Hermione Granger” Version: For the perfectionist who just can’t handle the messiness. Make the same cake, but frost it perfectly smoothly. Use a ruler to make sure the crack is at a precise 45-degree angle. Spell everything correctly. We’ll know what you mean, you brilliant, insufferable witch. 😉
Frequently Asked Questions (FAQ)
You’ve got questions? The Sorting Hat and I have answers.
1. What flavor is the actual Harry Potter birthday cake from the movie? While the movie doesn’t specify, it’s widely accepted to be a rich chocolate cake with vanilla buttercream, which is what this recipe creates! It just feels right for a comforting, heartfelt cake like this one.
2. What does it say on the cake? It famously says “HAPPEE BIRTHDAE HARRY” in two lines, with “HARRY” on the second line. The misspelling is essential!
3. Do I really have to make it look messy? You don’t have to, but it’s highly encouraged! The charm of this particular harry potter birthday cake is its homemade, slightly clumsy look. A perfect version is just a pink cake; a messy version is the cake.
4. What’s the best frosting to use? A simple American buttercream (like the one in this recipe) is perfect. It’s sweet, easy to make, and “crusts” slightly, which makes it a stable surface for the piped lettering.
5. How do you get the right shade of pink? Start with a tiny amount of pink gel food coloring and add more until you reach that classic, slightly-too-bright bubblegum pink. It’s better to add less and build up the color than to add too much at once.
6. Can I make this cake ahead of time? Absolutely! You can bake the cake layers a day in advance and store them, well-wrapped, at room temperature. You can even frost the cake and keep it in the fridge overnight. Just let it sit out for about 30 minutes before serving.
7. What if I am terrible at piping letters? Join the club! That’s part of the fun. Hagrid wasn’t a master calligrapher, and you don’t need to be either. Just go for it. If you’re really nervous, you can lightly trace the letters with a toothpick first.
Final Thoughts
And there you have it. You are now fully prepared to create one of the most iconic cakes in literary and film history. This harry potter birthday cake is more than just sugar and flour; it’s a hug in dessert form. It’s a reminder that the best gifts are the ones made with love, even if they’re a little bit squashed.
So go on, make some magic. And when you present this masterpiece, just puff out your chest and say, “Baked it myself, words and all.”