Stunning Cake Pops Designs: Your Ultimate Guide to Wow-Worthy Treats!
Ever scrolled through Instagram, seen those impossibly perfect, glossy cake pops, and just thought, “Yeah, right”? I get it. They look like tiny, edible sculptures crafted by culinary wizards with far too much time on their hands. But what if I told you that creating stunning cake pops designs is not only possible but actually fun? What if you, yes YOU, could be the person who shows up to the party with a tray of these adorable cake-on-a-stick creations?
This guide is your official permission slip to stop admiring and start making. We’re going to break down the process, sidestep the common pitfalls, and unleash your inner dessert artist. Forget store-bought; you’re about to become a cake pop legend. This isn’t just a recipe; it’s your launchpad for countless creative cake pops designs.
Why This Recipe Is Basically Magic
So, why are we so obsessed with these little guys? Are they just a passing fad? Absolutely not, and here’s why you need this in your baking repertoire.
First and foremost, they are creativity on a stick. This base recipe is a blank canvas. Once you master the simple process of making the cake ball, you can explore an infinite universe of cake pops designs. From elegant wedding favors to goofy animal faces for a kid’s birthday, the same simple core recipe applies.
Second, they are the ultimate party food. They’re perfectly portioned, easy to eat without a fork, and an instant conversation starter. Plop a stand of these on a dessert table, and I guarantee they’ll be the first thing to disappear. People go nuts for them!

And let’s be real: they make you look like a baking rockstar. The effort-to-impressed-gasps ratio is ridiculously in your favor. Your friends will think you slaved away for days, but you’ll know the secret. Ready to grab your apron and get a little bossy with some cake?
Ingredients for Your Cake Pop Empire
Let’s break down the shopping list. We have two main components: the delicious guts and the gorgeous exterior.
For the Cake Guts:
- 1 box of cake mix (approx. 15.25 oz): Your choice of flavor! Chocolate, vanilla, and red velvet are classic winners.
- Ingredients as called for on the cake mix box: Usually eggs, oil, and water.
- 1/2 to 2/3 cup of ready-made frosting: Again, your choice! Cream cheese frosting with red velvet cake? A match made in heaven.
- A pinch of salt: To balance the sweetness.
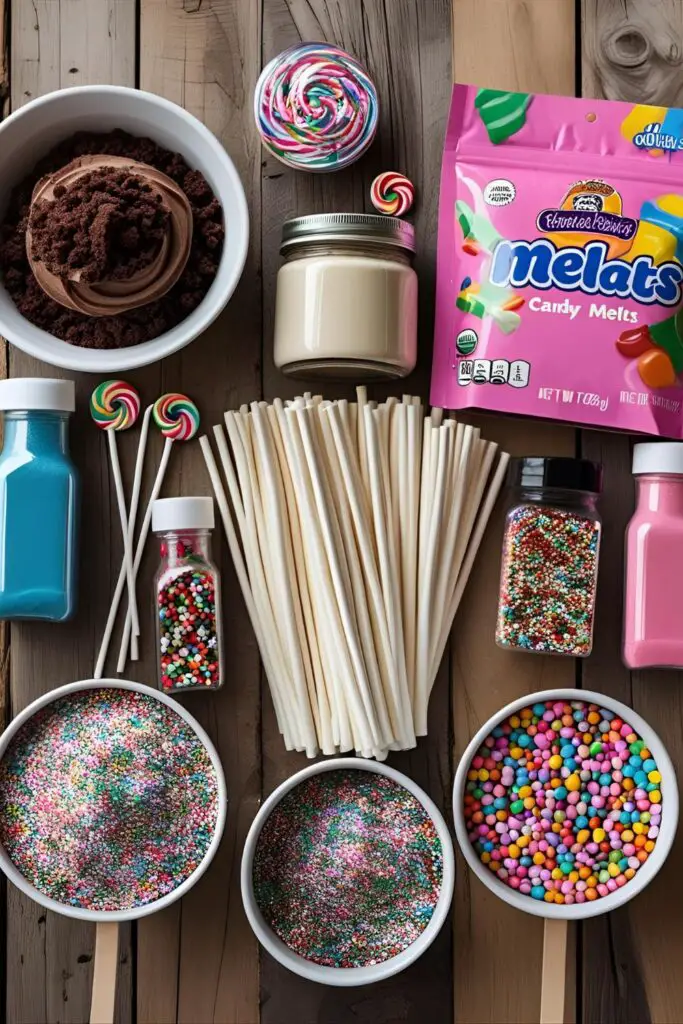
For the Gorgeous Coating & Designs:
- 24 oz (or more) of candy melts: Pick your colors! White is the most versatile for custom coloring, but pre-colored melts save time.
- 2 teaspoons of vegetable shortening or coconut oil (optional): This helps thin the candy melts for a smoother dip.
- Lollipop sticks: The very foundation of our pop.
- Sprinkles, edible glitter, sanding sugar, nonpareils: Your decorating arsenal!
- Oil-based food coloring (optional): Crucially, it MUST be oil-based. Regular water-based food coloring will make your candy melts seize into a clumpy mess.
Tools & Kitchen Gadgets of the Trade
Having the right tools can be the difference between a fun afternoon and a sticky, tear-filled disaster. Here are my non-negotiables.
- A Stand Mixer or Food Processor: While you can crumble the cake by hand, a KitchenAid Stand Mixer or a Cuisinart Food Processor makes short, glorious work of it.
- Candy Melting Pot: Seriously, get one. A Wilton Candy Melts Melting Pot keeps your coating at the perfect temperature, so you don’t have to keep running to the microwave. It’s a game-changer.
- Lollipop Sticks and a Drying Stand: You need sticks to make them pops and a cake pop drying stand to let them dry flawlessly without smudging your beautiful work. A block of styrofoam also works in a pinch.
- Cookie Scoop: A 1-tablespoon cookie scoop ensures all your cake balls are uniform in size, which helps them bake (if you go that route) and look professional.
Step-by-Step Instructions: From Cake to Pop
Alright, time to get our hands dirty. Don’t be intimidated; we’ll go step-by-step.
Part 1: Making the Cake Pop “Dough”

Step 1: Bake and Destroy Bake the cake according to the package directions in a 9×13 inch pan. Let it cool completely. Then, the fun part: crumble the entire cake into a large bowl. Yes, destroy your beautiful cake. It feels wrong, but it’s so right. You want fine crumbs, so get in there with your hands or use a stand mixer with the paddle attachment.
Step 2: Get Mushy Add about 1/2 cup of frosting and a pinch of salt to the cake crumbs. Mix it all together until it has the consistency of dough. It should be moist enough to hold its shape when rolled but not so wet that it’s greasy. If it’s too dry, add more frosting, one tablespoon at a time. This is a key step for all your future cake pops designs.
Step 3: Roll ‘Em Up Use a cookie scoop to portion out the mixture and roll it between your palms to form smooth, tight balls. Place them on a parchment-lined baking sheet. Once all are rolled, cover them with plastic wrap and pop them in the refrigerator to chill for at least 2 hours, or in the freezer for about 30 minutes. They must be firm, not frozen.
Part 2: The Art of the Dip and Decorate
Step 4: Melt and Prep Melt your candy melts in a melting pot or in the microwave in 30-second intervals, stirring in between. Stir in the shortening or coconut oil to thin it out if needed. You’re looking for a smooth, fluid consistency. Pour it into a narrow cup or glass for easier dipping.
Step 5: The Crucial First Dip Take one lollipop stick, dip the tip about 1/2 inch into the melted candy, and then insert it into the center of a chilled cake ball, pushing it about halfway through. The melted candy acts as glue. Do this for all your cake balls and let them set for a few minutes. Do not skip this step, or your cake ball will take a sad swim in the candy melts.
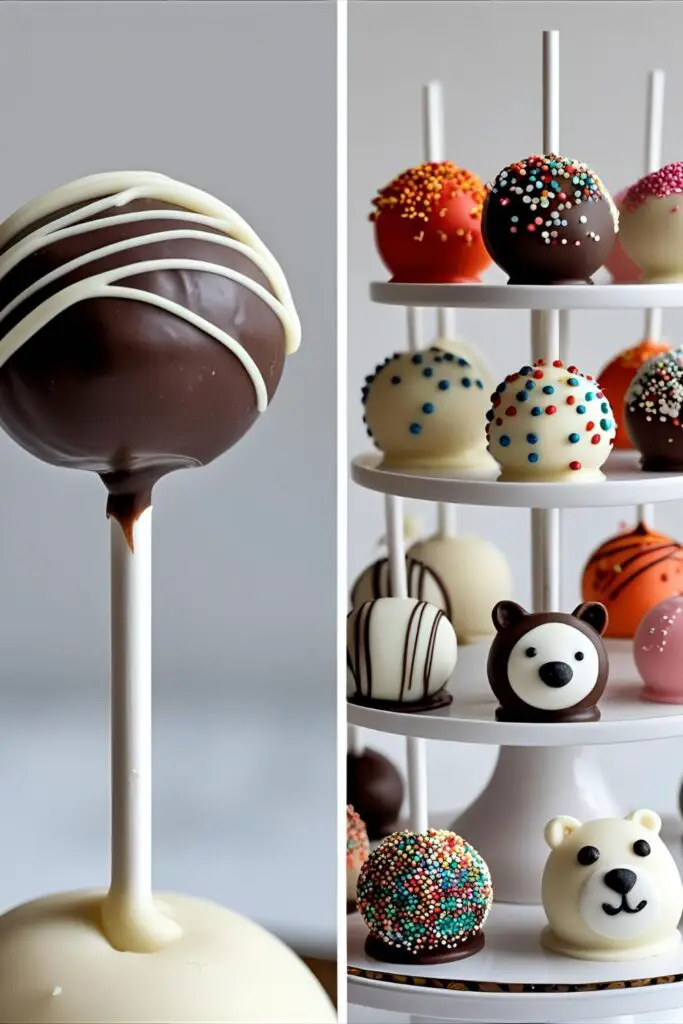
Step 6: The Full Plunge and Decorate! Hold the stick and dip a cake pop straight down into the melted candy until it’s completely submerged. Lift it straight out and gently tap the stick against the rim of the cup to let the excess candy drip off. Now, it’s go-time for your cake pops designs!
- For Sprinkles: While the coating is still wet, shower it with your chosen sprinkles, turning to coat all sides.
- For Drizzles: Let the base coat set completely. Melt a contrasting color of candy melts, pour it into a piping bag or a ziplock bag with the corner snipped off, and drizzle it back and forth over the pop.
- For Faces: Use tweezers to apply sprinkles for eyes or noses while the coating is wet. You can also “glue” them on later with a dab of melted candy.

Place the finished pop in your drying stand and repeat with the rest.
Calories & Nutritional Info
Let’s just get this out of the way. You’re eating cake, frosting, and candy on a stick. It’s a treat, not a health food.
- Estimated Calories per Pop: 150 – 250 (depending on size and decorations)
- Sugar: A glorious amount
- Happiness Quotient: 110%
- Good for the Soul?: Absolutely.
TBH, I recommend you don’t think about it too much. Just enjoy the ride.
Common Mistakes to Avoid (Or, How Not to Cry Over Spilled Cake)
Making cake pops is a journey, and there are a few bumps in the road. Here’s how to avoid them.
- The Dreaded Crack: Your candy coating is cracking as it dries. This happens when your cake balls are too cold! The extreme temperature difference between the frozen ball and the warm candy causes the shell to crack. Let your chilled pops sit at room temp for about 10-15 minutes before dipping.
- The Tragic Plop: Your cake ball falls off the stick right into your pot of melted candy. You probably skipped the “glue” step. Dipping the stick in candy before inserting it is non-negotiable.
- The Lumpy Coat: Your candy coating is thick and lumpy. Your candy melts are either overheated or too thick. Add a little more vegetable shortening or coconut oil to thin it out. And always melt low and slow.
- The Greasy Weep: Your cake pops look like they’re sweating oil. You added too much frosting. The mixture should be like play-doh, not a greasy paste. If it feels too wet, try crumbling in a few plain vanilla wafers to absorb the excess oil.
Variations & Customizations
The base recipe is just the beginning. The real fun is in creating your own unique cake pops designs and flavors.
- Flavor Fiesta: Go wild with combinations! Try red velvet cake with cream cheese frosting, lemon cake with a tangy lemon glaze, or Funfetti cake with vanilla frosting for a rainbow surprise inside.
- The Gluten-Free Route: This is an easy swap. Just use your favorite brand of gluten-free cake mix and a certified gluten-free frosting. The process is exactly the same!
- Next-Level Decor: Ready to graduate from sprinkles? Use edible paint to add details, mold tiny fondant decorations (like unicorn horns or mermaid tails), or use edible luster dust to create stunning metallic or geode cake pops designs.
Frequently Asked Questions (FAQ)
Got questions? I’ve got answers. Here are some of the most common ones.
1. Why are my cake pops cracking? This is the most common issue! It’s almost always because your cake balls are too cold when you dip them in the warm candy. Let them sit at room temperature for 10-15 minutes before dipping to reduce the temperature shock.
2. How do you get a perfectly smooth coating on cake pops? The key is the consistency of your candy melts. It should be thin enough to drip smoothly. Add a teaspoon or two of coconut oil or vegetable shortening. Also, after dipping, gently tap the stick to help the excess drip off and smooth the surface.
3. Can I make cake pops ahead of time? Yes! You can store finished cake pops in an airtight container at room temperature for up to a week. If you need to make them further in advance, you can refrigerate them, but let them come to room temperature before serving to avoid condensation.
4. Why do my cake pops keep falling off the stick? Two likely culprits: you either forgot to dip the stick in melted candy to act as glue, or your cake balls are too heavy. Make sure your cake balls are around 1 to 1.5 tablespoons in size.
5. What is the best consistency for candy melts? You’re looking for the consistency of melted chocolate or warm honey—smooth, fluid, and pourable. If it’s like thick pudding, it’s too thick.
6. How do I store my beautiful cake pops? Once fully dry, you can place them in a single layer in an airtight container. If you need to stack them, place a layer of parchment paper in between. Store at a cool room temperature.
7. Can you use regular chocolate instead of candy melts for the coating? You can, but it’s trickier. You’ll need to properly temper the chocolate, or it won’t set up hard and shiny. Candy melts are designed to melt easily and set up hard without any fuss, which is why they are the preferred choice for most cake pops designs.
Final Thoughts
You did it! You’ve navigated the crumbs, the frosting, and the molten candy to create something truly special. These little pops of joy are more than just dessert; they’re tiny canvases for your imagination.
So go ahead, experiment with wild colors, bold flavors, and crazy cake pops designs. Be the person who brings edible art to the next potluck. And when everyone asks for your secret, you can just smile mysteriously… or send them a link to this article. 😉