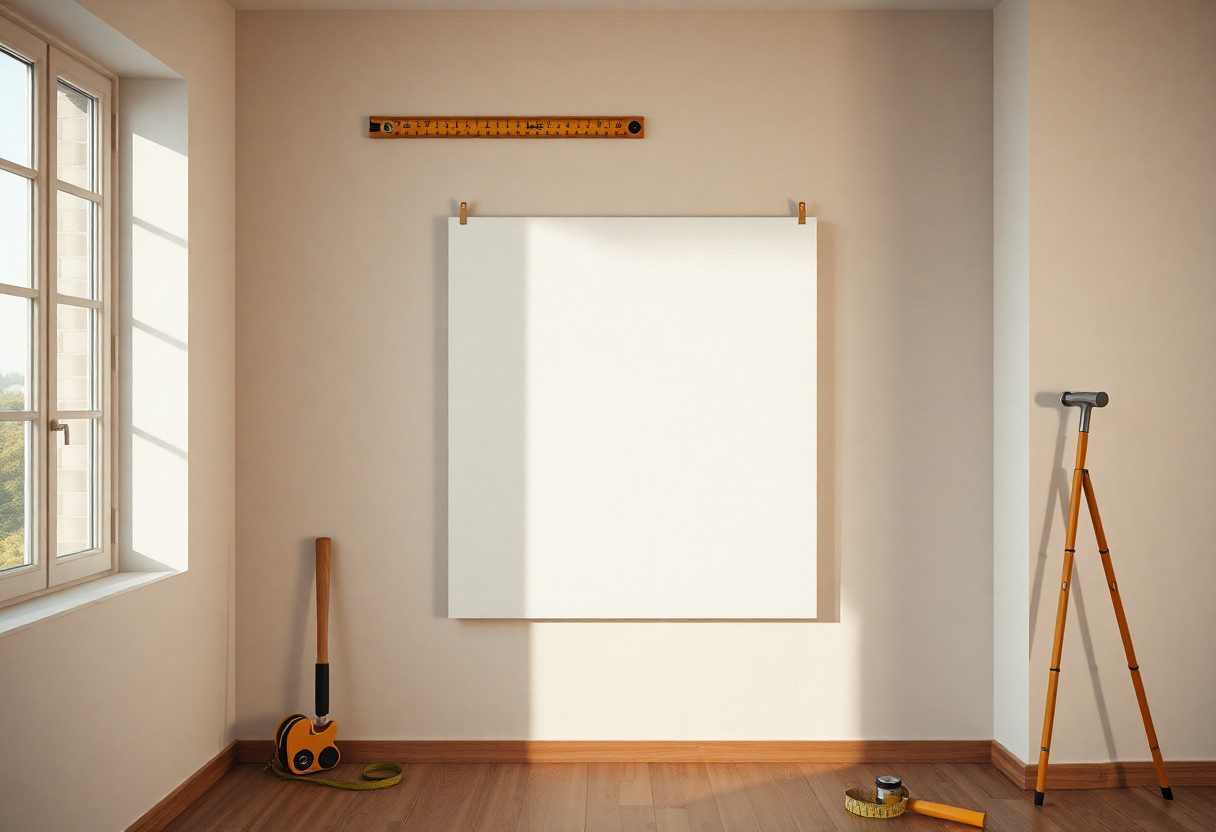
Wall space can be transformed into an inspiring gallery with the right approach to hanging canvas art. To ensure your pieces are displayed securely and at the ideal height, you’ll need to follow a systematic process. This guide will walk you through the crucial steps, tools, and techniques to achieve a polished and professional look, all while avoiding potential pitfalls that could damage your walls or artwork. Get ready to enhance your living space by showcasing your most cherished canvases effectively!
Factors to Consider
A variety of factors influence how to successfully hang your canvas. Before you proceed, consider the following:
- Wall Material
- Canvas Size
- Room Aesthetics
Thou should evaluate these elements to ensure your canvas is displayed effectively.
Wall Material
Factors such as the type of wall material can significantly affect your hanging method. Whether your walls are drywall, plaster, or brick, the right hardware is imperative to securely mount your artwork without damaging the surface.
Canvas Size
The size of your canvas plays a vital role in how and where you hang it. Selecting the appropriate height and location depends on your canvas dimensions as well as the surrounding space.

This choice can also influence how the artwork interacts with other elements in the room. You want your canvas to be proportionate to the wall and the furniture, ensuring it draws attention without feeling oversized or lost within the space.
Room Aesthetics
Some factors impacting room aesthetics include colors, styles, and existing decor. The canvas should harmonize with your space rather than clash with it, enhancing the overall ambiance.
Wall color and existing furnishings are imperative considerations; for example, a brightly colored canvas can serve as a focal point in a neutral room, while a more muted piece may suit a vibrant decor style. Aim for balance to create a cohesive feel throughout your space.
Tools and Materials Needed
You will need a few important tools and materials to hang your canvas on the wall securely. Gather your canvas artwork, hanging hardware, measuring tools, leveling tools, and a drill or hammer, depending on the type of wall surface. Having everything prepared in advance will make the process smoother and help you achieve the perfect placement for your canvas.
Hanging Hardware
Some options for hanging hardware include sawtooth hangers, D-rings, and picture wire. Choose a hardware type suitable for the weight of your canvas to ensure stability. Properly selecting and installing your hardware can prevent any damage to your walls or the artwork itself.
Measuring Tools
Needed for this task are a tape measure and pencil. Accurate measurements will help position your canvas correctly, ensuring it is centered and visually appealing on your wall. Taking your time to measure can save you from unnecessary holes in your wall.
Another handy tool to have is a notepad to jot down your measurements. Once you’ve determined the ideal height and location for your canvas, note the dimensions carefully. This documentation will allow you to double-check before drilling or nailing and help maintain a tidy workspace free of marks or errors.
Leveling Tools
An important tool for hanging canvas is a level. This tool will help you ensure your canvas is straight, enhancing its overall aesthetic appeal. Alevel can prevent the frustration of discovering that your canvas is tilted after it has been hung.
Leveling your canvas is vital to achieving a polished and professional look. Use a standard bubble level or a laser level to check your installation. If your canvas isn’t level, it can look unprofessional and detracts from the artistry of your work. Ensuring proper alignment will give you and your viewers a more enjoyable visual experience.
Steps to Hang Canvas
After gathering your materials and deciding on the perfect spot, it’s time to follow the necessary steps to hang your canvas securely and beautifully. Ensure you have everything you need before you start, and you’ll be able to transform your wall in no time.
Measure and Mark
One key step is to accurately measure and mark where you want your canvas to hang. Use a measuring tape to find the center of your wall and the desired height for your canvas. Mark this point with a pencil to ensure that your canvas is level.
Install Hanging Hardware

Any canvas you hang will require appropriate hanging hardware to ensure it stays in place. Choose the right type of hardware based on the weight of your canvas; options include picture hooks, D-rings, or sawtooth hangers for lighter pieces.
Steps for installing hanging hardware generally involve determining the weight of your canvas and selecting suitable anchors. For heavier canvases, use wall anchors or screws that can support additional weight. Always double-check the placement and fittings to ensure a safe and secure mount.
Position the Canvas
Assuming you’ve completed the previous steps correctly, it’s time to position your canvas on the wall. Carefully lift your artwork and align it with the marks you made earlier, ensuring it hangs straight and is visually appealing.
With patience and a keen eye, adjust and fine-tune the canvas’s position until it meets your expectations. Standing back to view the arrangement can help you spot any misalignment, allowing you to make those necessary adjustments for an optimal display.
Tips for Ultimate Display
Despite your canvas’s beauty, there are tips to ensure the ultimate display. Consider these strategies:
- Choose the right location
- Use complementary colors
- Experiment with framing
- Keep harmony in size
- Be mindful of lighting
Any adjustments you make can significantly enhance the presence of your artwork in the room.
Height Recommendations
Clearly, the height at which you hang your canvas affects its visual impact. Aim to position the center of your artwork at eye level, generally between 57 to 60 inches from the floor, ensuring it draws attention without requiring constant craning or bending.
Grouping Multiple Canvases
With a thoughtful approach, grouping multiple canvases can create a stunning focal point. Use variations in size and spacing for a captivating effect that tells a story through your art.
Tips for successful grouping include starting with a large piece as the anchor and arranging smaller canvases around it. Layout can be done on the floor first to visualize the final arrangement before hanging. Considering symmetry or asymmetry and leaving consistent spacing will also enhance the overall aesthetic.
Lighting Considerations
There’s no denying that proper lighting can dramatically enhance your canvas’s appeal. Use natural light, or strategically placed artificial light to accentuate colors and textures, making your artwork come alive.
A well-lit piece will draw attention and elevate the room’s ambiance, while inadequate lighting may hide its beauty. Consider installing adjustable lighting options to easily modify the focus on your canvases, and avoid placing artworks in direct sunlight to prevent fading. Centered lights or picture lights directly above can add beautiful highlights, resulting in a professional gallery feeling in your home.
Maintenance and Care
Once again, maintaining your canvas artwork is crucial for preserving its beauty and longevity. Regular upkeep ensures that your canvas remains vibrant and securely attached to the wall. By implementing simple maintenance practices, you can enjoy your art collection for years to come.
Dusting and Cleaning
Now, it’s important to regularly dust your canvas to avoid dirt buildup that can dull its appearance. Use a soft, dry cloth or a gentle brush to remove dust particles without damaging the surface. For deeper cleaning, a slightly damp cloth can be used, but avoid soaking the canvas.
Check for Secure Attachment
To ensure the safety of your artwork, regularly check that your canvas is securely attached to the wall. This will help prevent it from falling and causing damage or injury.
Check the wall fasteners and hooks to confirm they haven’t loosened over time. An unstable attachment can lead to serious risks of damage to both the artwork and your space. If you notice any signs of wear or movement, promptly reassess the mounting hardware and consider replacing it to maintain safety.
Seasonal Adjustments
One factor to consider is environmental changes that might affect your canvas. Fluctuations in humidity and temperature can influence the material and paint used, so it’s wise to reassess your artwork’s positioning as seasons change.
Another key aspect is adjusting the canvas location if you notice any warping or discoloration due to sunlight exposure or humidity. Position your artwork away from direct sunlight, or use protective measures like UV-filtering glass if it’s in a bright area. By being proactive about seasonal adjustments, you can protect your investment and enjoy your canvas in pristine condition.

Common Mistakes to Avoid
Your artwork can transform a space, but it’s important to avoid common pitfalls. Pay attention to the details in your hanging technique, as missteps can lead to an unappealing display. Be cautious with spacing, placement, and the support you use; these factors can significantly impact the appearance and safety of your hanging canvas.
Misplacing the Canvas
Clearly, the location of your canvas is vital. Hanging it too high or too low can disrupt visual balance and flow in your room. Aim for a height where the center of your canvas is at eye level, ensuring a compelling and accessible presentation.
Overloading Wall Space
Overloading a wall with too many canvases can create a chaotic look, detracting from each piece’s beauty. Too much clutter can overwhelm viewers and diminish the impact of each individual artwork.
This balance is important for showcasing your canvases effectively. Instead of filling every inch of wall space, curate your selection thoughtfully, allowing for breathing room between pieces. This will create a more cohesive and visually pleasing arrangement, highlight your favorite works, and draw attention to the details that matter.
Neglecting Wall Support
The strength of your wall plays a significant role in keeping your canvas securely hung. Neglecting proper support can lead to accidents or damage to both the artwork and your walls.
Wall integrity is paramount; ensure that you use appropriate hardware for your chosen material, whether it’s drywall, plaster, or brick. Choose strong anchors and screws that can support the weight of your canvas, and avoid relying solely on lightweight hangers, especially for larger pieces. Investing in proper supports is key to a safe and stable display.
Conclusion
Summing up, hanging a canvas on your wall can enhance the aesthetic of your space and showcase your personal style. You should select the right hardware, determine the appropriate height, and ensure the canvas is securely fastened for a polished look. Take the time to measure and plan your arrangement, allowing for optimal visual impact. With these tips in mind, you can confidently display your favorite artwork in your home, creating an inviting and personalized atmosphere.
FAQ
Q: What tools do I need to hang a canvas on the wall?
A: To hang a canvas, you will typically need a level, a measuring tape, a pencil for marking, and either nails or picture-hanging hooks. If you are mounting heavier canvases, you may require wall anchors or screws.
Q: How do I determine where to place my canvas on the wall?
A: The ideal height for hanging a canvas is typically at eye level, which is approximately 57-60 inches from the floor to the center of the canvas. You can measure your wall space and use a pencil to mark where the center of your canvas will be, making adjustments based on the room’s overall decor.
Q: Should I use a frame for my canvas before hanging it?
A: Whether to use a frame depends on your personal preference and the style of the canvas. Some people prefer a framed look for a more polished appearance, while others enjoy the simplicity of an unframed canvas. If you choose to frame it, ensure the frame is suitable for the weight and size of the canvas.
Q: What is the best way to hang a canvas without damaging the wall?
A: To minimize wall damage, consider using adhesive picture hanging strips, which can hold lightweight canvases without leaving marks. For heavier canvases, use removable wall anchors or hooks designed specifically for this purpose to ensure stability while protecting your walls.
Q: How can I ensure my canvas is straight after hanging?
A: Use a level when hanging your canvas to make sure it’s perfectly straight. If you don’t have a level handy, you can use the edge of a piece of paper or the wall itself as a reference point. After hanging, step back and visually check that it appears level from different angles.
Q: Is it safe to hang multiple canvases together, and how should I space them?
A: Yes, it is safe to hang multiple canvases together. When creating a gallery wall, maintain consistent spacing between each piece, typically 2 to 4 inches apart, depending on your preference. Use a measuring tape to ensure uniformity and create a balanced visual effect.
Q: Can I hang a canvas on a textured wall? If so, how?
A: Yes, hanging a canvas on a textured wall is possible. In this case, using wall anchors or sturdy hooks can secure the canvas effectively. It’s helpful to choose hooks that can accommodate the wall’s texture and provide stability. For lightweight canvases, adhesive strips can also work well on textured surfaces.