The “Fabulous at Fifty” Guide to the Perfect 50th Birthday Cake
Let’s talk about the big five-oh. It’s not just a number; it’s a milestone. It’s the year you’re officially too old for nonsense and too young for the senior discount. It’s a moment that deserves more than a sad, store-bought sheet cake with questionable frosting. It demands a cake that is as sophisticated, fabulous, and all-around awesome as the person being celebrated. You need the ultimate 50 birthday cake.
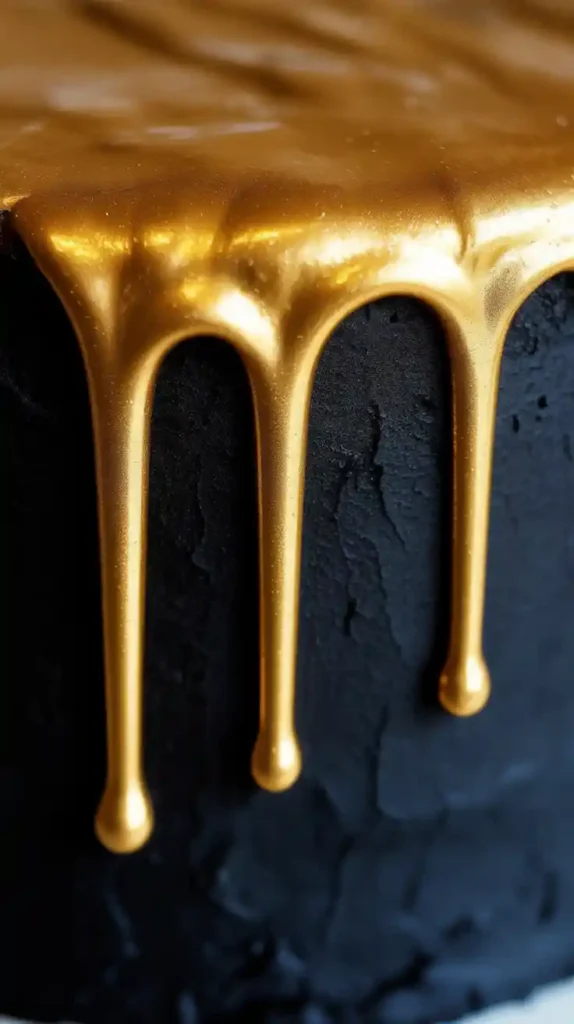
Forget the “Over the Hill” clichés. We’re leaning into pure, unadulterated glamour. We are making a show-stopping, “Golden Year” Drip Cake. It’s a decadent, rich chocolate cake with a chic, smooth frosting, all enrobed in a cascade of shimmering, liquid gold. It looks like it costs a fortune from a high-end bakery, but you’re about to make it yourself.
Why This Cake is Worthy of a Milestone
So, why is this the perfect cake to celebrate half a century of being awesome?
- It’s Pure, Unadulterated Elegance: This cake is a showstopper. The dramatic contrast of a dark or clean white frosting with the shimmering gold drip is the definition of sophisticated glamour. It’s the centerpiece that will have every guest at the party snapping photos.
- It Tastes as Good as It Looks: This isn’t just a pretty face. Beneath that glamorous exterior is a rich, moist, and intensely chocolatey fudge cake. It’s a classic, crowd-pleasing flavor that feels special and indulgent—perfect for a milestone celebration.
- The “Drip” is Easier Than You Think: I know a perfect drip looks intimidating, but it’s a surprisingly simple technique that relies on two things: the right temperature and a cold cake. I’ll walk you through it, and you’ll feel like a professional cake artist.
The Ingredient List: A Recipe for a Golden Year

A cake this special deserves the best ingredients.
For the Decadent Chocolate Fudge Cake:
- All-Purpose Flour: 2 cups.
- Granulated Sugar: 2 cups.
- Unsweetened Cocoa Powder: ¾ cup, the good stuff.
- Baking Soda: 2 teaspoons.
- Baking Powder: 1 teaspoon.
- Salt: 1 teaspoon.
- Large Eggs: 2, at room temperature.
- Buttermilk: 1 cup, at room temperature.
- Vegetable Oil: ½ cup.
- Vanilla Extract: 2 teaspoons.
- Hot Coffee: 1 cup.
For the Chic Buttercream Canvas:
- Unsalted Butter: 3 cups (6 sticks), softened.
- Powdered Sugar: 8 cups, sifted.
- Heavy Cream or Milk: 5-7 tablespoons.
- Vanilla Extract: 1 tablespoon.
- A Pinch of Salt.
- Optional: Use black cocoa powder for a dramatic black frosting, or a tiny drop of violet food coloring for a stark white frosting.
For the Midas Touch (The Gold Drip & Garnish):
- Good Quality White Chocolate Chips or Wafers: 1 cup.
- Heavy Cream: ⅓ cup.
- Edible Gold Luster Dust: 1-2 teaspoons. This is the key to the shimmer.
- Clear, High-Proof Alcohol (like vodka) or Lemon Extract: 1-2 teaspoons.
- The Garnish: Ferrero Rocher chocolates, gold sprinkles, or a chic “50” cake topper.
Tools & Kitchen Gadgets: The Goldsmith’s Kit
To create this masterpiece, you’ll need a few key tools.
- Three 8-inch Round Cake Pans: For a tall, impressive cake.
- A Stand Mixer.
- A Cake Turntable: Essential for getting a smooth frosting finish.
- An Offset Spatula and a Tall Bench Scraper: The dynamic duo of smooth cakes.
- A Small Saucepan and a Heatproof Bowl: For making the ganache drip.
- A Squeeze Bottle or a Spoon: For applying the drip.
- A Small, Food-Safe Paintbrush.
Step-by-Step Instructions: The Path to Golden Glory
Ready to create a cake worthy of a half-century celebration? Let’s do this.
Step 1: Bake the Decadent Foundation
- Prep: Preheat your oven to 350°F (175°C). Grease and flour your three 8-inch cake pans.
- Mix: In your stand mixer, whisk all the dry cake ingredients. In a separate bowl, whisk the eggs, buttermilk, oil, and vanilla.
- Combine: Pour the wet into the dry, mix until combined, then carefully stream in the hot coffee. The batter will be thin.
- Bake: Divide the batter between your pans and bake for 25-30 minutes. Let the layers cool completely.
Step 2: Whip the Buttercream Canvas

Whip up your buttercream by beating the softened butter, then gradually adding the sifted powdered sugar. Add the vanilla, salt, and cream, and beat on high speed for 5 minutes until very light and fluffy. If making a black cake, add the black cocoa and black gel color.
Step 3: Build a Flawless Foundation
- Level and stack your cooled cake layers on a cake board with a generous layer of buttercream between each.
- Apply a thin crumb coat all over the cake. Chill for at least 30 minutes. This step is crucial.
- Apply a final, generous coat of buttercream. Use your cake turntable and bench scraper to get the sides and top as perfectly smooth and sharp-edged as possible.
- CHILL AGAIN. Your cake needs to be cold and very firm before you apply the drip. Chill it in the fridge for at least another 30 minutes, or in the freezer for 15.
Step 4: Create the Liquid Gold
- Place your white chocolate chips in a heatproof bowl.
- Heat the heavy cream in your saucepan until it just begins to simmer. Pour the hot cream over the white chocolate and let it sit, untouched, for 5 minutes.
- Whisk the mixture gently until you have a smooth, luscious white chocolate ganache.
- Now, for the most important part: let the ganache cool. It needs to cool to about 90°F (32°C). It should be just slightly warm to the touch, and the consistency of thin honey.
Step 5: The Golden Drip
- Take your cold, firm cake out of the fridge.
- Using a squeeze bottle or a spoon, apply the cooled ganache around the top edge of the cake, letting it drip artfully down the sides. Do a few test drips first to see how far it will run.
- Once you’ve done the drips, pour the remaining ganache on top of the cake and use a small offset spatula to smooth it out to the edges.
Step 6: The Midas Touch
- Let the drip set for about 15-20 minutes.
- In a small bowl, mix your gold luster dust with a few drops of clear alcohol or extract to create a paint.
- Using your food-safe paintbrush, carefully paint the drips gold.
- Arrange your Ferrero Rocher, sprinkles, or “50” cake topper on top.
Calories & Nutritional Info (The Golden Years)
This is a cake for a milestone. Let’s not tarnish it with trivialities.
- Serving Size: One fabulous slice.
- Calories: At 50, you’ve earned the right to not ask, and for no one to tell.
- Good For: Celebrating 50 years of being awesome.
Common Mistakes to Avoid (Milestone Mishaps)
- The Dreaded Drip-tastrophe: This is the #1 issue with drip cakes.
- If your ganache is too hot, it will be too thin and will run all the way down to the cake board in a sad, messy puddle.
- If your ganache is too cold, it will be too thick and will just plop down in a stumpy, sad blob.
- The key is a COLD cake and a BARELY WARM ganache.
- A Messy, Bumpy Canvas: A beautiful drip needs a perfectly smooth, chilled buttercream base to run down. If your frosting is soft or lumpy, your drips will look messy.
- A Dull, Sad Gold: Not all luster dusts are created equal. Use a high-quality, super-fine, metallic luster dust for the best shine. Mixing it with a clear, high-proof spirit like vodka allows it to dry quickly and look like real gold.
Variations & Customizations (The Golden Age)
Every 50th is a unique celebration. Your cake can be too.
1. The Silver & White Anniversary
Perfect for a 50th anniversary or a silver-themed party. Make a classic white cake with a white vanilla buttercream. Use silver luster dust instead of gold for the drip, and top with white chocolate truffles or silver dragées.
2. The Sophisticated Sipper
Give your cake a cocktail-inspired twist. Add a splash of Grand Marnier or Cointreau to your chocolate cake batter, and a little to your buttercream. Fill the layers with a thin spread of orange marmalade for a beautiful chocolate-orange flavor.
3. The “Vintage Dude”
For a more humorous, masculine take. Make a chocolate cake with a whiskey-spiked buttercream. Use a dark chocolate ganache for the drip (no gold needed). Top with chocolate-covered pretzels, bacon bits, or a “Vintage” themed cake topper.
FAQ: Your Most Pressing Milestone Questions
Is a drip cake hard to make for a beginner?

The technique itself is simple, but it’s all about patience and temperature control. The most important things are a very cold cake and a ganache that has cooled to the right consistency. I recommend doing a few test drips on the side of a cold glass to check it first.
What’s the secret to a perfect, non-messy drip?
A cold cake and a squeeze bottle. A squeeze bottle gives you much more control over where the drips go and how long they are than using a spoon.
Can I make this cake ahead of time?
Yes, this is a great make-ahead cake! You can bake the layers in advance. The entire cake can be assembled and frosted 1-2 days before the party. Add the drip and the final garnishes on the day of the party for the best shine.
Final Thoughts
You’ve done it. You have created a cake that is as timeless, sophisticated, and absolutely fabulous as the person you’re celebrating. You’ve made a centerpiece that is worthy of a 50-year milestone.
So go on, light the (many) candles, pour a glass of something bubbly, and make a toast. You’re not just serving a cake; you’re serving a tribute to half a century of a life well-lived. Cheers to 50!