Easy Sugar Cookie Designs That Look Like You’re a Pro
You’ve done it. You’ve baked a batch of the most perfect, no-spread sugar cookies. They’re buttery, they smell divine, and they’re cooled and ready. But now they just sit there on the rack, looking… naked. Pale. A little boring, if we’re being honest. You scroll through Pinterest and see a world of impossibly perfect cookies, and the pressure mounts. But what if you could create stunning, jaw-dropping cookies without a culinary degree and a PhD in piping? Good news: you absolutely can. Forget the intimidatingly complex stuff; today, we’re diving into easy sugar cookie designs that deliver maximum wow-factor with minimum stress.
Why This “Recipe” Is Awesome (It’s Your Guide to Edible Art)
This isn’t just a recipe; it’s your official guide to becoming a cookie decorating rockstar. Why is mastering a few simple designs so great? Because it transforms your baking from just “tasty” to unforgettable. These techniques are:
- Beginner-Friendly: We’re focusing on designs that don’t require a surgeon’s steady hand. If you can drizzle, dot, and swirl, you can do this.
- Endlessly Creative: Once you learn these basic methods, you can adapt them to any color scheme, holiday, or party theme you can dream up.
- Incredibly Impressive: Your friends and family in your Barishal home will think you spent hours crafting these edible works of art. We don’t have to tell them our secrets. 😉
- Seriously Fun: This is a chance to play with your food in the most creative way possible. It’s a relaxing, artistic process with a delicious payoff.
You’re not just making dessert; you’re creating little moments of joy that are as beautiful as they are delicious.
The Ingredients: Your Canvas and Your Paint
To create a masterpiece, you first need a great canvas and the right paint.
For the Perfect No-Spread Sugar Cookie Canvas:
- 1 cup (2 sticks) unsalted butter, cold and cubed
- 1 cup granulated sugar
- 1 large egg
- 1 teaspoon vanilla extract
- 3 cups all-purpose flour
- ½ teaspoon salt
For the Simple, Versatile Cookie Icing:
- 3 cups powdered sugar, sifted
- ¼ cup milk (plus more, a tiny bit at a time, for thinning)
- 2 tablespoons light corn syrup (for a soft bite and a pretty sheen)
- ½ teaspoon clear vanilla or almond extract
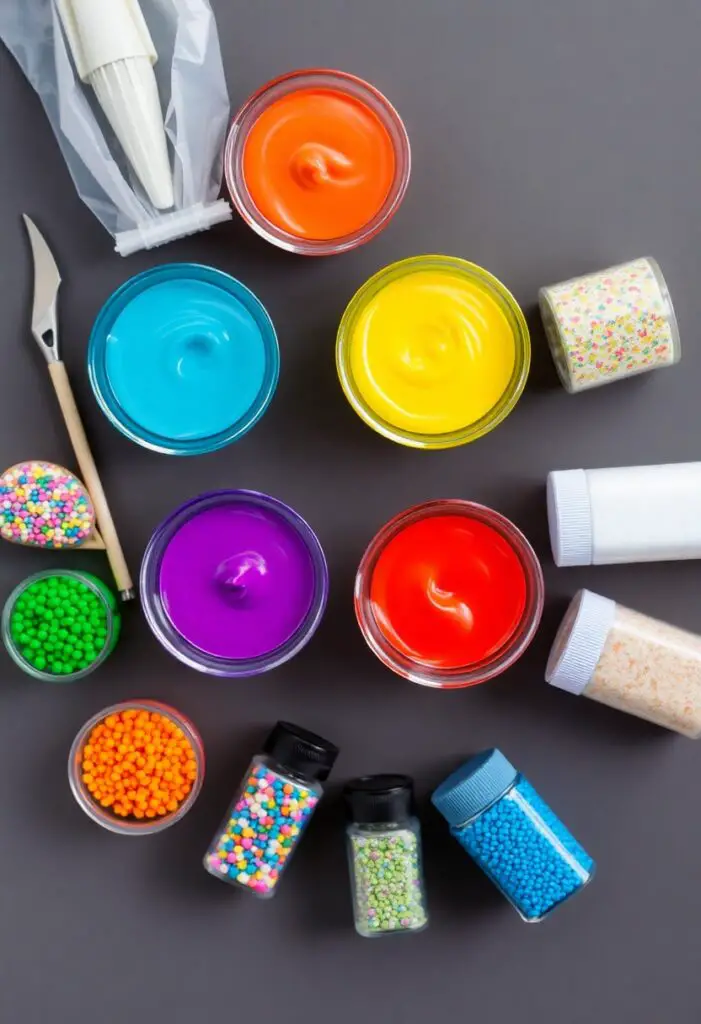
- Gel food coloring (in your desired colors)
- Sprinkles, nonpareils, sanding sugar (your edible glitter!)
Tools & Kitchen Gadgets Used: Your Art Studio Kit
Having the right gear will make you feel like a true artist.
- Stand Mixer or a Hand Mixer
- Rolling Pin (preferably with guide rings for even thickness)
- Cookie Cutters
- Baking Sheets lined with Parchment Paper
- Small bowls for mixing icing colors
- Piping Bags or Squeeze Bottles
- Toothpicks or a Scribe Tool (for swirling and popping bubbles)
- An Offset Spatula
Step-by-Step Instructions: Let’s Get Decorating!
First, you’ll need your canvas. Bake the No-Spread Sugar Cookies by creaming the cold butter and sugar, adding the egg and vanilla, then mixing in the flour and salt. Chill the dough for 1 hour, roll to ¼-inch thickness, cut shapes, and bake at 375°F (190°C) for 9-11 minutes until the edges are set but still pale. Let them cool completely!
Next, make the Simple Cookie Icing by whisking the sifted powdered sugar, ¼ cup milk, corn syrup, and extract until smooth. The consistency should be like thick honey. Now, let’s get to the fun part.
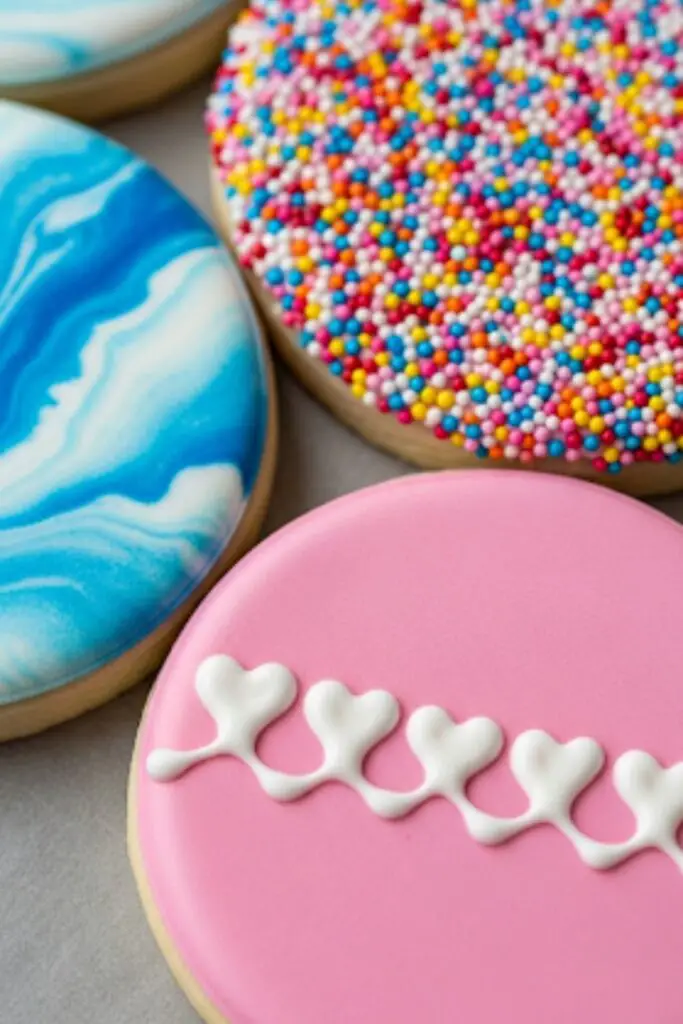
Design #1: The Marbled Watercolor Effect
This design looks incredibly chic and is ridiculously easy.
- Prep Your Colors: Prepare your base icing (usually white or a very pale color) in a bowl. In 2-3 other small bowls, mix up your accent colors. Thin all your icings with a few extra drops of milk until they reach a “flood” consistency (when you drag a knife through it, the line disappears in about 10-15 seconds).
- Flood the Base: Using a spoon or squeeze bottle, cover the top of your cooled cookie with the white base icing, spreading it to the edges with a toothpick.
- Dot and Swirl: While the base is still wet, immediately add a few small dots or drizzles of your accent colors on top.
- Create the Magic: Take a clean toothpick and gently drag it through the dots of color to create a beautiful, marbled, watercolor look. Don’t overmix! A few simple drags are all you need. Let it dry completely.
Design #2: The Perfect Sprinkle Coat
Tired of sad, patchy sprinkles? Here’s how to get a full, professional-looking coat.
- Prep Your Station: Pour a generous amount of your chosen sprinkles or nonpareils into a shallow bowl or plate that’s wider than your cookie.
- Ice the Cookie: Using an offset spatula, apply a smooth, even layer of your icing over the top of the cookie. It shouldn’t be too thick or too thin.
- The Dip: Don’t sprinkle from above! Instead, take your freshly iced cookie, turn it upside down, and gently press the iced surface directly into the bowl of sprinkles.
- The Gentle Press: Give it a little wiggle and a gentle press to ensure the sprinkles adhere everywhere.
- The Reveal: Lift the cookie straight up. You’ll have a perfect, edge-to-edge coating of sprinkles! Let it dry completely.
Design #3: Easy Wet-on-Wet Hearts & Chevrons
This technique sounds fancy, but it’s the easiest way to make cute patterns.
- Prep Your Icings: You’ll need a base “flood” color and at least one accent “flood” color, both at that same 10-15 second consistency.
- Flood the Base: Cover your cookie with your base color, spreading it evenly.
- Dot or Line: While the base is still wet, use your accent color to pipe a line of dots (for hearts) or a series of parallel lines (for chevrons).
- The Drag:
- For Hearts: Take a clean toothpick and drag it straight through the center of the line of dots. Voila, a perfect row of hearts!
- For Chevrons: Drag your toothpick through the parallel lines in alternating directions (down, up, down, up). Instant chevron pattern!
- Let It Dry: As always, let your masterpiece dry completely, undisturbed.
Calories & Nutritional Info (Per Decorated Cookie)
This is edible art. Art is good for the soul. The numbers are secondary.
- Estimated Calories per cookie: ~200-250 calories
- Sugar: A delightful, artful amount.
- Joy: Immeasurable.
Common Mistakes to Avoid: Sidestep the Decorating Disasters!
Even simple art can go wrong. Avoid these common issues.
- Decorating Warm Cookies: This is the #1 sin. Your icing will melt into a greasy, sad puddle. Your cookies must be completely, 100% cool.
- Icing is Too Thin: If your flood icing is too watery, it will run off the sides of your cookie and your colors will bleed together into a muddy mess. It should be the consistency of honey, not water.
- Icing is Too Thick: If your icing is too stiff, it won’t smooth out on its own, leaving you with a lumpy, bumpy surface.
- Impatience: Cookie decorating requires drying time. If you try to stack them, wrap them, or add details on top of a wet base, you will ruin your beautiful work.
Variations & Customizations: Your Inner Artist Awaits
These techniques are just the beginning.
- Flavor Infusions: Add ½ teaspoon of lemon, almond, or peppermint extract to your cookie dough or icing to create a whole new flavor profile.
- Themed Color Palettes: Think beyond the basics! For a beach theme in your coastal Barishal home, use shades of sand, aqua, and coral. For a holiday, go with classic red and green or elegant blue and silver.
- Texture Play: Before your icing sets, sprinkle on different textures. Sanding sugar gives a glittery crunch, nonpareils give a classic dotty look, and jimmies (the long ones) are pure fun.
FAQ Section: All Your Decorating Doubts, Dusted Away
You have questions about becoming a cookie artist. I have answers.
- Q: What’s the best kind of icing for these easy designs? A: A simple glaze or a thinned-out buttercream is perfect for these techniques because it’s forgiving and smooths out nicely. Royal icing is fantastic for intricate piping and details that need to dry rock-hard, but it can be more finicky for beginners.
- Q: How do I get really vibrant colors? A: Use gel food coloring. It’s super concentrated, so you only need a tiny drop, and it won’t water down your icing like liquid coloring can.
- Q: How long do these cookies need to dry before I can stack or package them? A: It depends on your icing and the humidity, but plan on at least 8 hours, or overnight, to be safe. They should be completely hard to the touch.
- Q: My icing is too runny/too thick. How do I fix it? A: It’s an easy fix! If it’s too runny, add sifted powdered sugar, a tablespoon at a time. If it’s too thick, add milk or water, a few drops at a time, until you get it right.
- Q: What’s the best way to get sprinkles only on the icing? A: The dipping method is foolproof! If you must sprinkle from above, place your cookie on a baking sheet to catch the rogue sprinkles for easy cleanup.
- Q: Can I make the cookies and icing ahead of time? A: Yes! You can bake the cookies and store them in an airtight container for a few days. The icing can also be made and stored in the fridge for up to a week (press plastic wrap on the surface to prevent a crust). Just bring it to room temp and give it a good stir before using.
- Q: How do I store my beautifully decorated cookies? A: Once the icing is completely dry and hard, you can store them in an airtight container at room temperature for up to a week. Layer them between sheets of parchment paper to protect your designs.
Final Thoughts: Go Forth and Create!
You are now officially a cookie decorator. You’ve moved beyond the naked cookie and into the realm of edible art. You’re armed with three simple, impressive techniques that will make you look like a total pro. So go on, turn your kitchen into an art studio, make a glorious mess, and create something beautiful. Your friends, family, and your Instagram feed will thank you.


